
Crochet Lily Of The Valley Keychain Pattern Everyone Needs
Solve key confusion while adding charm with the Free Crochet Lily Of The Valley Keychain Pattern, perfect for unique gifting.
Hands that love crafting will appreciate the delicate beauty of a tiny flower brought to life through simple stitches. This sweet crochet lily of the valley keychain pattern combines charm and elegance in a compact design that's perfect for brightening up bags, keys, or gifts. Its fine petals and gentle curves, shaped with single crochet, double crochet, and slip stitches, create a realistic flower that feels light and graceful to the touch. Working with a 3 mm hook adds the lovely detail, making it a delightful project for beginners eager to try slightly more advanced techniques.
Using This Pattern for Other Projects
This pattern’s combination of stitches and assembly method can inspire other delicate floral accessories such as brooches, earrings, or small appliqués for home décor. By experimenting with different yarn colors and sizes, you can create varied bouquets or even embellish clothing and gifts with a personal handmade touch. It’s a wonderful way to build confidence working with rounds and layered stitches while creating something truly beautiful.
Charming Crochet Lily Of The Valley Keychain Pattern Just for You

Starting with a magic ring, the flower’s core is formed with several single crochet stitches, tightening the center neatly. Chains and double crochets create small loops representing the lily’s signature bell-shaped blooms, with careful slip stitches anchoring rows and forming the structure. A soft pink yarn adds a natural touch to the petals, worked by pulling loops through strategic holes to give the flower depth and texture. Leaves are crocheted separately using chains, single crochets, half double crochets, and double crochets to form graceful waves that complement the bloom. The pieces come together with yarn and needle, resulting in a charming keychain that carries a touch of spring wherever it goes.

Crochet Pattern: Lily of the Valley
The Lily of the Valley crochet pattern is an elegant and delicate floral design perfect for home décor, gifting, or embellishing garments and accessories. This project uses basic crochet techniques like the magic ring, single crochet, double crochet, and slip stitches to create stunning blooms and leaves. The pattern is versatile and can be made into flowers for bouquets, table centerpieces, or even added to wreaths.
Skill Level & Terminology
- Skill Level: Beginner to Intermediate
- Terminology: Pattern uses US crochet terms.
Materials & Tools
- Yarn:
- White or light pink yarn (for the flower blooms)
- Green yarn (for the leaves and stem)
- Crochet Hook: 3.00 mm hook or as recommended for your yarn
- Tapestry Needle: For sewing pieces and weaving in ends
- Scissors
Gauge
Gauge is not critical for this project, but ensure that you crochet evenly and consistently for your flowers and leaves to look proportional.
Abbreviations
Here’s a glossary of abbreviations used in the pattern:
- ch: Chain
- sc: Single Crochet
- hdc: Half Double Crochet
- dc: Double Crochet
- sl st: Slip Stitch
- yo: Yarn Over
Special Stitch Instructions
Magic Ring
The magic ring creates a seamless and tight center for flowers:
- Wrap yarn around your fingers, insert hook, yarn over, and pull through the loop to form the ring.
- Begin working stitches directly into the loop.
Double Crochet (dc)
- Yarn over, insert hook into the stitch, yarn over, pull up a loop (3 loops on hook).
- Yarn over, pull through 2 loops (2 loops remain).
- Yarn over, pull through the last 2 loops.
Half Double Crochet (hdc)
- Yarn over, insert hook into the stitch, yarn over, pull up a loop (3 loops on hook).
- Yarn over, pull through all 3 loops simultaneously.
Finished Size
Each flower measures approximately 1.5–2 inches in diameter. The leaves and stems can vary in size depending on your design preference but are typically 4–5 inches long.
What You’ll Learn
- Magic Ring: A seamless start for circular or floral projects.
- Stitch Variations: Refinement of single crochet, double crochet, and half double crochet techniques.
- Creating Texture: Master petal formation through loop accumulation for realistic floral designs.
- Assembling Crochet Designs: Learn to attach multiple pieces seamlessly for a polished effect.
The Pattern
Step 1: Flower Base (Magic Ring)
- Create a magic ring with white or light pink yarn.
- Round 1:
- Work 6 sc into the ring, pull the loose end to tighten the ring, and close with a sl st into the first sc.
For Beginners: If you’re unfamiliar with the magic ring, think of it as creating an adjustable loop for a neat and seamless center for circular or floral projects.
Step 2: Petal Holes
- Round 2:
- Ch 4, then work 1 dc into the same stitch.
- Ch 1 and work 1 dc into the next stitch. Repeat this pattern (dc, ch 1) in every stitch around the ring for a total of 6 holes.
- Secure the round with a sl st into the top of the starting chain-3.
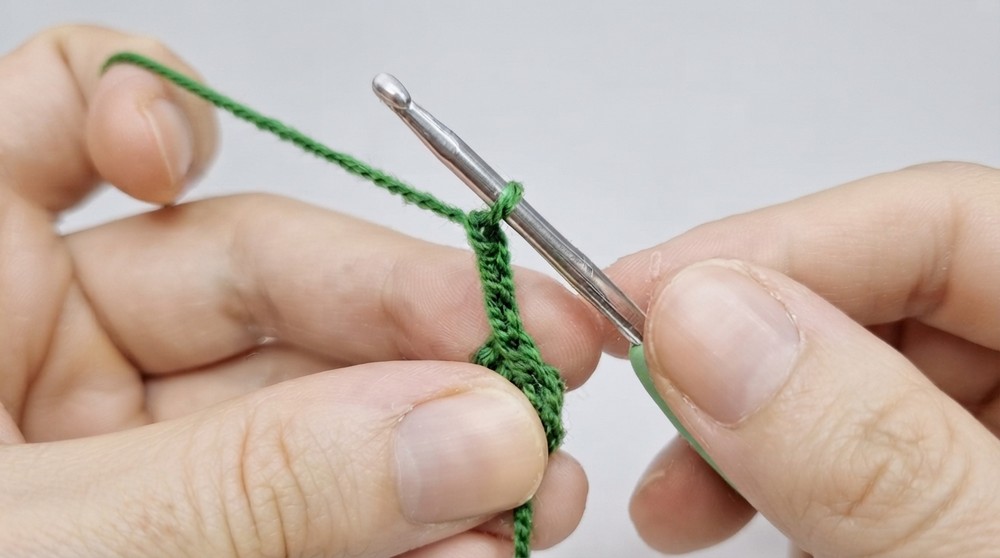
These chain spaces create the holes for the flower petals to be built upon later. It’s essential to count your stitches correctly to ensure symmetry.
Step 3: Flower Petals
- Starting Petals:
- Insert your hook into the first hole and attach pink yarn. Ch 2, then insert your hook into the hole and pull up a loop.
- Repeat the following process 6 times:
- Insert hook into the hole and pull up a loop (accumulating loops on your hook).
- Finish:
- Yarn over, pull through all loops, then yarn over and chain 1 to secure. Use a sl st in the next hole to anchor the petal.
- Create Remaining Petals: Repeat the process for the next hole. Form 6 petals in total by following the same steps.


The petals are created with loops in one go, allowing for a realistic textured look. Count loops carefully to achieve uniform petals.
Step 4: Leaves
- Foundation Chain:
- With green yarn, create a slip knot and ch 12 for the leaf base.
- Row 1:
- Skip the first chain and work stitches in the following order:
- 1 sc into the next chain.
- 1 hdc into the next chain.
- 2 dc into the next chain (increase).
- 1 hdc into the next chain.
- 1 sc into the next chain.
- 1 sl st into the next chain.
- Repeat the same pattern along the chain.
- Skip the first chain and work stitches in the following order:
- Row 2:
- Turn your work, begin working down the opposite side of the chain:
- Repeat sc, hdc, 2 dc, hdc, sc, sl st until the row is complete.
- Turn your work, begin working down the opposite side of the chain:
- Finish:
- Ch 55 to form the stem, then fasten off, leaving a tail for sewing later.

For Beginners: The leaf incorporates slightly more advanced stitches, but once you complete the first side of the chain, replicating it on the opposite side is straightforward.
Step 5: Assembly
- Attach Flowers to Stem:
- Use a tapestry needle to sew the flowers into position along the stem at varying intervals. Ensure the petals face outward for a realistic effect.
- Attach Leaves:
- Position the leaves at the base of the flowers and sew them onto the stem securely.
- Secure Loose Ends:
- Weave in all loose ends with a tapestry needle and trim excess yarn.
Troubleshooting & Solutions
Problem 1: Magic Ring Loosens over Time
Ensure the ring is pulled tight and the tail is woven in securely. If needed, tie a knot at the base of the ring.
Problem 2: Uneven Petals
If petals look uneven, double-check the number of loops before pulling through. Consistent stitch tension is key to making the petals uniform.
Problem 3: Twisty Leaf or Stem
To avoid twisting, ensure your stitches remain tight and consistent. Slight adjustments with your fingers can help straighten the piece.
Why You’ll Love This Pattern:
The Lily of the Valley pattern is beautifully detailed yet easy to follow. It’s quick to make, highly flexible, and a wonderful way to celebrate spring, love, or nature. Whether creating bouquets, decorating accessories, or crafting gifts, this pattern will leave you proud of your handmade florals.