
Creative Crochet French Market Bag Pattern for Every Adventure
Start your next project with the Free Crochet French Market Bag Pattern and make a useful bag that’s perfect for every day.
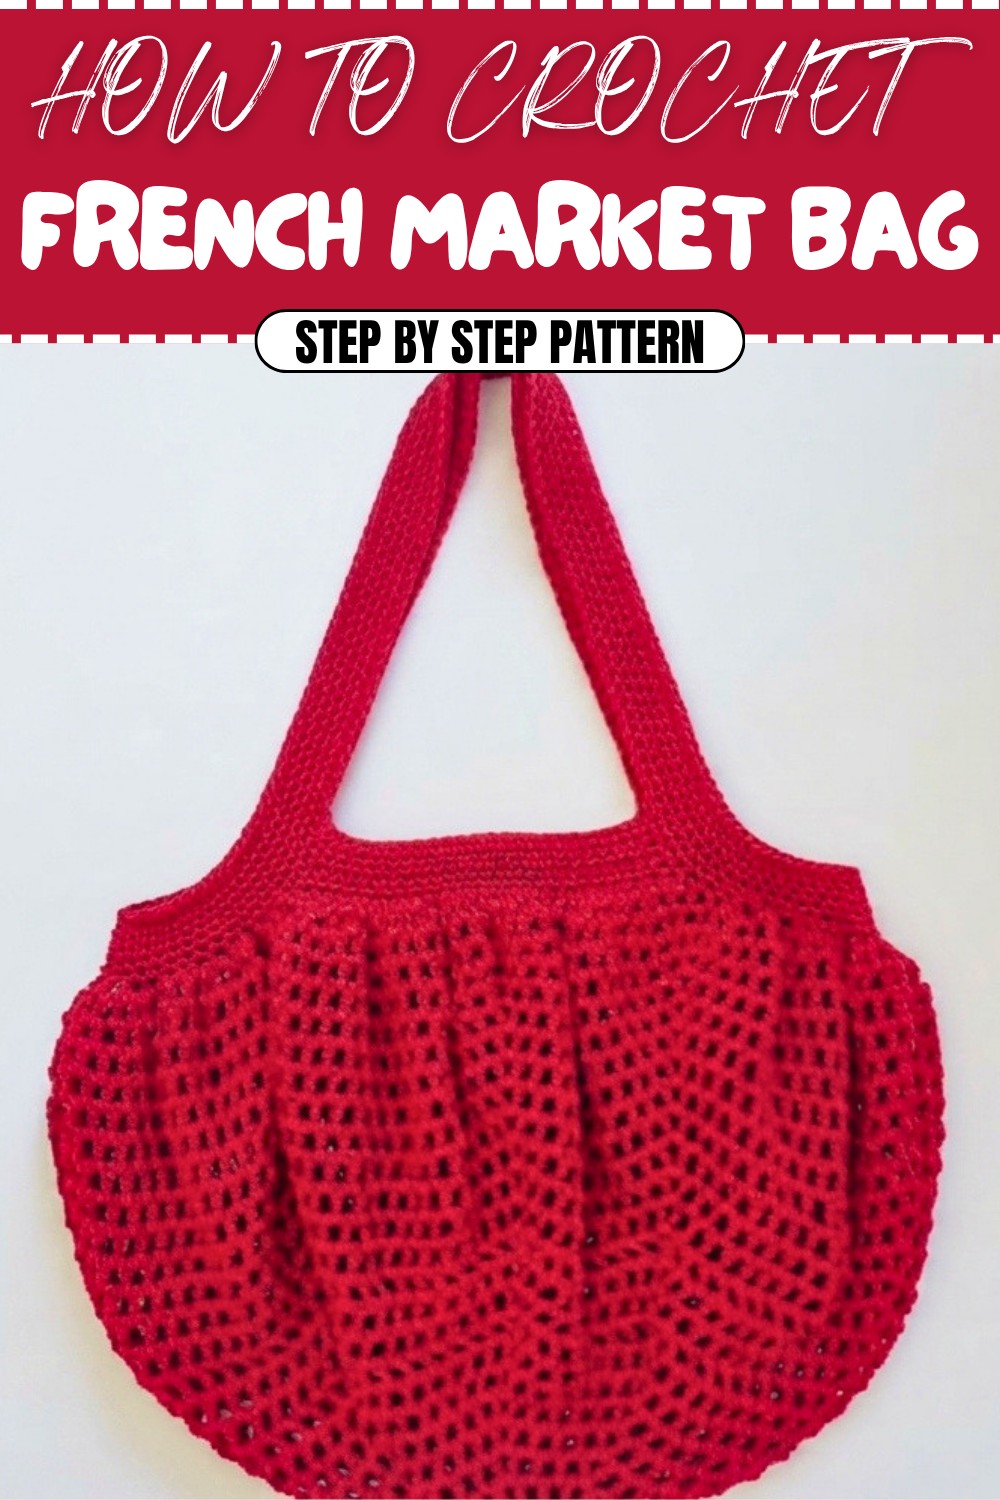
Crocheting a handmade bag that effortlessly blends style and practicality is a truly rewarding experience. This charming project features a lovely, spacious carryall made using double crochet and V stitches, which create a strong yet breathable fabric perfect for holding your essentials. The reinforced base adds extra durability, ensuring your bag stays sturdy even when filled with groceries or personal items. Its circular shape and openwork pattern give it a fresh, airy look that’s ideal for any season.
Crochet your own stylish French market bag using this free must-try pattern
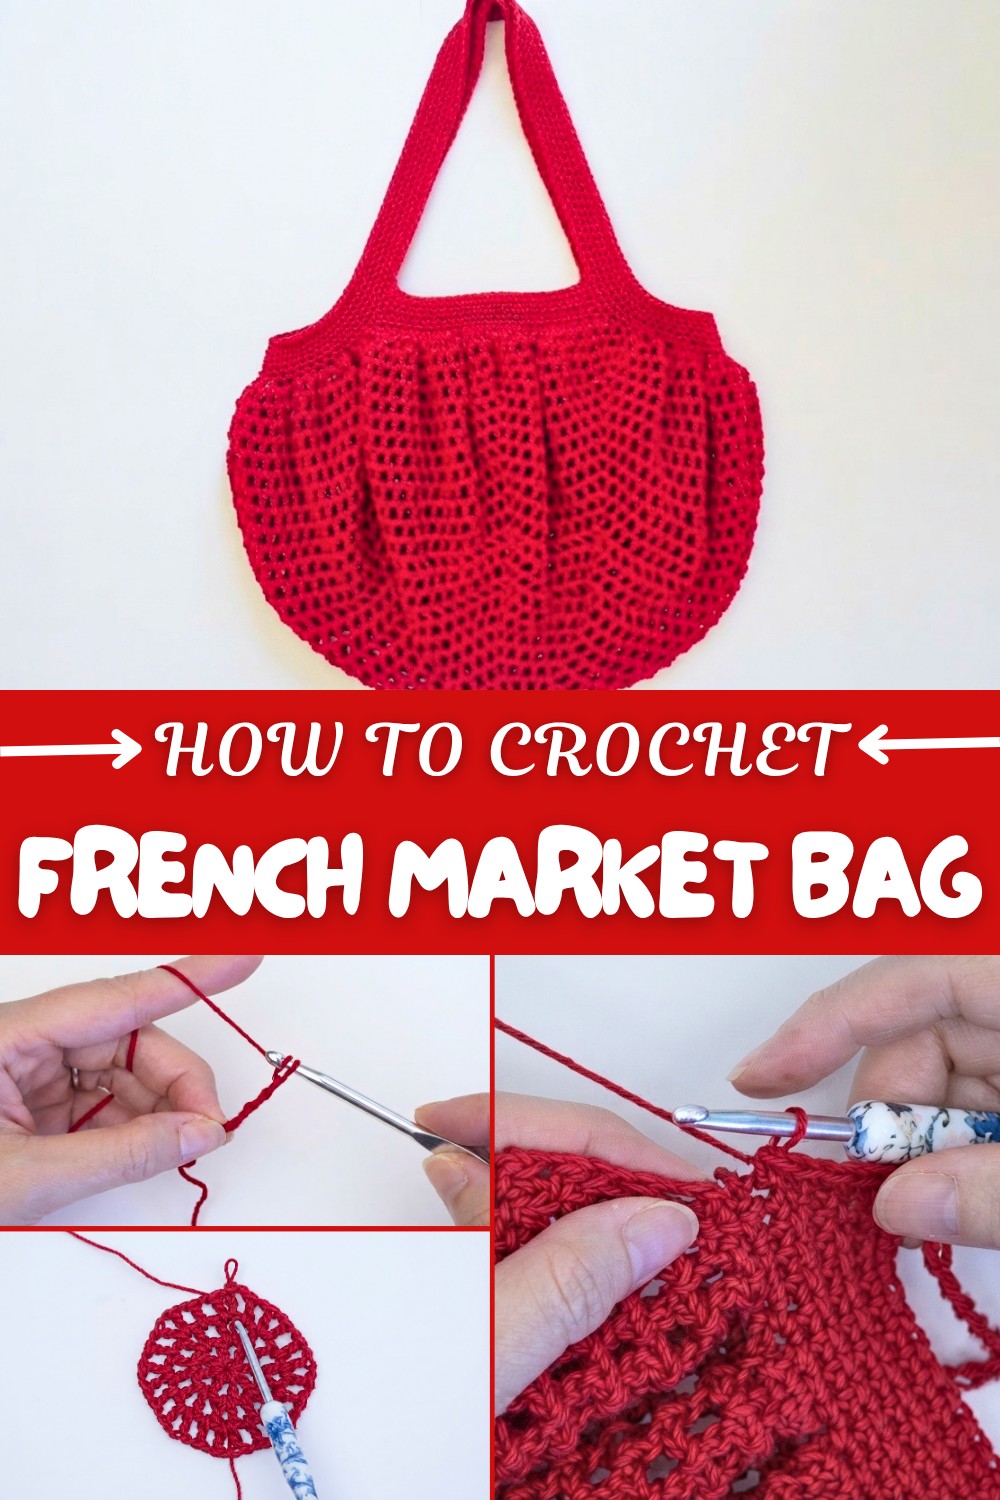
Designed with beginners in mind, the pattern gently guides you through working in rounds, mastering V stitches, and weaving in tails for a secure foundation. The handles are built up using simple single crochet stitches in continuous rounds, providing comfort and strength without complicating the process. The end result is a beautifully textured, flexible bag that’s as practical as it is eye-catching.
Beyond this market bag, the stitches and techniques learned here can be adapted to create a variety of other projects. You might try making baskets for organizing your space, lightweight beach totes, or even stylish, eco-friendly gift bags. The magic of chain spaces, V stitches, and single crochet edges gives you the tools to find countless creative crochet designs that are perfect for everyday use and gifting. This pattern truly opens doors to making versatile and charming handmade accessories!
Quick and Easy French Carryall Bag Crochet Pattern
Elevate your crochet skills with this free-flowing and lightweight French Carryall Bag. Designed to be roomy, flexible, and stylish, this bag is perfect for shopping, casual outings, or carrying everyday essentials. With a unique structure that combines stability at the base and airy V-stitch sections, this pattern is beginner-friendly yet rewarding for intermediate crocheters who enjoy repetitive, meditative stitches.
What You’ll Learn From This Pattern
- V-Stitch Mastery: Learn how chain spaces and double crochet combine for an airy texture.
- Shaping with Decreases: Practice reducing stitch counts to soften curves.
- Continuous Construction: Master techniques to avoid cutting yarn throughout most of the pattern.
Skill Level & Terminology
- Skill Level: Beginner
- Focused on simple repeats and basic shaping techniques, making this accessible for all skill levels.
- Terminology: US crochet terms
- (US dc = UK tr, US sc = UK dc, US hdc = UK htr).
Materials & Tools
- Yarn: Size 4 cotton yarn (medium-weight). Cotton ensures flexibility and strength for functional bags.
- Hook: Size 5.0 mm crochet hook (US H/8).
- Additional Tools:
- Tapestry needle (for weaving ends).
- Scissors.
- Stitch markers (optional for marking decrease points).
Plain explanation:
The pattern requires medium-weight yarn and a 5mm hook. You’ll also need a needle for finishing details and scissors to cut yarn. Stitch markers are optional for clarity during decreases.
Gauge
4 double crochet stitches by 2 rows = 1 inch.
Gauge is particularly important for the base of the bag to ensure stability and proper dimensions. Always check and adjust your hook size if needed.
Plain explanation:
Make a small sample of double crochets to see if your stitches match the size. Adjust your hook to match the gauge if the bag seems too small or big.
Abbreviations List
Below are all abbreviations in US terms:
- ch: Chain
- sl st: Slip Stitch
- sc: Single Crochet
- hdc: Half Double Crochet
- dc: Double Crochet
- sp: Space
- st: Stitch
Plain explanation:
These short symbols represent the stitches you’ll use. If you forget one, go back to this section!
Special Stitch Instructions
1. V-Stitch
- A V-stitch is created by working:
- dc, ch 1, dc into the same chain space.
2. Half-Double Crochet (hdc)
- Yarn over, insert hook into stitch, yarn over and pull up a loop (3 loops on hook).
- Yarn over and pull through all 3 loops.
3. Single Crochet (sc)
- Insert hook into stitch, yarn over and pull up a loop (2 loops on hook).
- Yarn over and pull through both loops.
Plain explanation:
The V-stitch forms the main airy texture, while half-double crochet and single crochet create other structural parts like the handles.
Finished Size
- Completed bag width: 12 inches (30 cm) diameter.
- Handle drop: 9 inches (23 cm).
- Total height (including handles): 21 inches (53 cm).
The Pattern Itself
Step 1: Creating the Base (Rounds 1–3)
- Round 1:
- Leave a 12-inch tail before creating a slip knot.
- Ch 4, then sl st into the first chain to form a circle.
- Ch 2 (counts as dc), ch 1 (create chain space), dc into the circle.
- Repeat (ch 1, dc into the circle) 5 more times.
- At the end, ch 1 and join with a sl st to the top of the initial ch-2.
- Total: 8 dc and 8 chain spaces.
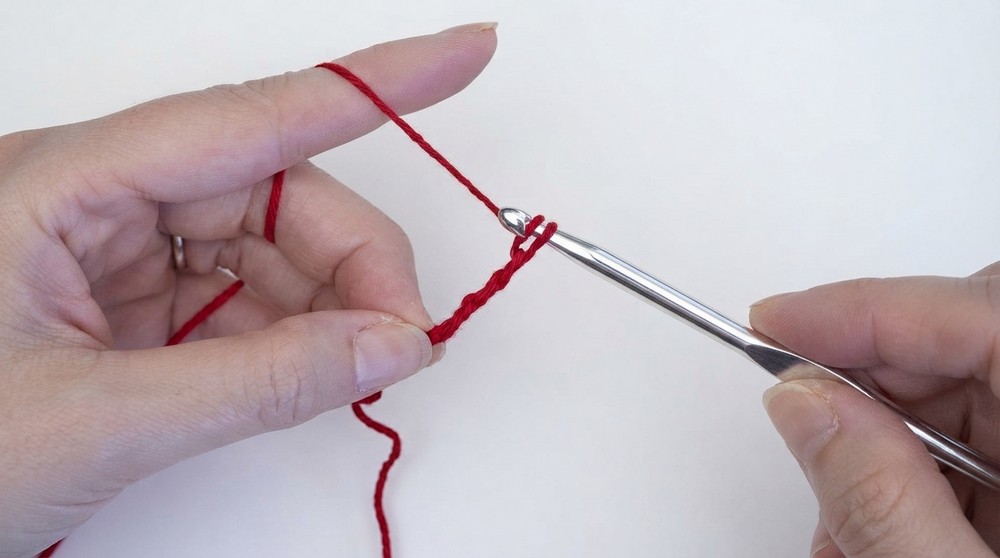
Tip: This forms the foundation ring of your bag. The round consists of evenly spaced double crochet stitches with chain spaces for flexibility.
- Round 2:
- Sl st into the next chain space (always start new rounds by moving into the first chain space).
- Ch 3 (counts as dc), ch 1 for the space, dc into the same chain space (forms the first V-stitch).
- Ch 1, dc in the next chain space, ch 1, dc into the same chain space.
- Continue working V-stitches (dc, ch 1, dc) in each chain space around.
- Join with a sl st to the top of the first ch-2.
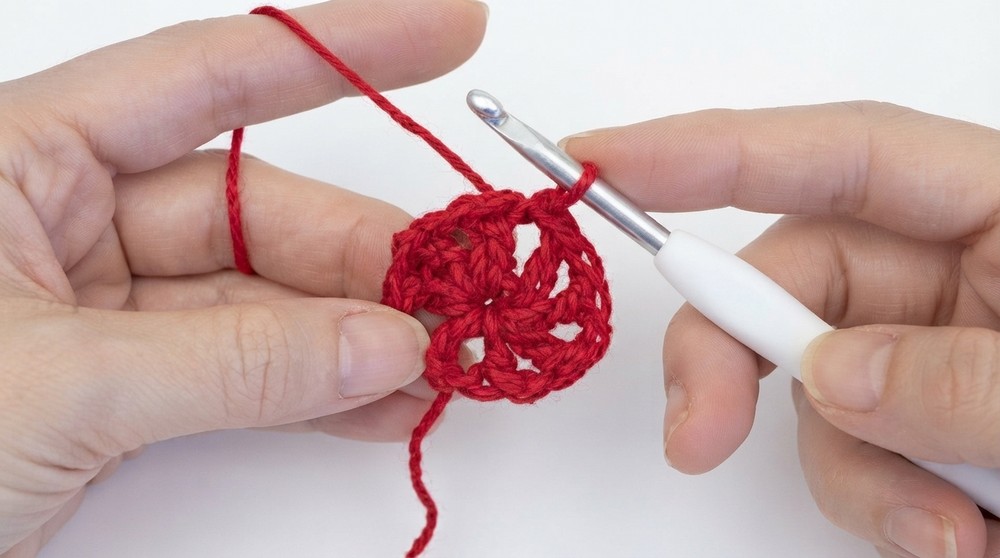
Tip: This creates 8 V-stitches (each V-stitch has 1 chain space between it).
- Round 3:
- Repeat the same as Round 2 but add a dc in every chain space between V-stitches.
- Work V-st on top of V-st and dc into each chain space between V’s.
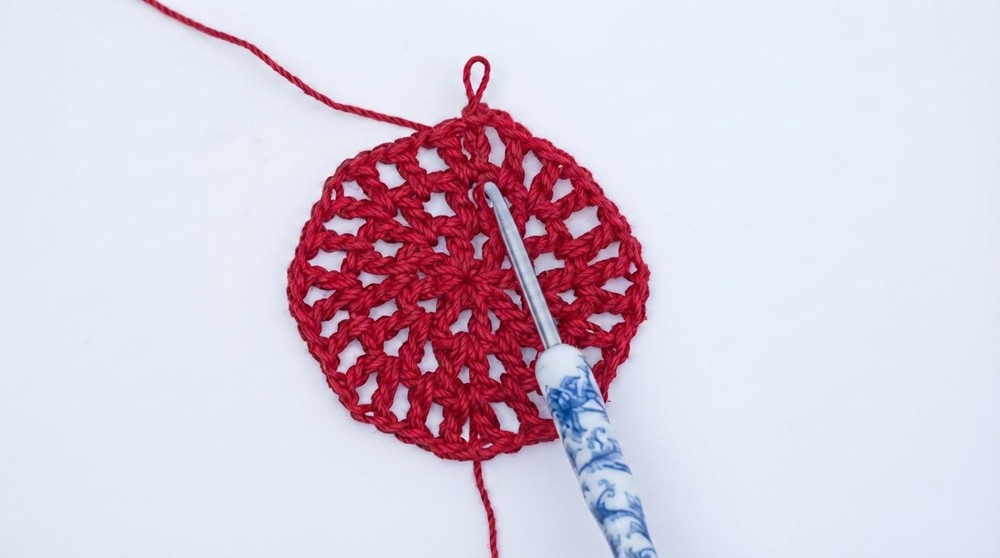
Explanation: The base pattern builds the flexible V-stitch framework for the bag shape quickly.
Step 2: Expanding Bag Body (Rounds 4–23)
- Starting from Round 4, add additional chain spaces between each V-stitch for a looser, airier design:
- Ch 2 (counts as dc), ch 1 (for space), dc into the same chain space.
- Follow the same structure but add an extra chain space (ch 1) between V-stitches (dc, ch 1, dc).
- Repeat this pattern through Round 23, increasing chain spaces where necessary for the growing height and roomy shape.
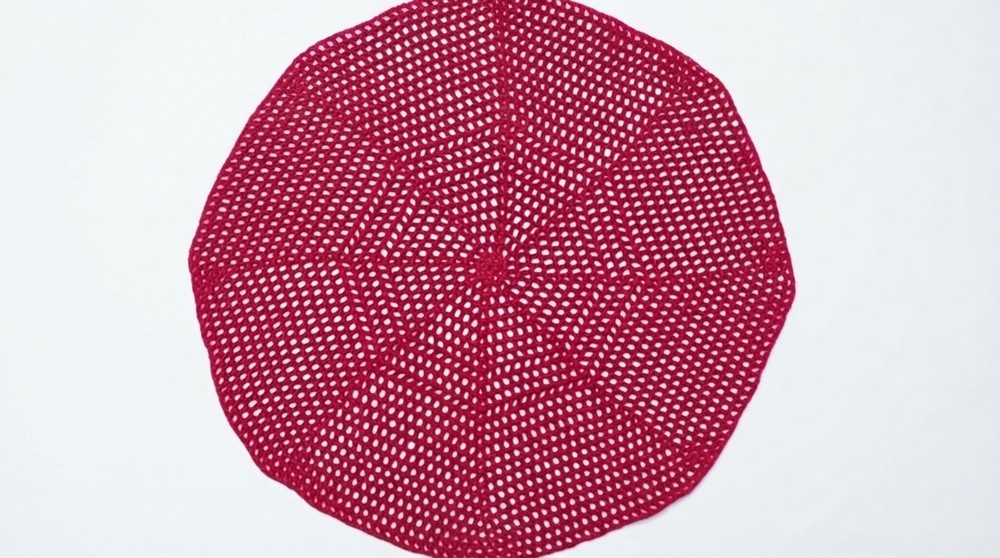
Tip: The repetitive V-stitch makes this section meditative and fast to work on!
Step 3: Strengthening the Bottom
- Take the leftover 12-inch tail from the slip knot and weave through the first round of base stitches.
- Tie a slip knot at the end.
- Repeat this weaving for the second round.
Tip: Reinforcing the base helps ensure your bag holds heavier objects without stretching or tearing.
Step 4: Decreasing for Structure (Rounds 24–26)
- Round 24:
- Replace each V-stitch with hdc stitches to decrease width.
- Insert hook into the next chain space and work: hdc, ch 1, hdc.
- Continue this pattern for the entire round.
- Round 25:
- Begin softening the edges by inserting hdc stitches one stitch before and after each V space.
- Round 26:
- Follow the same technique as Round 25 to further reduce the diameter and smooth out the edge curve.
Tip: The decrease rounds prepare the bag for strong edges and help balance its final shape.
Step 5: Edging & Handle Crochet (Rounds 27–33)
A. Edging
- Attach yarn to the back section of the circle.
- Work single crochet stitches evenly across the section as follows:
- Skip 1 st, sc into next chain space.
- Alternate skipping and working into chain spaces until you reach 18 single crochets across.
- Repeat this exact pattern for the front section.
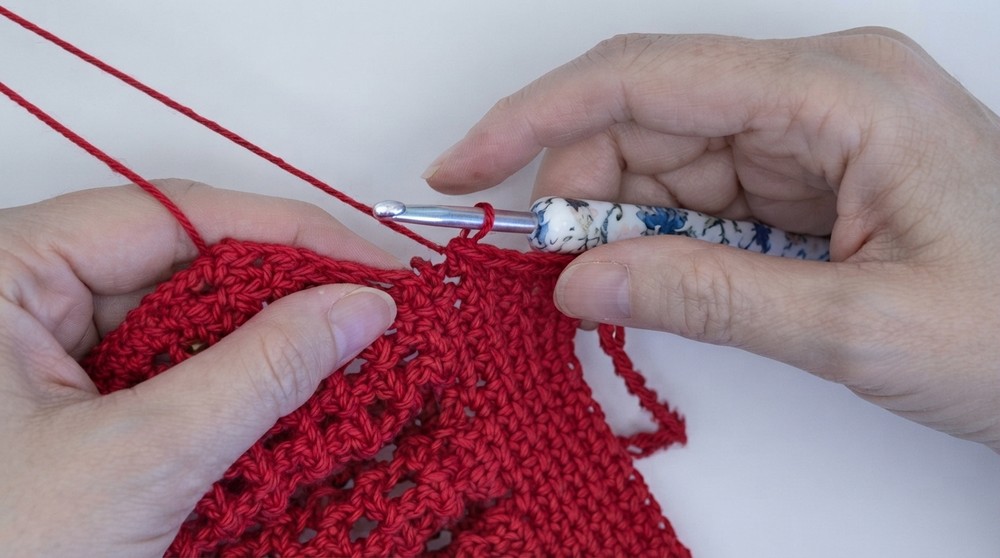
B. Handles
- Ch 70 for the front handle; join with sc to the panel.
- Work sc across the side edges, decreasing stitches (as in Round 24).
- Continue to back handle and repeat.
- Gradually shape handles by working sc into back bumps (for clean edges).
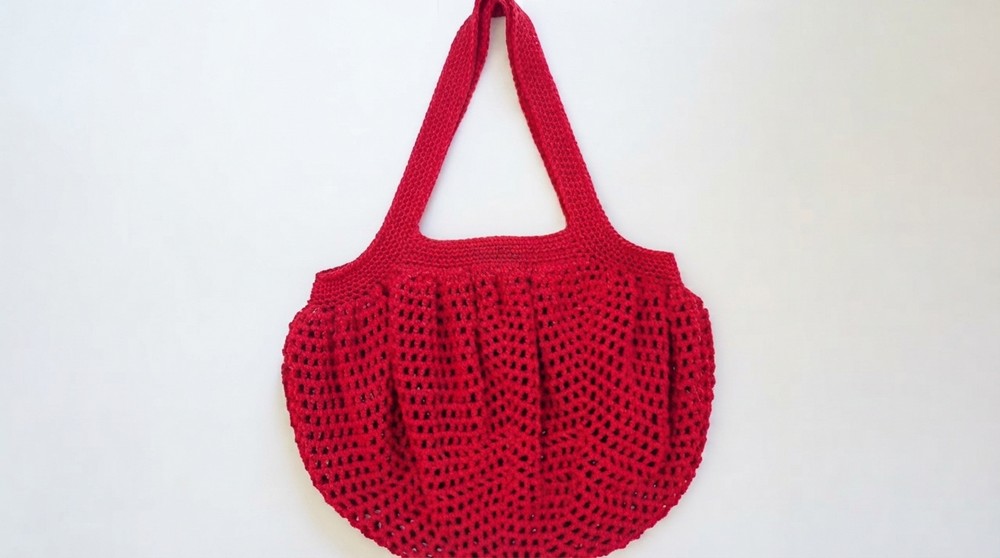
Tip: Handles are worked in continuous rounds for a polished look without cutting the yarn.
Assembly & Finishing
- Once edging and handles are complete, smooth the final edge with 2 slip stitches.
- Tie off with a slip knot, and weave in loose ends using a tapestry needle.
- Test the strength of the bottom before loading items into the bag.
Tip: Weaving in securely prevents fraying. If handles feel loose, double-check tension during joining.
Why You’ll Love This Pattern
The French Carryall Bag combines beauty with practicality. Its open and repetitive structure makes it a relaxing crochet project, while its roomy design ensures versatility. You can use it as a shopping bag, day bag, or even a gift package! Plus, it builds confidence in managing edges, handles, and decreases for shaped designs.