
Bold & Festive Crochet Halloween Earrings Pattern for Cute Looks
Enhance your holiday vibe and avoid ordinary jewelry via a Free Crochet Halloween Earrings Pattern designed for playful, trendy statements.
When the crisp air of autumn arrives, I love creating little projects that celebrate the season’s cozy and playful spirit. These crochet Halloween earrings pattern is one of my favorite creations because they combine cute pumpkin shapes with delicate stitch work that’s perfect for the festive season. Using stitches like medium stitches, double crochets, slip stitches, and picot accents, this pattern builds charming earrings that look intricate but are very beginner-friendly. The layered textures and small details give the pumpkins a lively, almost whimsical feel that adds a touch of fun to any outfit.
Try this Crochet Halloween Earrings Pattern for Spooky Style
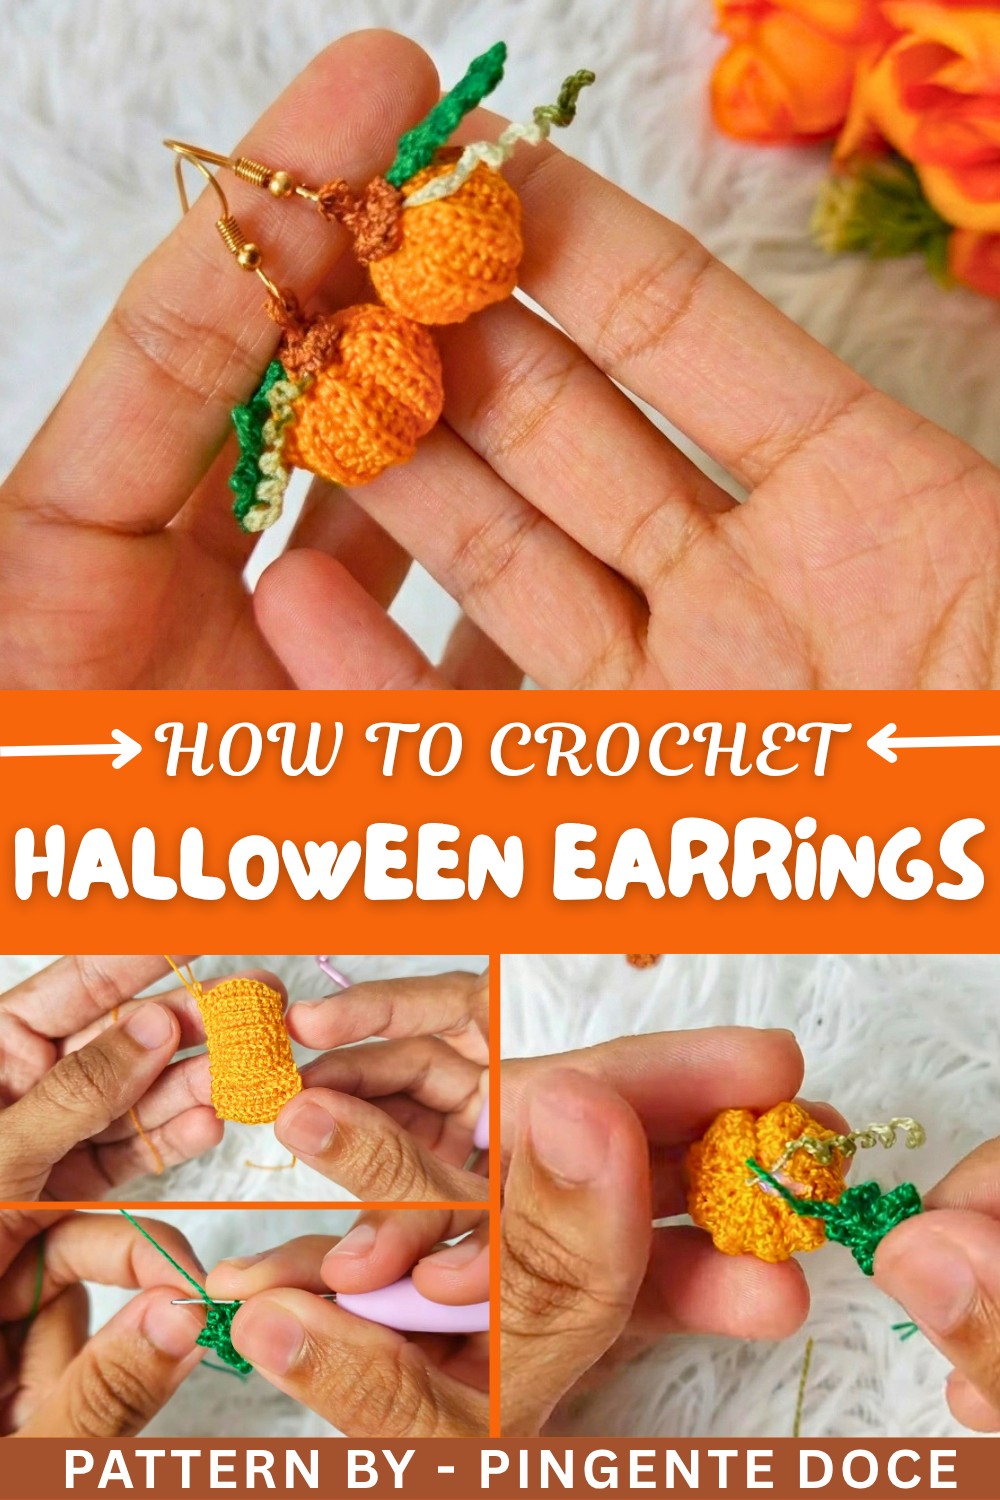
Making these earrings is a joy because the instructions guide you through working with back loops only, which adds a neat, ribbed texture to your fabric while keeping the pattern simple. The magic ring technique helps you start the shapes cleanly, and the finishing touches, like stuffing with synthetic fiber and wrapping cords for the stems, bring the pumpkins to life. These earrings are ideal for anyone who wants to add some seasonal flair to their jewelry collection or craft quick, adorable gifts for Halloween.
Other Creative Ideas from This Pattern
This pumpkin pattern has many possibilities beyond earrings. You can crochet larger pumpkin decorations to use as festive accents around your home or create a garland for a Halloween party. Small versions make charming appliques for hats, scarves, or bags, adding a handmade touch to your autumn wardrobe. With a little imagination, you could also use this pattern to make keychains or zipper pulls. The versatility of this design means you can spread the cozy Halloween spirit in many creative ways.
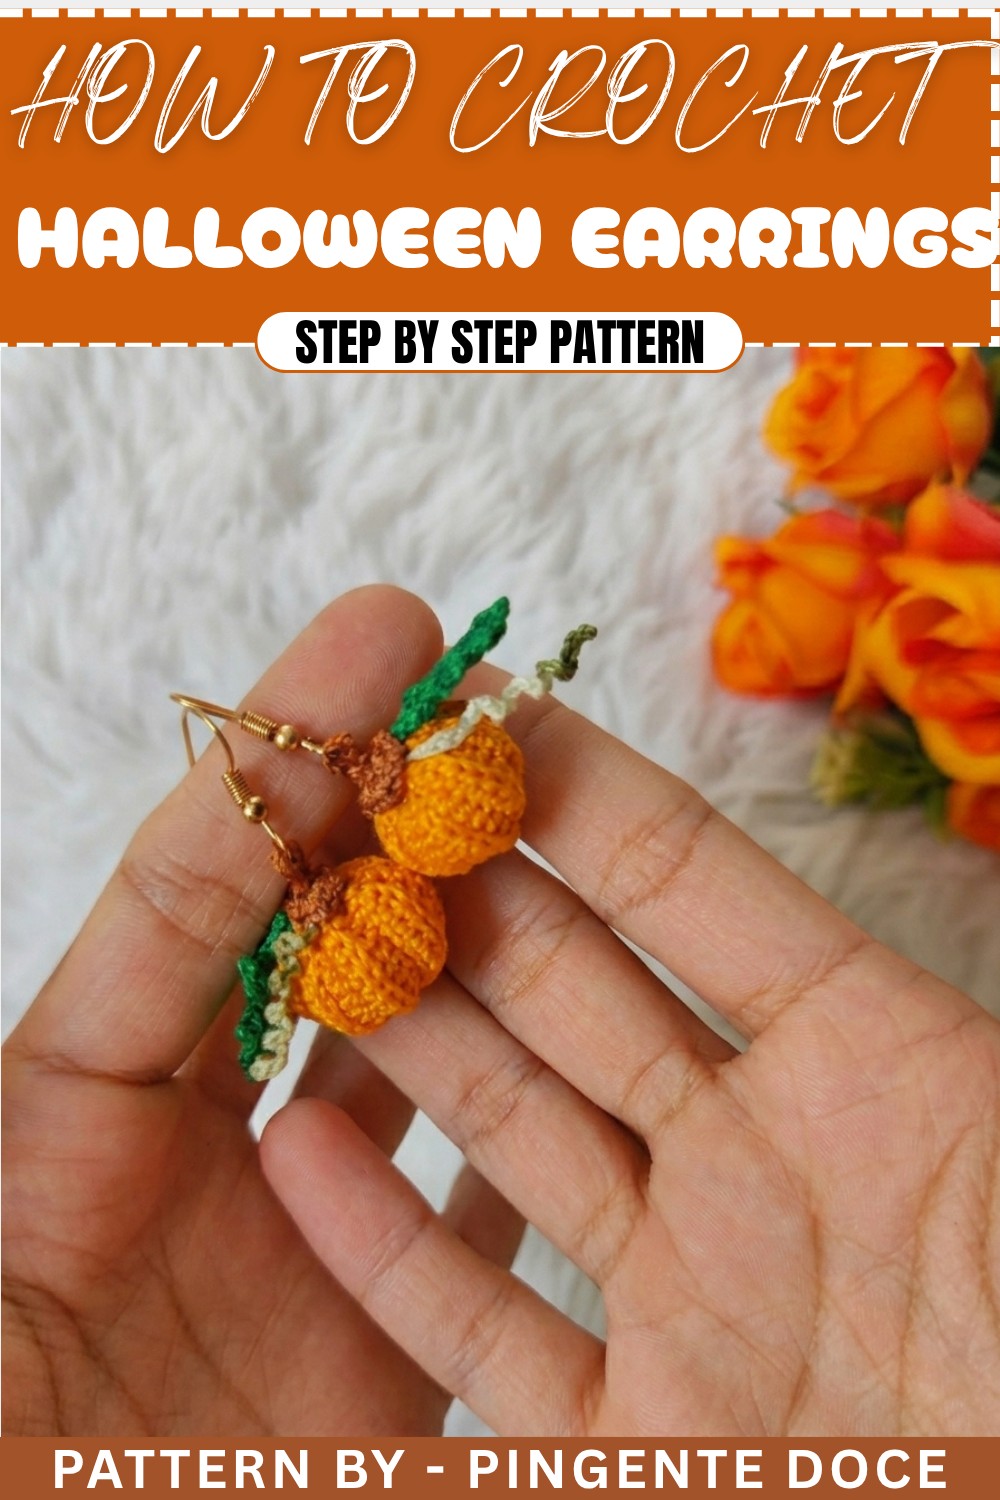
Crochet Pumpkin Earring Pattern
This delightful crochet pumpkin earring is perfect for autumn decorations, festive accessories, or thoughtful handmade gifts. Combining detailed crochet stitches with assembly techniques, this project allows you to create an elegant and stylish pumpkin-inspired accessory, ideal for Halloween or any fall celebrations.
Celebrate the beauty of autumn with this step-by-step crochet pumpkin earring tutorial. The pattern uses foundational stitches to create a pumpkin body, detailed stem, and leaf. Designed for both beginner and intermediate crocheters, this project is quick, versatile, and a great way to add handmade charm to your seasonal wardrobe.
Uses of This Pattern
- Autumn Accessory: Pair these earrings with cozy sweaters and fall outfits.
- Halloween Gifts: Perfect for gifting or selling as handmade Halloween items.
- Decorative Items: Turn these pumpkins into keychains, bag charms, or seasonal garlands.
- Sell in Craft Shops: A trendy craft for marketplaces, especially during fall.
Skill Level & Terminology
- Skill Level: Beginner–Intermediate. Requires knowledge of basic crochet stitches and assembly skills.
- Terminology: U.S. Crochet Terms
Materials & Tools
- Thread: Anchor thread, or any thin yarn in the following colors: orange (pumpkin body), brown (stem), and green (leaf).
- Crochet Hook: 1 mm crochet hook (use a suitable hook for your yarn/thread).
- Additional Tools: Scissors, pliers, tapestry needle, sewing needle, synthetic fiber for stuffing, fabric glue, and earring hooks with rings.
Gauge
Gauge is not critical for this pattern. Ensure the tension is firm enough to provide structure but loose enough to comfortably work small stitches.
Abbreviations List
- ch: Chain
- sc: Single crochet
- sl st: Slip stitch
- m st: Medium stitch
- dc: Double crochet
- BL: Back loop
Special Stitch Instructions
- Medium Stitch (m st): Yarn over, insert the hook into the stitch, yarn over again, and pull through all three loops on the hook. This creates a stitch with height between a single and double crochet.
- Picot Stitch: Chain 1 and insert the hook into the two loops at the top of the stitch. Pull through with a slip stitch to create a decorative edge.
- Back Loop Stitch (BL): Insert the hook into only the back loop of the base stitch, leaving the front loop untouched. This creates a textured ridge.
Finished Size
The finished pumpkin earring measures approximately 1.5 inches in diameter, with a length that includes the leaf and stem.
Pattern Overview
This pattern creates a 3D pumpkin shape with front ridges to mimic the appearance of a real pumpkin. The design incorporates assembly techniques for stuffing, shaping, and adding decorative elements like the stem and leaf. Let’s crochet your way to a festive accessory!
The Pattern Itself
Part 1: Creating the Pumpkin Body
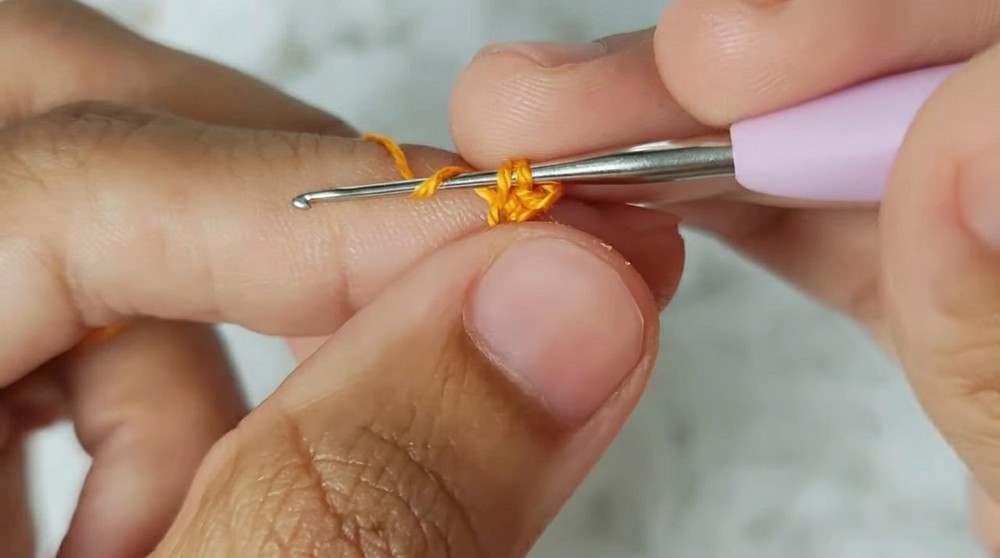
- Foundation Chains:
- Begin with 12 ch in orange thread.
- Skip the first chain and make a sl st into the second chain.
- Base Stitches for Row 1:
- Work sc into the next two chains.
- Work 5 m st, one in each of the following chains.
- Finish with 2 dc, one stitch in each of the last two chains.
- End with a sl st in the final chain.
- Turning to Row 2:
- Chain 1, turn your work.
- Insert the hook into the BL of each stitch from Row 1.
- Follow the same stitch pattern: sl st, 2 sc, 5 m st, 2 dc, and end with sl st in BL.
- Repeat Rows:
- Work this sequence for 18 rows to create the textured ridges of the pumpkin.
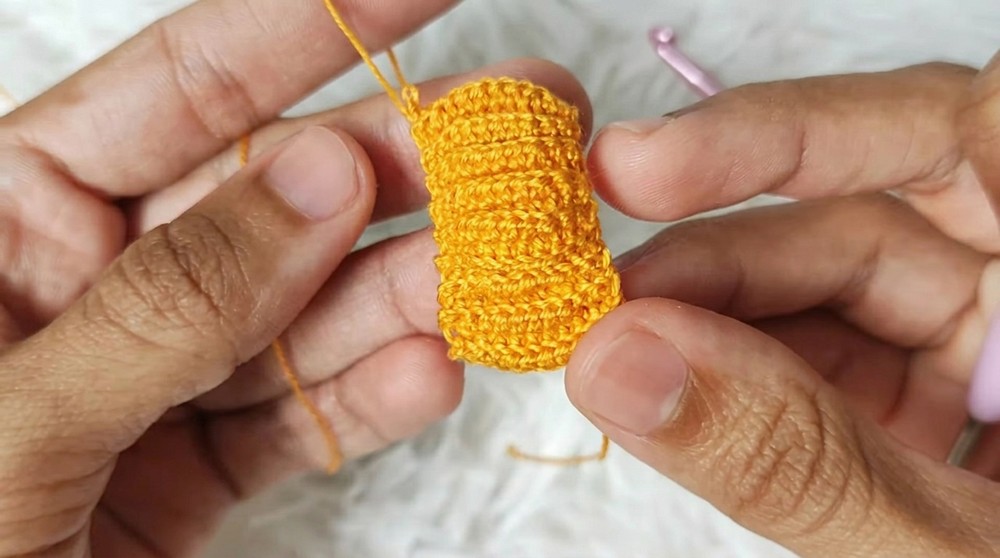
Note for Beginners: These rows form the curved structure of the pumpkin body. Pay attention to the BL technique, as it gives the piece its characteristic ridges.
Part 2: Assembling the Pumpkin
- Folding and Joining:
- Fold the piece in half to join both edges.
- Work sl st through the BLs of each stitch across to close the seam. This will require 11 sl st in total.
- Securing Thread Ends:
- Cut the thread, leaving a long tail for sewing. Use this tail to sew the top and bottom edges.
Note for Beginners: This step transforms the flat piece into a rounded pumpkin. The slip stitches ensure that the shape stays secure.
Part 3: Stuffing the Body
- Adding Synthetic Fiber:
- Place synthetic fiber or small yarn scraps inside the pumpkin through the top opening.
- Closing the Top:
- Pass the needle through the fabric loops around the top edge. Tighten gently to close the opening completely.
Note for Beginners: Ensure that the stuffing is evenly distributed to give the pumpkin a firm, rounded look.
Part 4: Creating the Stem
- Magic Ring with Brown Thread:
- Work a MR and make 6 sc inside the ring. Leave a small center opening.
- Chain 1 and add a picot detail by working 2 sc followed by ch 1 for texture on the stem.
- Twisted Cord for Stem Attachment:
- Create a cord with 5 ch in brown thread.
- Add glue to secure the thread ends.
Note for Beginners: The stem adds realism and structure to the pumpkin. Keep the picot stitches tight for a neat finish.
Part 5: Adding the Leaf
- Magic Ring with Green Thread:
- Work a MR and follow this sequence: 2 dc, picot stitch, 2 chains, sl st inside the ring repeatedly to create the leaf shape.
- Creating the Handle for Attachment:
- Cut the thread, leaving a tail for sewing. Use this tail to sew the leaf onto the top of the pumpkin.
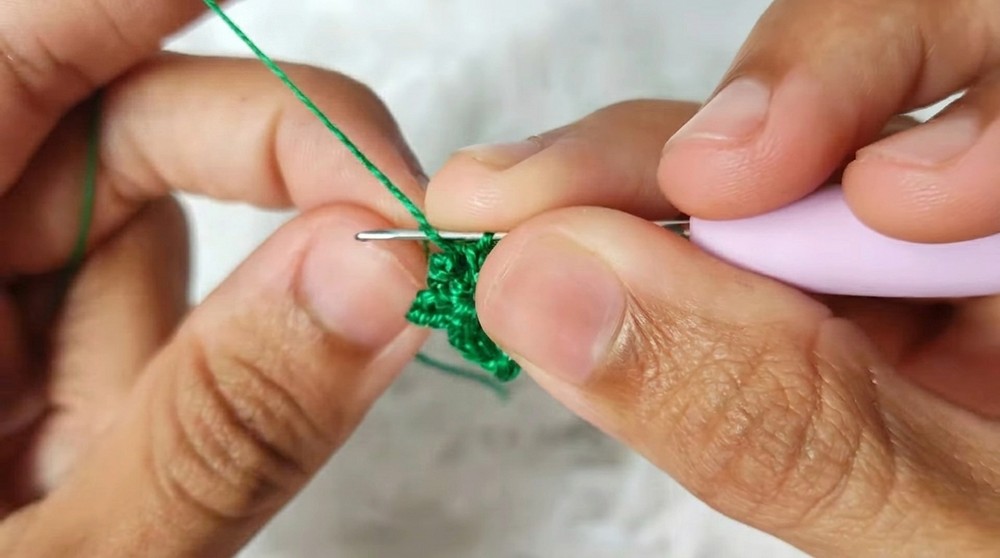
Note for Beginners: The pattern mimics natural leaf curves. Experiment with tighter or looser picot stitches for different textures.
Part 6: Creating Coiled Vine
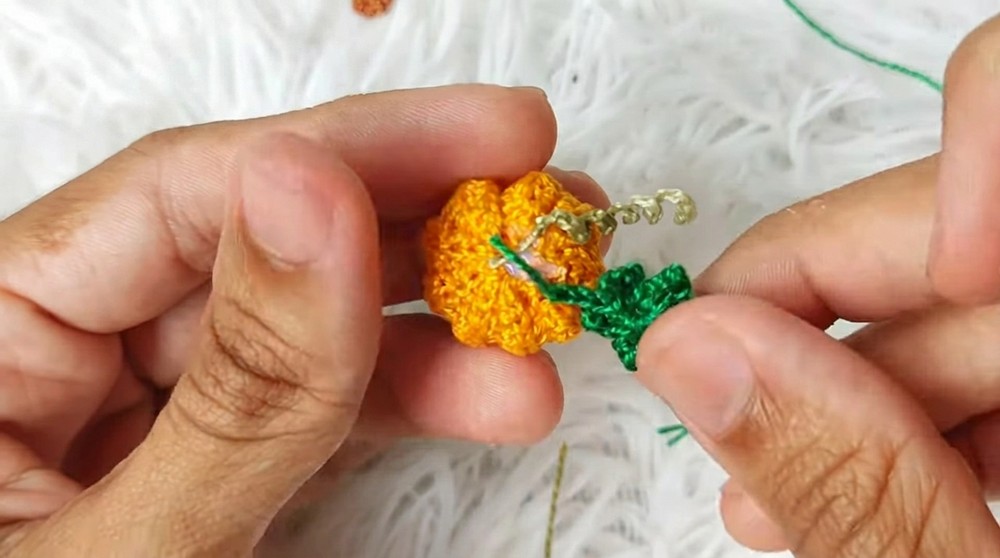
- Green Thread Vine:
- Make 20 ch and apply glue sparingly before coiling the thread into a vine shape.
Assembly Instructions:
- Attach the vine to the pumpkin near the leaf using the tapestry needle.
Assembly & Finishing
- Adding Earring Details:
- Attach the earring hook and hoop to the top of the pumpkin using pliers.
- Position the hook securely through the top opening of the piece.
- Finishing Touches:
- Ensure all thread ends are hidden inside the piece. Secure with extra fabric glue for a polished look.
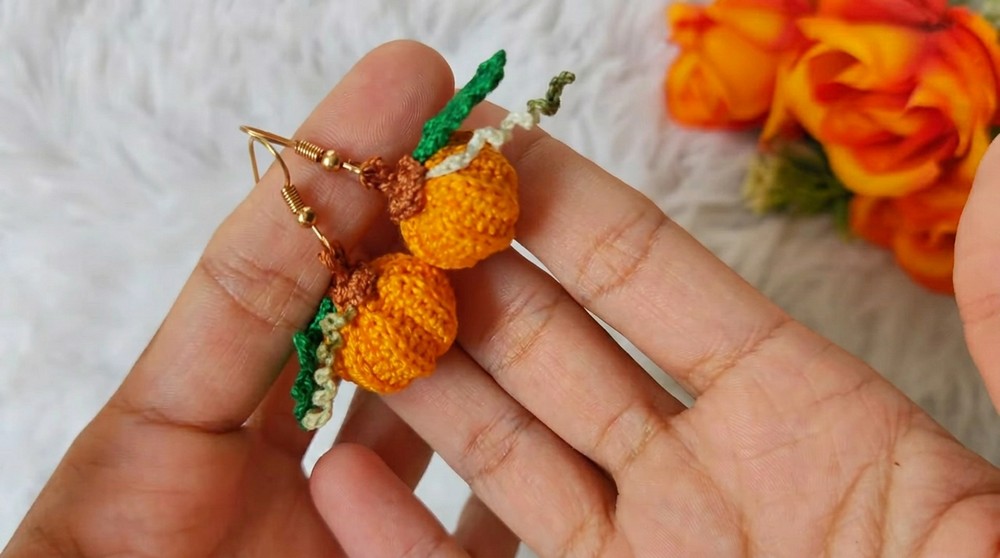
Note for Beginners: Pay special attention to securely attaching earring hardware to ensure durability.
What You’ll Learn
- Texturing with Back Loop: Learn the technique for creating ridges in flat crochet pieces.
- Magic Ring Mastery: Use this versatile technique for small, rounded components like stems and leaves.
- Decorative Picot Stitch: Perfect for adding intricate details to your projects.
- Assembly Skills: Combine crochet pieces into structured and decorative accessories.
Pattern Difficulties and Solutions
Common Challenges:
- Maintaining stiff loops while shaping the pumpkin.
- Achieving neat coiling for the vine.
- Proper attachment of earring hardware without damaging the thread.
Solutions:
- Use fabric glue sparingly to harden the vine and leaf without creating visible marks.
- Work slowly and accurately to stitch the edges of the pumpkin without skipping loops.
- Handle tools carefully to avoid any damage during jewelry assembly.
Why You’ll Love This Pattern
This crochet pumpkin earring pattern combines creativity and versatility, making it the perfect autumn accessory. Whether worn with seasonal outfits or given as heartfelt gifts, these earrings are sure to charm anyone who appreciates handmade crochets. You’ll love how quick and rewarding this project is, with delightful results!