
Cute Free Crochet Flower Coaster Pattern You Must Try
Learn how to create beautiful crochet flower coaster with this easy pattern, perfect for brightening your table and impressing friends and family.
A flower shaped coaster is a beautiful addition to any home, combining functionality and charm. With its delicate yet eye catching design, it’s perfect for protecting tables from drinkware while adding a touch of elegance to your décor. Crocheting this coaster creates not only a practical item but also a work of art, something that can brighten your living spaces or make thoughtful handmade gifts for loved ones. The shape stands out with soft petals that mimic a natural flower, creating a cozy, inviting look for any table setting.
Designed by
This pattern, demonstrated by Trang Lam Crochet, a channel specially created for left handed crocheters, is both beginner friendly and creatively engaging. The tutorial shows how to work through the petals with care, starting from the center and seamlessly expanding outward. The stitches used in this project combine basic crochet techniques with colorful yarns, making it easy to follow and customize.
The Perfect Crochet Flower Coaster for Your Home Style
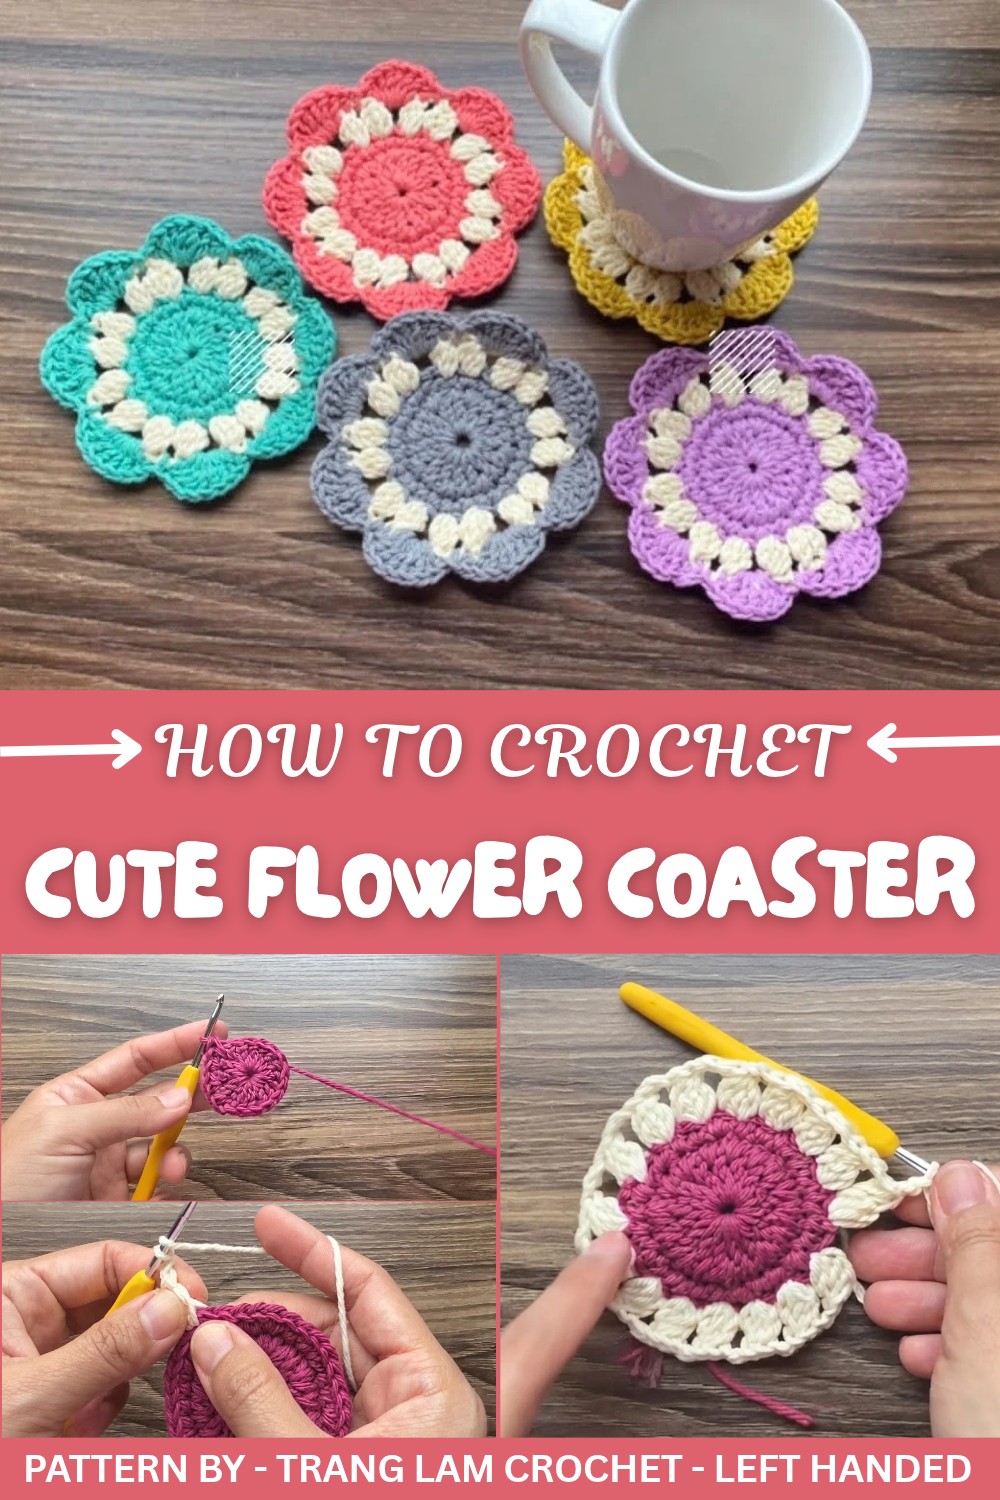
The most attractive feature of this design is how the petals are shaped, they aren’t just flat; they have subtle curves that give them depth and texture. Created with vibrant yarns, you can mix and match colors to suit your preferences, making the finished coasters truly unique. Whether you opt for soft pastel tones or a bold color palette, the result is stunning.
This flower coaster is versatile and functional. It’s great for use during tea times, as a table centerpiece, or simply as a decorative addition to any room. The pattern is easy to adapt, and the tutorial by Trang Lam Crochet makes it accessible for left handed crocheters seeking stylish handmade projects. Lasting and lovely, it’s a perfect crochet for both gifting and personal use.
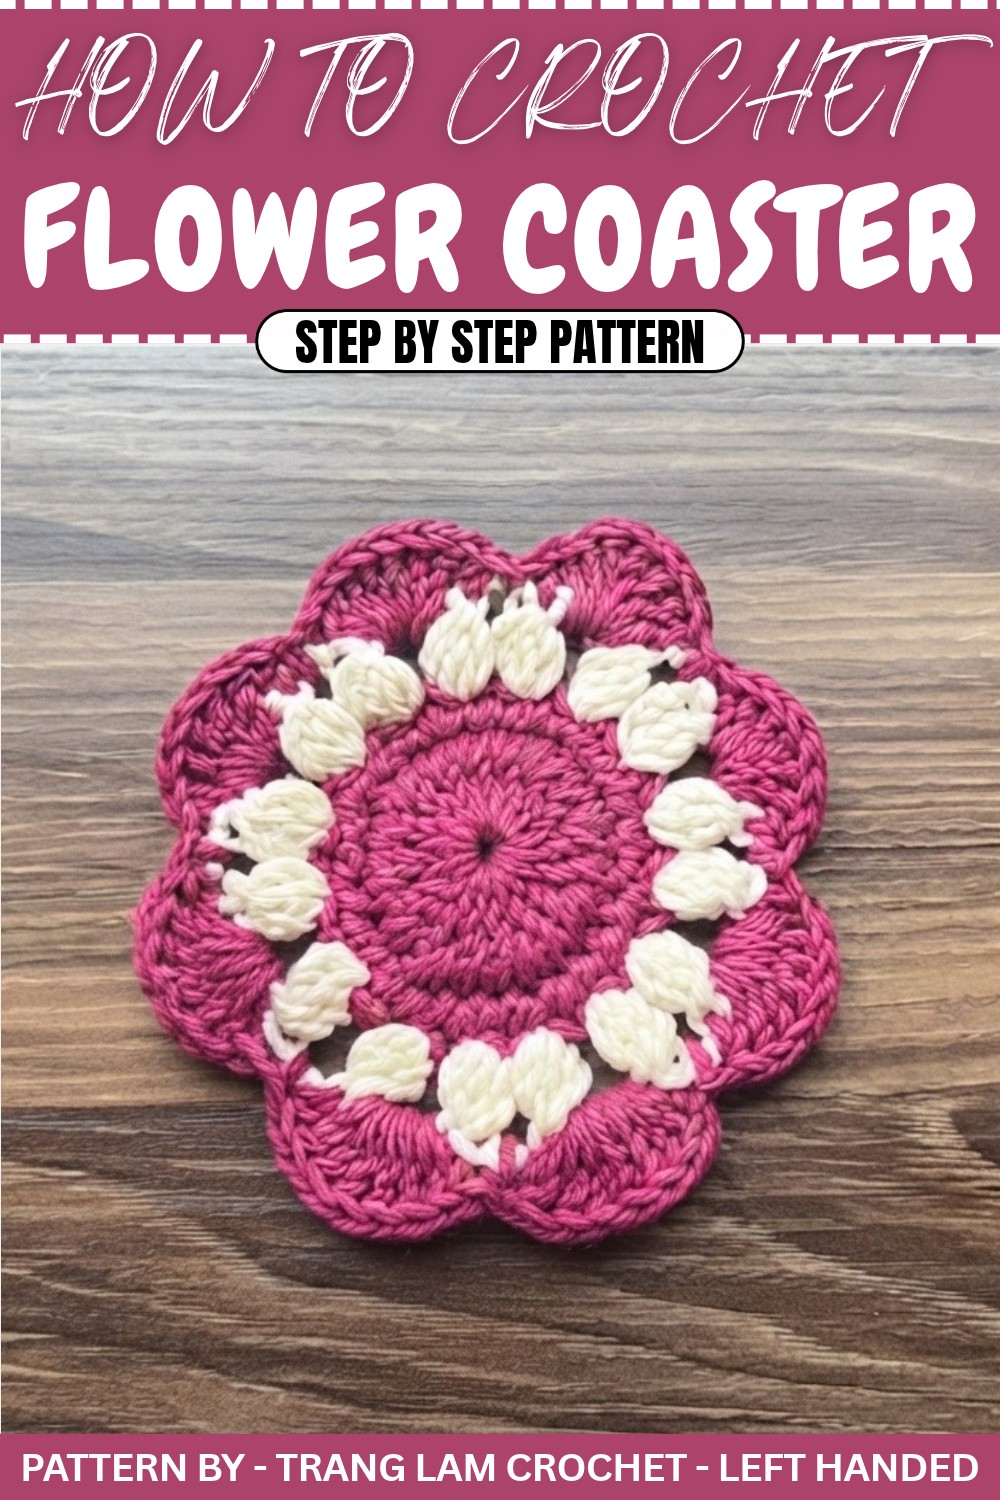
Crochet Coaster Pattern
This elegant piece is designed to be sturdy, absorbent, and functional, perfect for protecting your table while adding a decorative touch. Whether you want to make it for personal use or as an easy to crochet item to gift or sell, this coaster pattern is quick and enjoyable to create.
Quick Overview of Pattern
- Project Name: Crochet Cotton Coaster
- Purpose: Functional tableware accessory for cups and glasses
- Key Details:
- Simple, textured design
- Two color combination for elegance
- Sturdy cotton yarn for durability and water absorption
- Construction: Worked in rounds starting from the center and finishing with a final decorative border.
Notes
- This pattern is designed for cotton yarn, which is ideal for coasters due to its absorbent and durable properties.
- Ensure your stitches are tight to maintain the proper shape and structure of the coaster.
- You can customize the colors and sizes to match your home décor or preferences.
- Transitioning between colors adds a professional touch—use a seamless method for neat joins.
Skill Level
Beginner to intermediate. This project uses basic crochet stitches but introduces techniques like the magic circle and puff clusters to build texture.
Materials
- Yarn:
- Cotton yarn in two colors:
- Main Color: Purple (for the body)
- Accent Color: White (for the border)
- Cotton yarn in two colors:
- Hook Size: 3.5mm crochet hook
- Additional Supplies:
- Tapestry needle for weaving in ends
- Scissors
Measurements / Sizing
- Finished Size: ~10–12cm diameter (depending on tension and yarn thickness).
Gauge & Stitch Pattern
- Gauge: Not critical for this pattern.
- Stitch Pattern: Combines basic stitches (SC, DC) with textured puff clusters for the border.
Stitch Abbreviations
- CH: Chain
- SC: Single Crochet
- DC: Double Crochet
- SL ST: Slip Stitch
Special Stitches
- Magic Circle:
Create a loop of yarn. Insert the hook, YO, pull through, and crochet into the circle. - Cluster:
A puff like stitch formed by pulling loops through 2–3 yarn overs consecutively.
The Crochet Pattern
Step 1: Center Base
- Magic Circle:
- Create a magic circle using purple yarn.
- CH 3 (counts as the first DC).
- Round 1:
- Work 15 DC into the magic circle. Including the initial CH 3, there will now be 16 DC.
- Pull the circle tight to close. Join with SL ST into the top of the CH 3.
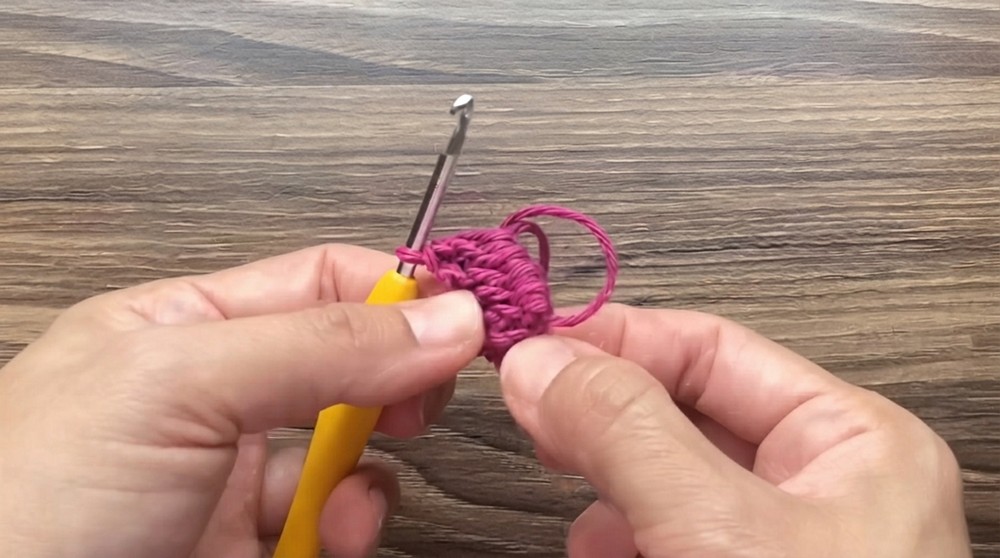
Step 2: Expanding the Circle
- Round 2 (Increase):
- CH 1 and insert the hook between every two DC (not into the stitches themselves).
- Work 1 SC into the space, followed by 2 SC into the next space across (i.e., 1 SC, 2 SC alternating).
- At the end of the round, you will have 24 SC.
- Join with SL ST into the first SC, and CH 1.
- Round 3:
- CH 1. Work 1 SC into the first stitch, then 2 SC into the next stitch (1 single, 1 increase).
- Repeat this pattern (1 SC, 2 SC alternating) around the circle.
- Finish by joining with SL ST into the first SC, then fasten off.
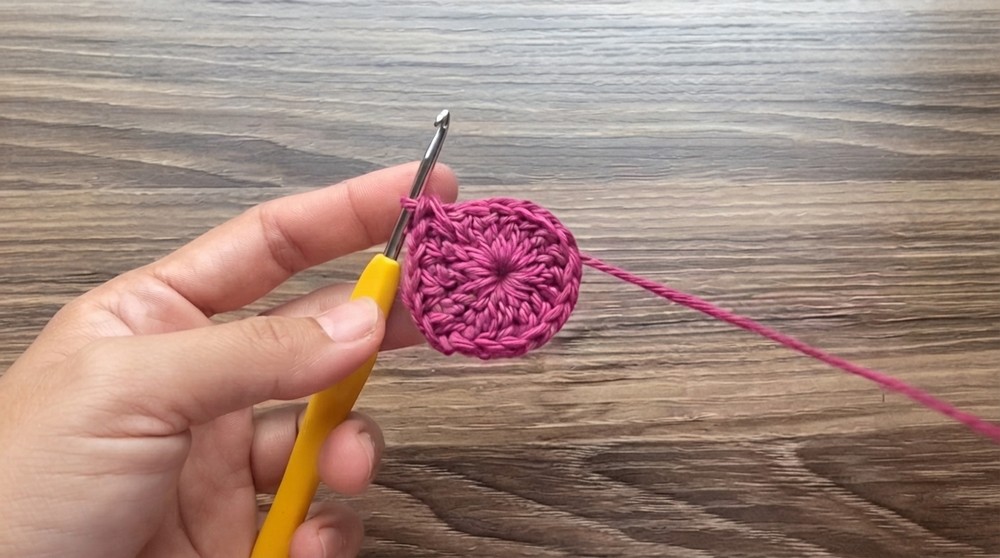
Step 3: Adding Color Transition
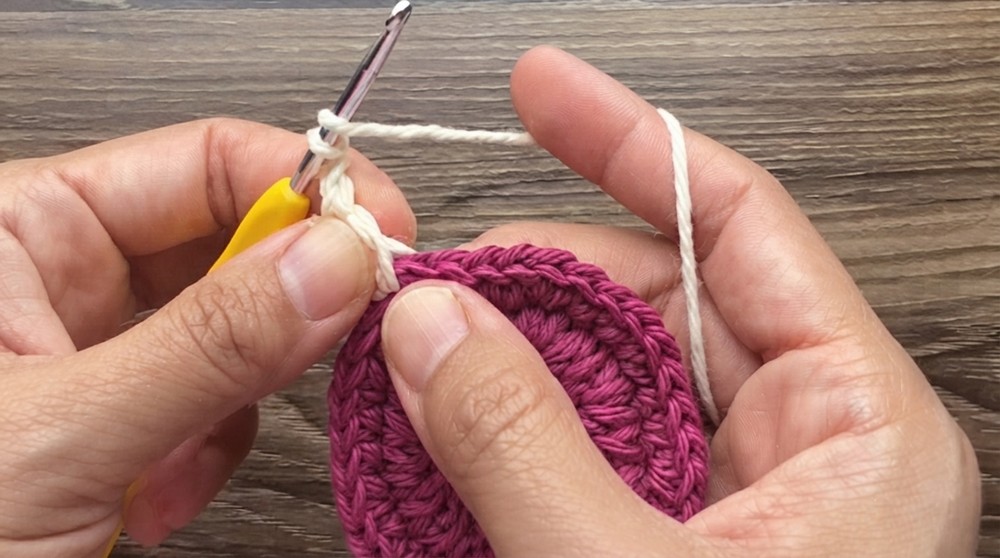
- Switch to the white yarn (or your chosen accent color).
- Create a slip knot and attach the yarn to any stitch in the previous round.
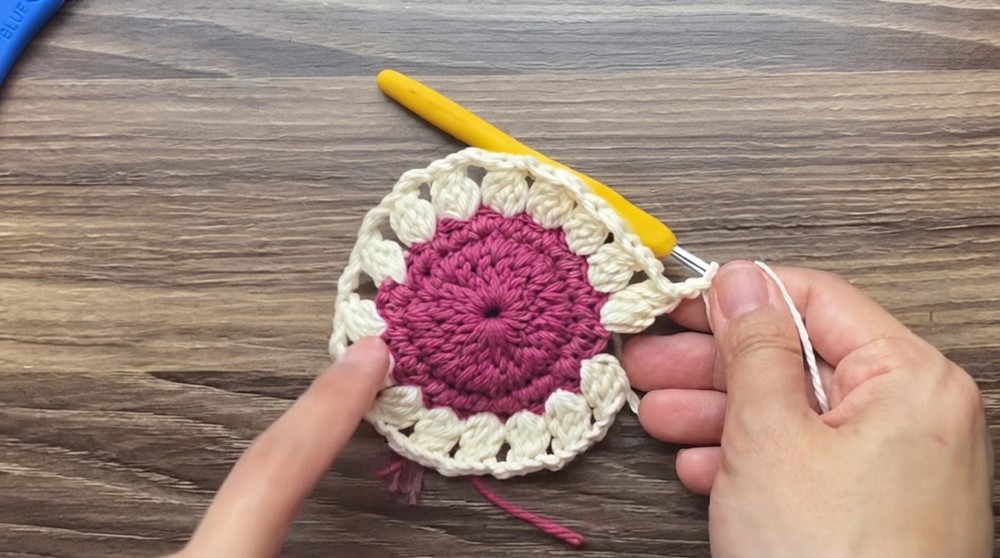
- Round 4 (Cluster Creation):
- CH 2. Skip one stitch and work a cluster in the next stitch. A cluster consists of pulling loops through three yarn overs into the same space:
- YO, insert hook, pull up a loop (repeat twice more).
- YO and pull through all loops on the hook.
- Repeat: CH 2, skip one stitch, and work a cluster in the next.
- At the end of the round, you will have 16 clusters.
- Finish by working SL ST into the first cluster’s top. CH 1 and fasten off.
- CH 2. Skip one stitch and work a cluster in the next stitch. A cluster consists of pulling loops through three yarn overs into the same space:
Step 4: Decorative Border
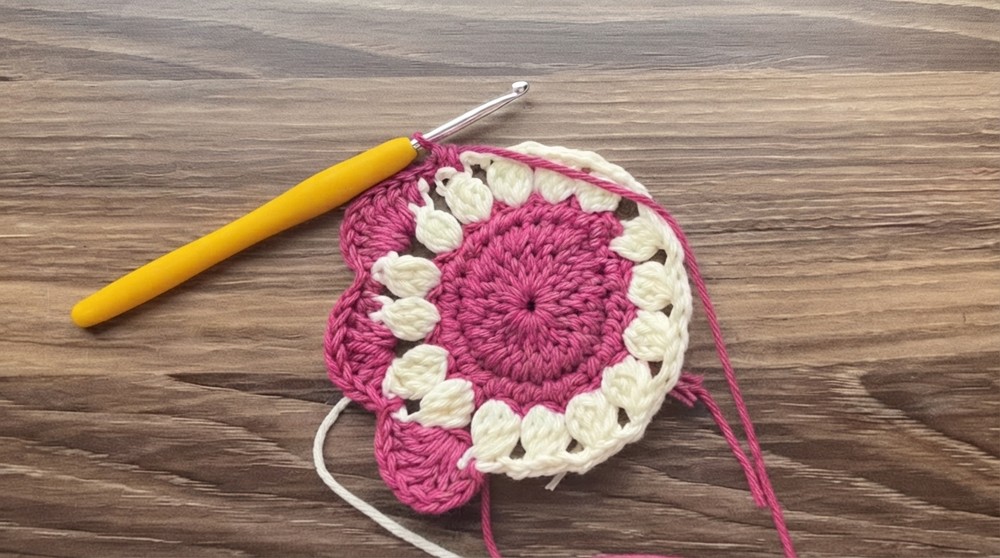
- Switch back to purple yarn for the final touch.
- Attach the yarn at the top of any cluster.
- Round 5:
- CH 1. Work 6 DC into the CH 2 space between clusters.
- Then, work 1 Half DC into the top of the next cluster, followed by SL ST into the next CH 2 space.
- Repeat the process (6 DC, Half DC, SL ST) around.
- Fasten off once the round is complete, and weave in all loose ends using a tapestry needle.
Assembly & Finished Size
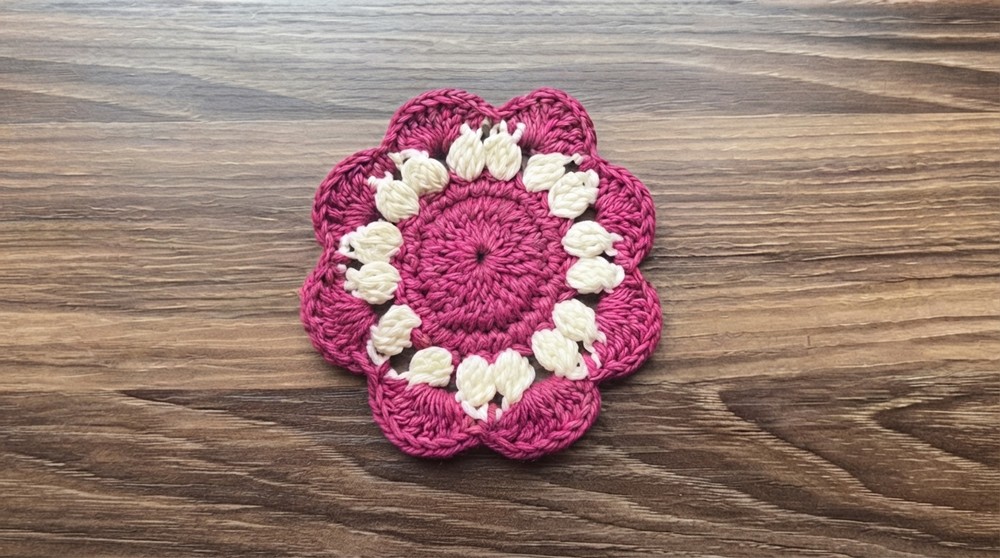
- Finishing Touches:
- Carefully trim excess yarn and weave ends securely into the underside of the coaster.
- For added stability, block your coaster using a steam iron or by soaking it in water, shaping it flat, and letting it dry overnight.
- Final Dimensions: Your completed coaster will measure approximately 10–12cm in diameter, depending on your tension.
Conclusion
Congratulations, You’ve completed your crocheted coaster in just a few simple steps. Its textured design and vibrant colors make it perfect for protecting your table while doubling as a charming decoration. Easy to crochet and customize, this pattern is ideal for personal use, gifting, or even selling at craft markets.