
Quick Free Crochet Towel Holder Pattern for Easy Home Decor
Try this free crochet towel holder pattern to make a cute and useful holder for your kitchen towels, keeping them neat, handy, and easy to reach every day.
Finding an engaging and functional crochet project can be truly satisfying. A crochet towel holder is a practical and stylish addition to any home. It serves not only as a useful item but also as a charming touch for your kitchen or bathroom. With its thoughtful features and attractive look, it’s loved by both beginners and seasoned crocheters alike.
Free Crochet Towel Holder Pattern for Small Spaces
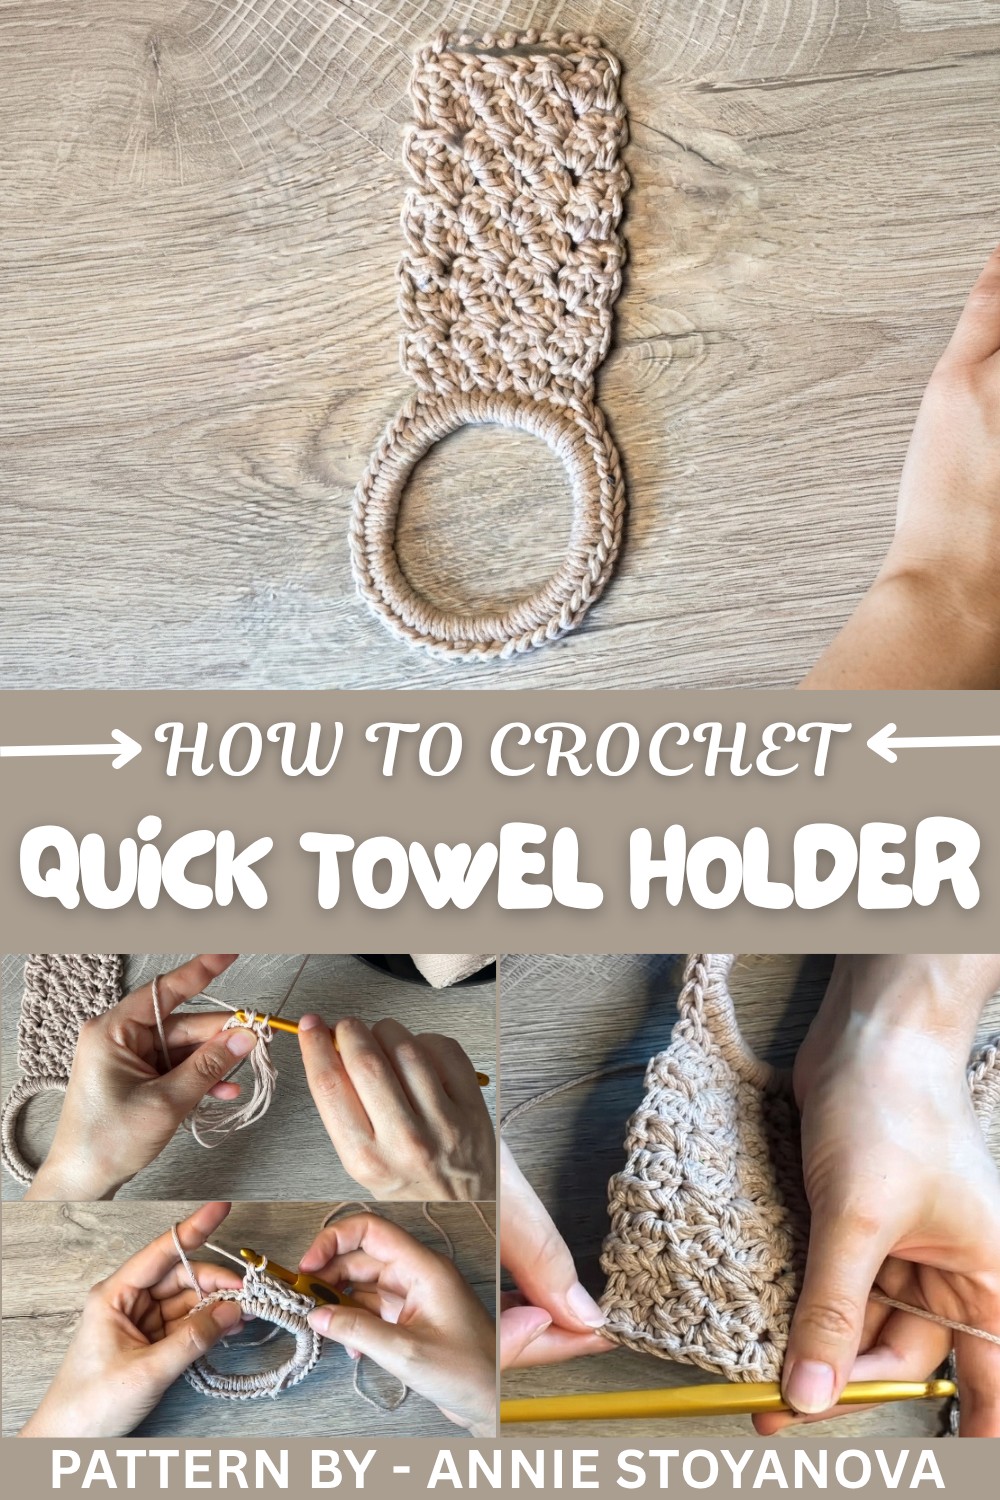
This towel holder stands out due to its clever structure and strength. The sturdy ring at the base makes it perfect for securely holding hand or dish towels. The stitching forms a delightful texture, which catches the eye and adds an elegant touch to the overall look. Made using basic crochet techniques, it is straightforward to make but results in something that looks refined and neat.
It also allows room for personal expression. Whether you prefer soft, pastel shades for a calming vibe or bold colors to brighten up your space, the yarn choice can match your unique style. Its adaptability in size ensures it fits well in various spaces and works well for different purposes. This attention to detail makes it both useful and visually appealing in any setting.
This project is ideal for crocheters of all skill levels. The repetitive nature of the stitches makes it easy to follow and enjoyable to complete. The end result is not only functional but also a heartfelt piece that reflects the effort and creativity behind it.
For a clear step by step guide to making this beautiful towel holder, visit Annie Stoyanova’s YouTube channel, where you can follow her easy and detailed instructions to bring this idea to life.
Free Crochet Towel Holder Pattern
In this pattern, we will learn how to crochet a unique textured pattern, which combines beautiful detailing and an easy to follow single and double crochet sequence. This step by step guide will help you master fundamentals such as slip knots, single and double crochet combinations, and adding rows. Follow along and enjoy creating your crochet masterpiece.
Quick Overview of Pattern
- Foundation Step: Wrap yarn around fingers for seven loops and secure with a slip knot.
- Round 1: Work single crochets around the loops and join with a slip stitch.
- Repeating Rows: Work a one-row repeat pattern incorporating single and double crochets.
- Adding Rows: Continue the repeat pattern for 10 rows or as long as you prefer.
- Finishing: Add a chain of 8 as a decorative connection to the turning chain.
Notes
- Ensure your stitches are snug, sliding them closer together as you work around the loops in Round 1.
- The one row repeat pattern allows for customization; create as many rows as you'd like to achieve the desired length.
- The chain of 8 at the end can be adjusted based on your preference or project needs.
Skill Level
Beginner to Intermediate – Ideal for those familiar with basic crochet techniques such as single, double, and half double crochet.
Materials
- Yarn: Medium weight yarn in the color of your choice
- Hook: 6mm crochet hook
- Scissors: For trimming yarn ends
- Tapestry Needle: For weaving in ends
Measurements / Sizing
- Size can vary depending on the number of rows completed in the repeat pattern.
Gauge
Gauge is not provided, as this pattern is adjustable. Ensure consistent tension for a uniform texture.
Stitch Abbreviations
- ch: Chain
- sl st: Slip Stitch
- sc: Single Crochet
- hdc: Half Double Crochet
- dc: Double Crochet
Special Stitches
Half Double Crochet (hdc):
- Yarn over, insert hook into the stitch.
- Yarn over and pull up a loop (3 loops on hook).
- Yarn over and pull through all 3 loops.
Single and Double Crochet Combo:
- Insert hook into the indicated stitch and work a single crochet (sc).
- In the same stitch, yarn over and create a double crochet (dc).
The Crochet Pattern
Step 1: Wrapping the Loops
- Open your fingers and take the yarn you plan to use.
- Wrap the yarn around your fingers seven times. (You can do six loops for thinner results.)
- Once complete, check that the loops are even.

Step 2: Slip Knot
- Create a slip knot by pulling the working yarn through the loops.
- Hold all the loops firmly in one hand as you create the slip knot.
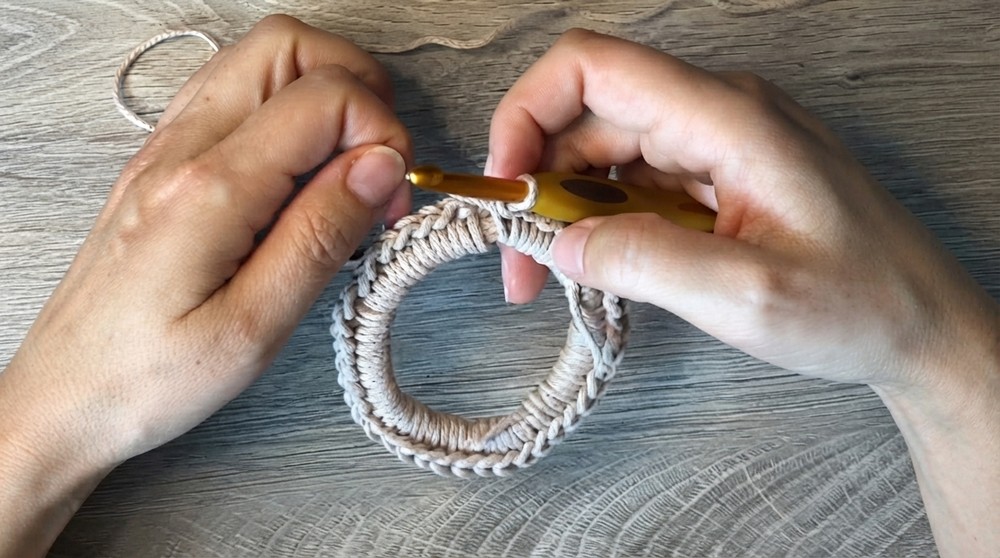
Step 3: Single Crochets Around the Loops (Round 1)
- Insert your 6mm hook under the loops and yarn over to make a single crochet (sc).
- Repeat this step several times, inserting your hook under all loops for each sc.
- If the single crochets seem spaced apart, gently push the stitches closer together for evenness.
- Work single crochets around the loops until the entire round is covered.
Step 4: Joining Round 1
- Once the round is complete, join the last single crochet with the first single crochet using a sl st.
Step 5: Starting the Repeating Row (Row 1)
- Ch 1 to begin the next row.
- Work a hdc in the same stitch as the chain 1 (this is the first sc from the previous round).
- Skip 1 stitch, then in the next stitch work:
- 1 sc followed by 1 dc in the same stitch.
Step 6: Continuing the Repeating Pattern
- Repeat the following sequence: Skip 1 stitch, work 1 sc and 1 dc in the next.
- Do this across the row until you reach the last stitch.
- In the last stitch of the row, work a hdc. This will mirror the starting half double crochet of the row.
Step 7: Turning for the Next Row
- Once the first row of the repeat is complete, ch 1 and turn your project.
- Begin the row with a hdc in the first stitch (from where the chain originated).
- Follow the same sequence as before: Skip 1 stitch, work 1 sc and 1 dc in the next.
- End the row with a hdc in the last stitch.
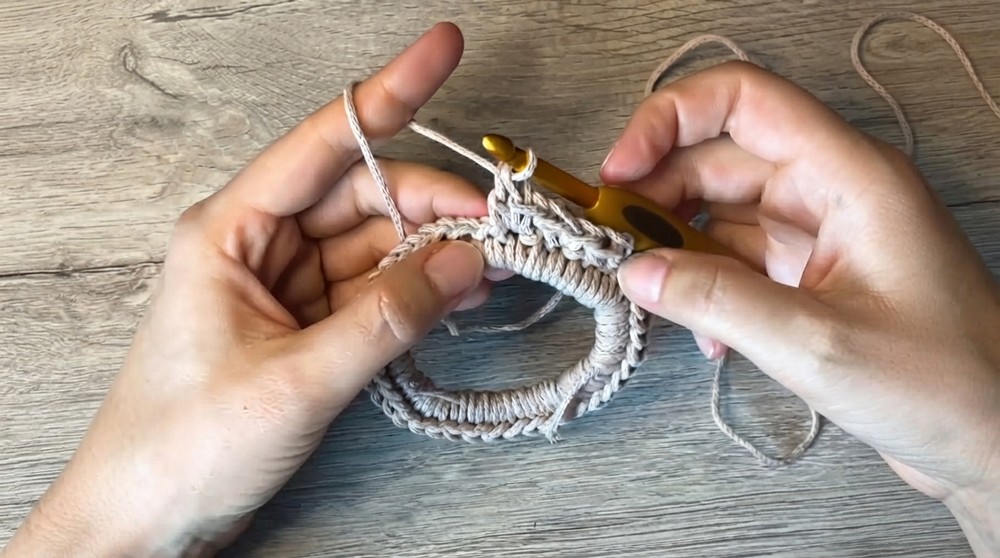
Step 8: Adding More Rows
- Continue this one row repeat pattern for 10 rows or until you reach your desired length.
- Remember to always start and end each row with a hdc, with the single and double crochet combinations worked in between.
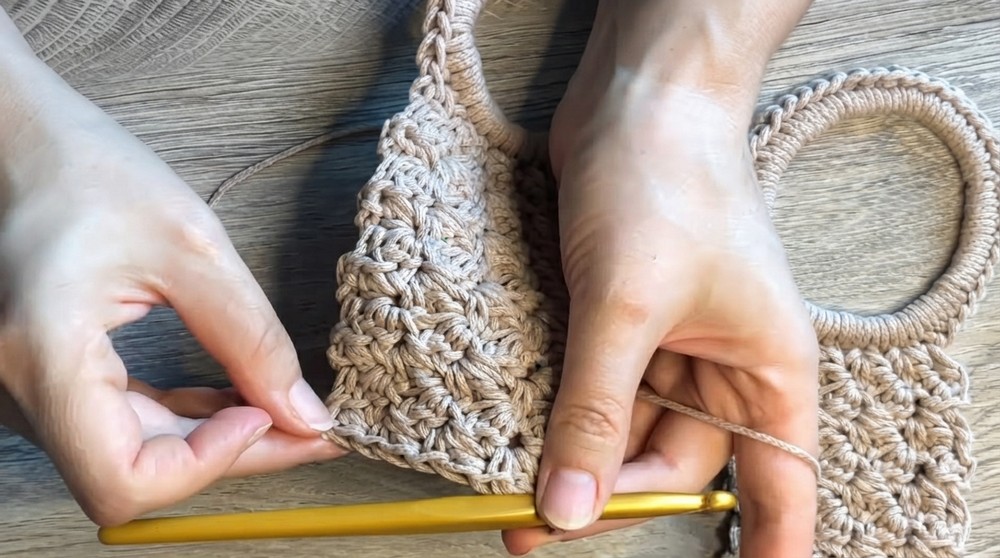
Step 9: Adding the Chain Detail
- Once your 10 rows (or desired length) are complete, you will add a decorative chain.
- Ch 8 and connect it with a sl st, not to the first single crochet but to the turning chain of the corresponding row.
- Note: It may require careful maneuvering to slip stitch into the turning chain.
Assembly & Finished Size
- After completing the chain detail, fasten off your yarn and trim the end using scissors.
- Use a tapestry needle to weave in all loose ends for a neat finish.
- The size will vary based on your completed rows and the number of loops in the foundation.

Conclusion and Ending Words
Congratulations, You’ve successfully completed your crochet project using this step by step pattern. This simple yet elegant design can be used for a variety of projects or further customized to match your creative ideas. Keep practicing to perfect your crochet skills, and don’t forget to experiment with different yarns and colors.