
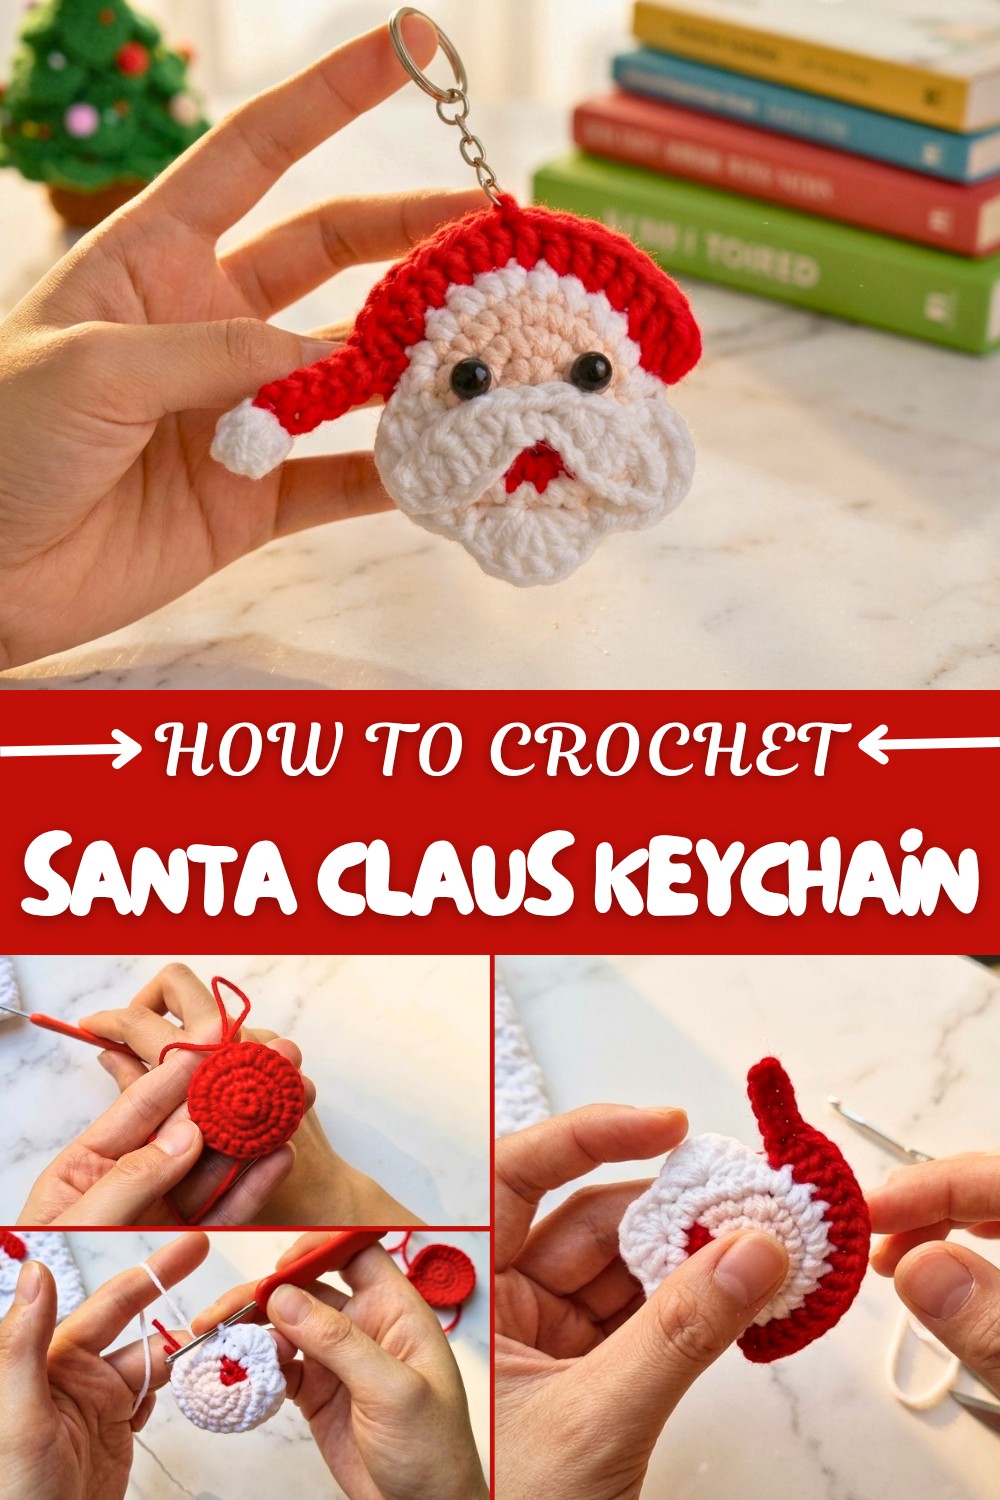
Crochet a Santa Claus Keychain Free Pattern for Effortless Seasonal Fun
Add jolly charm to your accessories using the Free Crochet Santa Claus Keychain Pattern for trendy, handmade holiday flair.
There’s something truly heartwarming about creating little handmade treasures that capture the magic of Christmas! In this delightful project, you’ll learn to crochet a charming Santa Claus keychain that’s perfect for adding a festive touch to your keys or bag. The magic begins with simple single crochet stitches worked in rounds to form a cute and plump Santa face, due to some soft cotton stuffing inside that gives it a nice, huggable shape. As you progress, you’ll use half double crochet stitches to add texture and dimension, shaping Santa’s classic hat and fluffy beard with ease.
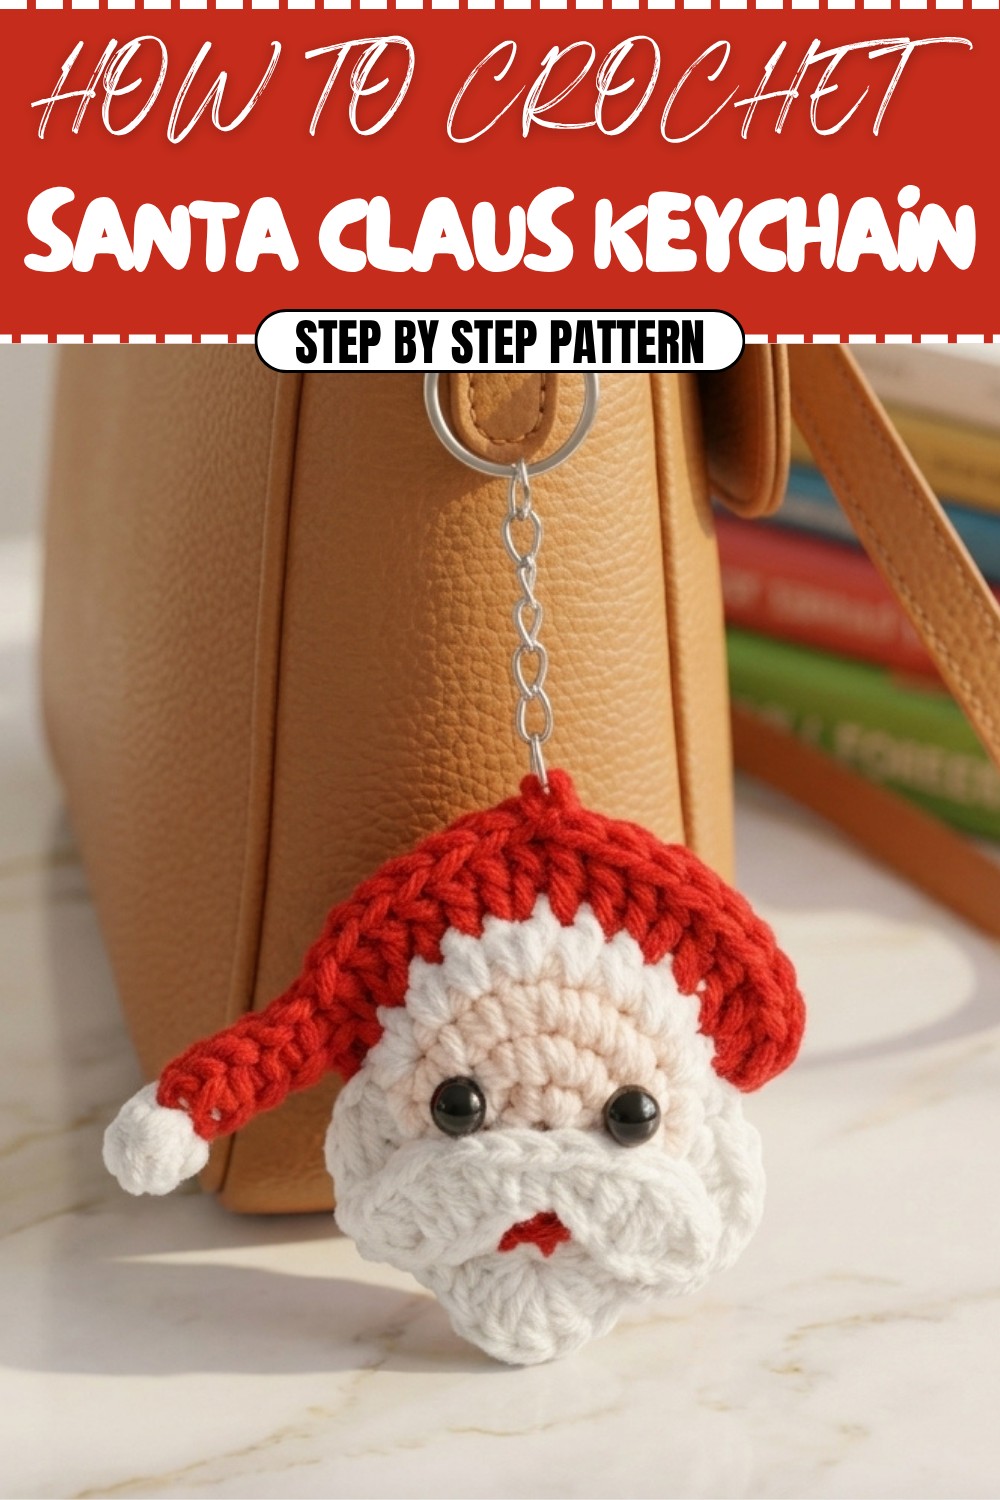
How to Crochet a Santa Claus Keychain with Free Pattern for Festive Style
This pattern is wonderfully beginner-friendly—working in rounds and learning to increase stitches to shape the face and hat will boost your crochet confidence. The artful color changes create Santa’s rosy cheeks, bright red hat, and snowy white beard, giving your keychain that authentic holiday charm. Plus, the design cleverly includes a back panel for neat finishing and stuffing, making your Santa keychain feel complete and cozy.
What Else Can You Make?
Once you’ve mastered this adorable Santa Claus keychain, your new skills open doors to many other festive crochet creations! Use the same stitches and color-changing techniques to craft mini snowmen, holiday ornaments, or even soft Christmas stockings for decorating your home. You might also explore making cute character keychains, gift toppers, or festive appliqué for winter hats and scarves. This pattern is a wonderful way to weave holiday joy into your crochet projects all season long!
Crochet Pattern for a Santa Claus Keychain
This step-by-step crochet pattern enables you to create a delightful Santa Claus keychain. With simple stitches, cotton stuffing for depth, and decorative features like a beard, hat, and eyes, this mini project is perfect for festive gifting or holiday decoration. The pattern uses approachable techniques while introducing intermediate-level design components, making it enjoyable for crocheters with basic skills.
What You’ll Learn From This Pattern
- How to work in the round, including magic rings for seamless starts.
- Techniques for shaping 3D structures, such as the face and hat.
- Methods for attaching complementary components, like the beard, hat, and eyes.
- Stuffing and assembly techniques to create clean and sturdy pieces.
This Santa Claus keychain pattern is an excellent holiday project that introduces multiple useful crochet skills. Share your work with loved ones or on social platforms to spread festive cheer!
Skill Level & Terminology
- Skill Level: Intermediate
- Terminology: US terms are used throughout this pattern.
Materials & Tools
- Yarn:
- Red (hat and decorative parts)
- White (beard and hat trim)
- Skin-colored (face)
- Black (details)
- Hook: 2.5mm crochet hook
- Stuffing: Polyester fiberfill for the body.
- Other Tools:
- Stitch markers
- Scissors
- Tapestry needle
- Small pearls or beads for eyes (4 mm)
- Hot glue gun or sewing thread for attaching details
- Keychain ring
Gauge
Since this is a small, stuffed project, gauge isn’t crucial. Aim for tight stitches to ensure the stuffing doesn’t show through. You can adjust your hook size if necessary.
Abbreviations List
- ch = chain
- sc = single crochet
- hdc = half double crochet
- sl st = slip stitch
- inc = increase (2 stitches in the same stitch)
- dec = decrease (crochet 2 stitches together)
Special Stitch Instructions
- Single Crochet Increase (sc inc): Crochet two single crochet stitches in the same stitch.
- Half Double Crochet Increase (hdc inc): Crochet two half double crochet stitches in the same stitch.
- Magic Ring: Create a tightly closed circle to start the base.
Finished Size
Approximately 4 inches (10 cm) tall (excluding the keychain ring).
The Pattern
Part 1: The Face of Santa Claus
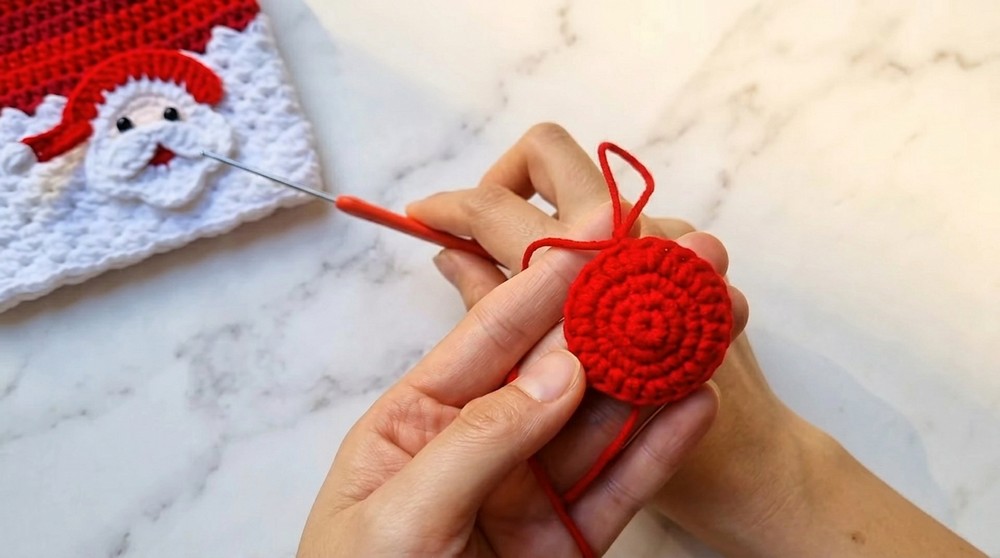
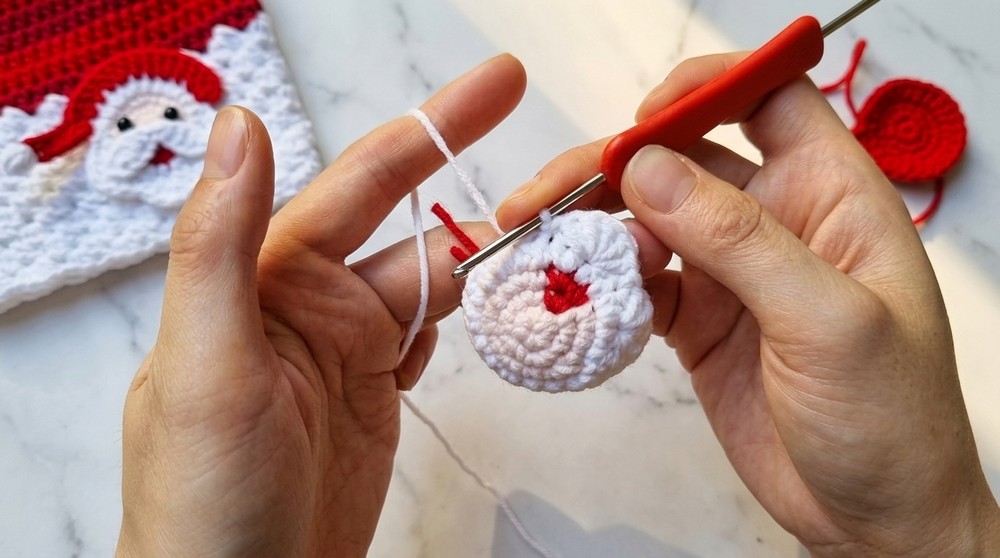
- Start with a magic ring and crochet 6 sc into the ring. Pull the tail to tighten the loop and join with a sl st to close the round.
Tip: This creates the base for Santa’s head. - Round 2: Work sc inc in each stitch around (12 sts).
- Round 3: 1 sc, sc inc; repeat around (18 sts).
- Round 4: 2 sc, sc inc; repeat around (24 sts).
- Round 5: 3 sc, sc inc; repeat around (30 sts).

⮞ At this stage, Santa’s face will begin to take shape.
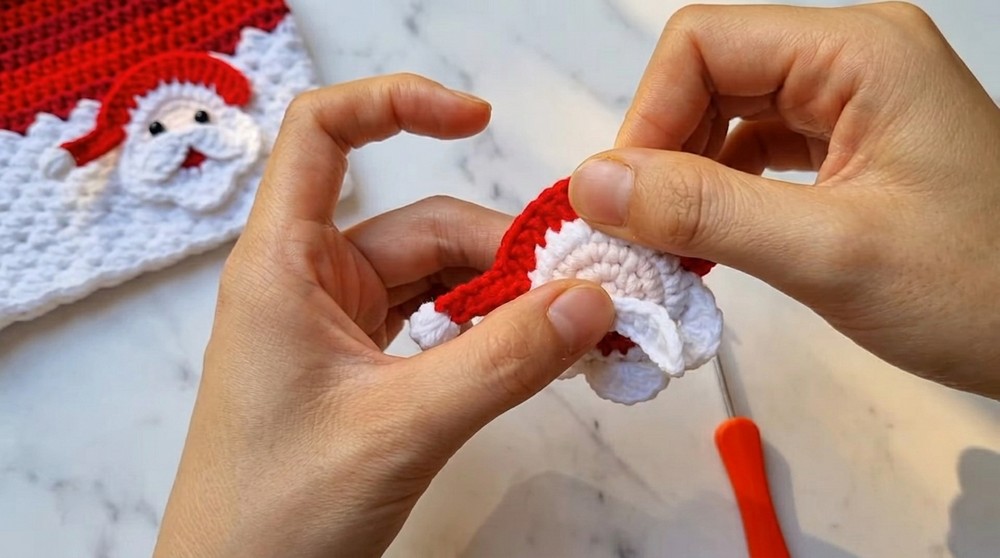
Part 2: Adding Santa’s Hat
- Change the yarn to red.
- Round 6: Work in hdc stitches: 4 hdc, hdc inc; repeat around (36 sts).
- Round 7: 5 hdc, hdc inc; repeat around (42 sts).
- Fasten off and set aside.
Explanation: The red portion emerging from Round 6 is the base of Santa’s hat.
Part 3: Creating the Back Side
- Repeat Rounds 1 to 5 of Part 1 using skin-colored yarn.
- Fasten off, leaving a long tail for sewing it to the front piece.
⮞ The back side creates a neat, flat cover for Santa’s face.
Part 4: The Beard
- Attach white yarn to any front stitch of the face. Work 3 slip stitches, then skip 1 stitch.
- Row 1: 5 sc in the next stitch, sl st in the next stitch; repeat this pattern to create 3 curve-like “beard loops.”
- Finishing: After completing the loops, sl st to the beginning point, fasten off, and weave in the yarn ends.
Explanation: These loops mimic Santa’s classic wavy beard.
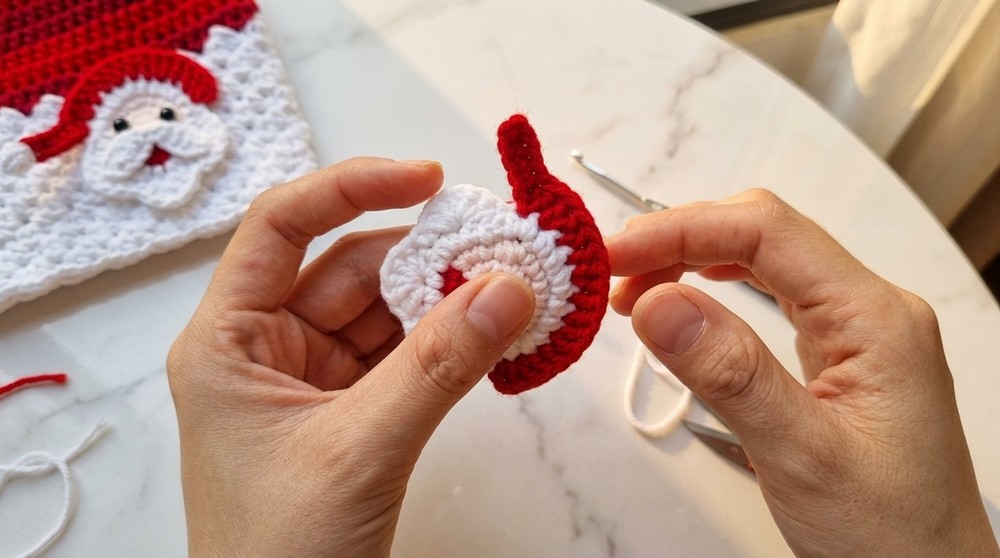
Part 5: The Hat Trim and Pom-Pom
- Attach white yarn along the edge of the red hat base using sl st.
- Work sc in each stitch around the brim of the hat for the trim. Fasten off.
- Pom-Pom at the Top:
- Use white yarn and create a bobble stitch by looping yarn multiple times through the same stitch until 5 loops are on the hook.
- Pull through all loops, chain 2, and sl st into the same stitch to secure.
- Fasten off and hide ends inside the hat.
⮞ The white trim adds texture and definition to Santa’s hat.
Part 6: Adding Features
- Eyes: Use 4 mm pearls or beads, attaching them symmetrically using sewing thread or glue for Santa’s eyes.
- Nose: With red yarn, sew a few small stitches in the shape of a circle at the center of the face.
- Mouth (Optional): Use black yarn to sew tiny lines or curves for the smile.
Part 7: Sewing the Keychain
- Stuffing: Before assembly, lightly fill the face portion with fiberfill to give it a puffy appearance.
- Sewing: Place the front and back pieces together (wrong sides facing in) and sew along the edges using the skin-colored yarn from Part 3.
- Attach Keyring: Insert the keyring through the top of the hat. Secure in place by threading the yarn through keychain gaps.
⮞ Your completed Santa keychain is now fully functional and adorable!
Assembly & Finishing
Once assembled, ensure all threads are securely tucked in or sewn underneath stitches. Adjust the shape to balance the stuffing evenly. Use glue for additional touches like securing the beard or detailing the edges of the hat.
Conclusion
This Santa keychain pattern combines various practical crochet techniques, like working in rounds, increasing, adding bobble stitches, and attaching embellishments. By finishing this project, you would have gained skills in handling colors, shaping textured details, and assembling components.