
Elegant Crochet Christmas Tree Ornament Pattern for Winter Glam
Brighten seasonal décor fast with a Free Crochet Christmas Tree Ornament Pattern, ideal for gifts or adding charm to any festive nook.
There’s something truly stunning about decorating for Christmas with handmade treasures. If you enjoy crocheting and want to add a personal touch to your holiday décor, creating a crocheted Christmas tree ornament can be a delightful way to celebrate the season. The pattern is built mainly with familiar stitches like the magic circle, single crochet, double crochet, and slip stitch, making it a fantastic choice for beginners and experienced crochets' alike.
Free Crochet Christmas Tree Ornament Pattern for Handmade Cheer

What’s especially fun about this ornament is how the leaves are created in layers, each starting with a magic circle and crocheted in clusters that build a lovely 3D effect. The magic circle allows you to start your rounds neatly, while clusters of double and single crochets give the tree its fuller, leafy appearance. You’ll also practice chaining and slip stitching to join rounds smoothly, which helps you develop a clean, professional finish. These stitches are so versatile—they're perfect for making toys, coasters, or even cozy blankets once you get the hang of them.
Besides the Christmas tree, this pattern opens the door to crocheting other festive decorations and gifts. You can easily use the same techniques to make miniature wreaths, garlands, or even layered flowers by adjusting colors and sizes. The trunk and star additions give you practice with shaping small parts that can be adapted to make other cute amigurumi pieces or holiday charms. This project combines simplicity with creativity, making your holiday crocheting joyful and rewarding!

Crochet Christmas Tree Pattern
This step-by-step pattern for crocheting a delightful Christmas Tree, perfect for the holiday season! This fun and festive pattern incorporates layers of crochet leaves, a trunk, a star, and even a bow tie. Whether you’re creating holiday decorations, gift embellishments, or adding charm to your handmade collection, this project is full of seasonal joy. It uses simple stitches and is easy to customize with different colors and sizes. Let’s bring some crochet magic to your holidays!
Skill Level & Terminology
- Skill Level: Beginner to Intermediate
- Terminology: US Crochet Terms
Materials & Tools
- Yarn:
- 50g cotton yarn in green for the tree leaves.
- Brown yarn for the trunk.
- Yellow or gold yarn for the star.
- Red yarn for the bow tie.
- Hook: 2.0 mm crochet hook for mini details.
- Stuffing: Polyester fiberfill to give a sturdy shape (for trunk if needed).
- Pins/Markers: To mark rows or specific stitches.
- Tapestry Needle: For sewing and weaving ends.
- Scissors: To trim yarn neatly.
Gauge
Gauge is not critical for this pattern, but ensure crochet stitches are tight enough to hold the shape without gaps. Recommended: 10 sc x 10 rows = 2x2 inches using a 2.0mm hook and cotton yarn.
Abbreviations Used
| Abbreviation | Explanation |
|---|---|
| ch | Chain |
| sc | Single Crochet |
| dc | Double Crochet |
| sl st | Slip Stitch |
| mr | Magic Ring |
Special Techniques
- Magic Ring (mr): Create a yarn loop, crochet stitches into this ring, and pull the yarn tail tightly to close. This avoids gaps at the center of your work.
- Double Crochet (dc): Yarn over, insert hook into stitch, pull through, and complete the stitch in three loops.
- Slip Stitch (sl st): Insert hook into stitch, yarn over, pull through both loops.
Finished Size
The completed Christmas tree measures approximately 6 inches tall, depending on the yarn and hook size you use.
The Pattern Itself
Chapter 1: First Leaf Layer
- Begin:
- Create a magic ring using green yarn.
- Round 1:
- Crochet 2 ch, then crochet 1 dc into the magic ring.
- Mark the first stitch with a pin.
- Crochet 5 dc into the ring. (Total: 6 dc).
- Pull the yarn tail tight to close the circle.
- Sl st into the first dc to complete the round.
- Round 2:
- Ch 2, then work 1 dc into the first stitch.
- Continue alternating 1 dc and increase (2 dc in one stitch) until the end of the row.
- Round 3:
- Ch 2, crochet 2 dc into the base, then sl st to the next stitch. This forms a small cluster.
- Repeat this cluster 6 times to form the layer of leaves.


This completes the first layer of leaves! It forms the base and the start of the Christmas tree.
Chapter 2: Second Leaf Layer
- Begin:
- Create another magic ring in green yarn for the second leaf layer.
- Round 1:
- Crochet 7 dc into the magic ring. Pull tightly to close the circle.
- Sl st into the first stitch to complete the row.
- Round 2:
- Ch 2, crochet 2 dc into the first stitch, then sl st into the next stitch. Repeat the 2 dc cluster for the remaining stitches.
- Continuation:
- Repeat the process to form 6 clusters around this layer, ensuring a wider spread than the first.

This second layer forms the middle section of the Christmas tree. It builds height and breadth for the festive layers.
Chapter 3: Third Leaf Layer
- Begin:
- Create a magic ring in green yarn.
- Round 1:
- Crochet 8 dc into the magic ring. Pull tightly to close the circle.
- Sl st into the first stitch to complete the row.
- Round 2:
- Ch 2, crochet 2 dc into the first stitch, then sl st into the next stitch.
- Repeat the 2 dc cluster 7 times, spacing the clusters evenly around the circle.
This upper layer completes the triangular shape of the Christmas tree, forming the tip layers.
Chapter 4: Trunk
- Round 1:
- Using brown yarn, create a magic ring and work 6 sc into it.
- Sl st to join the round tightly.
- Round 2:
- Ch 1, crochet 1 sc into the first stitch.
- Work 1 sc, 1 inc (2 sc in one stitch) alternately around the loop. (Total: 12 sc).
- Rounds 3–4:
- Crochet 1 sc into each stitch (no increases).
- Continue for two steady rows to form cylindrical shape for the trunk.

The trunk adds the foundation to your Christmas tree and creates contrast with the green leaf layers.
Chapter 5: Star
- Begin:
- Using yellow yarn, create a magic ring and pull tight.
- Wing Formation:
- Ch 2, crochet 2 dc into the magic ring.
- Sl st into the next stitch. Repeat this 5 times to form 5 wings/petals.
- Completion:
- Fasten off and sew the star to the top of the Christmas tree.
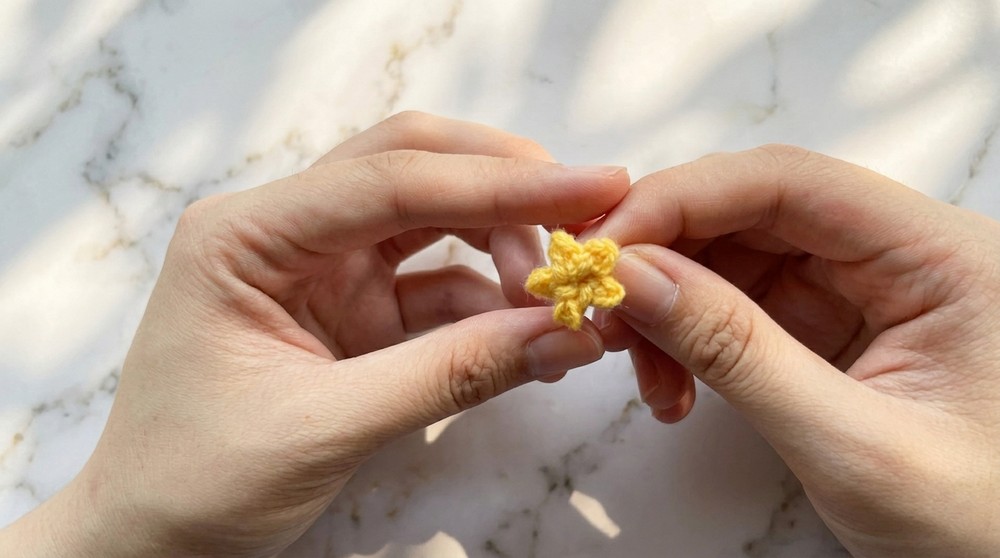
The star adds the festive finishing touch to your holiday-themed crochet project!
Chapter 6: Bow Tie
- Begin:
- Using red yarn, create a magic ring.
- Row 1:
- Ch 1, crochet 8 dc into the ring, and close tightly.
- Row 2:
- Form the bow shape by folding the ring and adding a few secure wraps of yarn in the center.
- Sewing:
- Attach the bow tie to the middle or lower portion of the tree for decoration.
The bow tie adds an extra decorative element to the Christmas tree, making it even more festive!
Assembly & Finishing
- Sewing the Pieces Together:
- Layer the leaf sections (largest at the bottom, smallest at the top) and sew them securely.
- Attach the trunk to the base of the tree using a tapestry needle.
- Sew the star onto the topmost leaf section.
- Lastly, attach the bow tie to complete the design.
- Shaping and Adjustments:
- Adjust the layers by gently pulling and shaping the leaves into a triangular tree-like structure.
How to Start This Pattern
This project begins with three leaf layers worked from magic circles and basic stitches. You’ll practice double crochet, shaping clusters, and working in rounds. The trunk, star, and bow tie are small additional pieces sewn afterward to complete the festive design. Beginners can enjoy learning foundational amigurumi techniques, while advanced crochets' can explore decorative possibilities.
Conclusion
Congratulations! You’ve completed your Crochet Christmas Tree! This fun and festive design makes a wonderful handmade decoration or gift. You learned essential techniques like working in rounds, clustering stitches, and shaping layers while creating a cheerful project. Whether you use it to brighten your holiday decorations or as a memorable gift, this tree is sure to spread seasonal joy.