
Crochet Bear Amigurumi – Free Pattern
Soft cuddly appeal fills every corner with this Free Crochet Bear Amigurumi Pattern that's ideal for animal lovers and cute room décor.
When I first picked up my crochet hook, I was eager to create something cute and comforting. That’s how I discovered the Free crochet Bear Amigurumi Pattern, a delightful little project that brought my hobby to life. This pattern guides you through making an adorable crocheted bear, but with just a few small tweaks, you can easily transform it into a bunny, a cat, or even a fox. It’s wonderfully versatile and perfect for anyone looking to craft charming stuffed animals that feel personal and handmade.
The beauty of this crochet bear lies in its soft, cuddly appeal and simple yet charming design. The bear has a round face with tiny ears and a plump body, giving it a lovable, huggable shape. The texture from the tight stitches creates a smooth finish, making it cozy to hold or display. Its style is classic amigurumi—minimalist but full of character—with standout features like little embroidered eyes and an inviting smile that make this bear truly memorable. Whether perched on a shelf or nestled in a child’s arms, it’s a small piece of warmth and joy.
Bear Amigurumi Crochet Pattern You'll Love to Make

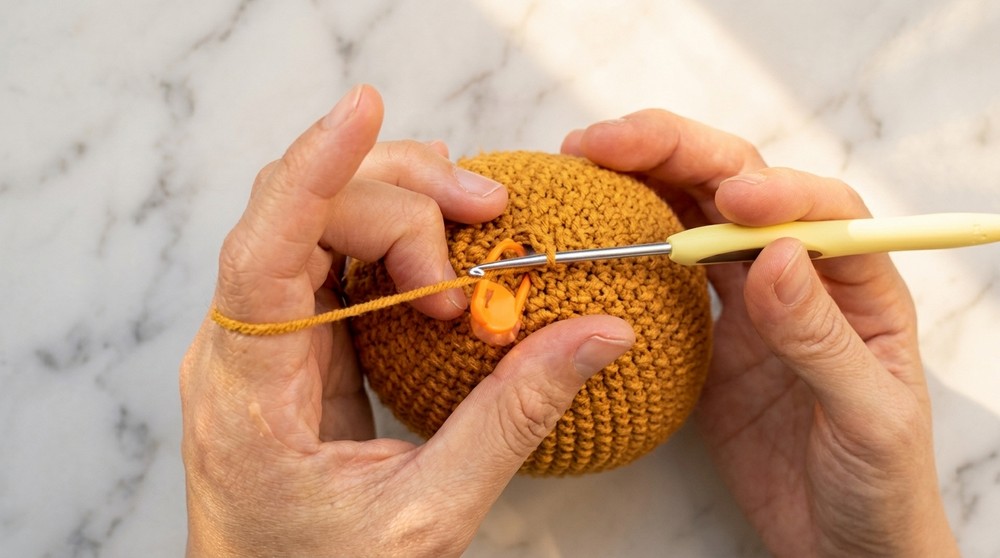
This project is perfect for beginner to intermediate crocheters. The main stitch used is the single crochet, which is straightforward to learn and master. You’ll work mostly in the round, building up the bear’s shape piece by piece before assembling it. The pattern encourages developing your shaping skills with increases and decreases, making it a gentle step up from very basic projects. Completing this adorable amigurumi bear not only boosts your confidence but also leaves you with a delightful companion.
Beyond being an endearing toy, this crochet bear makes a heartfelt handmade gift, a lovely decorative accent for nurseries or cozy spaces, and a sweet collectible for amigurumi lovers. If you’re searching for a project that’s both creative and rewarding, this pattern is a wonderful choice. With a little patience and love, you’ll create something truly special — a tiny bear full of charm and personality, just waiting to be loved. So grab your yarn and hook, and enjoy the warm, satisfying journey of crocheting your own little friend!
Mini Bear Amigurumi Crochet Pattern
Create a charming mini bear amigurumi that’s adorable and perfect for novice crocheters. This pattern crafts a simple and cute bear figure, worked in continuous rounds using basic stitches. The project includes crocheting legs, body, ears, mouth, eyes, and finishing with embroidered nose and mouth details. By following this step-by-step guide, you will master spiral crochet and basic shaping techniques to bring your little bear to life.
Skill Level & Terminology
- Skill Level: Beginner
- Terminology: This pattern uses US crochet terms
- Basic knowledge of chain stitch, single crochet, increases, decreases, slip stitch, and working in the round is recommended.
Materials & Tools
- Worsted weight yarn in brown (or desired color for bear) and small amounts of black yarn for nose and mouth detailing
- Crochet hook 3.5 mm (E) or size suitable for your yarn and tension
- Fiberfill or toy stuffing
- Tapestry needle for sewing and embroidery
- Stitch marker (optional, helpful for rounds)
- Scissors
Gauge
- Gauge is not critical for this project.
- Aim for tight stitches to avoid stuffing showing through.
- To test, crochet a small swatch of 10x10 cm in single crochet and adjust hook size for firmness.
Abbreviations List
- ch = chain
- sc = single crochet
- inc = increase (2 sc in 1 stitch)
- dec = decrease (crochet 2 stitches together)
- sl st = slip stitch
- st/sts = stitch/stitches
- BLO = back loops only
- MR = magic ring
Special Stitch Instructions
- Magic Ring (MR): Create a loop, crochet stitches into it, then pull to close tightly.
- Increase (inc): 2 single crochets in the same stitch.
- Decrease (dec): Insert hook through front loops of two stitches, yarn over, pull through both loops, yarn over and pull through remaining loops to combine two stitches into one.

Finished Size
- Approximately 10 cm (4 inches) tall depending on yarn and hook size.
The Pattern
Legs (Make 2)
- Start with Magic Ring (MR), then work:
- Round 1: Crochet 6 sc into MR (6 sts). Pull tight.
- Round 2: Inc in each stitch (12 sts).
- Round 3: Crochet 12 sc, but work BLO (back loops only) for texture and shaping.
- Round 4: Crochet 12 sc regularly (through both loops). Mark the first stitch.
- Pull yarn tail tightly and cut.
- Using yarn needle, sew the base seam for a flat bottom: skip first stitch, insert needle into second stitch, then pick the last stitch’s back loop and the loop below it to join. Weave the tail inside the leg.

Summary: At the end of this section, you will have two sturdy little legs, each shaped with increases and textured to form a base for the bear.
Joining Legs and Beginning Body
- For second leg, crochet rounds 1 through 4 similarly but do not cut yarn after finishing.
- Join legs together:
- Chain 3 stitches, then attach first leg by picking up stitch through the body where yarn tail pokes out.
- Crochet 12 stitches from the first leg regularly to close the gap.
- In the 3-chain space, crochet 3 sc to bridge legs together.
- Crochet 12 stitches from second leg to complete join (30 sts total).
- Chain 3, crochet 3 sc in the gap between legs again.

Summary: Your two legs are now joined by bridging with chains and stitches, beginning the bear’s body round creating a continuous circle.
Body
Round 6:
- 2 sc, inc repeat 10 times around (40 sts). Mark first stitch.
Round 7:
- 3 sc, inc repeat 10 times (50 sts).

Round 8:
- 11 sc, inc, 12 sc, inc repeat twice (54 sts).
Rounds 9-12 (Colorwork introduction):
- Add color changes alternating between two yarn colors (brown and white).
- Change color on last stitch of round, pulling through new yarn to prevent gaps.
- Maintain stitch counts as: 19 sc brown, 18 sc brown, 11 sc white, 10 sc white, etc., with increases as defined.
Round 13-26:
- Continue the pattern of color changes and increasing/decreasing by following the color shift method where you always change color on the last stitch of the previous color (change color in advance).
- Maintain the stitch pattern as per diagram, smoothly transitioning colors to achieve neat stripes.
Summary: The body grows larger with structured increases and playful alternating colors, achieving a striped effect. Changing colors on the last stitch ensures seamless transitions without gaps.
Decreasing and Closing Body
Round 27:
- Decrease round: 7 sc, dec repeat 6 times (48 sts).
- Use front loops of stitches to create a smooth decrease.
Rounds 28-35:
- Follow diagram to decrease gradually (symbol ‘A’ representing decrease).
- Stuff the body firmly with fiberfill as the hole narrows.
Round 36:
- Final round: 6 decreases evenly spaced (6 sts remain).
- Pull yarn tail through remaining stitches and pull tight to close. Weave in ends.
Summary: The body shrinks gracefully with decreases while stuffing is added for shape. The final closing ensures no holes remain in the piece.
Ears (Make 2)
- Start with Magic Ring (MR), crochet 6 sc into ring (6 sts).
- Continue to round 4 following diagram, increasing stitches to shape ear.
- Fold the ear flat and pinch it together, then sc across to close flat side.
- Leave a long tail for sewing.
Summary: Ears are small, slightly curved pieces shaped by folding and stitching flat side, providing cute bear ears.
Mouth
- Begin with Magic Ring, crochet 6 sc.
- Round 2: 6 inc (12 sts).
- Round 3: 12 sc.
- Finish, leaving a tail for sewing.

Summary: The mouth is a small flat piece, shaped by increases, ready to be attached under eyes.
Hands (Make 2)
- Follow diagram to crochet hands with the specified stitch counts.
- Pinch flat and crochet 3 sc to close flat side.
- Leave long tail for sewing.
Summary: Hands are small, flat pieces with a rounded shape, designed to attach on sides of the body.
Assembly & Finishing
- Attach Hands:
- Position hands between rounds 18 and 19 on body.
- Sew symmetrically on both sides with yarn needle, no stuffing needed for hands.
- Attach Ears:
- Sew ears symmetrically on round 6 of the head/body using the tails.
- Sew stitches in the back of each ear, slightly curling the edge for a cute shape.
- Attach Eyes:
- Position eyes between rounds 23 and 24, leaving about 10 stitches distance between them.
- Sew securely in place.
- Embroider Nose and Mouth:
- Use black yarn threaded on needle.
- Embroider nose on mouth piece with several back-and-forth stitches.
- Attach mouth below eyes, centered between legs. Stuff lightly if desired.
- Weave in all ends and hide yarn tails inside body.

Conclusion
- You have completed a cute, cuddly mini bear amigurumi perfect as a gift or keepsake.
- The pattern uses only basic stitches: single crochet, increases, decreases, and slip stitches.
- Color changes add charm, and textured details bring your bear to life.
- Assembly involves simple sewing and embroidery skills.
- Experiment with colors and yarn weights to personalize your bear.
- Enjoy your handcrafted toy and the skills gained through this project!