
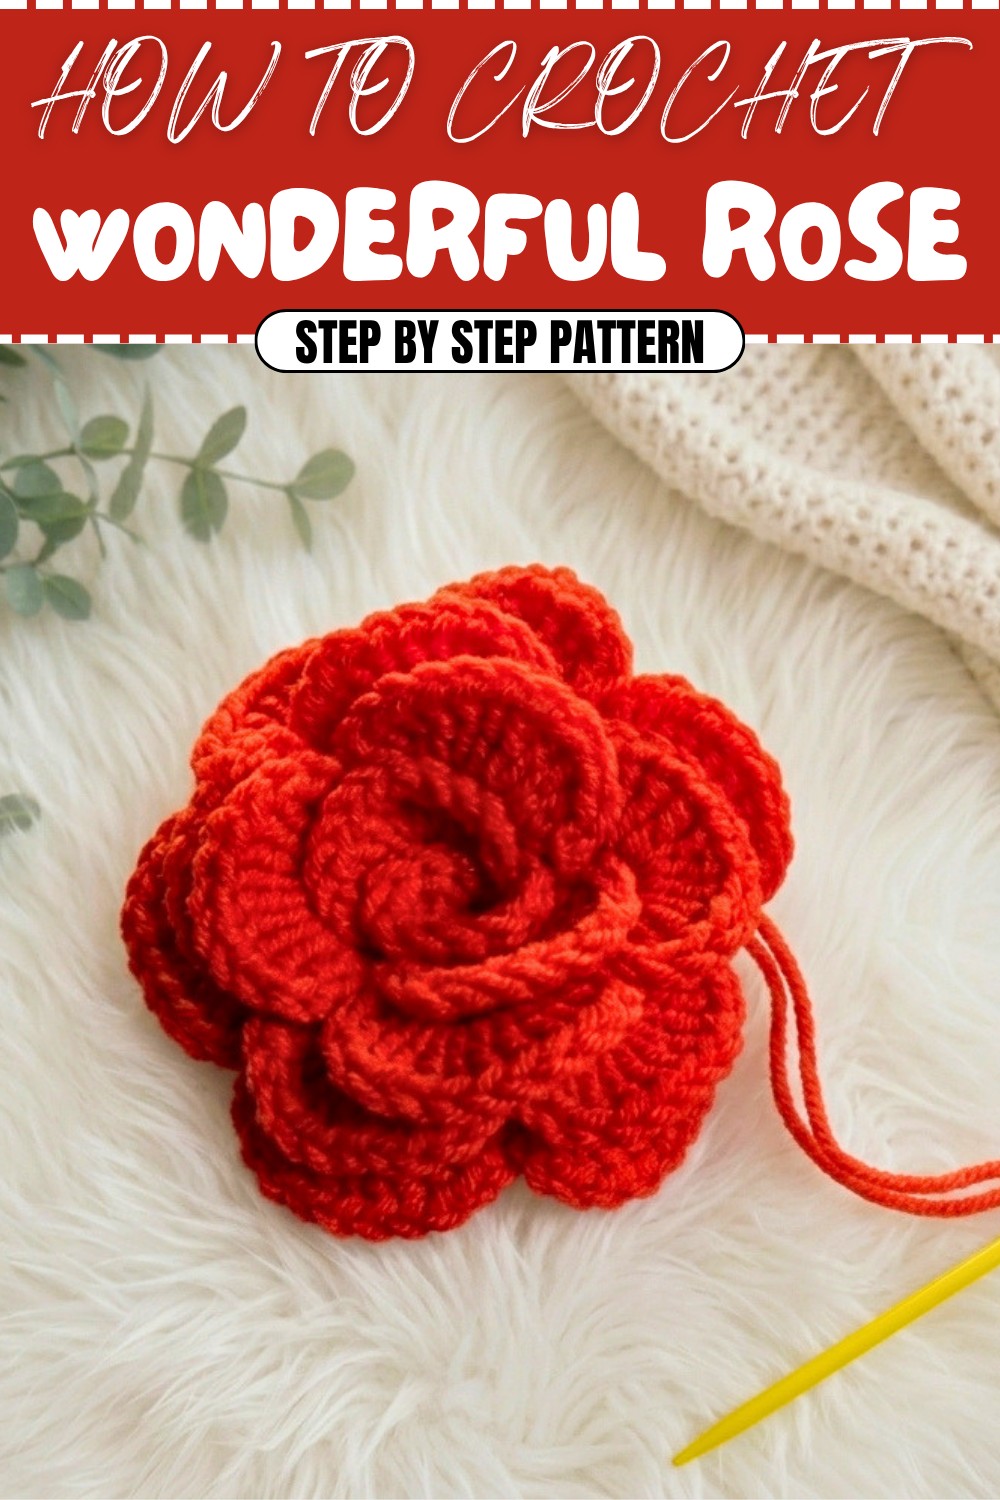
How to Free Crochet Rose Pattern for Chic Home Decor
Uplift your special occasions with a free crochet rose pattern designed for romantic touches and personalized handmade flair.
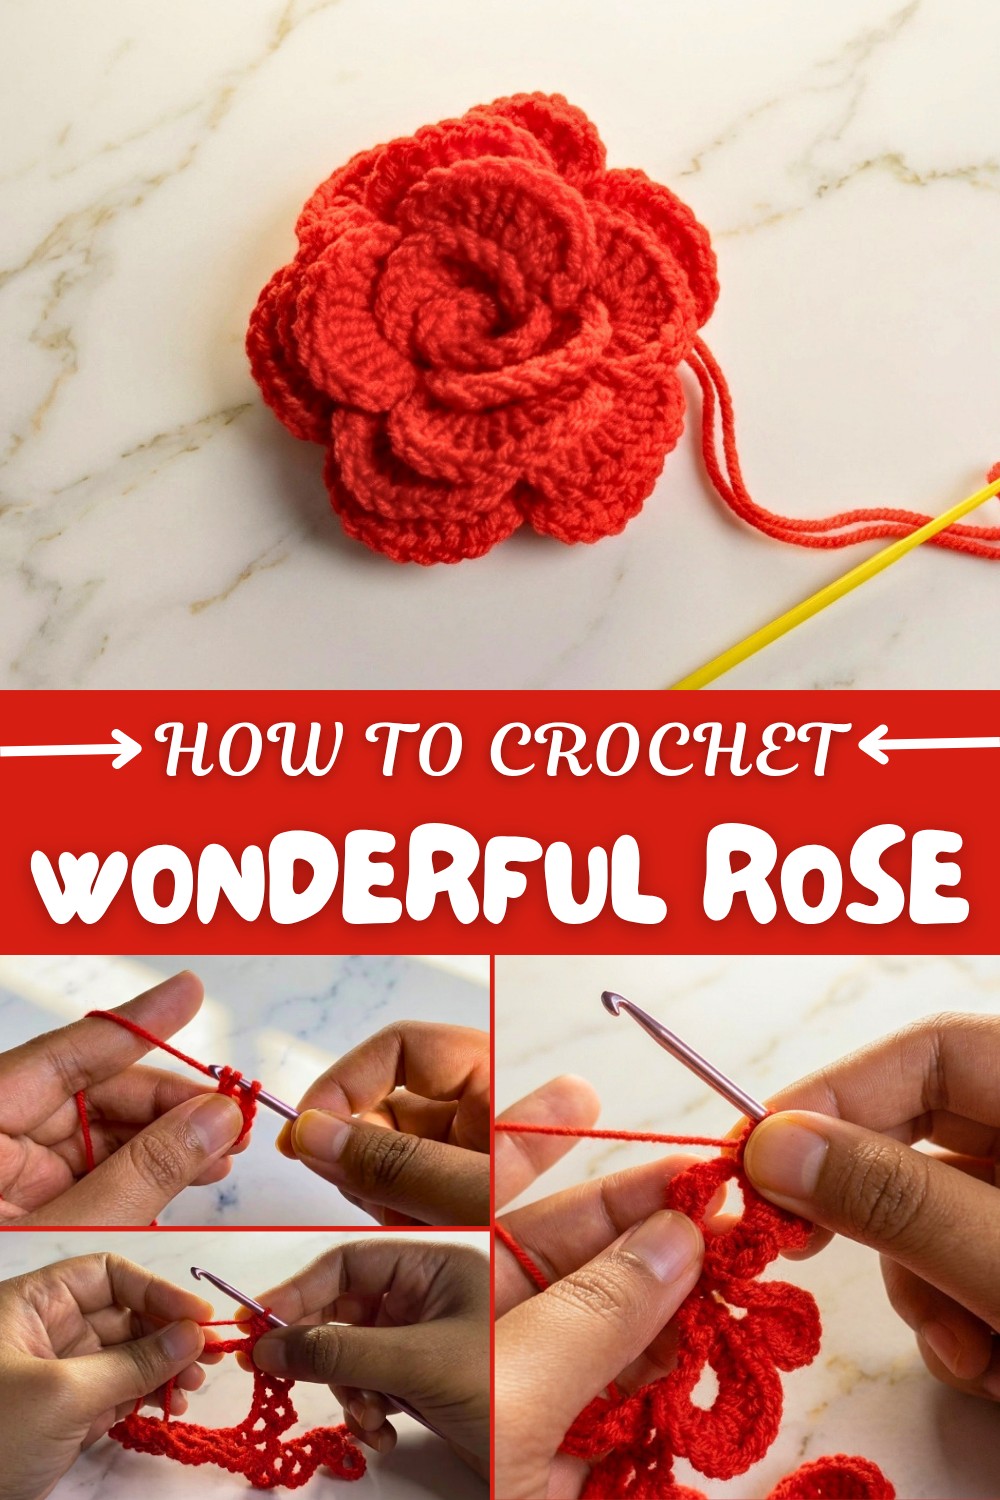
There’s something creative about turning a simple strand of yarn into an elegant crochet rose. These blooming beauties are a quick and satisfying project for beginners and advanced crocheters alike. One of the highlights of this rose pattern is its 3D structure, which gives the petals a realistic appearance as they curl and come to life during the rolling stage. Accentuating your rose with vibrant reds, delicate pinks, classic whites, or even unconventional hues like lavender or teal—the creative possibilities are endless! Using basic stitches like the slip knot, chain stitch, double crochet, and single crochet, this pattern produces a stunning result that looks intricate but is surprisingly easy to follow.
Free Crochet Rose Pattern with Simple Steps for Artistic Hands
What makes this pattern truly special is its versatility. You can use these roses to create anything from a beautiful bouquet to embellishments for hats, scarves, or even baby blankets. Whether you crochet a single rose for a brooch or several to craft a unique centerpiece, this pattern is your gateway to endless creative opportunities. The double crochet (dc) used throughout gives the rose its full and blooming appearance, while the chain stitches (ch) between petals allow for flexibility and make assembly a breeze.
Get Creative With This Pattern:
Once you’ve mastered this crochet rose, use it to create:
- Floral bouquets for home decor or special occasions.
- Gorgeous gift toppers for wrapping presents.
- Adornments for accessories like hats, bags, or headbands.
- Elegant additions to blankets or pillows for a cozy aesthetic.
- Brooches or pins to decorate clothing or scarves.
Why You’ll Love It
- Quick to finish and perfect for beginners.
- Customizable size depending on the yarn and hook you use.
- An opportunity to explore colorwork and blend different shades.
This timeless crochet project is an excellent way to start your journey into creating floral patterns while brightening your day with an easy, fun, and beautiful handmade rose.
Crochet Rose Pattern: Beginner-Friendly Tutorial
This pattern walks you step-by-step through crocheting a beautiful rose. If you're new to crochet, this beginner-friendly pattern will help you create a stunning craft piece using simple stitches. Follow along carefully, and don’t hesitate to pause and re-read sections as needed. By the end, you'll have a versatile crochet rose to use as part of a bouquet or to decorate other crochet projects.
Introduction
- Skill Level: Beginner
- Terminology: US Crochet Terms
This pattern is designed for beginners and uses fundamental crochet stitches such as the slip knot, double crochet, and single crochet. It’s a great way to practice your skills while creating something decorative and useful.
Materials & Tools
- Yarn: 3-ply milk cotton yarn (approximately 1.55 mm in diameter or similar). The size of your yarn will affect the dimensions of the final rose.
- Crochet Hook: 4.5 mm crochet hook. You can adjust the hook size depending on your yarn.
- Scissors: Any small scissors to trim excess yarn.
- Darning Needle: To weave in ends and sew the rose together.
Gauge
No specific gauge is required, but consistent tension will help you achieve a uniform look. Larger yarn and hook sizes will result in bigger roses, and smaller materials will create more delicate blossoms.
Abbreviations
Here are the crochet terms you'll need for this pattern:
- ch: Chain
- sc: Single Crochet
- dc: Double Crochet
- yo: Yarn Over
- sl st: Slip Stitch
Special Stitch Instructions
No special or advanced stitches are needed in this pattern — it’s perfect for beginners working on their foundational crochet skills.
Finished Size
With the materials listed (3-ply milk cotton yarn and a 4.5 mm hook), the finished rose will have a diameter of approximately 2–3 inches. The rose size can vary based on the yarn and hook you choose.
The Crochet Pattern
Follow these simple steps to create your rose. The finished piece is made in just two rows, followed by rolling and sewing the petals together.
Step 1: Foundation Chain
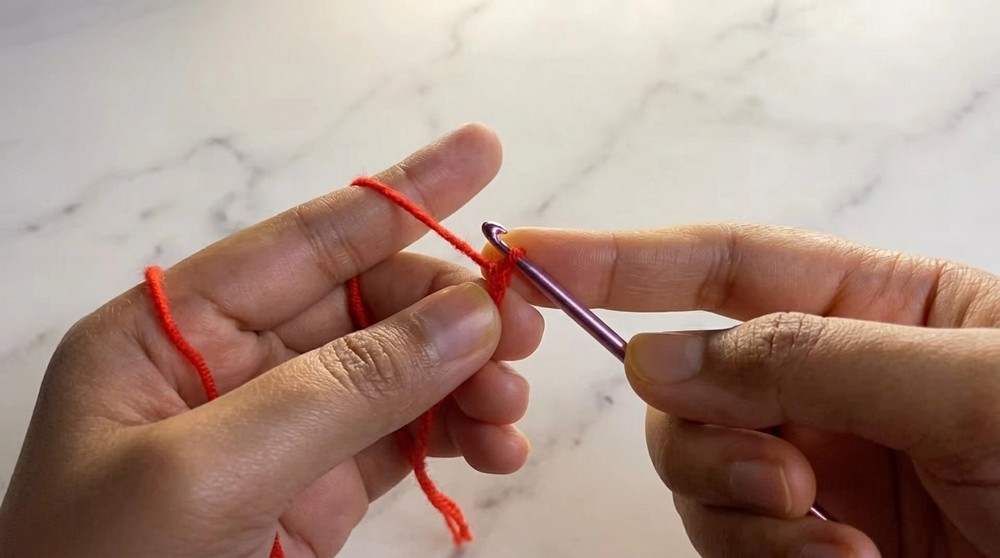
- Make a Slip Knot:
- Wrap the yarn around your index finger and form a loop. Insert the hook into the loop, grab the working yarn, and pull through. Tighten to secure.
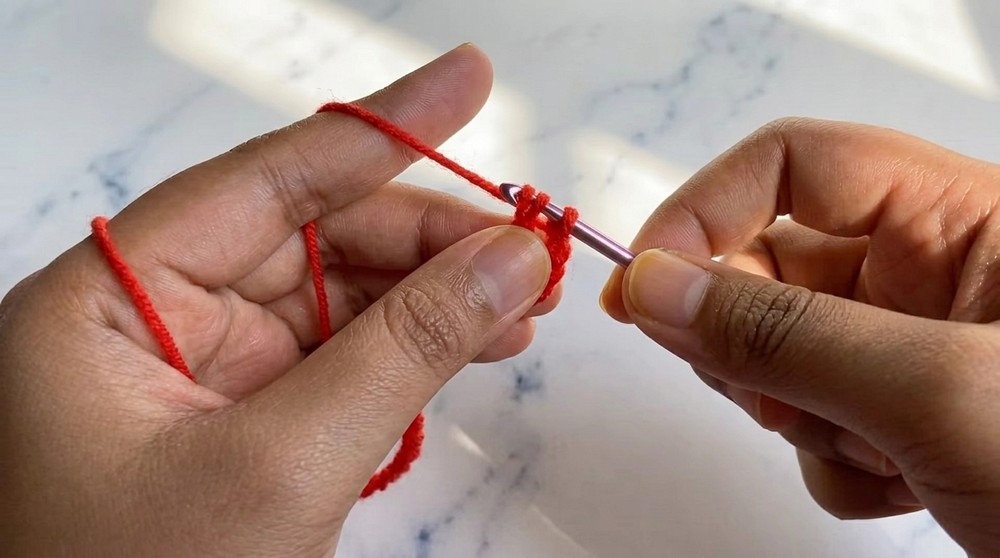
- Chain 55 (ch 55):
- Use your hook to make 55 chain stitches. Yarn over (yo), then pull through the loop to create each chain.
At the end of this step, you’ll have a long chain. Don’t worry if the chain curls slightly; that’s normal.
Step 2: Creating the Base for Petals
- Double Crochet in the 4th Chain from Hook:
- Yo, insert your hook into the fourth chain, yo again, pull through the chain, yo, pull through the first two loops, yo, and pull through the last two loops.
- Chain 4 (ch 4):
- Make 4 chain stitches as a spacer for the petals.
- Double Crochet Again into the Same Chain:
- Repeat the double crochet step in the same chain.
- Skip 2 Chains and Repeat:
- Skip the next 2 chains, then double crochet, chain 4, and double crochet into the third chain.
Repeat this pattern of dc, ch 4, dc, skipping 2 chains between each, until you reach the end of your row. At the end, you will notice curled loops, which are the beginnings of your rose petals.
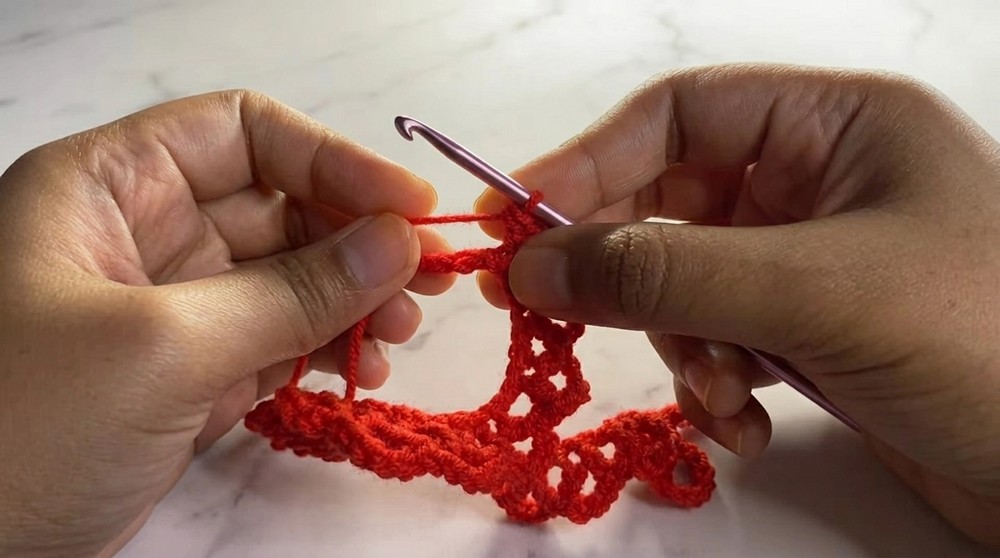
Step 3: Adding the Petals
- Chain 1 (ch 1) and Turn Your Work.
- Locate the Spaces Above the Double Crochets:
- You’ll be working into the spaces created by the chain-4 loops from the previous step.
- Make 10 Double Crochets into Each Space:
- Yo, insert your hook into the first loop, yo, pull through, yo, pull through the first two loops, and yo, pull through the final two loops.
- Repeat until you’ve made 10 dc in the same space.
- Chain 1 (ch 1) and Single Crochet (sc):
- After finishing the 10 double crochets, chain 1 and make a sc in the same space to anchor the petal.
- Skip to the Next Space and Repeat:
- In the next loop, make:
- 10 dc
- 1 ch 1
- 1 sc
- Repeat this pattern across all loops until you reach the end of the row.
This step creates the full petals of your rose. The work will start to take on a spiraling shape.
- In the next loop, make:
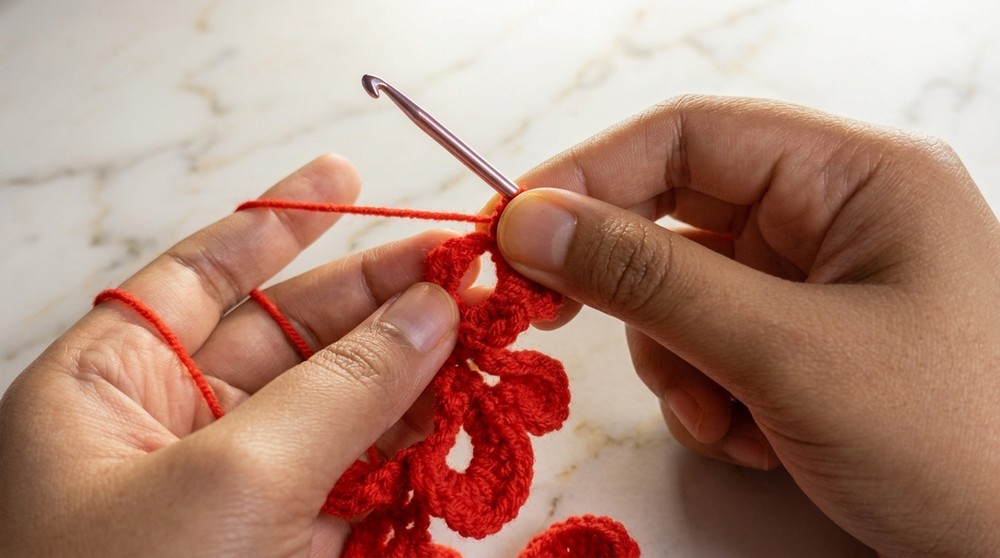
Step 4: Fastening Off
- Cut the Yarn:
- Leave a tail approximately 15 cm long before trimming.
- Secure the End:
- Pull the final loop on your hook to fasten off and tighten.
- Weave in the Ends:
- Tuck any loose yarn tails into the stitches using your hook or a darning needle.
At this point, the crochet base for the rose is complete, and you’re ready to assemble it.
Assembly & Finishing
- Roll the Petals into a Rose:
- Start from one end of the spiral and gently roll the petals inward, forming the characteristic shape of a rose. Push the center slightly outward to add depth.
- Sew the Base:
- Using the darning needle and the leftover yarn tail, sew the base of the spiral to secure the rolled petals. Sew back and forth through the base several times to keep the rose firmly in place.
Now your rose is complete! Adjust the petals as needed to shape them into a more natural configuration.
What You’ll Learn
- Master basic stitches like double crochet and single crochet, along with creating a foundation chain.
- Understand how to curl rows into realistic petals when forming the rose.
- Practice skills like proper yarn tension and weaving in ends to create a polished finish.
Conclusion & Final Remarks
Congratulations! You’ve just completed your crochet rose. This pattern is not only beginner-friendly but also incredibly adaptable. The finished roses can be used to create stunning bouquets, embellish accessories, or add a decorative touch to other crochet projects like hats, bags, or blankets.
If you enjoyed this tutorial, consider experimenting with different yarn colors, thicknesses, and hook sizes to achieve unique looks. A bouquet of these roses in various shades can be a perfect handmade gift for a loved one or a beautiful home décor piece.