
Stylish Crochet Hollow Star Keychain Pattern for Accessory Lovers
Amplify your personal style with a free crochet hollow star keychain pattern that's edgy, playful, and sure to impress your friends.
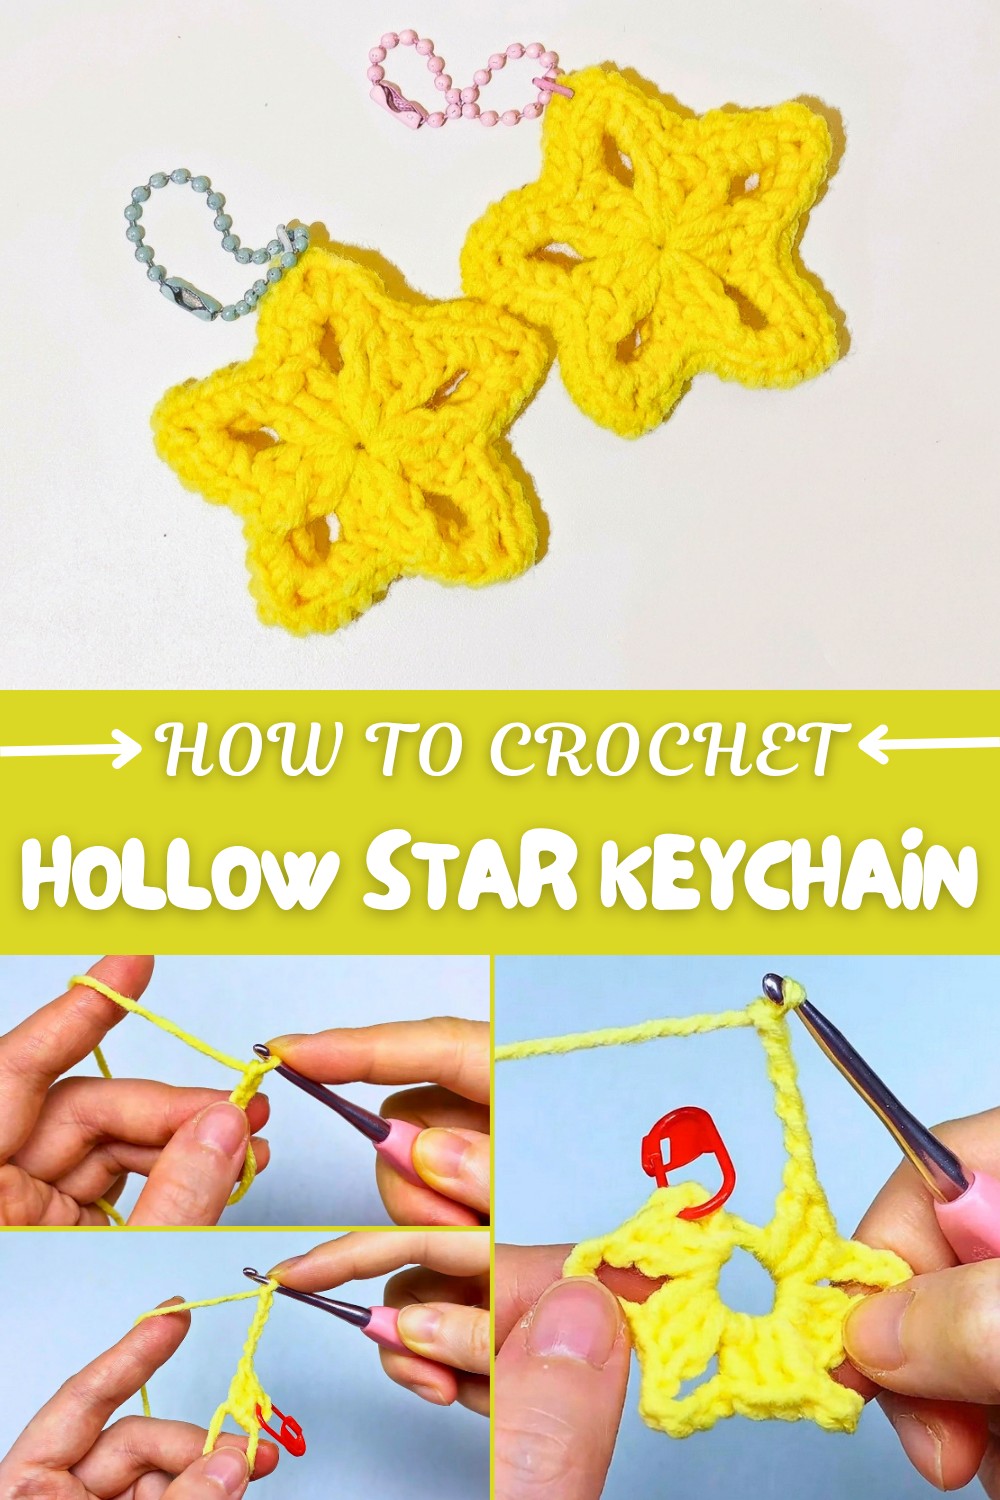
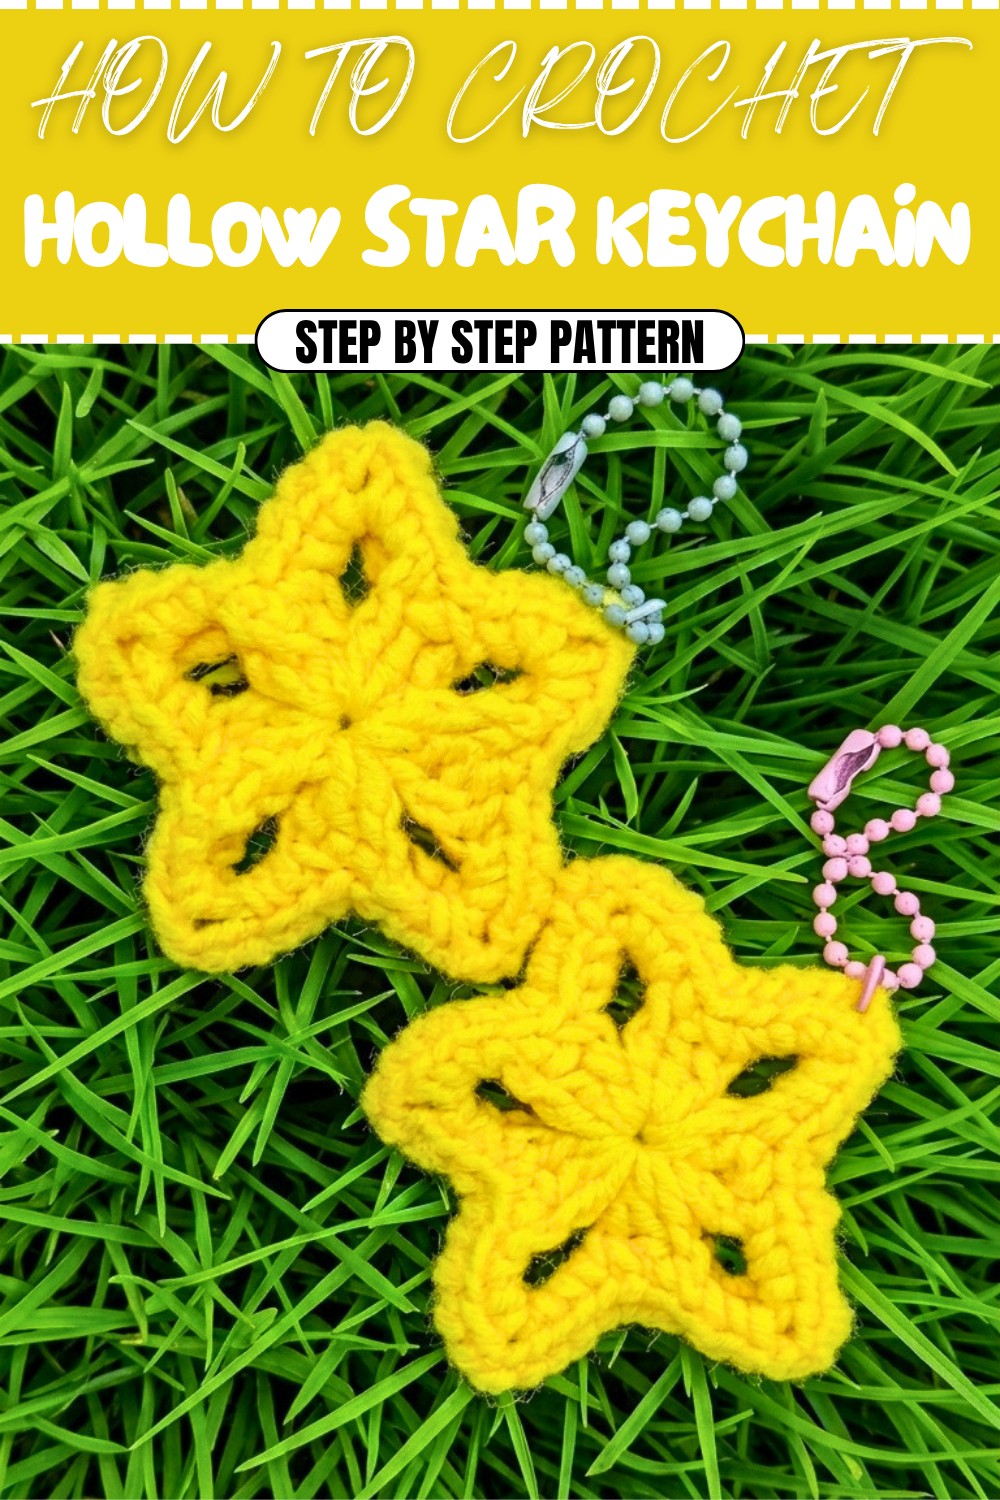
Every handmade creation tells a story, and this hollow star keychain pattern is like crafting a little piece of art you can carry with you. Its five dainty, airy points make it light and playful, perfect for adding charm to your keys, bags, or even holiday decorations. Pairing vibrant colors for a bold look, pastel shades for a soft, dreamy tone, or even metallic yarn for an elegant twist. There's personalization in every stitch, and the delicate beauty of this pattern ensures it stands out wherever you use it.
Free Crochet Hollow Star Keychain Pattern for Sparkling Creatives
This pattern is simple yet rewarding, making it ideal for both beginners and experienced crocheters. You’ll start with a magic ring, a technique designed to create seamless circular shapes, and work double crochets (dc) to form the base. The star's structure is perfected with a combination of single crochet (sc) clusters and chain spaces, creating its unique hollow points. The invisible slip stitch ties it all together for a neat, polished finish.
Other Things You Can Crochet Inspired By This Pattern
This versatile star pattern opens the door to endless creative possibilities like:
- Festive garlands made of colorful stars for parties or holidays.
- Bag charms or unique dangling clips for backpacks and purses.
- Small ornaments for Christmas trees or wedding décor.
- Star mobiles for nurseries or children’s rooms.
Why You’ll Love Crocheting This Star Keychain
- Beginner-friendly design with room for personalization.
- Versatile use for décor, accessories, and gifts.
- Fun, quick project perfect for practicing essential techniques!
Star Hollow Crochet Keychain Pattern
This pattern will guide you through making a delicate, hollow five-point star that is created by crocheting two identical star motifs and sewing them together. Each point of the star is open and airy, making this piece light and decorative. You can use it as a keychain, a bag charm, an ornament, or as part of a garland.
The star is worked in the round, starting from a magic ring, then built up using double crochet in the first round and single crochet with chain spaces in the second round to form the points. The two stars are then joined with an invisible seam for a neat, professional finish.
Skill Level & Terminology
- Skill Level: Advanced Beginner
- Terminology: US crochet terms
You should be comfortable with working in the round, basic stitches, and using a yarn needle for seaming.
Materials & Tools
- Yarn:
- Any light or medium weight yarn works well (e.g., DK / worsted). Cotton or acrylic both work nicely.
- Use a single color, or make each star in a different color for contrast.
- Hook:
- Crochet hook size suitable for your yarn (commonly 3.0–4.0 mm for DK/worsted).
- Notions:
- Stitch marker
- Yarn needle (tapestry needle) for seaming and weaving in ends
- Scissors
- Keychain ring / lobster clasp (optional, if using as keychain)
Gauge
Gauge is not critical for this pattern, as the star is a small decorative item.
If you would like a reference:
- Using DK yarn and a 3.5 mm hook, each finished star piece will measure approximately 6–8 cm across from point to point.
To adjust size:
- Use a smaller hook for a firmer, smaller star.
- Use a larger hook and thicker yarn for a bigger star.
Abbreviations (US Terms)
- MR – Magic Ring
- ch – chain
- sc – single crochet
- dc – double crochet
- sl st – slip stitch
- st(s) – stitch(es)
- sp – space
- V – the V-shaped top of a stitch (front loop + back loop)
- blo – back loop only
Special Stitch Instructions
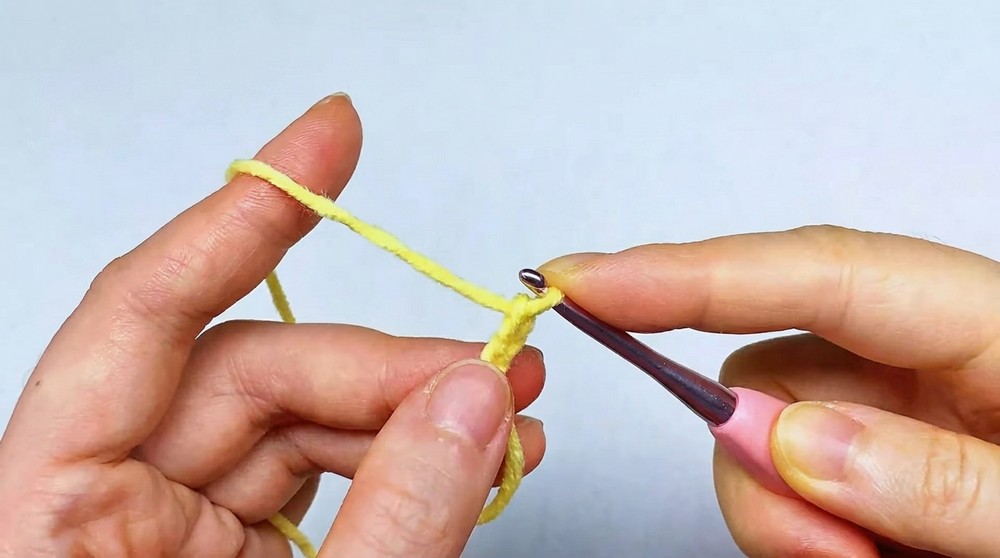
Magic Ring (MR)
- Wrap yarn around your fingers to form a loop.
- Insert hook under the front strand of the loop, yarn over, and pull up a loop.
- Ch 1 (or as instructed) to secure and begin working the first round of stitches into the ring.
- After completing the round, pull the yarn tail to tighten the ring closed.
Double Crochet (dc)
- Yarn over, insert hook into indicated st or ring.
- Yarn over, pull up a loop (3 loops on hook).
- Yarn over, pull through first 2 loops (2 loops on hook).
- Yarn over, pull through last 2 loops.
Invisible Slip Stitch (for finishing round)
Used to create a seamless join at the end.
- Cut yarn leaving a long tail (about 20 in / 50 cm for seaming later).
- Thread tail onto a yarn needle.
- Insert needle from front to back under both loops (whole V) of the first stitch of the round.
- Then insert needle from back to front through the back loop only of the last stitch made.
- Pull gently to form a “fake” stitch that blends with the rest.
Finished Size
- Approx. 6–8 cm across (point to point) for each star piece, depending on yarn and hook.
- When two pieces are sewn together, the star keeps its hollow points and becomes slightly thicker and more structured.
What You Will Learn From This Pattern
Dive into techniques that will boost your crochet skills, including:
- How to make a magic ring for smooth project starts.
- Working double crochet stitches to form solid bases.
- Creating decorative shapes using single crochet clusters and chain spaces.
- Finishing with invisible slip stitches for a polished, professional look.
The Pattern
You will make two identical star pieces and then sew them together.
- Piece 1: Leave a long tail at the end (for seaming).
- Piece 2: Leave a short tail (just for weaving in).
Part 1: First Round – Star Base (Center and Point Foundations)
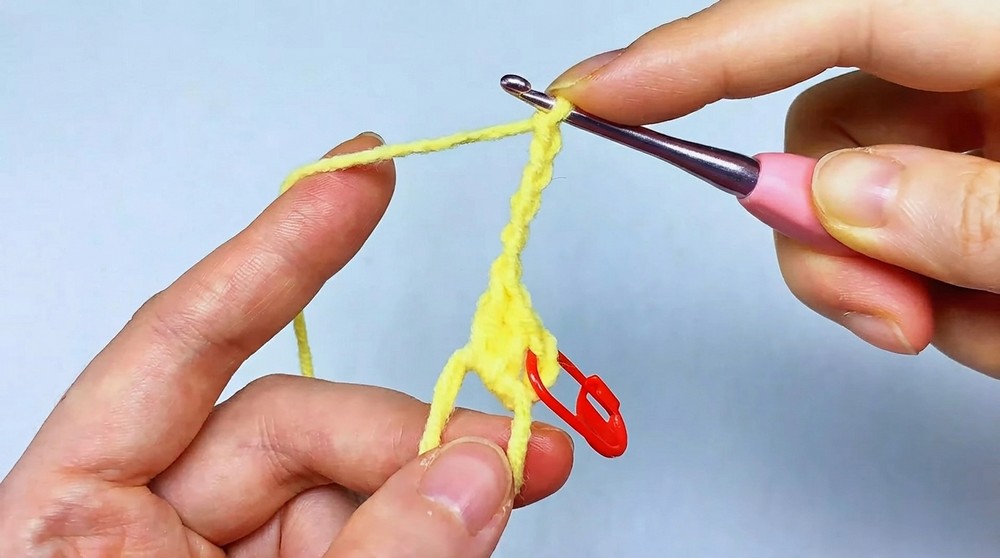
Rnd 1 (Base groups):
- Start with MR.
- Ch 3 (counts as first dc). Place a marker in this ch-3 if desired.
- Work 2 dc into MR.
- Ch 5.
- This completes the first group.
- Repeat the following 4 more times (for a total of 5 groups):
- 3 dc into MR
- ch 5
You should now have 5 groups of:
3 dc, ch 5
- Finish round: sl st into top of initial ch-3.
- Pull the MR tail tight to close the center of the star.
Plain language explanation (Part 1):
In this part, you start with a magic ring and create 5 clusters of three double crochets followed by five chains. These clusters become the base of each star point. At the end of the round, you slip stitch to join and pull the ring tight so the center closes neatly.
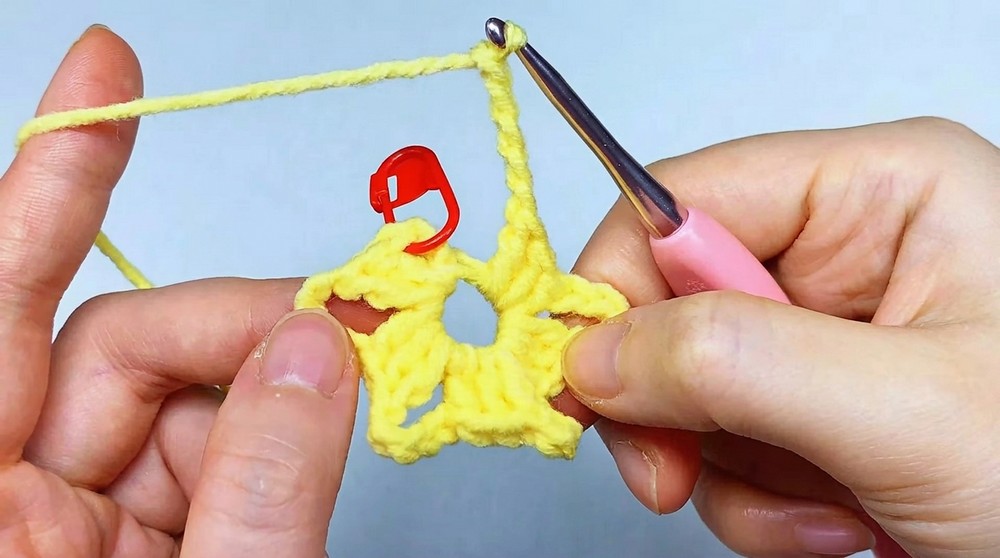
Part 2: Second Round – Shaping Each Star Point
Rnd 2 (Star points):
- Ch 1.
- Sc in first st (the top of the first dc from Rnd 1). Place a stitch marker in this sc.
Now work around the round in five repeating groups as follows:
For each group:
- Skip next st (skip the second dc of the 3-dc cluster).
- Sc in next st (third dc of the cluster).
- Sc 3 into the next ch-5 sp.
- Work: 3 sc in ch-5 sp.
- Ch 3.
- Sc 3 again into the same ch-5 sp.
This forms one complete group and creates one corner/point of the star.
- Repeat the above group a total of 5 times around (you have already started the first group with the first sc and skip).
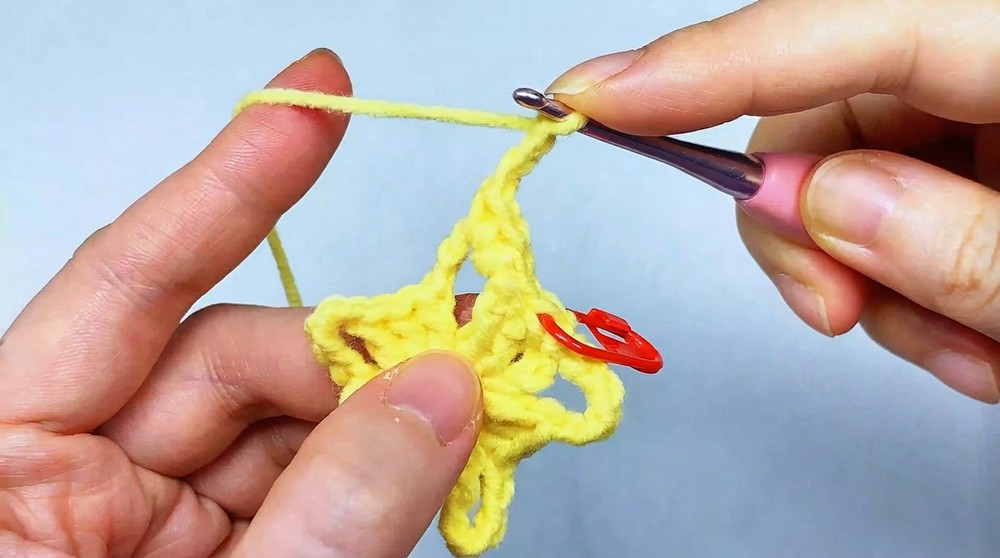
At the end of the round:
- Cut yarn, leaving a long tail (about 20 in / 50 cm) if this is Piece 1 you will use for seaming.
- Use the invisible slip stitch to join:
- Insert needle through both loops of the first sc of the round (where marker is).
- Then insert needle through the back loop only of the last sc you made.
- Pull gently to form a seamless join.
You have now completed one star piece.
In this round, you use single crochets and chains to shape each of the five star points. You skip one stitch in each cluster, add three single crochets and three chains in each chain space, and repeat this around. At the end, you finish with an invisible slip stitch for a smooth edge and leave a long tail on the first star for sewing later.
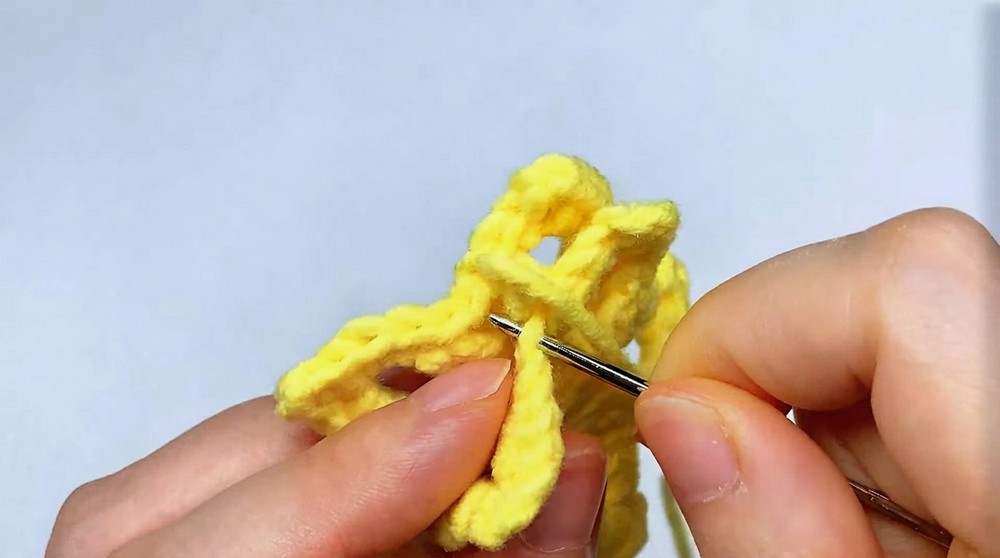
Part 3: Make the Second Star Piece
- Repeat Rnd 1 and Rnd 2 exactly as for the first star.
- Do not leave a long tail this time. Cut yarn with a short tail and use it just to weave in and close the piece neatly.
You now crochet another identical star using the same steps as before. The only difference is that you do not need a long tail because this piece will not be used for sewing. Just weave in the ends so it looks clean.
Assembly & Finishing
Seaming the Two Star Pieces Together
- Lay the two star pieces together with right sides facing out and points aligned.
- Thread the long tail from Piece 1 onto a yarn needle.
- Work around the inner edge:
- Insert the needle through the loops on the inner edge of both pieces (i.e., the stitches around the inside of the star, not the outer tips).
- Sew stitch by stitch, matching each corresponding stitch on Piece 1 and Piece 2.
- Continue seaming all the way around the star.
- At the end:
- Work a small knot in the last area to secure the yarn.
- Weave the tail through several stitches inside the fabric to hide it.
- Trim any excess yarn.
The star will remain hollow in the points, giving it an airy, decorative look.
If you are making a keychain:
- Attach a jump ring or keyring through a stitch at one of the star tips or through a chain space near the point.
Place both stars together and sew around the inner edges so they form a double-layered star. You do not stuff it; it stays flat and hollow. After sewing all the way around, secure the yarn with a knot, hide the tail, and add a keyring or clasp to one of the tips if you want to turn it into a keychain or bag charm.
How to Start & What Stitches Are Used
You begin this pattern with a magic ring to form the center, then build a round of double crochet (dc) and chain spaces for the base. The second round uses single crochet (sc) and chains to form the points and edges. The pattern uses:
- Magic ring
- Chain (ch)
- Single crochet (sc)
- Double crochet (dc)
- Slip stitch (sl st)
- Invisible slip stitch for a clean finish
These basic stitches combine to create a polished, decorative star that looks more complex than it actually is, making it a great project for advancing your crochet skills in a structured, satisfying way.