
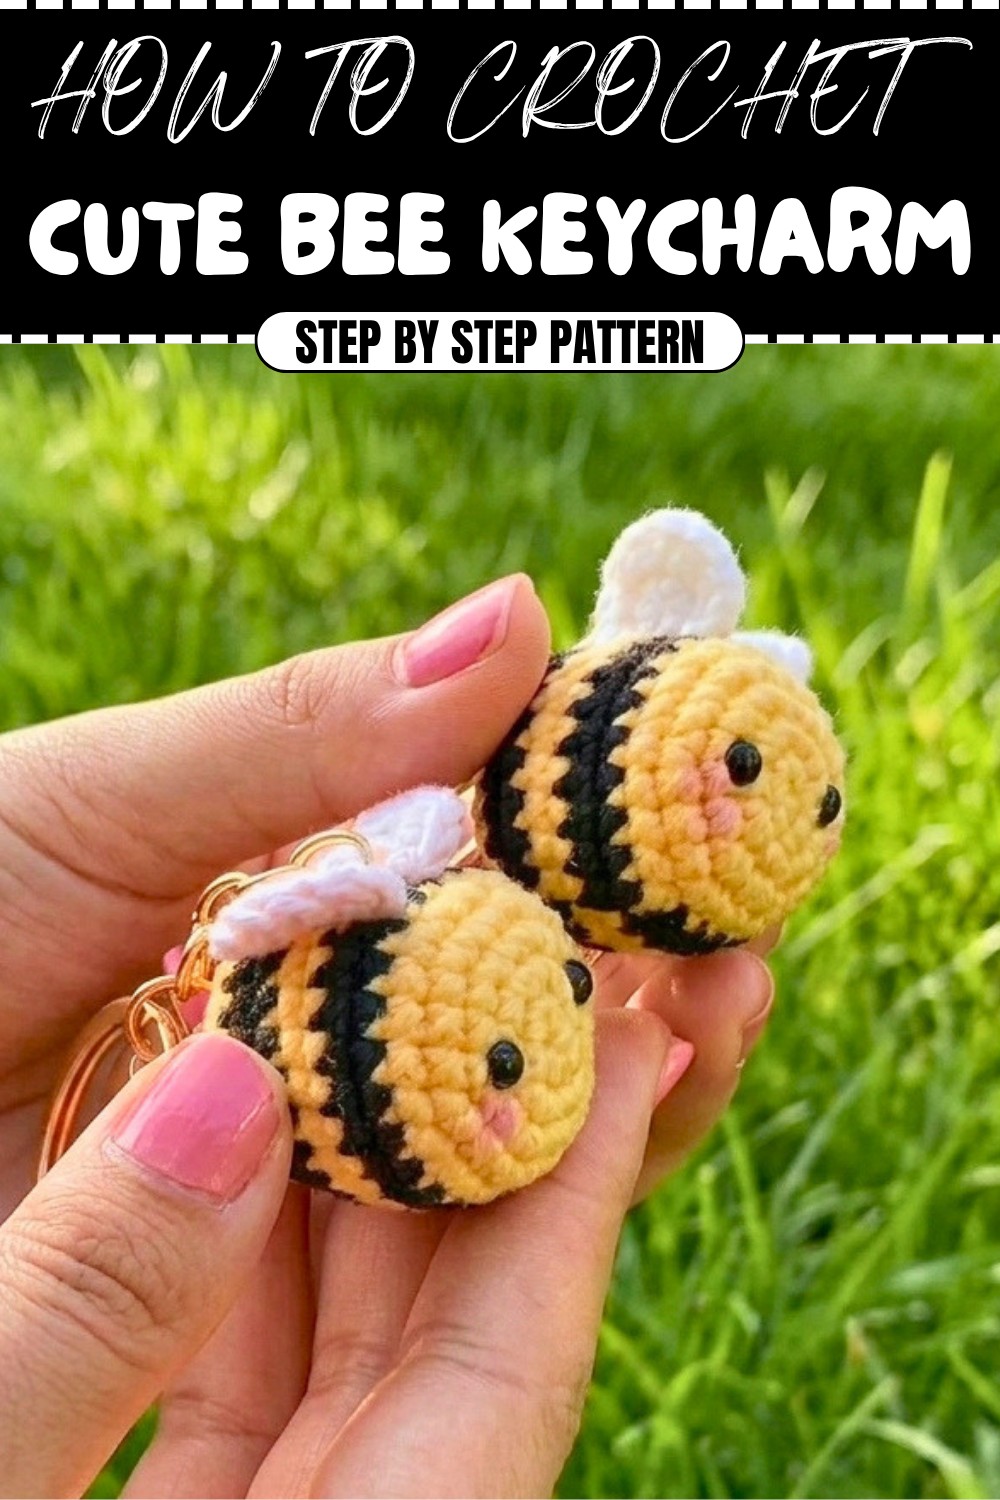
Cute Free Crochet Bee Keycharm Pattern For Fun
Create your own buzzing buddy with this Free Crochet Bee Keycharm Pattern, a simple and delightful project perfect for adding charm to your keys or gifting.
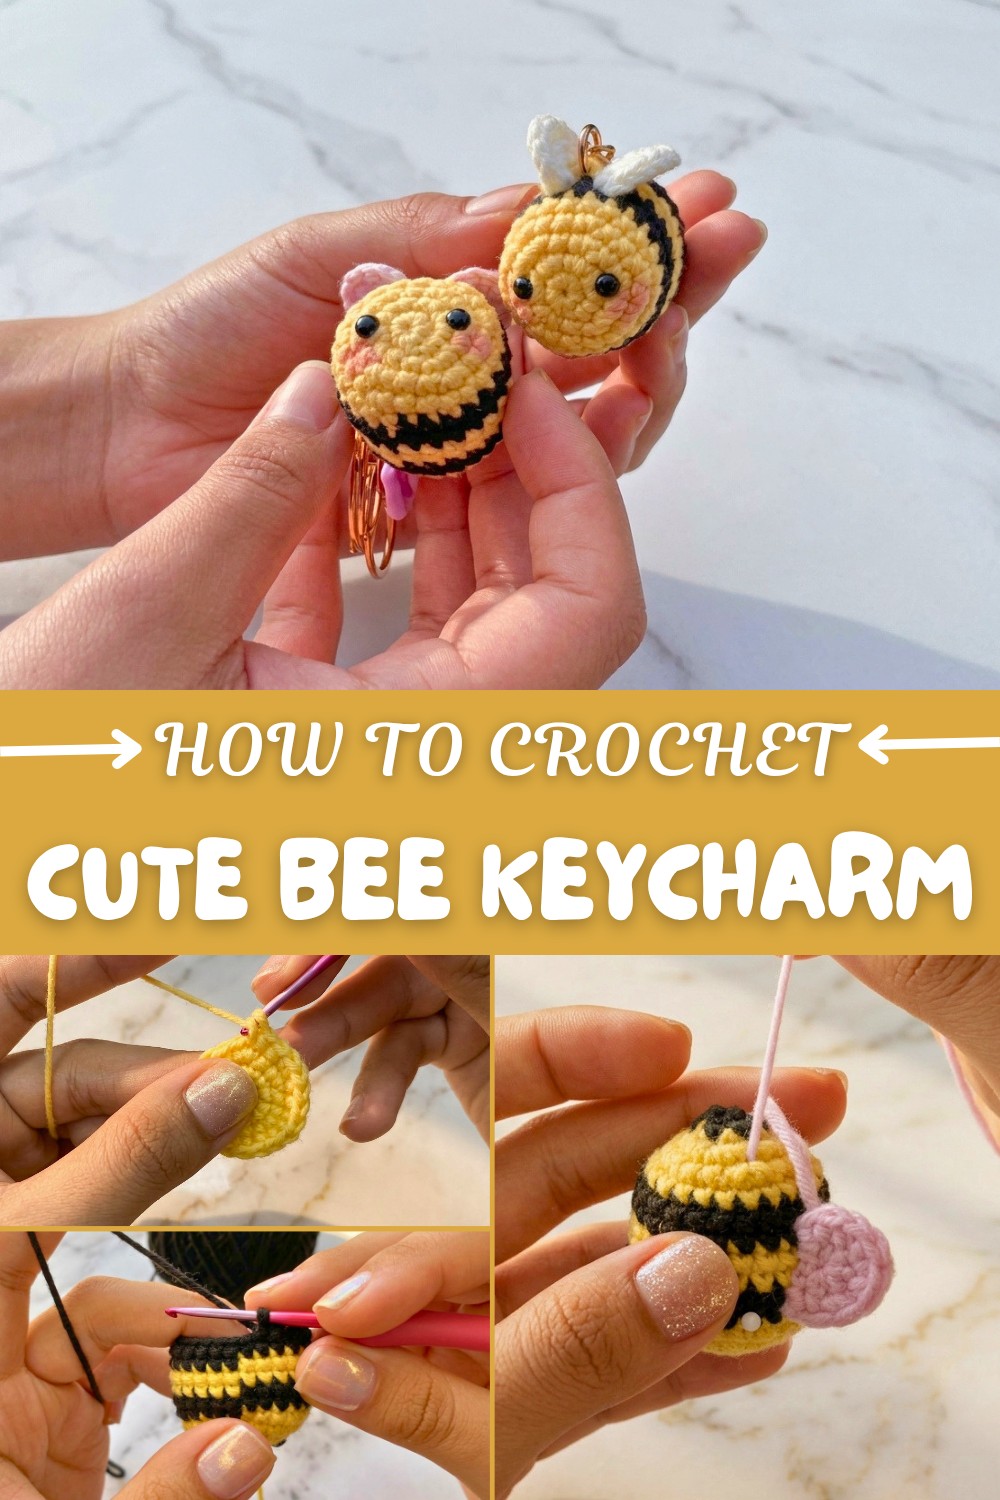
There are moments when the tiniest crochet creations bring the biggest joy. If you love charming, quick projects, this Free Crochet Bee Keychain Pattern is sure to capture your heart. These tiny bees are absolutely adorable, measuring just a few centimeters tall, and are the perfect size to carry everywhere. Their cute round bodies, complete with classic yellow and black stripes, give them a cheerful and recognizable look, while the tiny, soft white wings stitched on top add a wonderful finishing touch.
Free Crochet Bee Keycharm Pattern
The bee’s texture is both firm and squishy, thanks to the cotton yarn and neat single crochet stitches. Each stripe change is smooth and tidy, resulting in a bee that feels as good as it looks. Their little safety eyes and embroidered smile immediately add personality, making it almost impossible not to smile back at them. You’ll love how soft and sturdy they turn out, ideal for keychains, bag charms, backpack buddies, or even as fridge magnets if you want a fun touch at home.
What makes this pattern especially attractive is how simple and beginner-friendly it is. Even if you’re new to crochet, you’ll learn basic increases, decreases, and color changes with ease. Besides, the project works up fast, letting you see your results in no time.
You can also get creative and give your bee a twist, swap the colors for a pastel effect or add little heart charms for an extra dose of cuteness. These bees make wonderful gifts for friends, handmade market items, or just a treat for yourself. With bright stripes and an ultra-cute shape, this crochet bee will be a favorite in your handmade collection.
Certainly! Here is a detailed, professionally formatted amigurumi bee pattern, expanded and explained at every stage, including summaries and important tips. This version is approximately 1300 words and aims to be highly readable, formal, and beginner-friendly.
Amigurumi Kissing Bee Keychain Pattern
Introduction
Welcome to this comprehensive, step-by-step crochet pattern for amigurumi bee keychains. These charming little bees make wonderful gifts, cheerful “kissing” desk buddies, or stylish bag ornaments. Designed for all levels, this pattern walks you from the first stitch to the final embellishments. Unique features include neat color changes for classic bee stripes, simple wing construction, optional magnetization for a kissing effect, and professional finishing. Whether you’re expanding your amigurumi repertoire or making your very first stuffed friend, this project will provide a delightful and successful result!
Skill Level & Terminology
Skill Level:
Suitable for beginners to advanced beginners. You need to be comfortable working single crochet in rounds, making simple increases and decreases, and basic color changes. The pattern walks you through every essential technique.
Pattern Terminology:
All instructions use standard US crochet terms. If you only know UK terms, “sc” refers to UK “double crochet.”
Materials & Tools
- Cotton yarn, fingering or sport weight (2 mm thick):
- Yellow (body)
- Black (stripes)
- White (wings)
- 2.5 mm crochet hook
- Polyester fiberfill for stuffing
- Two safety eyes (5 mm per bee)
- Keychain rings or hardware (optional)
- Small magnets (1–1.5 cm, optional, for kissing feature)
- Scissors
- Tapestry needle
- Stitch marker
- Pins
- Lighter (optional, for eye post flattening)
Tip: All materials are easy to substitute by size and type, so long as you work tightly and select a hook appropriate to your yarn.
Gauge
Exact gauge is not essential for amigurumi, but your stitches should be tight enough to prevent stuffing from poking through the fabric. As a guideline:
6 single crochets ≈ 2 cm.
Abbreviations List
- MR – Magic ring
- ch – Chain
- sc – Single crochet
- inc – Increase (2 sc in the next stitch)
- dec – Invisible decrease (see below)
- st(s) – Stitch(es)
- sl st – Slip stitch
- FO – Fasten off
Special Stitches
Invisible Decrease:
Insert your hook into the front loop of the next two stitches, yarn over, pull through both front loops, yarn over and pull through both remaining loops.
Changing Colors:
In the last stitch before your color change, work the stitch as usual until the final yarn over. Drop the old yarn, draw through the new color to finish. Crochet over the old yarn tail for a neat join.
Finished Size
Each bee measures approximately 4 cm long by 3 cm wide when made with recommended yarn and hook.
Section Summaries
You will begin the bee body with a magic ring and increase in rounds, making color changes for perfect stripes. Decreases shape the plush body, and tiny wings are made separately and sewn on. Place safety eyes and stuff at the right moment for best shape. If desired, magnets are hidden inside for a sweet “kissing” effect.
Pattern Instructions
Bee Body
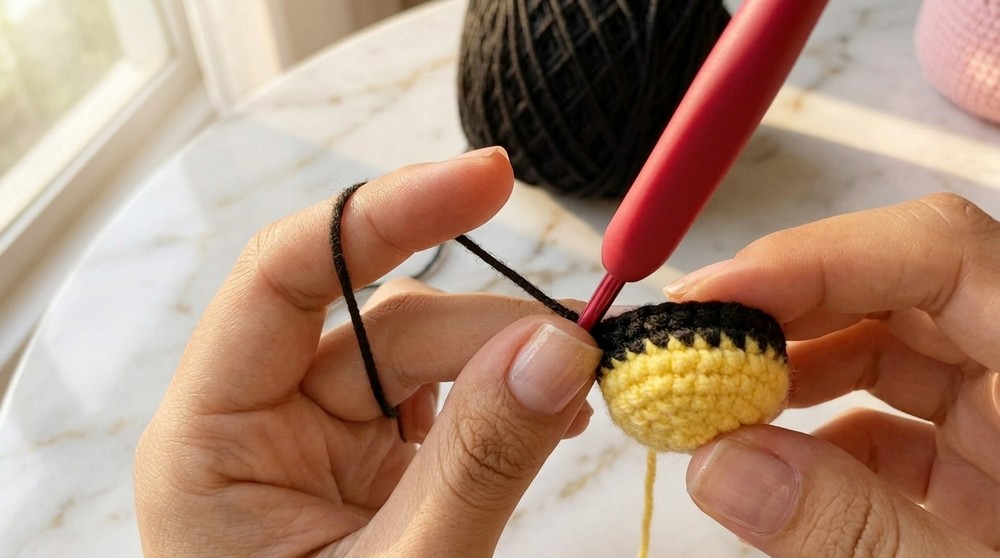
With yellow yarn:
Round 1: MR, ch 1, 6 sc in ring. Pull tight to close. (6 sts)
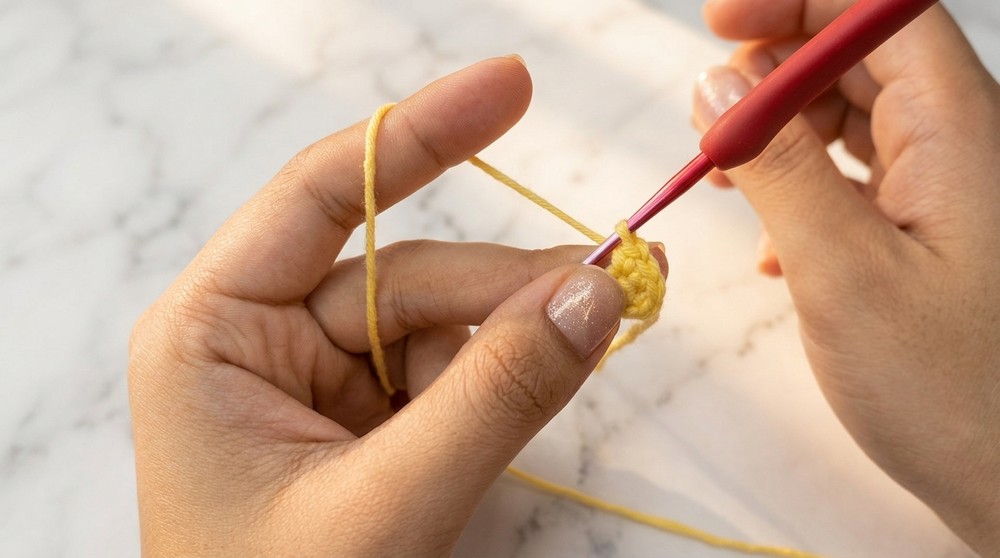
Round 2: 2 sc in each st around (12).
Round 3: [Sc 1, inc] around (18).
Round 4: [Sc 2, inc] around (24).
Round 5: Sc in each st (24).
Summary: Form the base and belly by working in spirals. Always use a marker for the first stitch to keep track.
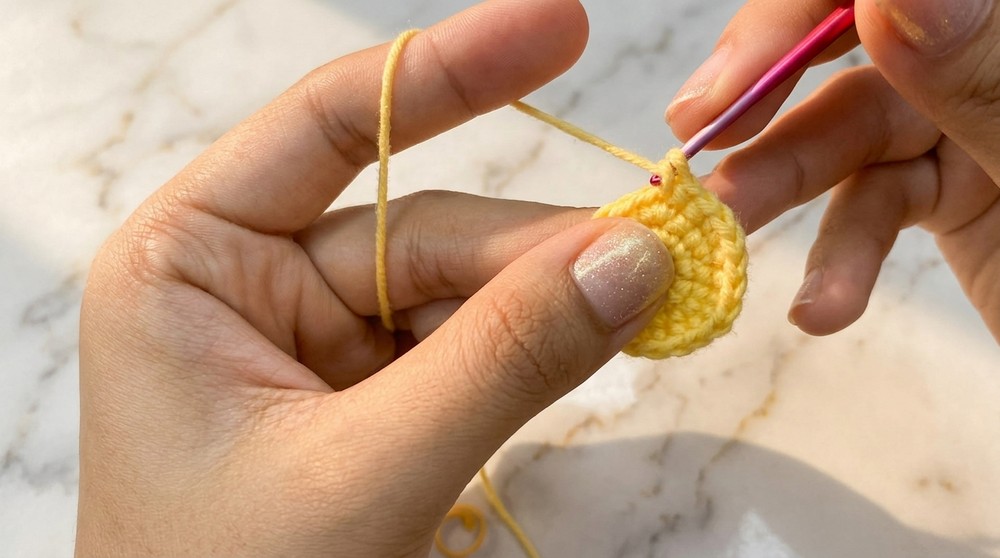
Change to black:
Round 6: Sc in each st (24).
Round 7: Sc in each st (24).
Switch to yellow:
Rounds 8–9: Sc in each st (24 per round).
Summary: These color rounds create the distinctive bee stripes. Changing color on the last yarn over of a stitch ensures crisp lines.
Place eyes now:
From the magic ring, count out two rounds. Insert safety eyes between rounds 2 and 3, about 2–3 stitches apart. Secure with washers and, if desired, flatten posts at the back with a lighter.
Switch to black:
Rounds 10–11: Sc in each st (24 per round).
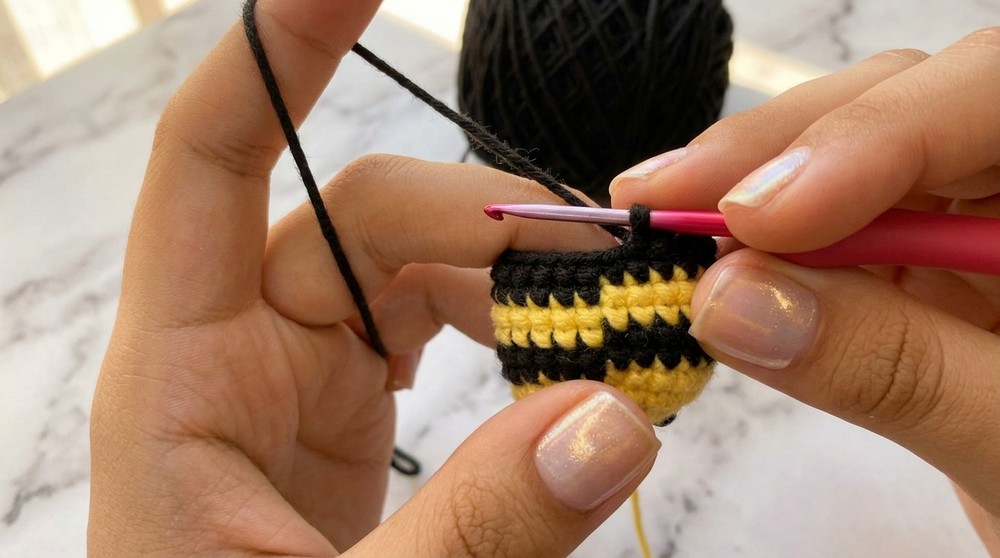
Switch to yellow:
Round 12: Sc in each st (24).
Summary: Additional stripes give your bee its classic look. Carry unused yarn inside the work when switching for the tidiest results.
Shaping
Round 13: [Sc 2, dec] around (18).
Round 14: [Sc 1, dec] around (12).
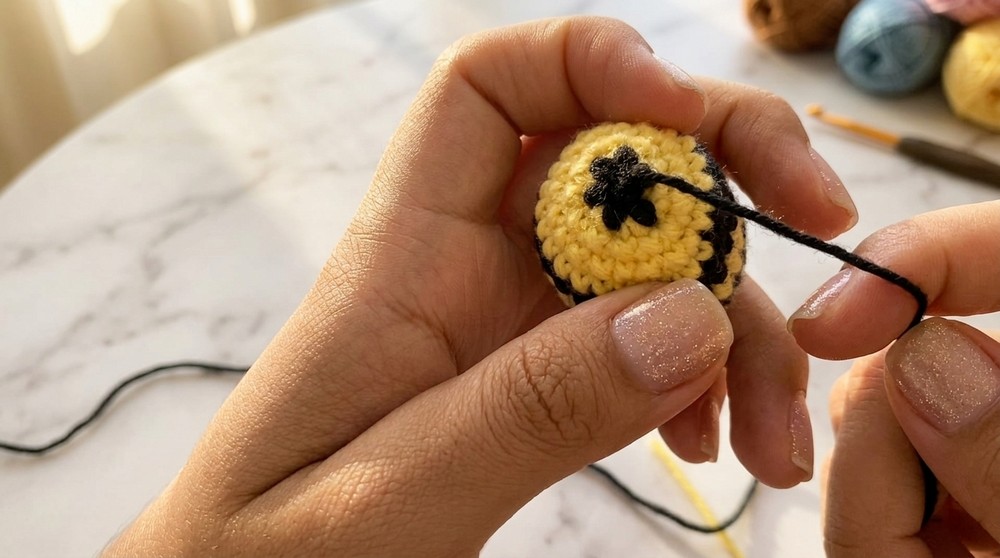
Explanation: Begin stuffing the bee here, adding magnet if using. Stuff firmly but don’t overfill to keep the shape neat.
Switch to black:
Round 15: [Dec] around (6). FO, leaving a long tail.
Thread the yarn into a tapestry needle, run through the front loops of the final 6 stitches, pull tight to close, and hide tail inside the bee.
Summary: Invisible decreases make the bottom tidy and round. Restuff if needed before closing completely.
Bee Wings (Make 2)
With white yarn:
Round 1: MR, ch 1, 6 sc in ring, close. (6)
Round 2: Ch 1, [Sc 1, inc] three times around. (9)
FO, leaving a long tail for sewing.
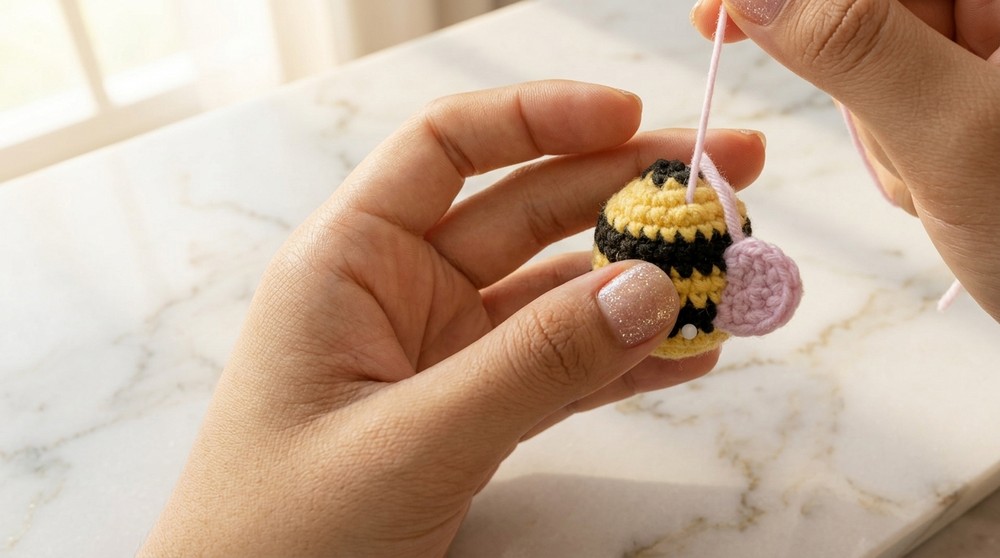
For newcomers: Each wing is just two quick rounds. Be sure to leave enough yarn for easy sewing.
Assembly & Finishing
- Pin wings to the top-center of the bee, about 2 stitches apart.
- Sew each wing securely with a tapestry needle, knotting yarn ends inside and hiding them.
- Attach a keychain ring through the top, if desired.
- If you added magnets, test that two bees attract each other at the “face” just before the final close.
Summary for finishing: Sew carefully and knot strands after sewing wings. Your bee should look lively and finished from all angles!
Project Recap & Final Tips
By following this pattern, you’ll have constructed a cheerful little bee with iconic stripes and sturdy wings. You’ve learned how to manage color changes, make invisible decreases, and stuff and assemble securely. If you’re new to amigurumi, don’t rush—the small parts are a great way to perfect your skills. For variety, try pastel wings, a different stripe sequence, or embroider a tiny smile.
Remember, amigurumi are forgiving fun. Even imperfect stitches add character. Display your bee as a keychain, pair with a second for kissing companions, or gift as a symbol of luck and friendship!
Conclusion
You’ve now finished your amigurumi kissing bee! These bees are ideal for practicing foundational crochet skills, as quick crafts, or gifts for loved ones. Their sweet expressions, fun magnets, and excellent durability will bring you and others joy. Don’t be afraid to personalize, change colors, add blushing cheeks, or sew on tiny felt hearts! Thank you for making and sharing your art, your creativity helps our maker community thrive.