
How to Crochet Winnie the Pooh keychain Easy Amigurumi Pattern
Crochet a cute Winnie the Pooh keychain with easy steps, perfect for beginners and a fun way to remember a beloved childhood character.
The first time I created something cute and small from yarn, I felt so happy and proud. Crocheting a Winnie the Pooh keychain gives you that same feeling, letting you make a tiny bear that is both fun and full of personality. As you crochet, Pooh’s round face and gentle smile slowly take shape. His soft yellow color and the famous red shirt make him easy to recognize and extra adorable.
Crochet Winnie the Pooh keychain With Free Pattern
One of the most enjoyable parts is making the miniature honey pot that he holds. This little detail is simple but makes the whole keychain more special. The steps to make each part, his ears, arms, snout, and shirt are straightforward, and you get to see each piece come together like a puzzle. Adding the finishing touches like his friendly eyes and sweet smile feels rewarding and brings Pooh to life in your hands.

This project is great for beginners, but even those who crochet often will enjoy how easy and quick it is. The finished keychain is just the right size for carrying on a bag, hanging from keys, or giving as a thoughtful gift. It’s soft and safe, with no small parts to worry about, and it looks nice everywhere you put it.
Crocheting a Winnie the Pooh keychain is not just a piece; it’s a way to remember childhood stories and share them with others. It brings a bit of happiness every time you see it, and it’s a project anyone can enjoy, whether you make it for yourself or as a present. With simple steps and cute results, it’s a wonderful way to spend time and make something special.

Mini Winnie the Pooh Keychain Crochet Pattern
This step-by-step pattern guides you in creating a charming mini Winnie the Pooh amigurumi, complete with his iconic red shirt and a little honey pot. The finished plush measures approximately 7 cm tall, perfect to use as a keychain, ornament, or a sweet, handmade gift. Through simple shaping, color changes, and embroidery, you’ll practice essential amigurumi techniques suitable for crafters with basic experience.
Skill Level & Terminology
- Skill Level: Advanced Beginner
- Terminology: US Crochet Terms
Materials & Tools
- Yarn: Yellow (body), Red (shirt), Brown (honey pot), White (pot details), Black (features), small amount of pink or orange (cheeks)
- Hook: 2.5 mm crochet hook
- Stuffing: Polyester fiberfill or similar
- 6mm Safety Eyes (or black fabric paint/beads)
- Tapestry Needle
- Stitch Marker
- Scissors
- Pins
- Keychain ring
- Optional: Blusher or chalk for cheeks
Gauge
Gauge is not critical. Your Winnie the Pooh should measure about 7 cm (2.75") tall when using the recommended yarn and hook.
Abbreviations List
| Abbreviation | Meaning |
|---|---|
| MR | Magic ring |
| ch | Chain |
| sc | Single crochet |
| inc | Increase (2 sc in one stitch) |
| dec | Decrease (sc2tog) |
| sl st | Slip stitch |
| st(s) | Stitch(es) |
| FO | Fasten off |
Special Stitch Instructions
- Magic Ring (MR): Create a loop, insert hook, draw up loop, ch 1, sc required stitches into the ring, pull tail to close.
- Increase (inc): 2 sc in same stitch.
- Decrease (dec): Insert hook in next st, yarn over and draw up loop, insert in next st, yarn over and draw up loop, yarn over and pull through all 3 loops.
Finished Size
Approx. 7 cm (2.75") tall.
Stitches Used & How to Start
This pattern is worked mostly in the round (spiral) using single crochet stitches, simple increases and decreases, and short rows for shaping. Color changes and embroidery details are minimal and beginner-friendly.
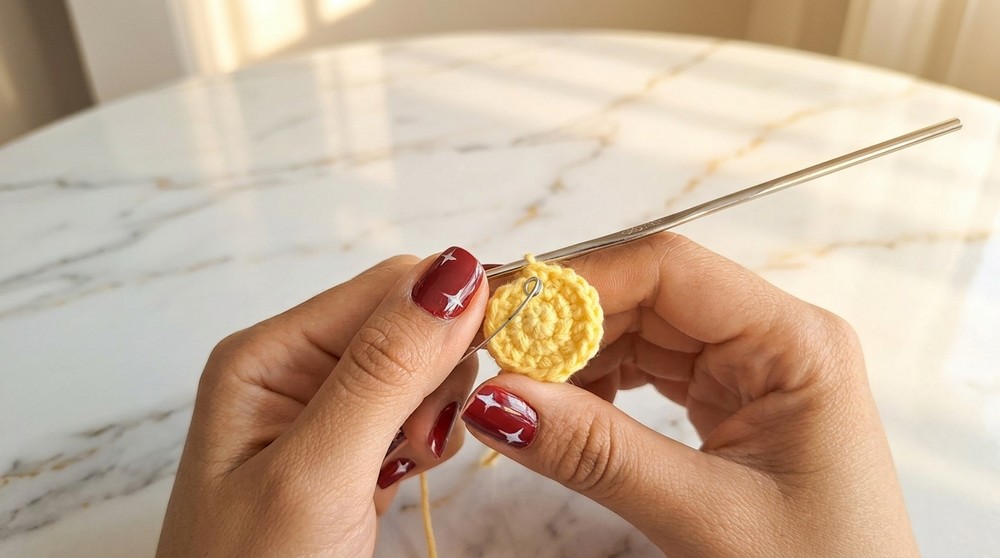
Every amigurumi journey begins with gathering your yarn, hook, and a spark of curiosity. In the opening steps, you’ll learn how to create a sturdy foundation, usually starting with a magic ring, essential increases, and the basic stitches that form the core of your Winnie the Pooh or character. This stage sets the stage for success, teaching you the foundational moves you’ll repeat and refine throughout the project.
The Pattern Itself
Head
Yarn: Yellow
- R1: MR, 6 sc in ring (6).
- R2: Inc around (12).
- R3: (Sc, inc) x6 (18).
- R4: (Sc x2, inc) x6 (24).
- R5–7: Sc in each st around (24 for 3 rounds).
- R8: Sc x4, inc x5, sc x6, inc x5, sc x4 (34).
- R9–11: Sc in each st around (34).
- R12: Sc x4, dec x5, sc x6, dec x5, sc x4 (24).
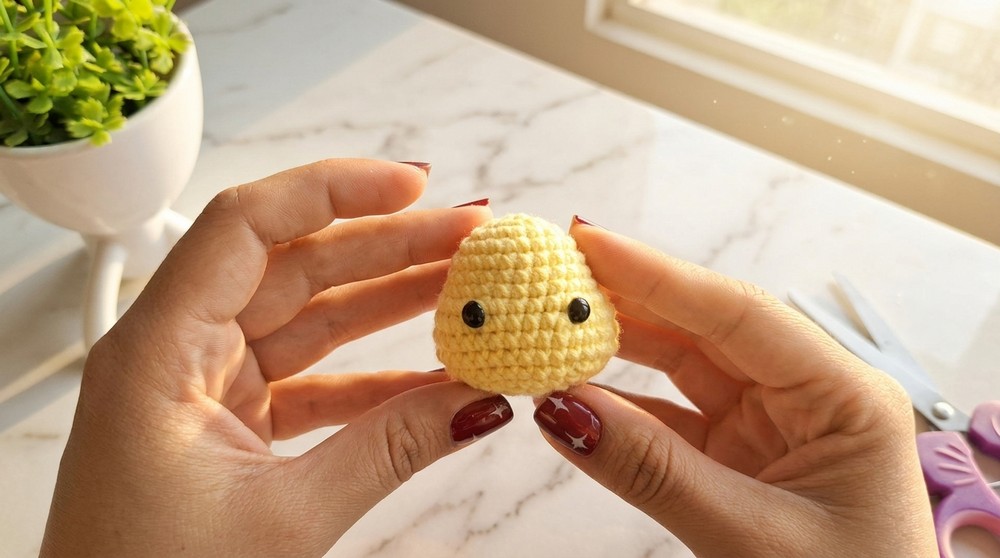
- Place safety eyes between Rounds 8 & 9, with 6 st between.
- R13: Sc in each st around (24).
- R14: Dec around (12).
- Stuff head firmly.
- R15: Dec around (6); FO leaving tail.
- Weave through front loop of remaining stitches, pull to close, and hide tail.
Not sure about written patterns? Start with a magic ring, increase to make a sphere, place eyes, stuff, then decrease to close.
Body (with Legs Joined)
Yarn: Yellow (then change to Red for shirt)**
- Make 1st leg: MR, 6 sc (6). Next 2 rounds: Sc in each st around (x2). Sl st, ch 1, cut yarn.
- Make 2nd leg: Repeat as above, do not cut yarn after sl st.
- Body join: Ch 2, join to 1st leg with sc, sc in each st around first leg, sc in ch2 once, sc around second leg, sc in ch2. (16 sc)
- R5–7: Sc in each st around (16).
- Change to Red.
- R8–10: Sc in each st around (16).
- R11: (Dec, sc x3) x2, (dec, sc x3) x2 (13).
- R12: Sc in each st around (13).
- Stuff body and legs well.
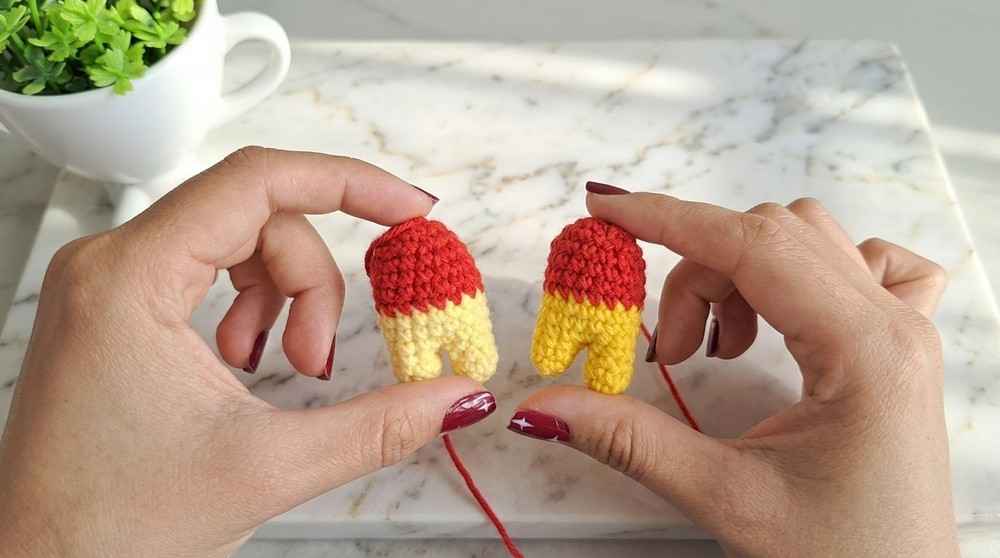
Not sure about written patterns? After making two small tubes for legs, connect them with chains, then work around as a single piece, switching to red for the shirt. Decrease towards the neck.
Arms (Make 2)
Yarn: Yellow
- MR, 6 sc.
- R2–3: Sc in each st around.
- Sl st, FO leaving tail for sewing.
- Do not stuff arms for a flatter look.
Ears (Make 2)
Yarn: Yellow
- MR, 6 sc.
- Sl st, FO, leave tail for sewing.
- Slightly flatten before attaching.
Snout
Yarn: Yellow
- MR, 6 sc.
- (Sc, inc) x3 (9).
- Sl st, FO, leave tail for sewing.
- Lightly stuff before attaching for dimension.
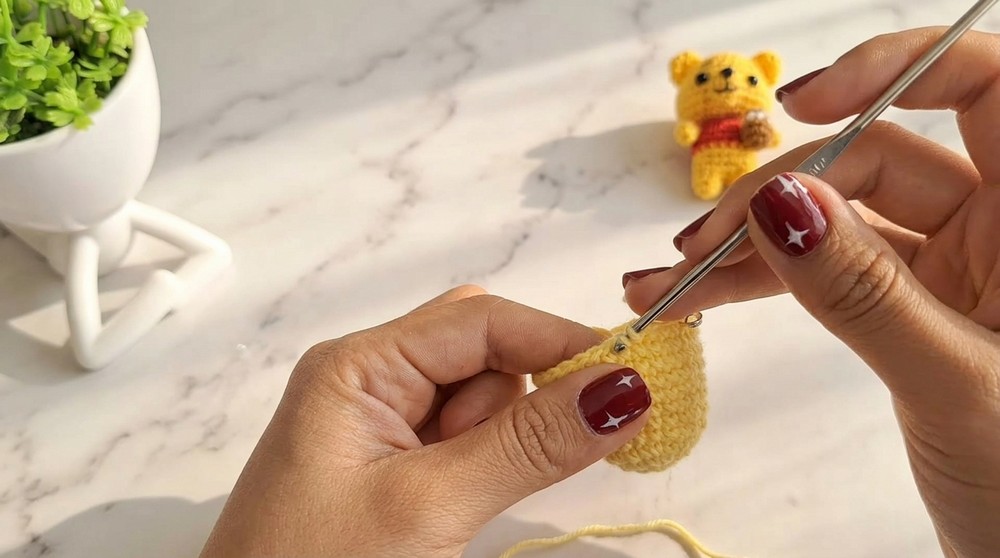
As you progress to the mid-section, the pattern guides you through shaping the body and features with clever stitch techniques. You’ll see how small changes, like adding color or switching to different parts, help build your amigurumi’s identity. The process becomes collaborative as you place the safety eyes, assemble arms and feet, and maybe even experiment with your own embellishments for a personal touch.
Honey Pot
Yarn: Brown**
- MR, 5 sc.
- Increase in each st around (10).
- Sc in each st (10).
- Change to White: Sc in each st (10).
- Change to Brown: (Dec, sc x2) x2 (6).
- Sl st, FO, leave tail for sewing.
- Stuff and close by weaving through front loops.
Lid (Black):
- MR, 8 sc. Join, sl st, FO.
- Sew lid on top of pot.
Assembly & Finishing
- Sew head to body securely, aligning shirt to neck.
- Attach arms (flat) to each side of red shirt.
- Sew ears to both sides of head, even above eye line.
- Sew snout under eyes, lightly stuffed.
- Attach honey pot to one arm, using tail to anchor.
- With black thread/yarn:
- Embroider nose as a small triangle on snout.
- Stitch mouth curving from nose down and to each side.
- Add eyebrows above eyes.
- Pull safety eye stems slightly inward for indented look before securing.
- Use chalk/blusher on cheeks and inner ears if desired.
- Sew keychain ring to top of head.
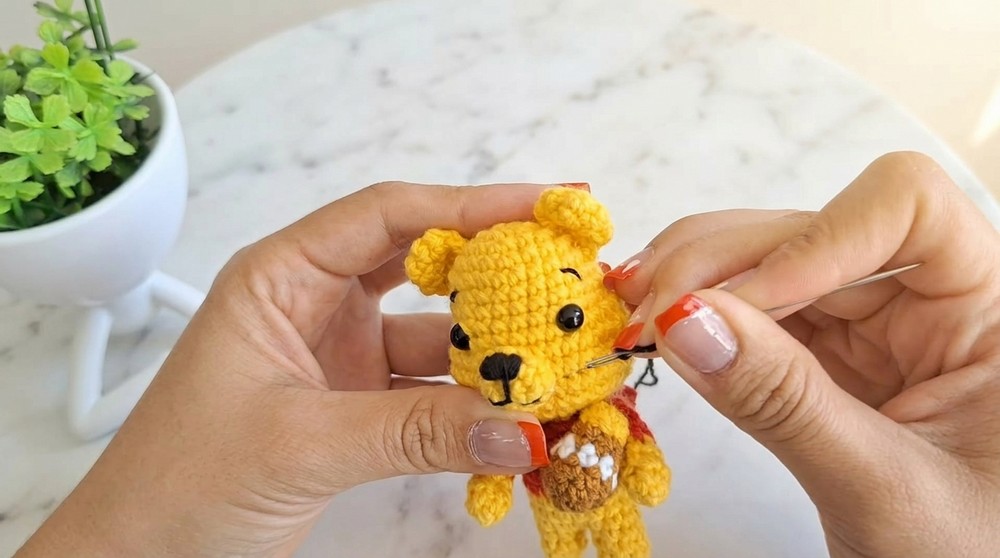
Not sure about written patterns? Stitch all parts where indicated, referencing any picture. Add details with a needle and a few stitches of black yarn.
Closing out the pattern, the focus shifts to careful assembly, seaming, and final embellishment, bringing your handmade creation to life. The pattern encourages you to stuff your project just right and pay attention to little details like embroidering a mouth or attaching a tail. In the end, you not only have a cute finished Winnie the Pooh but also a sense of accomplishment, having followed along and learned new skills with the help of a step-by-step guide.
Conclusion
Bravo—your adorable mini Winnie the Pooh with honey pot is complete! This pattern practiced amigurumi basics, color change, assembling small parts, and cute embroidery. These little Poohs make lovely gifts, decorations, or fair merchandise. Feel free to personalize further with different yarn or fun accessories. Stitches used: Magic ring, single crochet, increase, decrease, slip stitch, simple embroidery.