
How to Crochet Fun Hat Pattern for Fashionable Winter Looks
Stay cozy and stylish with the Free Crochet Fun Hat Pattern—perfect for all skill levels, customizable, and effortlessly chic.
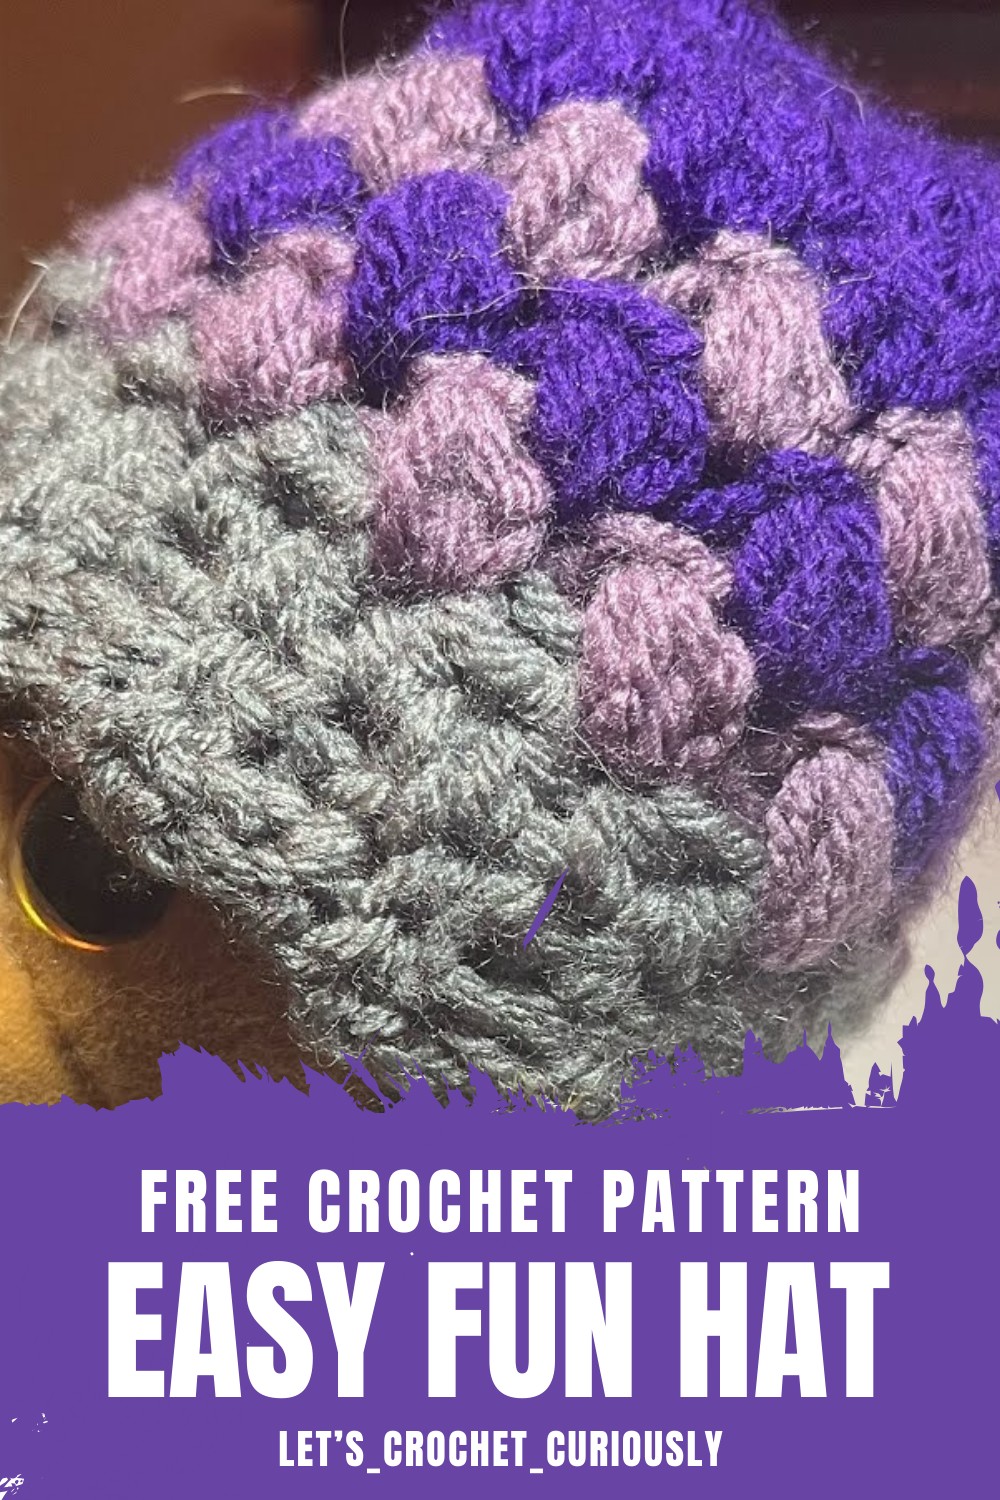
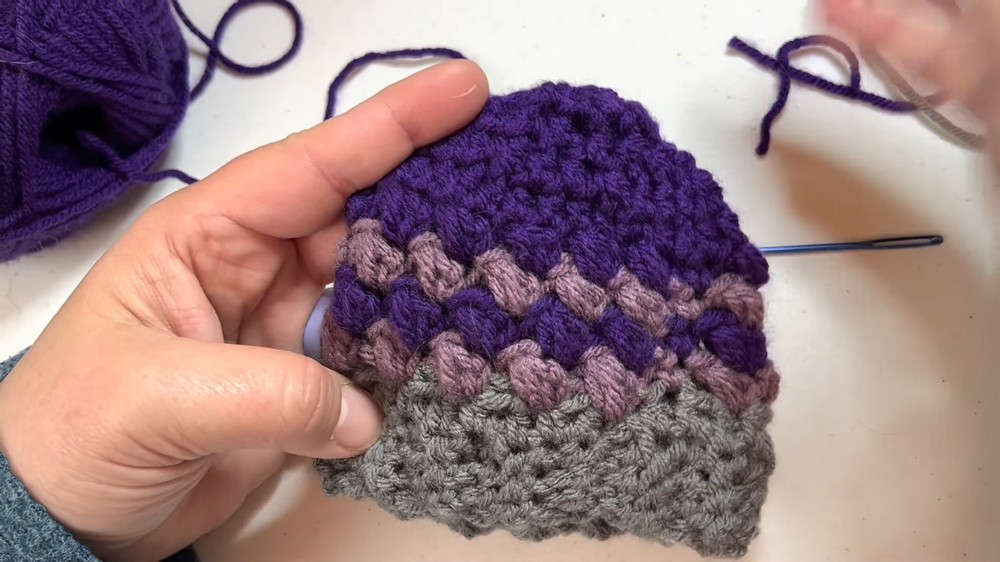
A csung, colorful hat that’s both practical and fun to make—this Free Crochet Fun Hat Pattern is the perfect project for all skill levels. Designed to combine warmth and personality, it’s an excellent addition to your wardrobe or a thoughtful handmade gift for loved ones. With its textured puff stitches and endless customization options, this pattern allows you to experiment with colors, yarn types, and sizes to suit any taste or occasion.
Beginner Steps to Crochet Fun Hat Pattern for All Seasons
Whether you’re looking to stay hot on cold days or add a pop of personality to your accessories, this hat pattern has you covered. It’s beginner-friendly yet engaging enough for experienced crocheters, making it a rewarding and satisfying choice. Easy-to-follow instructions ensure that you can work through the pattern confidently, turning basic materials into an eye-catching piece.
Whether it’s a one-of-a-kind gift, a stylish winter essential, or a charming handmade addition to your crochet collection, this pattern brings creativity and usefulness together in a way that’s hard to resist. It’s a modern must-try for anyone who loves simple yet striking crochet projects!
Materials Needed
- Yarn: Any weight of yarn can be used (3-weight, 4-weight, etc.). The instructor used 4-weight yarn in multiple colors.
- Special Mention: Premier Just Yarn (Dollar Tree) and Big Twist Soft (Joann’s).
- Hook: Use a hook size recommended by your yarn.
- Scissors: To trim yarn ends.
- Tapestry Needle: For seaming and weaving in ends.
Special Features
- One-Row Repeat Pattern: The hat’s puff pattern is simple yet elegant and involves a repeating stitch round for ease of learning.
- Customizable Sizing: Whether a 22-inch head for adults or smaller sizes like for toys, the pattern adapts beautifully to your needs.
- Beginner-Friendly: The step-by-step nature of the brim, the puff stitch, and the gradual decrease make this project approachable, even for beginners.
Step-by-Step Instructions
1. Start with the Brim
- Create a slip knot and chain 9 stitches (or desired brim width).
- Use single crochet (SC) in the back loop on the second chain from the hook and continue across the row.
- Repeat these single crochets in the back loops for each stitch, chaining 1 after every row.
- Measure the length of your brim to fit around the desired head size (22 inches for adult heads). Ensure the row count ends up as an odd number for best results.
- Slip stitch to join the brim ends and form a circle.
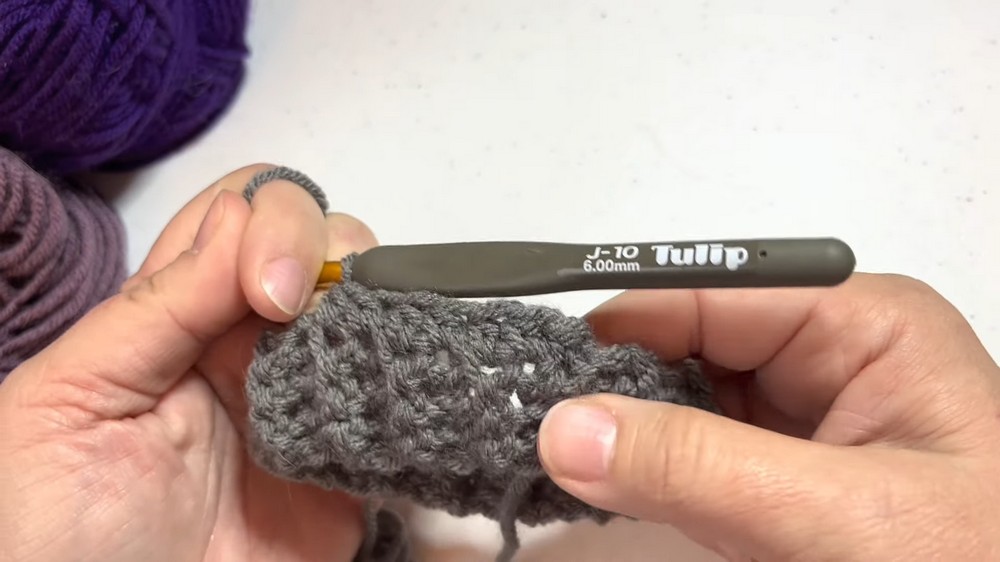
2. Base of the Hat
- Work a row of half-double crochets (HDC) around the joined brim. Add one HDC for every row in the brim. If the count doesn’t match perfectly, adjust slightly by adding or removing a stitch.
- At the end of the row, slip stitch to join and prepare for the puff stitch rounds.
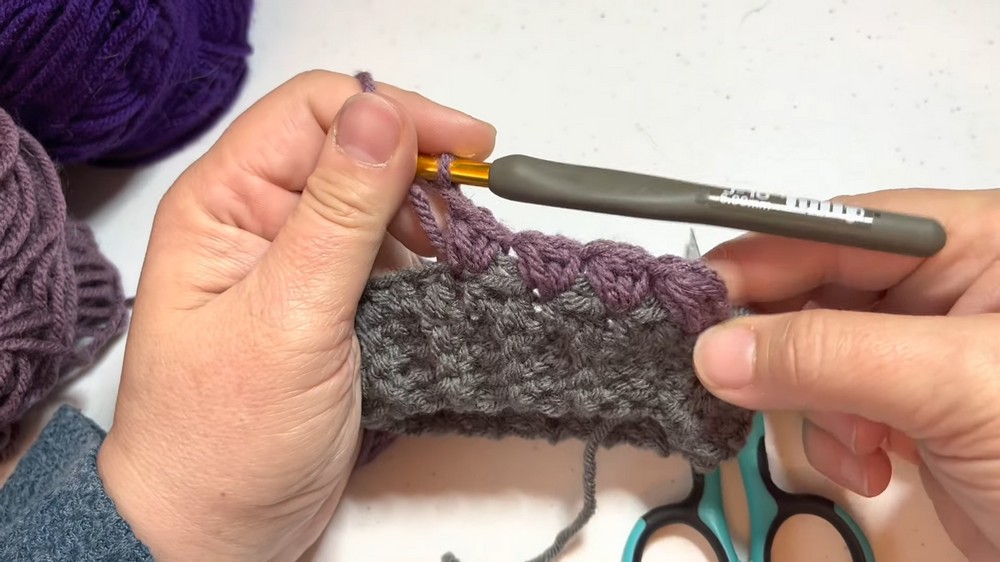
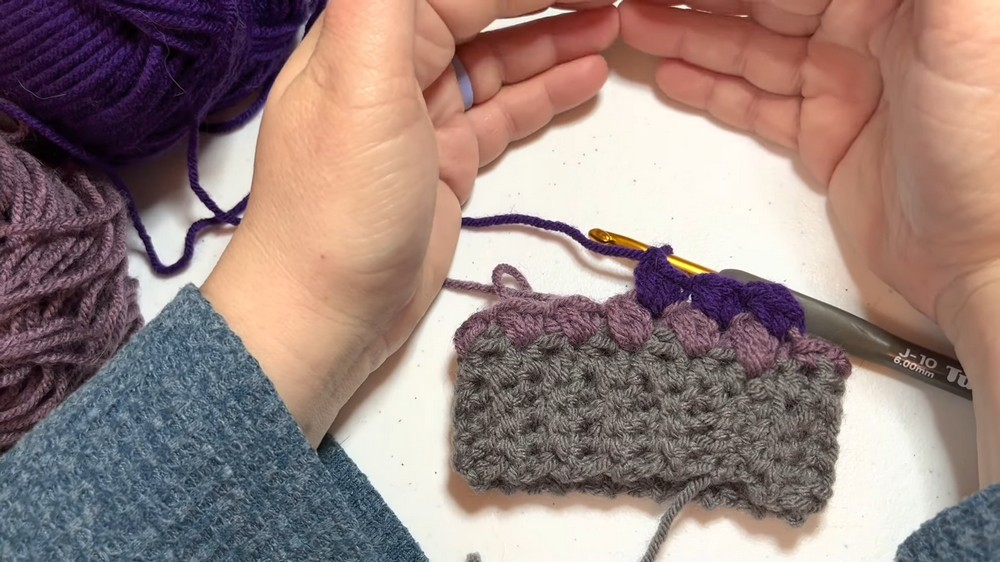
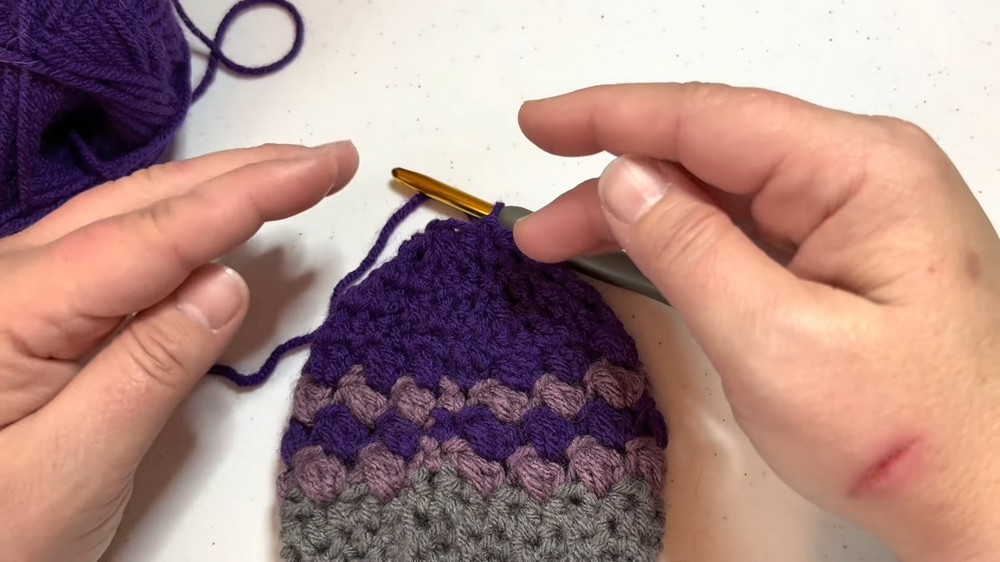
3. Puff Stitch Pattern
- Change colors if desired. Begin by pulling up your new color on a slip stitch for a clean transition.
- In each stitch, perform the following for the puff stitch:
- Insert the hook, yarn over, and pull up a loop through the stitch. Don’t finish the stitch—stop after pulling through the first loop.
- Yarn over and draw up the loops twice more, leaving multiple loops on the hook.
- Yarn over and pull through all loops on the hook and chain 1 to secure.
- Skip one stitch, repeat the puff, and chain 1 pattern around the row. Finish with a single crochet in the last stitch to close off.
- Continue alternating rows and optionally change colors every round to create a dynamic pattern.
4. Length and Sizing
- Continue puff stitch rounds until the hat measures between 7-10 inches in length, depending on preference (7–8 inches for a fitted beanie, 10+ for a slouchy style).
5. Decreasing and Closing the Hat
- Transition back to half-double crochets for the final rows.
- Begin decreasing by combining every 4th and 5th stitches into one half-double crochet 2 together (HDC2tog) until the top begins to tighten.
- Continue decreasing (from 4 to 3, then to 2, and so on) until only a small circle remains at the top.
6. Finishing
- Use a tapestry needle with a long yarn tail to weave through the remaining stitches at the top. Pull tightly to close.
- Weave the end inward, secure, and trim excess.

Tutor’s Suggestions
- Measure while you crochet. For gifts, the standard adult size is a 22-inch head circumference.
- Don’t stress over mismatched row counts—slight adjustments won’t affect the overall design.
- Use multiple colors (e.g., three shades) to make the puff stitch stand out. Alternating rows adds visual appeal.
- Tighten yarn neatly during color changes to avoid visible gaps in the pattern.
Uses
- Warm, cozy, and fashionable hats for adults or kids.
- Personalized seasonal gifts.
- Home decorations or toy-sized hats for display or crafting fun.
Tip of the Day
While crocheting with multiple colors, avoid cutting yarn at every transition. Instead, carry the unused yarn snugly along the inside of the hat, reducing unnecessary ends to weave.
Conclusion
This fun crochet hat pattern is a wonderful project packed with creativity and practical use. With an easy-to-follow puff stitch and adjustable length, it offers endless possibilities for unique designs. Whether you’re crocheting for practical wear or adding flair to a handmade collection, this charming hat will undoubtedly become one of your favorite go-to patterns.