
How to Crochet Striped Beanie Pattern That Are Bold and Beautiful
Stay cozy and stylish this winter with a vibrant Free Crochet Striped Beanie Pattern, perfect for adding charm to your outfits.
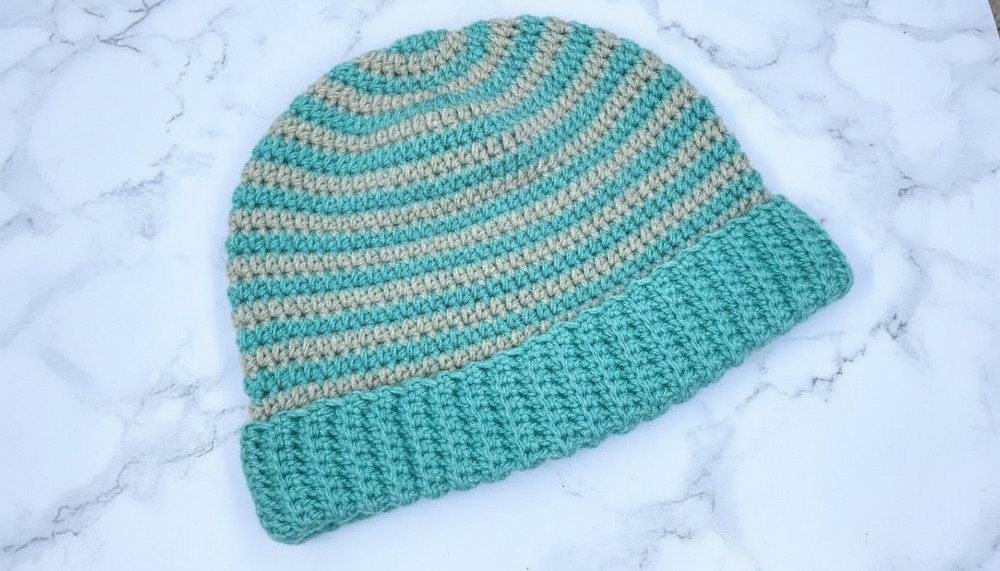
Perfect for chilly days, this striped beanie pattern combines warmth and style effortlessly. Featuring bold stripes and a modern design, it’s the ideal accessory to keep you cozy while adding personality to your outfits. Whether you’re running errands, heading out for winter walks, or looking for a thoughtful handmade gift, this pattern fits the bill flawlessly. It offers the benefit of customization, letting you choose colors and sizes to match your preferences or wardrobe needs.
Unique Crochet Striped Beanie Pattern to Level Up Your Casual Outfit
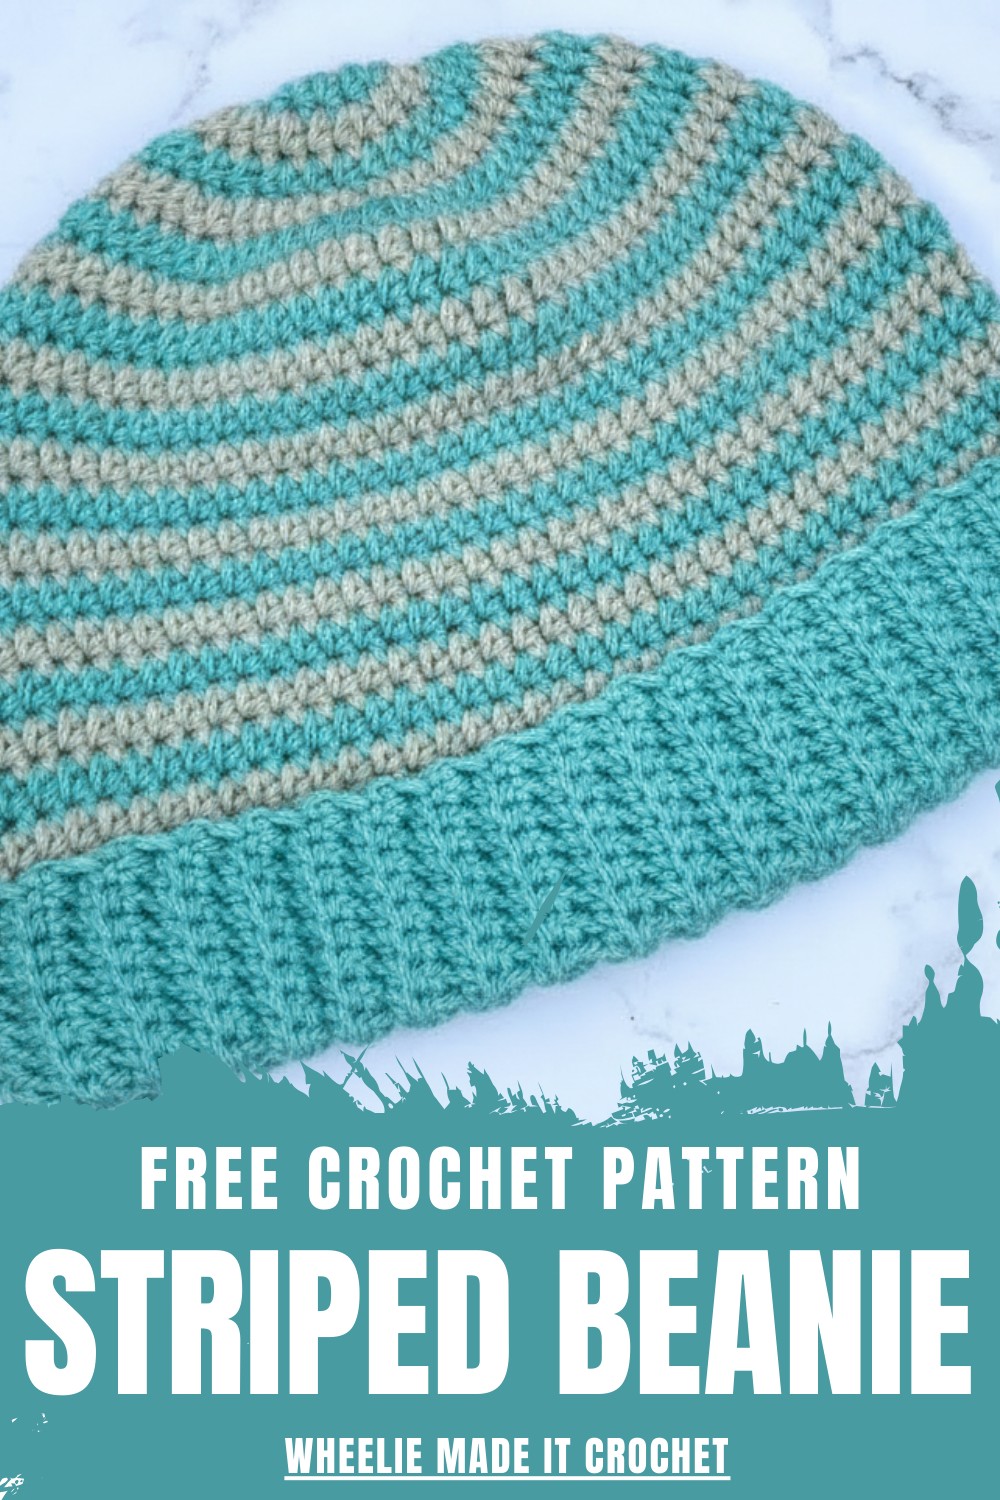
The lightweight yet snug pattern ensures all-day comfort, while the durable construction promises long-lasting use. Its seamless striped pattern adds a vibrant and clean look, making it stand out as more than just a functional winter hat. Not only is it a practical winter staple, but it also gives crochet enthusiasts a rewarding project to bring their creativity to life.
The pattern is simple enough to follow while still delivering a polished, professional result. Use soft and sustainable yarn to make it eco-friendly and even more special. This striped beanie isn’t just a hat—it’s a blend of comfort, utility, and personal flair, versatile for everyday wear or special occasions.
Materials Needed
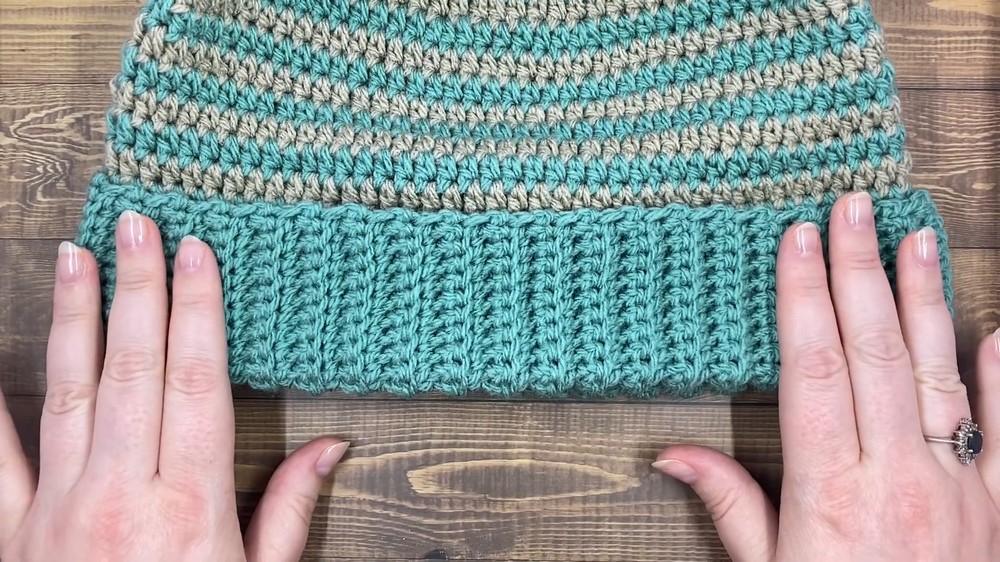
- Yarn: DK yarn (Two colors recommended). Example: 4 Seasons Marvel acrylic in "sea green" and "fawn."
- Hook Size: 4mm crochet hook.
- Notions:
- Two stitch markers (one for marking the start of the round and the other for the color change).
- Scissors.
- Big-eyed needle for weaving in ends.
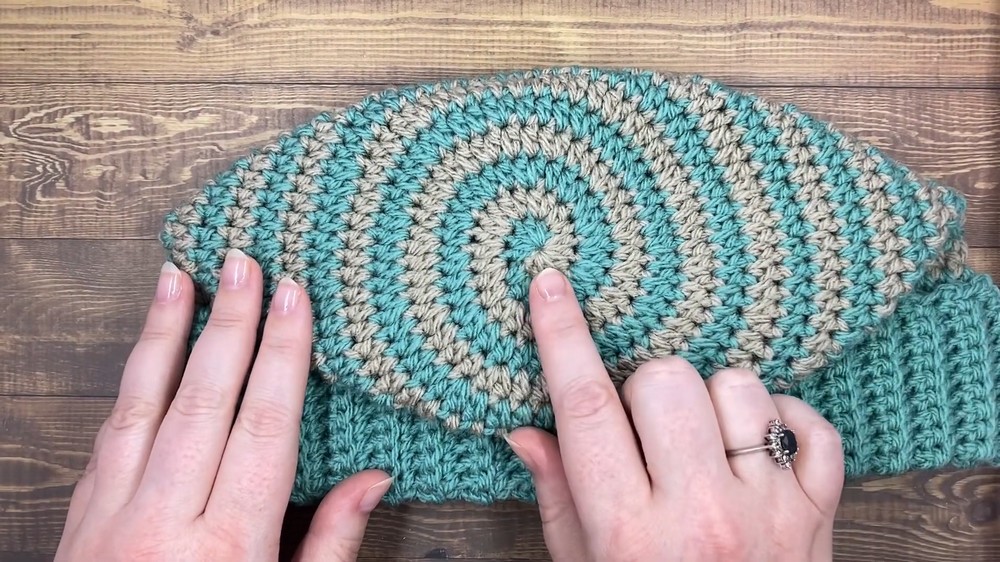
Features of the Spiral Beanie
- No Visible Seam: The unique pattern eliminates a visible seam on the back, resulting in a neat and professional finish.
- Customizable Fit: Adjust the number of rounds to achieve a slouchy or fitted beanie style.
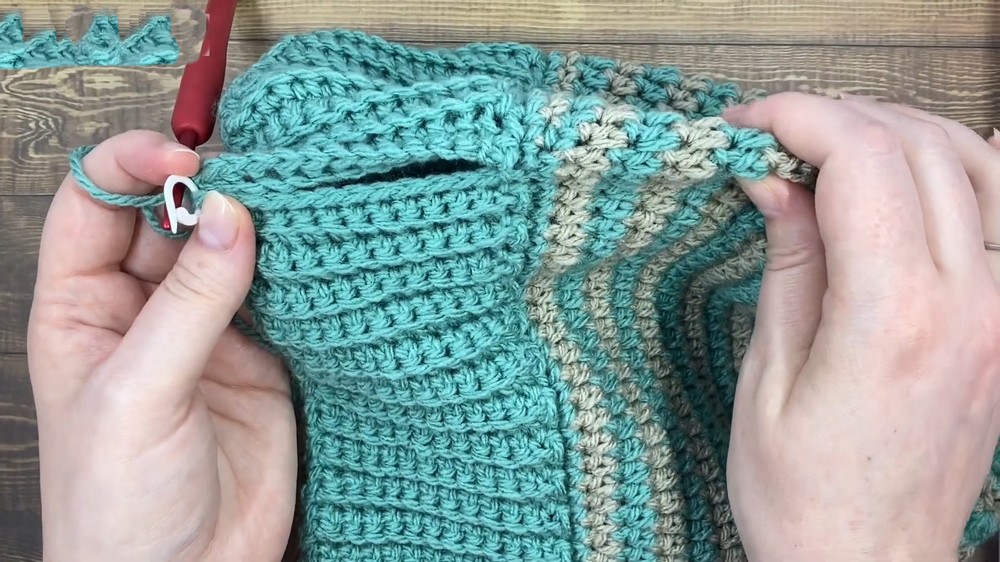
- Ribbed Band: The back loop single crochet ribbing creates a folded, snug band for extra warmth around the ears.
- Minimal Tail Weaving: If the yarn skeins have no breaks, you will only need to weave in 4 tails—saving time and effort.
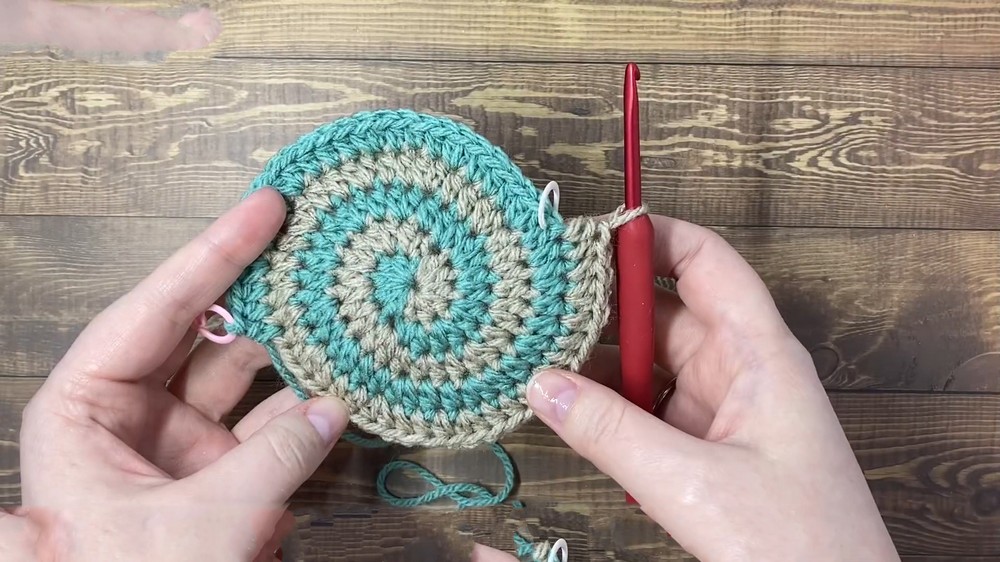
- Spiral Design on Top: A charming, signature spiral decorates the crown of the beanie.
Level of Difficulty
This project is suitable for intermediate-level crocheters due to its continuous rounds, color changes, and ribbing technique.
Tutor’s Suggestions
- Avoid Standing Stitches: To join the second color, use a slip knot and slip stitch into the magic circle rather than starting with a standing stitch. This helps achieve a cleaner look.
- Tightening the Magic Circle: Tighten the magic circle after the first round, but leave a little room for adding the second color.
- Customize Length: The slouchiness or fit of the beanie can be adjusted by adding or reducing rounds before starting the ribbed band. For a fitted look, stop after 18 rounds; for slouchiness, continue until round 20 or more.
- Seamless Ribbing: To reduce gaps at the ribbed edge, make the last single crochet of each ribbing row slightly tighter than usual.
Step-By-Step Instructions
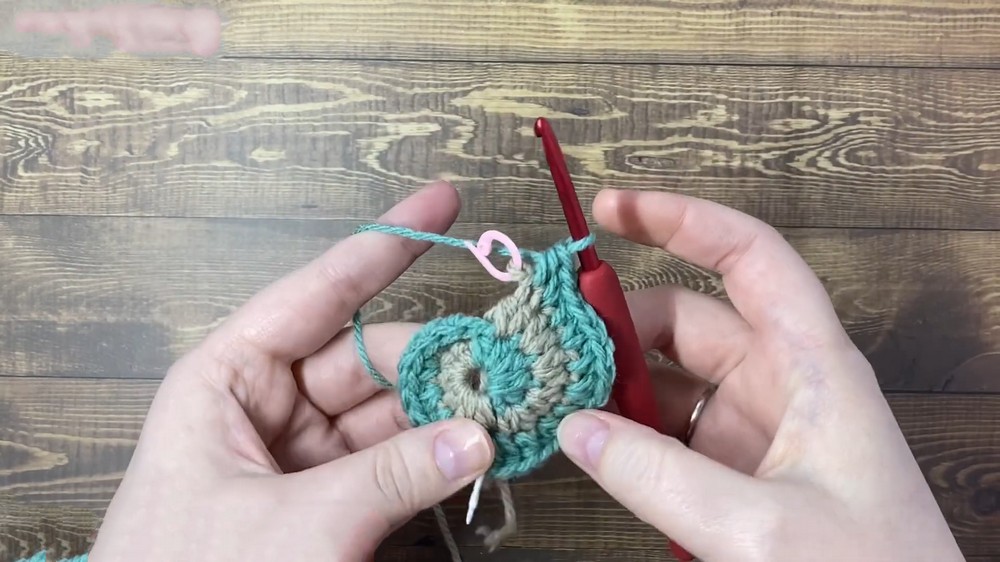
1. Begin with the Magic Circle
- Using color 1 (the color for the ribbed band), start with a magic circle.
- Work 5 half-double crochets into the circle (without chaining 1 before the first stitch).
- Mark the first stitch with a stitch marker.
2. Introduce Color 2
- Change to color 2 by tying a slip knot on your hook and slip stitching into the circle.
- Work 5 half-double crochets in color 2 to complete Round 1 (5 stitches per color).
3. Expand the Circle (Increasing Rounds)
- For Round 2, work 2 half-double crochets into each stitch, doubling the count to 10 stitches per color.
- Round 3: Follow a pattern of 2 half-double crochets in one stitch, then 1 half-double crochet in the next. Repeat.
- Repeat this increase pattern for subsequent rounds, gradually increasing the stitch count per color.
- Example: Round 4 has 20 stitches per color; Round 5 has 25 stitches per color, etc.

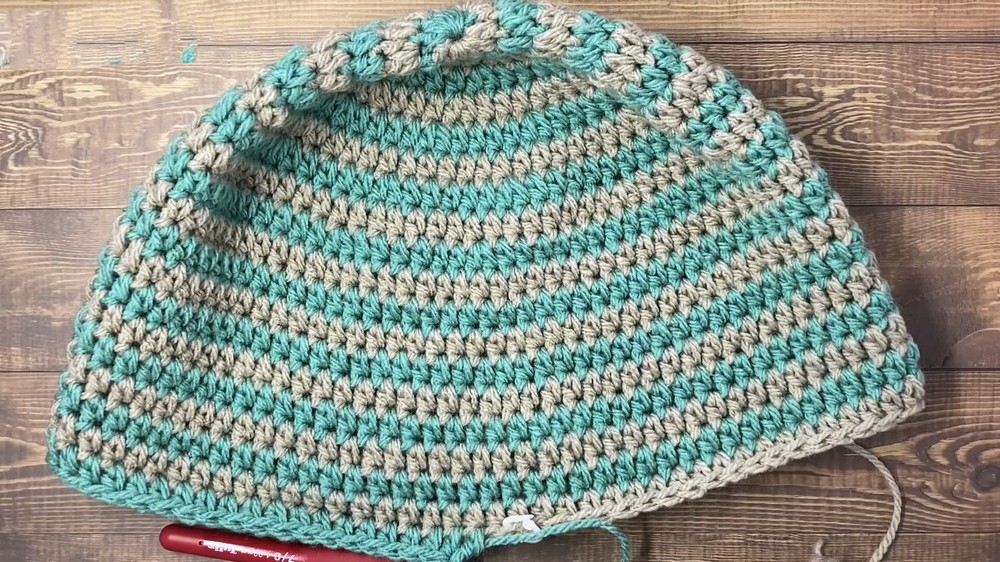
4. Switch to Straight Stitches (No Increases)
- Once the crown of the beanie is wide enough (after ~10 rounds), stop increasing.
- Create depth by crocheting straight rounds (1 half-double crochet per stitch) for the sides. Use stitch markers to ensure clean color transitions.
5. Measure the Beanie’s Length
- Measure from the crown to the base of the last stitch. For a slouchy fit, stop at ~19 cm or 7.5 inches. Adjust this length based on your slouch or fitted look preference.
6. Add the Ribbed Band
- Slip stitch into the next stitch, then chain 13.
- Work single crochets back down the chain, starting from the second chain (use the back bumps of the chain). You should have 12 single crochets.
- Slip stitch into the next 2 stitches on the beanie's base to attach the ribbing.
- Repeat the Pattern:
- Chain 1, turn, and work up the ribbing using back loop single crochet (11 stitches) and a tighter normal single crochet in the last stitch.
- Chain 1, turn, and work down the ribbing with back loop single crochets, ending with a tight single crochet.
- Attach to the base with 2 slip stitches, and repeat until the ribbing goes all the way around the beanie.
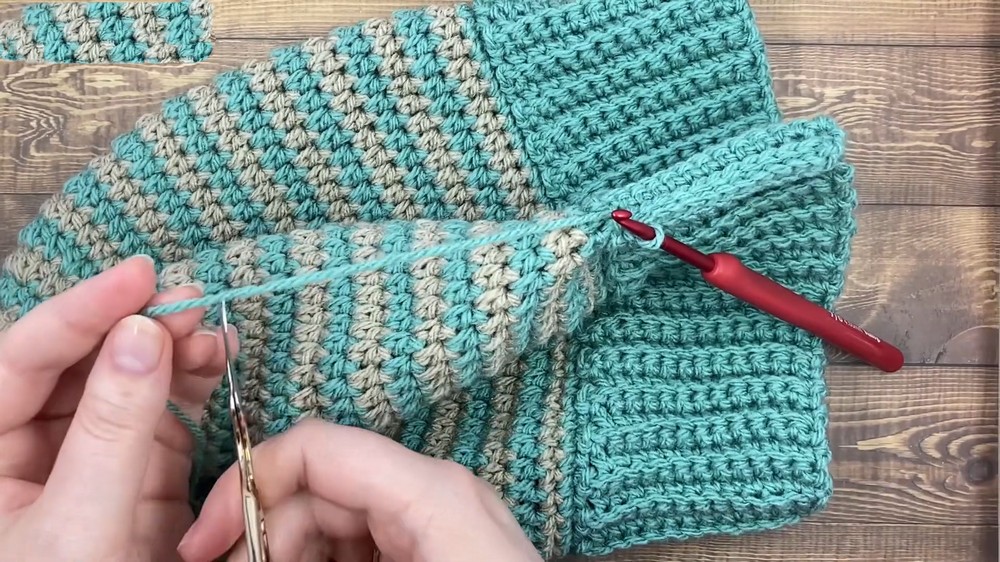
7. Finish the Ribbing
- Seam together the two edges of the ribbing with slip stitches or whip stitches.
- Weave in all the tails securely for a tidy finish.
Uses
- Winter Wear: The ribbed band provides extra warmth, making it ideal for cold weather.
- Stylish Accessory: The striped spiral pattern adds a chic, modern touch to your wardrobe.
- Gift Item: Handmade Spiral Beanies make a thoughtful and customizable gift for friends and loved ones.
Conclusion
The Spiral Beanie pattern is both functional and stylish, with its seamless design and warm ribbed band. Its customizable fit and unique spiral motif make it an enjoyable project for intermediate crocheters. Whether you wear it yourself or gift it, this pattern is sure to stand out.
Pro Tip
To ensure a perfect fit and enhance durability, measure your work frequently and maintain consistent tension. For the neatest finish, weave in your tails securely and use the invisible join wherever possible.