
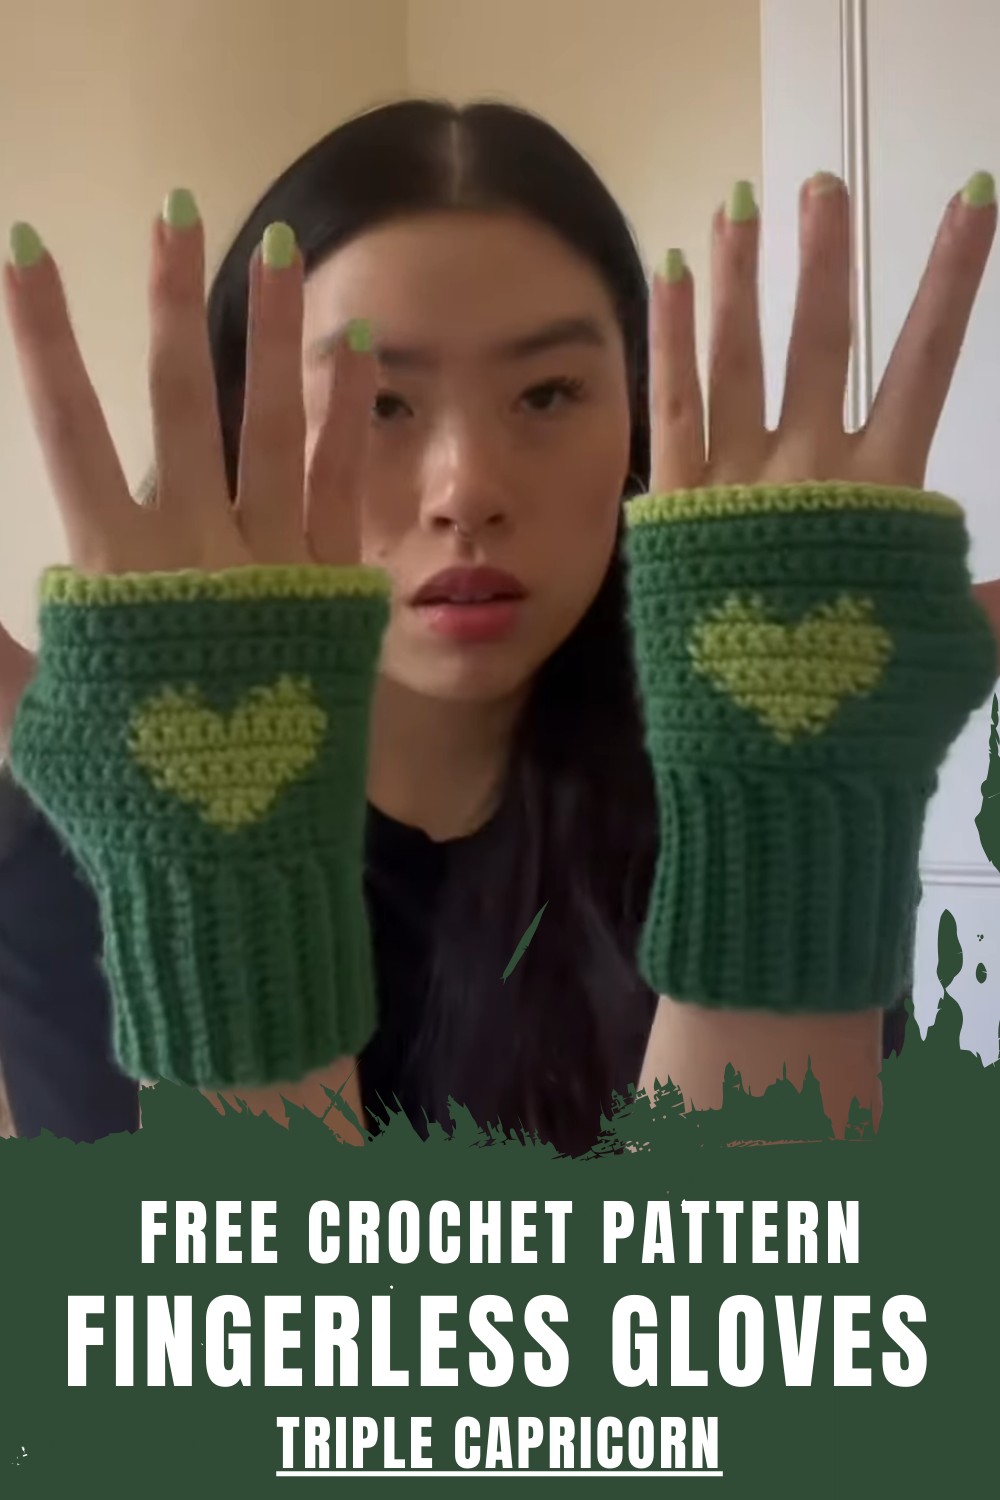
Simple Crochet Fingerless Gloves Pattern to Stay Stylishly Warm
Stay warm and stylish with this cute free crochet fingerless gloves pattern featuring a heart motif, perfect for gifting or everyday wear.
Chilly weather brings the perfect opportunity to combine fashion with functionality, and nothing does it better than fingerless gloves. Designed to keep your hands warm while leaving your fingers free for daily tasks, this pattern is versatile and stylish. The addition of a heart motif makes it even more special, offering a charming pattern that’s ideal for personal use or as a thoughtful handmade gift. Whether for accessorizing winter outfits or staying cozy while working at your desk, this pattern brings warmth and creativity together beautifully.
Charming Crochet Fingerless Gloves Pattern for Fashionable Warmth
The pattern includes helpful suggestions, such as securing a snug fit by regularly measuring as you crochet and managing yarn efficiently to maintain tidy color changes. This project is a satisfying way to sharpen your skills while producing a useful and charming handmade accessory. With just a little patience and attention to detail, you can crochet gloves that are practical, stylish, and full of personality.
Materials Needed
- Sharp scissors
- Stitch markers
- Darning needle
- Measuring tape
- 3.5 mm crochet hook
- Wool blend yarn (choose a main color and an accent color)

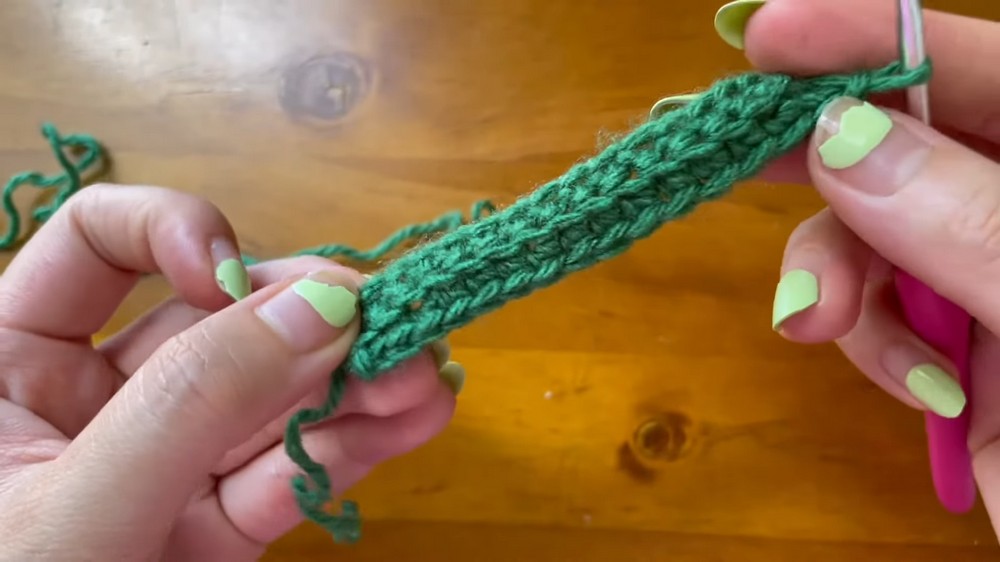
Begin the project with ribbing, chaining 16 and working 15 single crochet stitches into the back loop only across 35 rows. This creates a stretchy and comfortable ribbed design, perfect for a snug fit.
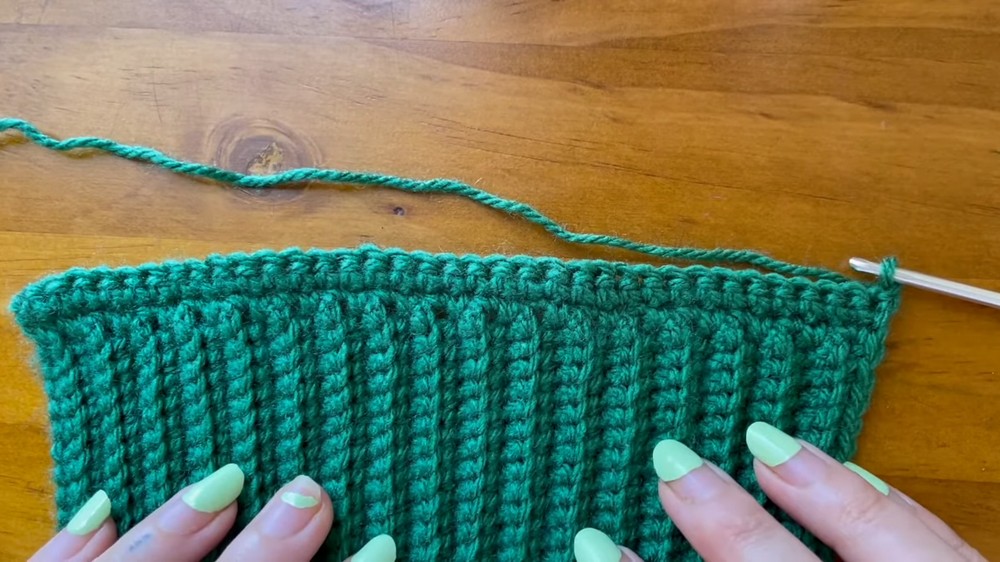
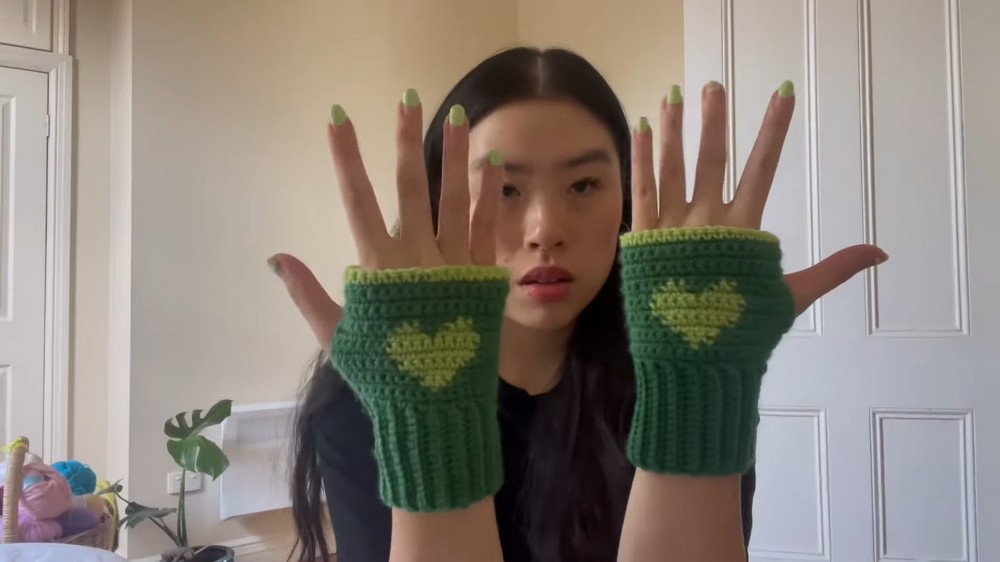
Once the ribbing is complete, stitches are worked along the side to build the palm. The glove’s standout feature, the heart motif, is introduced next using color changes with an accent yarn. Strategic stitching ensures clean and smooth transitions, with the heart positioned perfectly for visual appeal.
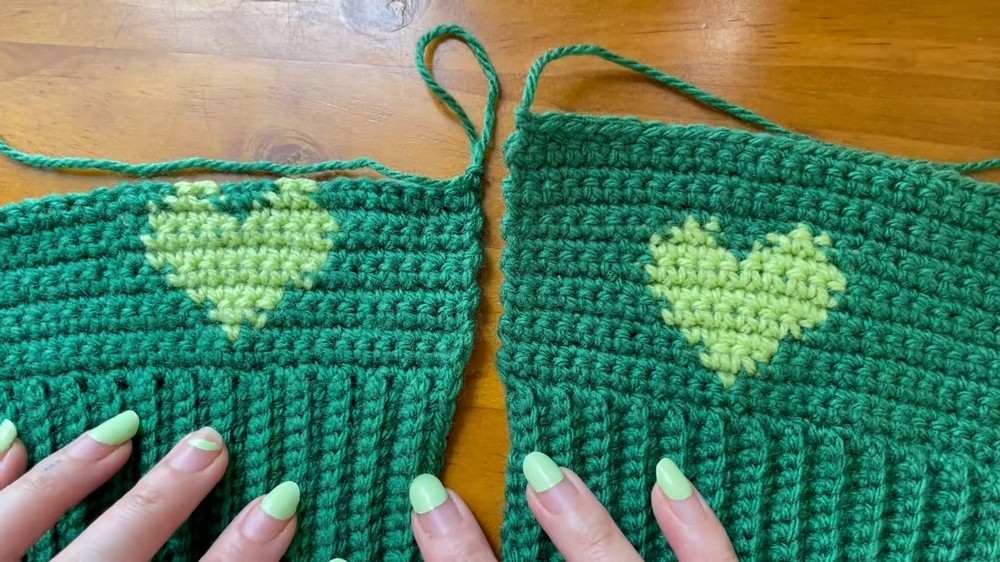
After the heart is complete, several rows of single crochet in the main color finish the palm. To assemble, fold the gloves in half and use slip stitches to seam the side, leaving space for the thumb opening. For a finishing touch, a decorative row in the accent yarn frames the top edge.
Special Features
The fingerless gloves feature a subtle heart motif created through color changes. Although this project appears intricate, it relies on straightforward single crochet stitches worked flat. The ribbing technique adds a professional touch without the need for advanced skills.
Level of Difficulty
This tutorial is not ideal for absolute beginners due to the complexity involved in color changes and forming the heart motif. However, with some basic crochet knowledge, it's an excellent project to refine your skills. The tutor suggests using sight and measurement to ensure a well-fitted glove, allowing you to personalize the pattern.
Tutor’s Suggestions
The tutor emphasizes frequent fitting while crocheting to ensure the gloves fit perfectly. Keep both yarns accessible when not in use for smooth color transitions and to prevent tangling.
Uses
These fingerless gloves are practical for chilly weather, allowing fingers to stay free for tasks requiring dexterity. The heart motif adds a personal touch, making them a thoughtful, handmade gift.
Step-by-Step Guide
This exciting step-by-step tutorial from Crochet Diaries, where we'll learn how to crochet fingerless gloves with a charming heart design. This project stands out for its simple yet elegant pattern, achieved by expert use of color changes and ribbing. If you're looking to keep your hands warm while showcasing your crochet skills, this pattern might just be perfect for you.
Conclusion
You've now completed a lovely pair of fingerless gloves that combine functionality with a heartwarming design. Congratulations on refining your crochet skills through this project.
Tip
When handling yarn for color changes, carry your previous color an additional two stitches past the transition to ensure tight and neat color transitions. This technique is crucial for achieving professional-looking results.