
Stylish and Cozy Crochet Star Stitch Hat Pattern for Beginners
Easy Steps to Crochet Star Stitch Hat Pattern That Slays Winter Looks
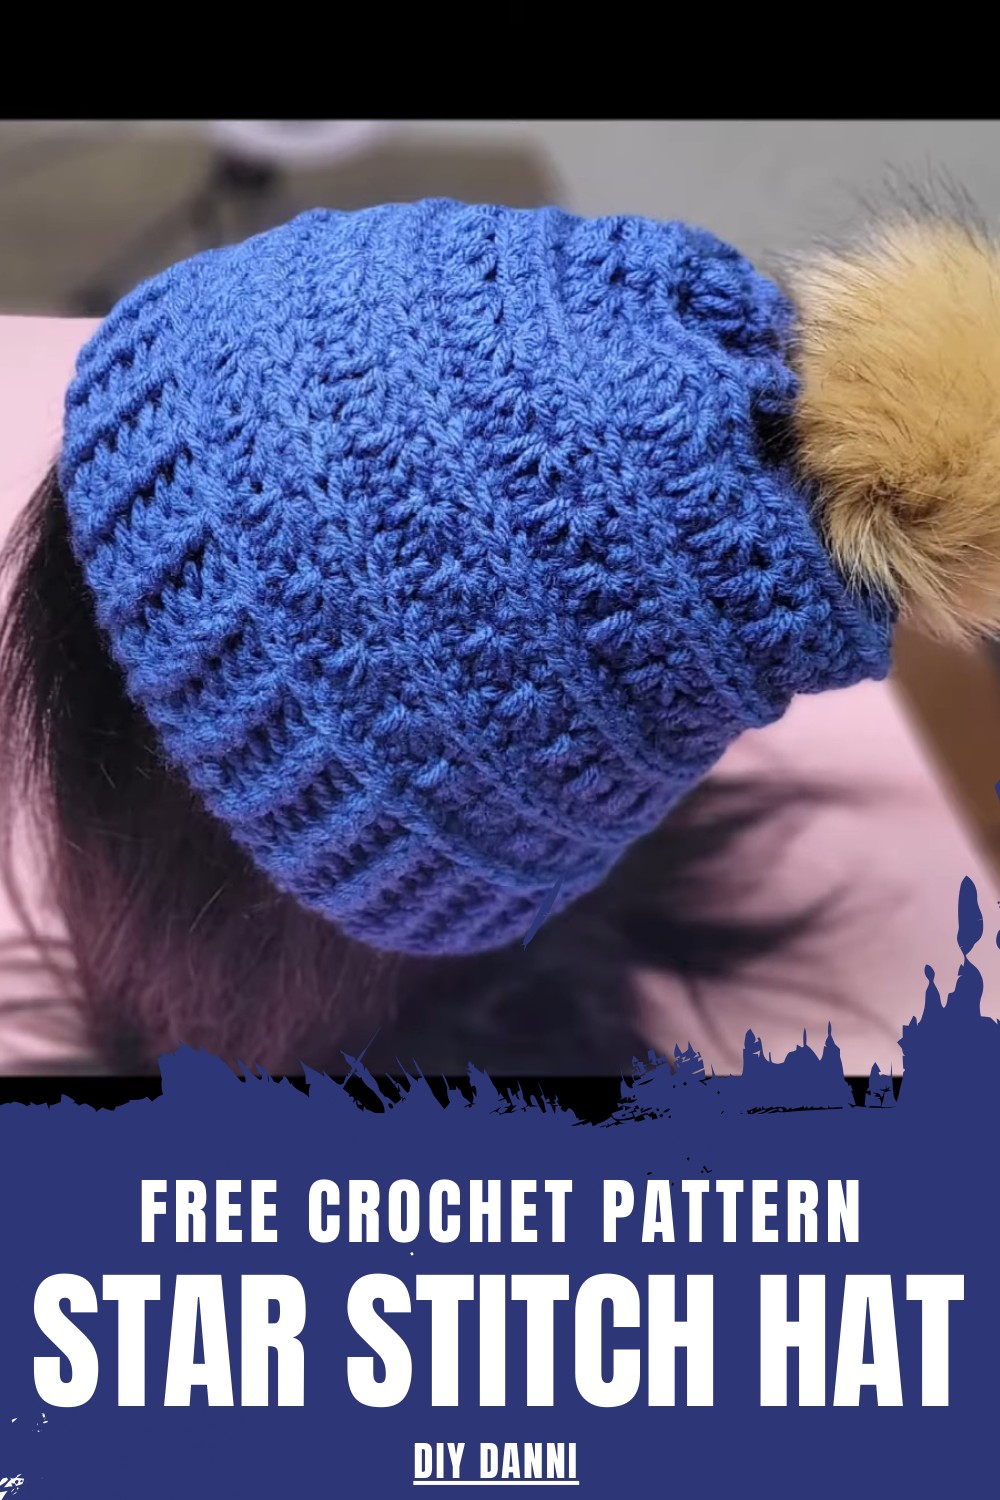
Whether you’re looking to expand your crochet skills or need a quick, heartfelt gift, this pattern is an excellent choice. It’s designed to suit all skill levels, offering a project that’s engaging without being overwhelming. The hat's customizable pattern allows you to play with colors, yarn types, and even optional embellishments like pom-poms or buttons, so it matches your personal style perfectly.
Beyond its aesthetic appeal, the snug fit and soft fabric make it comfortable for everyday wear, ensuring both function and fashion in one simple pattern. With a few simple materials and a bit of time, you’ll have a chic, handmade hat that’s sure to impress while keeping you cozy all winter long.
Materials Needed
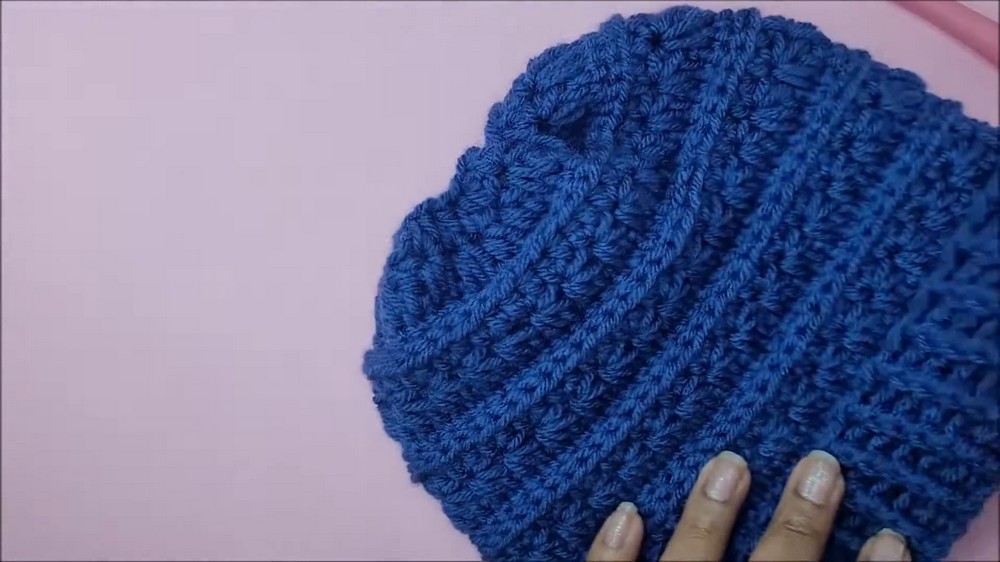
- Yarn: 4-ply medium-weight yarn in your favorite color (used: Shadow Blue).
- Hook Size: 6mm crochet hook.
- Other Tools: Yarn needle for sewing the top of the hat closed, scissors, and an optional pom-pom for decoration.

Special Features
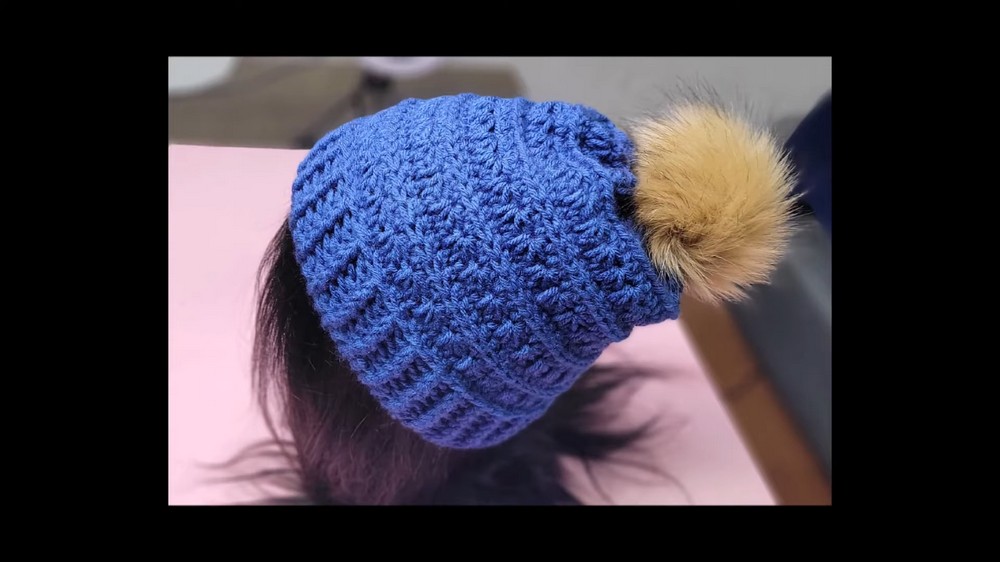
- Elegant Texture: The star stitch adds a unique, textured pattern that stands out and makes the hat shine.
- Customizable Band Width and Depth: The ribbed band and overall hat depth can be adjusted to your personal preferences.
- Fits Most Sizes: The pattern works for standard adult head sizes, but the chain length can be modified for smaller or larger heads.
- Versatile Design: The hat looks great as-is or with added embellishments like a pom-pom for extra flair.
Skill Level
This pattern is intermediate-friendly, although even confident beginners can master it by following the detailed instructions step by step. The star stitch may feel slightly tricky at first, but, becomes easier with practice.
Step-by-Step Instructions
1. Making the Foundation Chain
- Start by creating a foundation chain that fits snugly but comfortably around your head. Use a multiple of 3 chains to ensure proper alignment. For standard adult sizes, chain 19 inches (unstretched), which stretches to a typical head circumference of 20–21 inches.
2. Create a Ring
- Once you have your desired chain length, flatten the chain to avoid twisting, then slip stitch into the first chain to form a ring. Chain 1 to begin the first row.
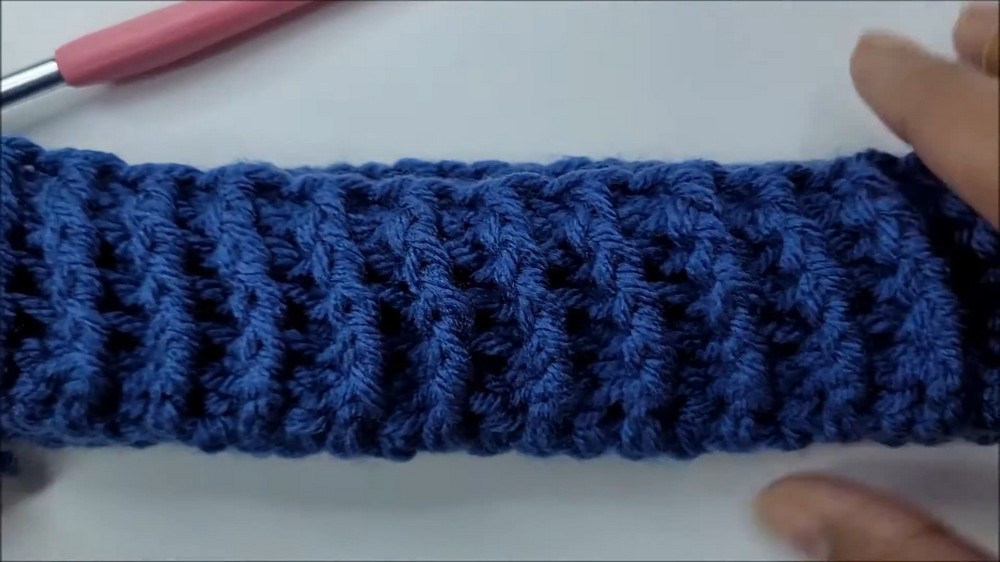
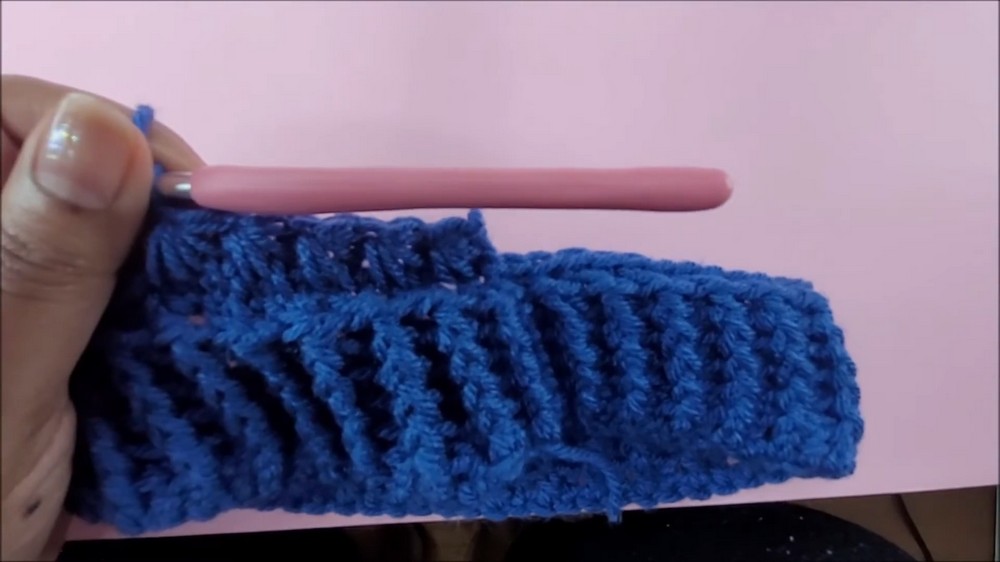
3. Start the Band (Ribbed Stitch)
Row 1:
- Work 1 half double crochet (HDC) into each stitch around the chain. Slip stitch into the starting chain to complete the row.
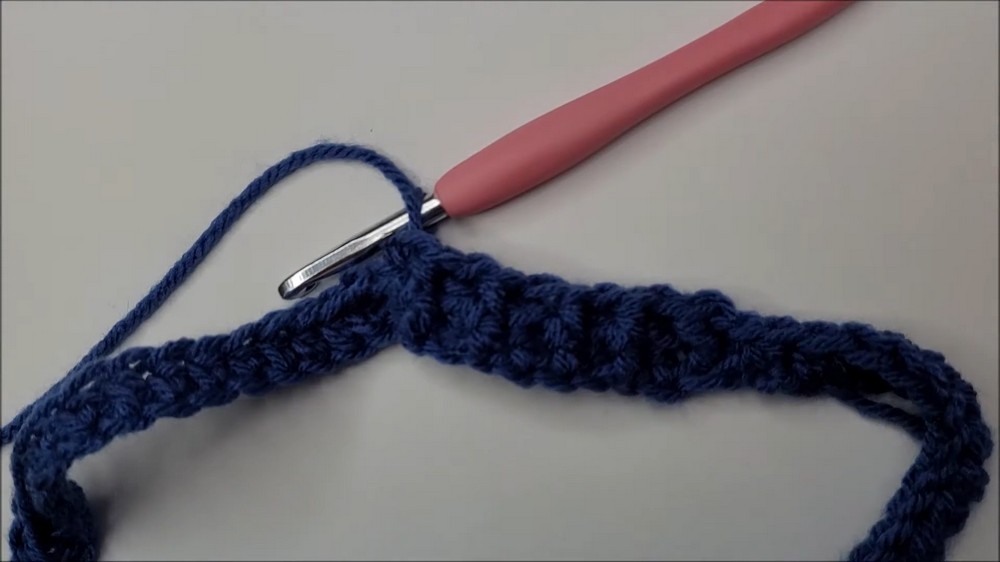
Rows 2-5:
- Create a ribbed band by alternating front post half double crochet (FPHDC) and back post half double crochet (BPHDC) stitches. Repeat the FPHDC/BPHDC pattern for 3–5 rows, or until you’re satisfied with the band width (approximately 2 inches).
4. Start the Hat Body
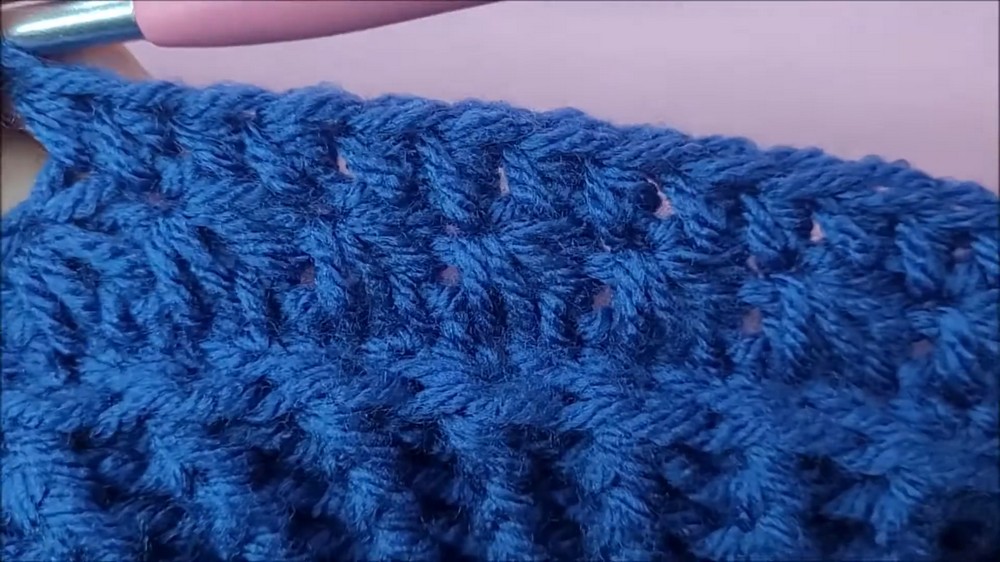
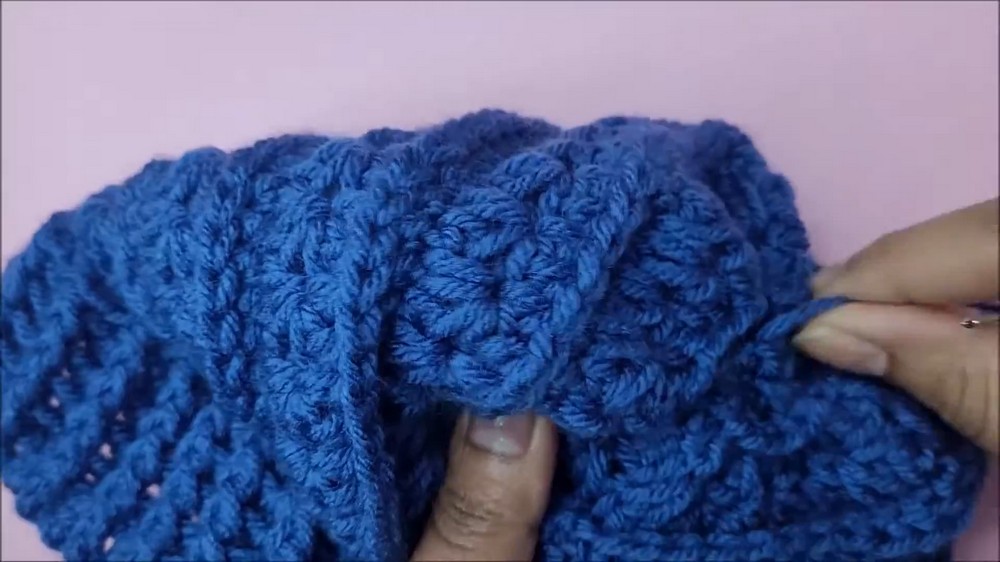
The body of the hat alternates between three-row repeats: single crochet in the back loop, star stitch, and half double crochet.

Row 1 (Single Crochet in the Back Loop):
- Chain 1. Flip your stitches toward you and identify the small bump behind each stitch. Work 1 single crochet into this back bump for the entire row to create an outward-facing braid texture. Slip stitch to close the row.
2 (Star Stitch):
- Start with a chain of 3. To form each star stitch:
- Insert the hook into the second chain from the hook, pull up a loop (2 loops on the hook).
- Insert into the next chain, pull up another loop (3 loops on the hook).
- Insert into the base of the chain, pull up a loop (4 loops on the hook).
- Insert into the next stitch, pull up a loop (5 loops on the hook).
- Repeat once more (6 loops on the hook).
- Yarn over and pull through all 6 loops, then chain 1 to lock the star.
- Repeat the process, working the next star in the space at the base of the previous star.
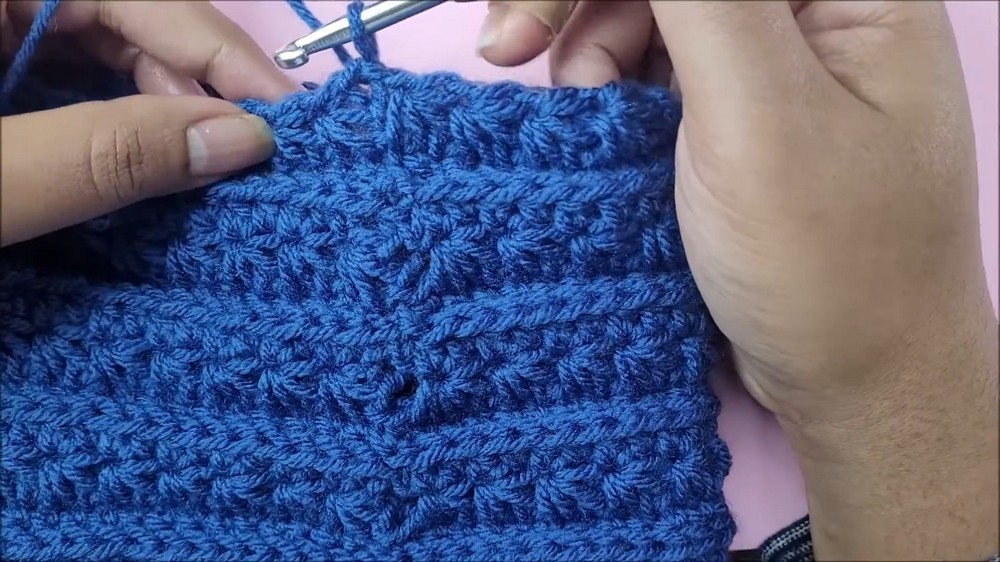
3 (Half Double Crochet):
- Work 1 HDC into the center of each star and 1 HDC into the side of the star stitch. Repeat around the row and slip stitch to close.
5. Repeat the Three-Row Pattern
- Repeat the steps (Row 1: Single crochet in the back loop, Row 2: Star Stitch, Row 3: HDC) for as many sets as needed to achieve the desired depth of the hat. For a snug fit, 5 sets of this three-row pattern are ideal.
6. Decreasing the Crown of the Hat
Once the body is complete, begin decreasing to bring the hat's top together.
Row 1 (Decrease with Half Double Crochet):
- Work HDC 2 Together by combining the side of the star and the center of the star into one stitch. Repeat this all the way around.
Row 2 (Decrease with Single Crochet):
- For this row, work single crochet 2 together by combining two back-loop stitches into one. Repeat around the row.
Closure:
- After completing the decreases, leave a long tail. Weave the tail through the remaining stitches using a yarn needle. Pull it taut to close the top of the hat securely.
Tutor’s Suggestions
- Scale the Band and Hat Depth: You can make the band wider or narrow and adjust the number of star stitch rows for a fitted or slouchy look.
- Take Your Time with the Star Stitch: It may feel intimidating, but slow and steady progress will help you master it.
Uses
- Stylish Winter Wear: Keep stylishly warm in the cold months.
- Customization Opportunity: Personalize the hat with different colors, textures, or accessories like pom-poms.
- Perfect Gift: Handmade crochet hats make thoughtful gifts for friends and family.
Pro Tip
To ensure a polished and professional finish, block your hat using a steam iron or spray bottle to even out the texture and bring out the star stitch design beautifully.
Conclusion
This crochet star stitch hat tutorial is perfect for anyone looking to crochet a cozy yet chic accessory. With its ribbed texture, stunning star stitch rows, and versatile fit, this hat is both stylish and functional. Once completed, you’ll have a unique piece that shows off your crochet skills and creativity! Add your personal flair with a pom-pom or different yarn colors.