
Free Crochet Baby Newsboy Cap Pattern for Precious Moments
Give your little one a stylish and adorable look with this free crochet baby newsboy cap pattern that is simple to create and adds charm to any baby outfit.
A little baby accessory has been quietly winning hearts everywhere, a tiny cap with a soft brim that’s as fashionable as it is adorable. This baby newsboy cap is the kind of thing that makes everyone stop and gush over its charm. Whether it’s for keeping a baby cozy, dressing them up for a special day, or adding a touch of personality for precious photos, this cap is more than just a head covering, it’s a statement of care and cuteness all in one.
Joy Torralba’s YouTube tutorial showcases exactly how to make this captivating baby accessory with ease. From learning the magic ring technique in the first round to adding the delightful brim as a finishing touch, Joy ensures the process flows smoothly. By the end of her step by step explanation, you're left with a piece that looks just as good as something you’d find in a boutique but is made with your own hands and heart.
Free Crochet Baby Newsboy Cap Pattern Moms Will Love
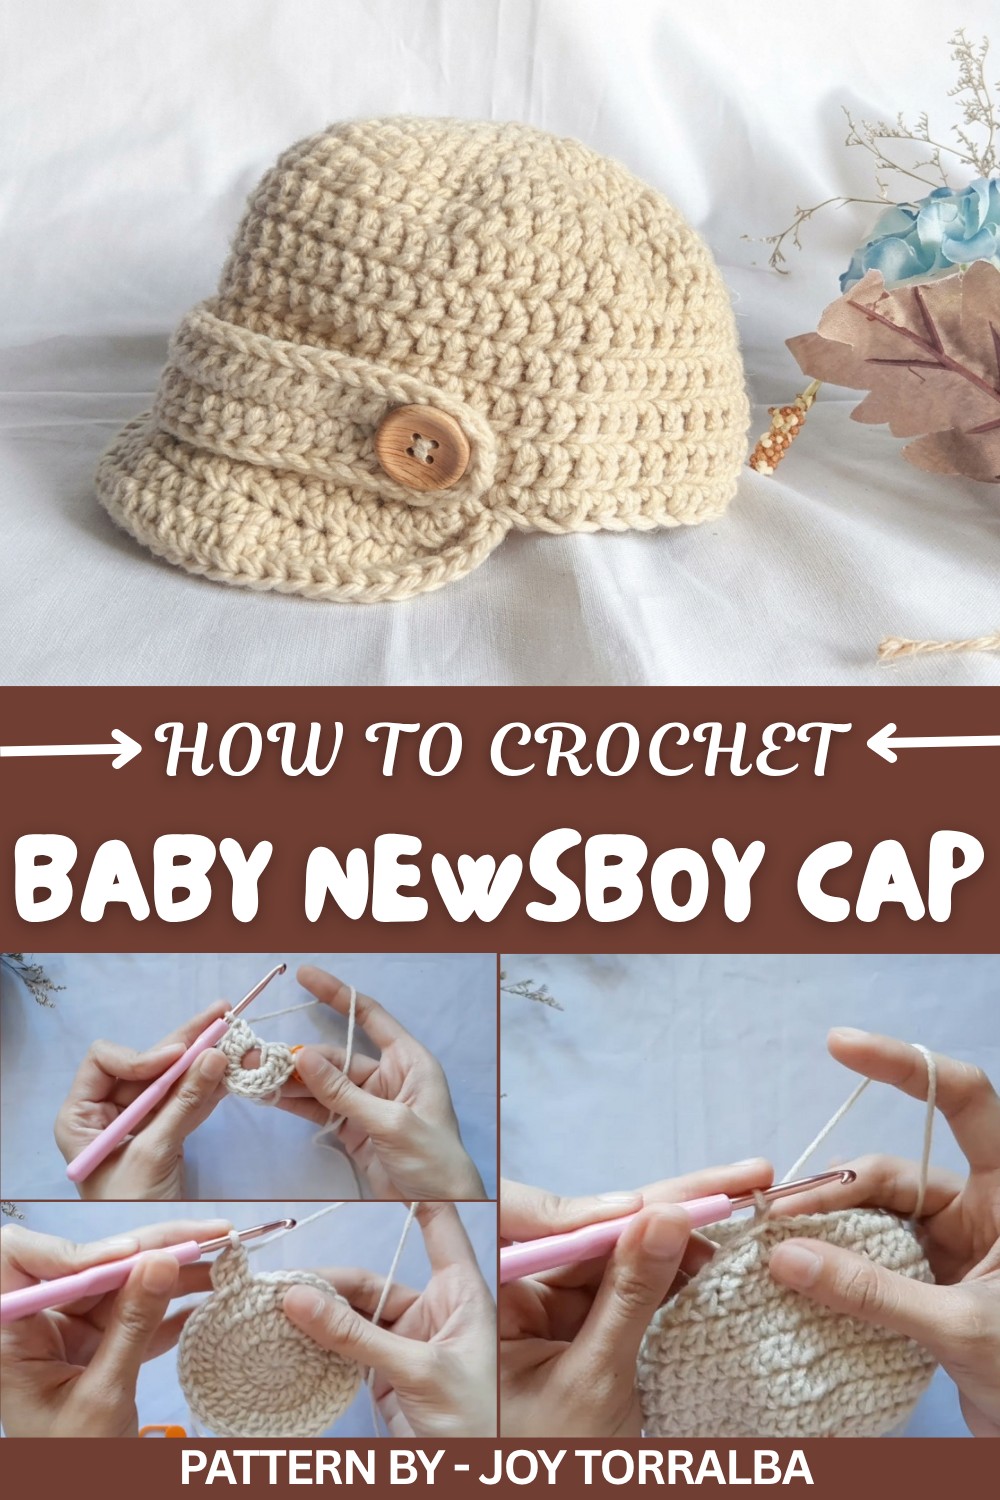
What makes this cap stand out is its thoughtful shape and style. The round crown fits gently onto a baby’s head, keeping them comfortable and warm. The small brim adds a playful yet sophisticated touch, making it an accessory that works for any occasion. By adding optional buttons or choosing customized yarn colors, each cap can be made uniquely personal. It’s not just a practical baby item, it’s a way to celebrate the joy of welcoming a new little one into the family.
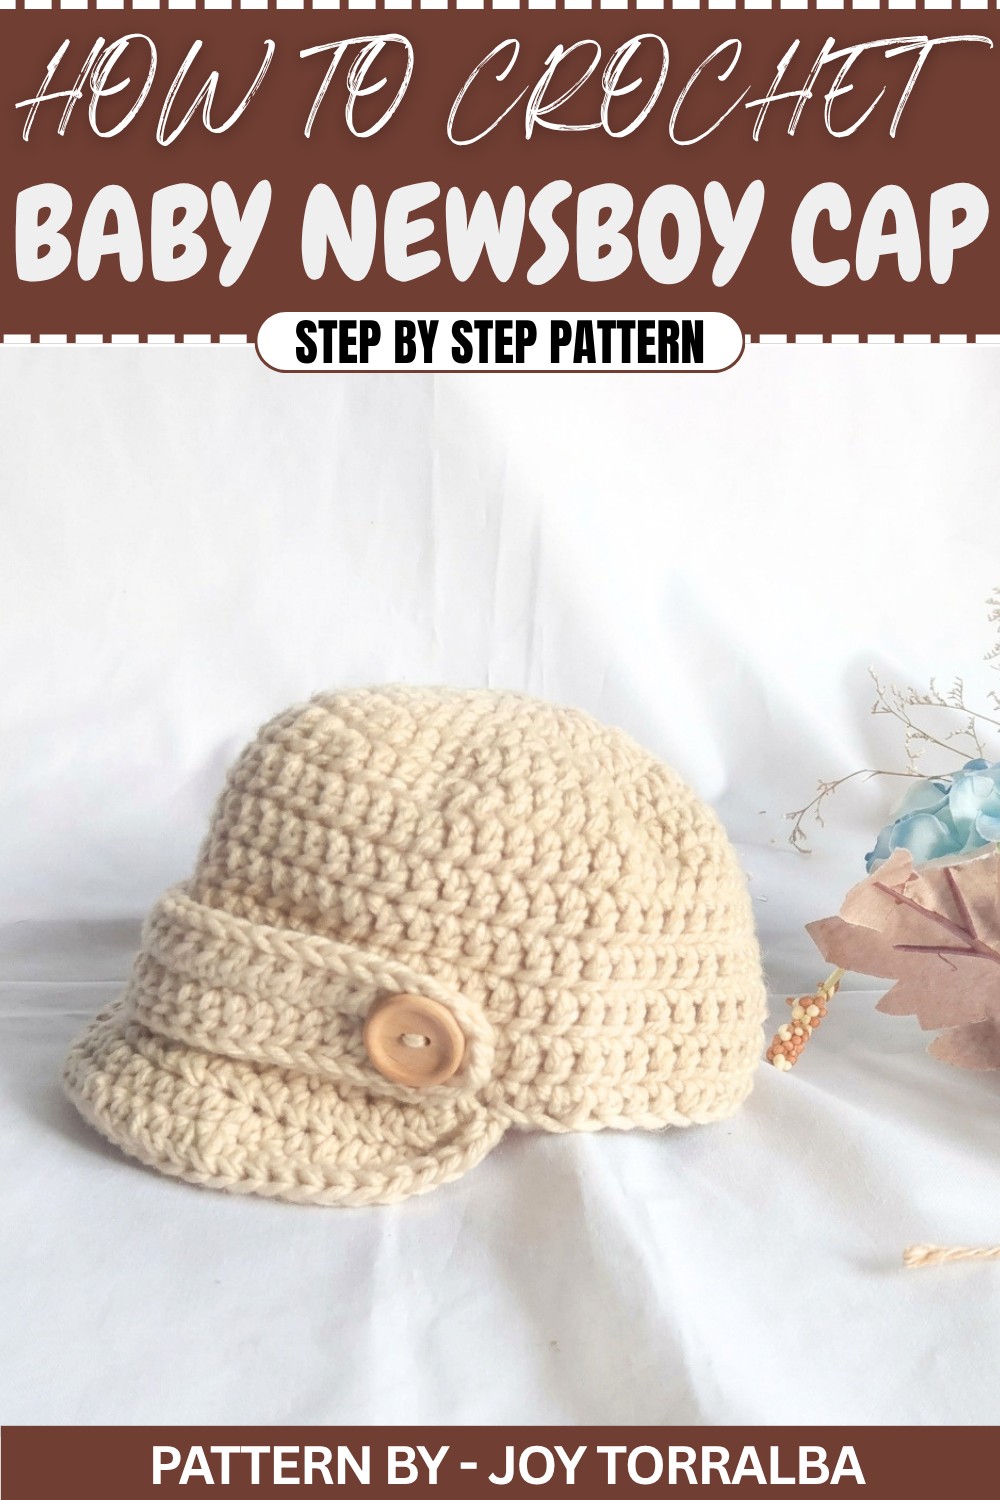
For anyone looking to make a meaningful gift or a keepsake treasure, this newsboy cap is a sweet and rewarding choice. It’s tiny, adorable, and filled with personality.
Newborn Newsboy Cap – Free Crochet Pattern
Quick Overview of Pattern
- Skill Level: Beginner friendly
- Size: Newborn
- Techniques Used: Magic ring, double crochet (dc), half double crochet (hdc), increase, and decrease
- Features: A textured crown, a neat brim, and button detailing
Notes
- Ensure you maintain even tension throughout the project.
- A stitch marker can make keeping track of rounds easier, especially if you're a beginner.
- Cotton yarn is recommended for its softness and durability, especially for baby items.
- The chain at the start of each round is not counted as a stitch unless otherwise stated.
Skill Level
- Beginner: This pattern uses basic stitches and is suitable for crochet newcomers ready to follow along with step by step instructions.
Materials
- Cotton yarn (soft and baby friendly)
- 4 mm crochet hook
- Tape measure
- Buttons for decoration
- Stitch markers
- Needle for weaving in ends
- Scissors
Measurements / Sizing
- Crown Diameter: 3.5 to 4 inches (ideal for newborns)
- Hat Height: 4.25 to 5 inches
Gauge
- 2 inches = 8 double crochet stitches x 5 rows.
- Gauge is important in shaping the crown, so measure at the end of a few rounds to verify the size matches.
Stitch Abbreviations
- ch = Chain
- dc = Double Crochet
- hdc = Half Double Crochet
- sl st = Slip Stitch
- st(s) = Stitch(es)
- inc = Increase (two stitches in the same st)
- dec = Decrease (combine two stitches into one)
Special Stitches
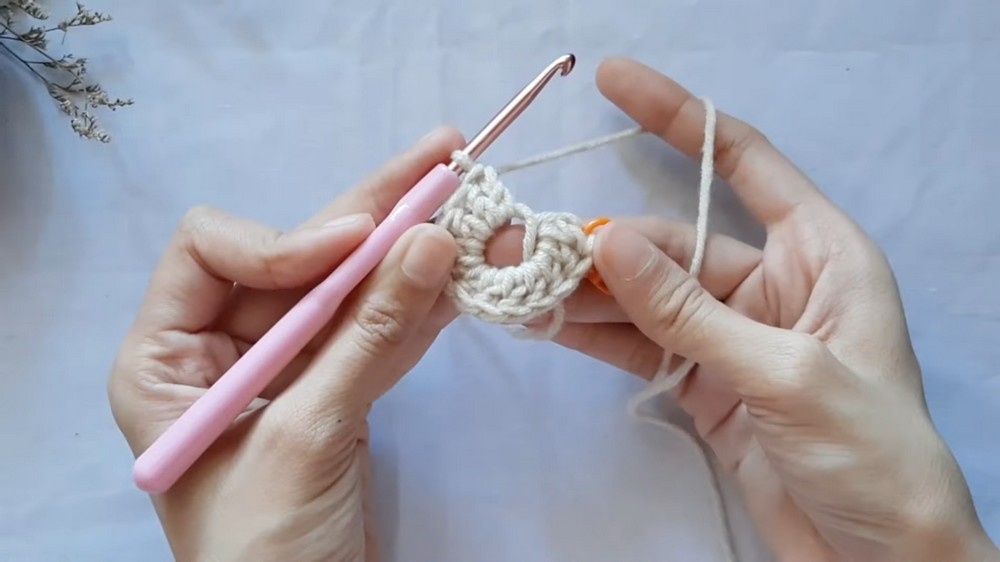
Magic Ring:
- Twist the yarn around your fingers to form a ring with the yarn tail at the bottom.
- Insert your hook into the ring, yarn over, and pull the yarn through to form a loop.
- Secure the loop with a ch2 to lock the magic ring in place.
Half double crochet decrease:
- Yarn over, insert your hook into the first st, yarn over again, and pull through.
- Yarn over and insert into the next st, yarn over, pull through. You now have five loops on your hook.
- Yarn over one last time and pull through all loops.
The Crochet Pattern
Step 1: Start the Crown
- Create a magic ring: Twist the yarn and hold it in place with one hand while inserting your hook into the loop.
- Secure the ring with a ch2, which will serve as the turning chain and is not counted as a stitch.
Round 1:
- Yarn over, insert the hook into the loop, yarn over, and pull through the loop.
- Yarn over again and pull through the first two loops on the hook.
- Yarn over and pull through the remaining two loops. This is your first double crochet stitch (dc).
- Add a stitch marker to identify your first st. Create 11 more dc into the magic ring for a total of 12 dc.
- Pull the magic ring closed by tugging on the yarn tail. Slip stitch (sl st) into the first st to join the round.
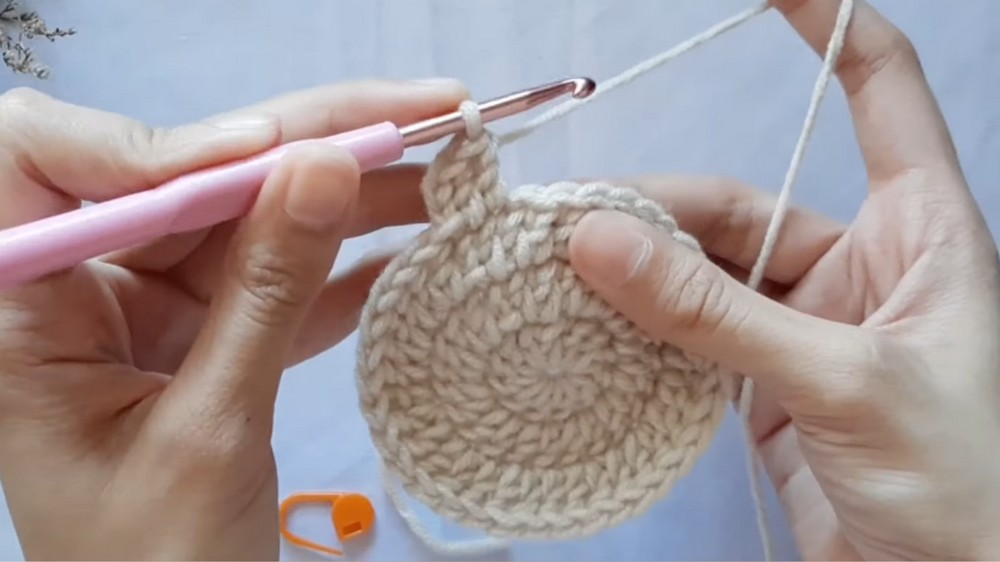
Step 2: Increase the Crown
Round 2:
- Ch 2 (not counted as a st).
- Work 2 dc into each st around. You’ll have a total of 24 dc by the end.
- Slip stitch into the first st to join the round.
Round 3:
- Ch 2 (not counted as a st).
- Work 1 dc in the first st, then 2 dc into the next st. Repeat this pattern (1 dc, 2 dc) all the way around. This will give you 36 dc in total.
- Slip stitch into the first st to join the round.
Round 4:
- Ch 2 (not counted as a st).
- Work 1 dc in the first 2 sts, then 2 dc in the next st. Repeat the pattern (1 dc, 1 dc, 2 dc) all the way around. Total: 48 dc.
- Slip stitch into the first st to join the round.
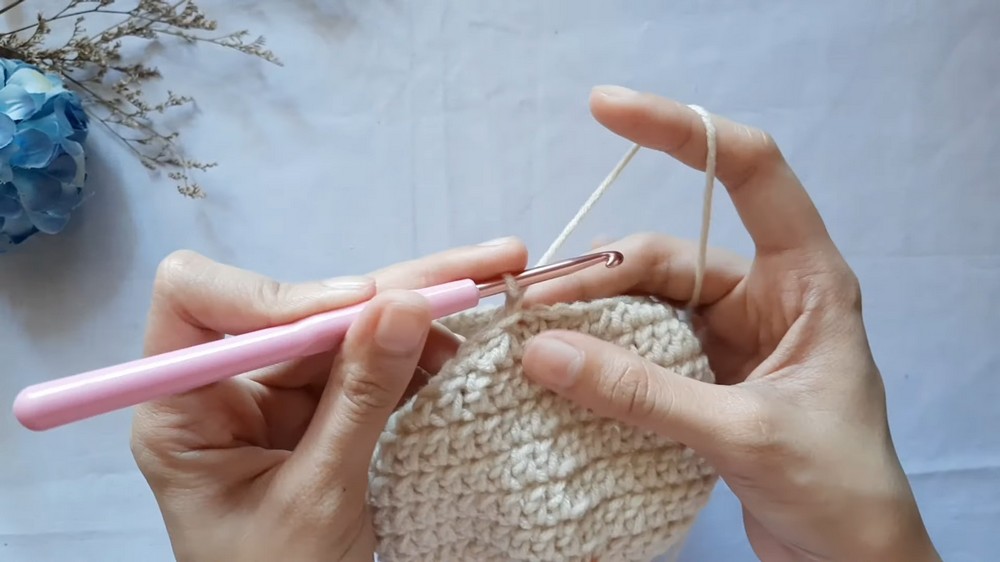
Step 3: Additional Crown Increases
Adjust for the correct crown diameter. For a newborn size, aim for a diameter of 3.5 to 4 inches.
Round 5 (Optional):
- Ch 2. Work 1 dc in the first 3 sts, then 2 dc in the next st. Repeat (1 dc, 1 dc, 1 dc, 2 dc) all around. Total: 60 sts.
- Slip stitch to join the round.
Step 4: Shaping the Height
Rounds 6–8:
- Ch 2 and work 1 dc into each st around. Repeat for additional rounds until the hat height reaches 4.25 to 5 inches.
- At the end of the last round, slip stitch to join.
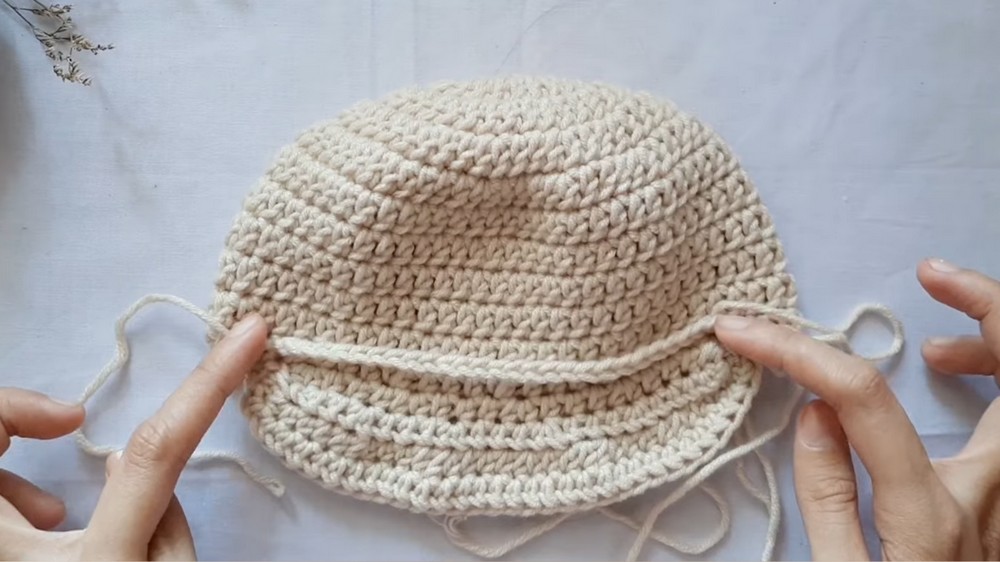
Step 5: Decrease for the Final Round
Work a decrease round to slightly tighten the brim:
Last Round:
- Ch 1. Work 1 hdc in the next 3 stitches, then 2 hdc worked together (decrease). Repeat this pattern (1 hdc, 1 hdc, 2 hdc together) all around. Total: 48 sts.
Step 6: Add the Brim
Step 1:
- Use two stitch markers to mark 24 stitches on the front of the hat. These will form the brim’s section.
Step 2:
- Attach yarn at the first stitch marker and ch 1.
- Work 1 hdc into each of the stitches up to the second marker.
Step 3:
- For the second row on the brim, ch1, turn your work, and work hdc stitches across. Add increases (2 hdc in 1 stitch) every 3 stitches in the row for shaping.
Step 4:
- Repeat the process of adding increases every 3 or 4 stitches until the brim reaches your desired width.
Step 7: Add the Band and Attach Buttons
- Chain 26 stitches to create the band (length may vary based on your preference).
- Add 2 more chains as your turning chain. From the third chain, work 1 dc across all chains. Add 4 dc into the last chain for the curve. Continue working 1 dc into each chain on the opposite side. Finish the last chain with 2 dc.
- Slip stitch to join the band and fasten off the yarn.
- Use yarn tails and a needle to attach the band to the hat, ensuring it spans evenly and securely across the brim.
- Sew buttons on either side of the band for decoration.
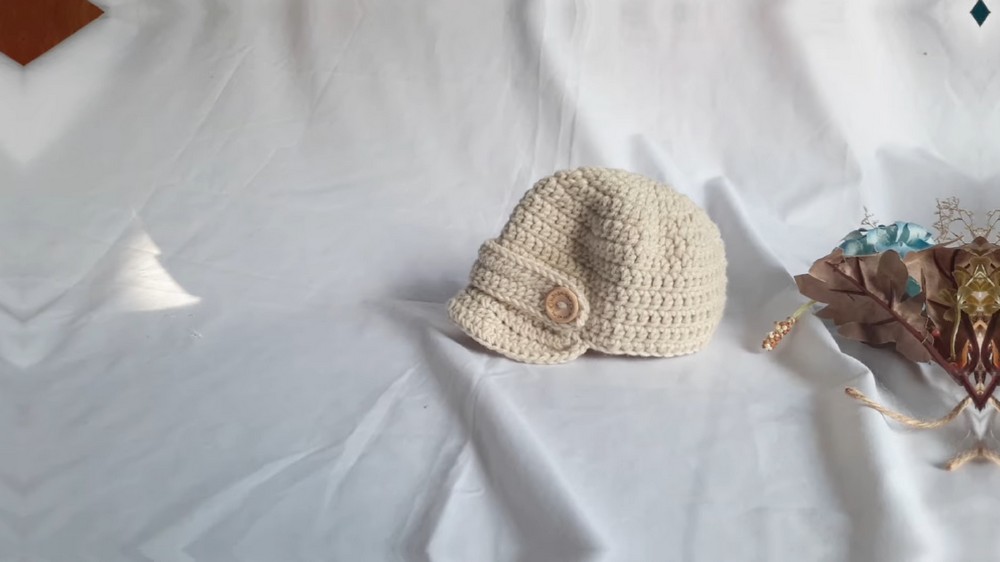
Assembly & Finished Size
- Weave in all yarn tails securely using a needle. Cut the excess thread to avoid undoing.
- Final dimensions: Crown diameter: 3.5 to 4 inches. Hat height: 4.25 to 5 inches.
- Ensure buttons and other decorations are securely fastened to avoid any hazards for babies.
Conclusion
Congratulations! You’ve just completed a beautiful and classic newborn newsboy hat. This easy to follow pattern is the perfect gift for baby showers, newborn photoshoots, or just keeping a little one stylish and cozy.