
Coquette Crochet Ribbon Bag Pattern for a dainty look
Accessorize your outfits with this crochet ribbon bag pattern, which provides silky textures unusually wonderful for weddings and parties.
Infusing a classic accessory with a glossy and high-fashion finish a crochet ribbon bag pattern serves as a premier guide for a vessel that radiates feminine grace. This design utilizes smooth and flat textile strips to produce a shimmering surface that catches the light with every movement. The finished item functions as a glamorous companion for evening galas or a chic accent for a weekend brunch providing a sturdy yet flexible space for a phone, wallet, and cosmetics.
Effortless Crochet Ribbon Bag Pattern with massive style impact
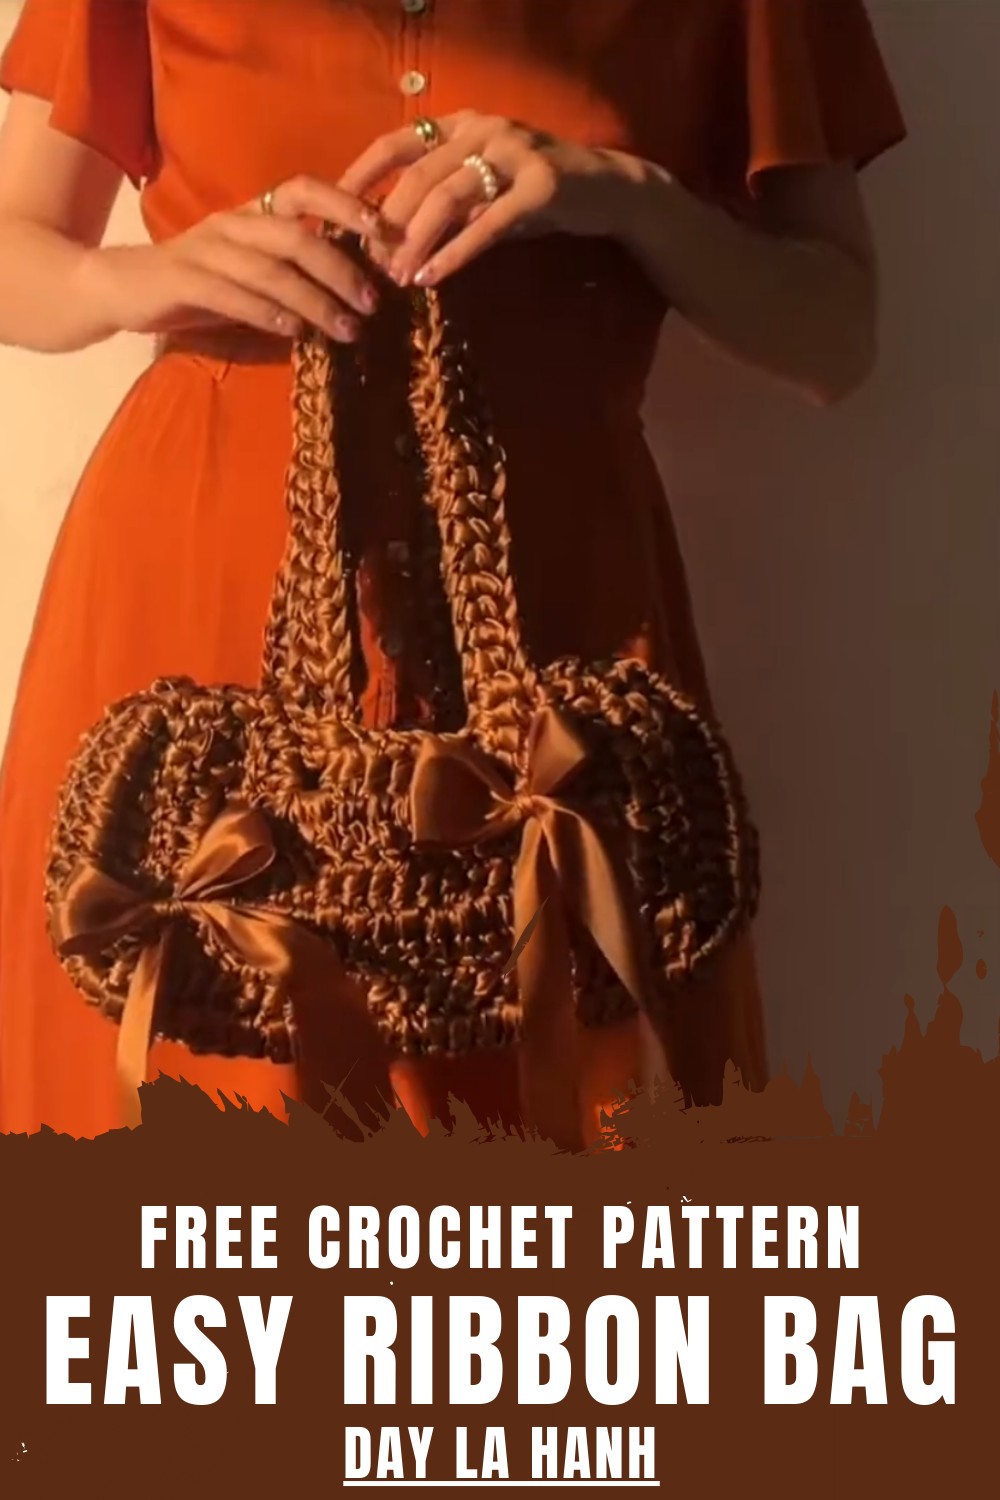
The overall look is defined by wide and flat stitches that offer a unique architectural depth and a modern minimalist appeal. Beyond its lustrous appearance the material provides a surprising tensile strength that prevents the base from sagging while remaining exceptionally soft to the touch.
Materials
You will need the following:
- Ribbon: 5 cm wide, 7.5 rolls (approximately 165 meters).
- Crochet Hook: 10 mm.
- Stitch Markers: 2 (using hoop earrings is a creative option).
- Scissors: To trim ends.
- Lighter: To seal ribbon edges and prevent fraying.
- Magnetic Buttons: Used for bag closure.

This accessory is a lightweight and durable alternative to heavy leather offering a breathable and silk-like texture that feels luxurious against the skin. Its presence in a wardrobe adds a touch of bespoke opulence and polished charm ensuring that the wearer carries a piece that is as much a jewelry item as it is a functional bag.
Step-by-Step Details Crochet Ribbon Bag Pattern
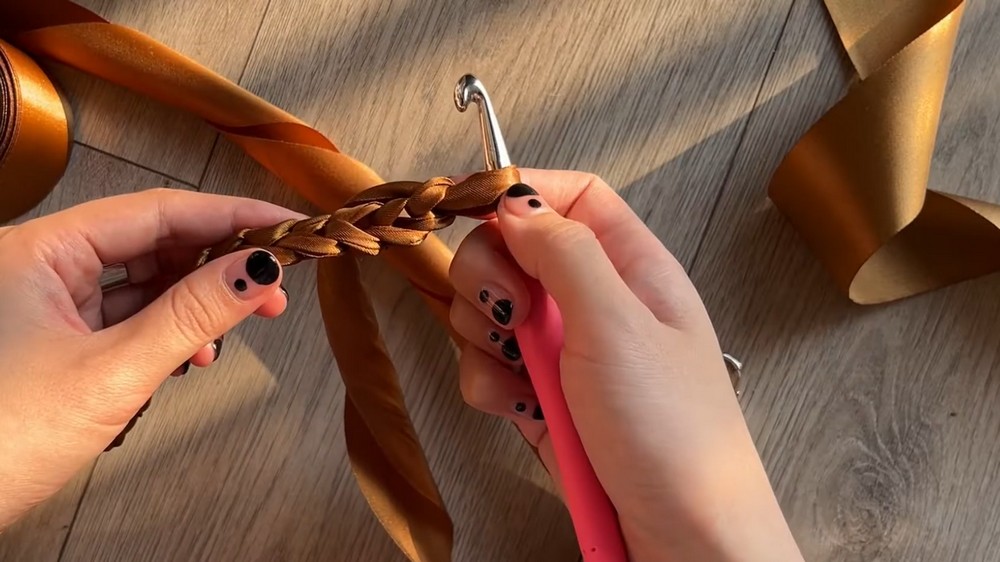
Step 2: Creating the Base Chain (Foundation)
- Start by making a slip knot with the ribbon. Use the glossy side as your right side and hide the matte side as you work.
- Wrap the ribbon around your finger to form an "X," insert your hook, pull the ribbon through, and secure it.
- Make 46 chains: Pull the ribbon through the loop on your hook to form chains, ensuring the matte side stays hidden. This chain will form the length of the bag.
- Once complete, check for twists and even out the chain by gently stretching it.
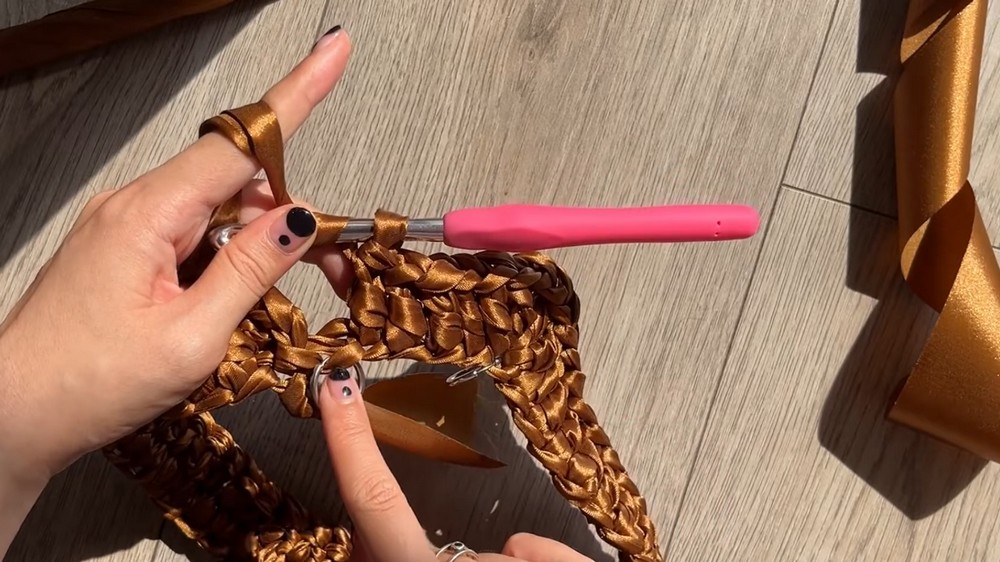
Step 3: Mark Key Stitches and Begin Crocheting
- Skip the loop on your hook (it’s not a stitch). Use stitch markers to mark the 1st and 6th stitches from the hook—this helps identify corners when working the pattern.
- Close the chain into a circle by slip-stitching the first and last chains together. Ensure the chain is not twisted.
4: Crochet the First Row
- In the first row, work single crochets (SC) into each chain starting from the back loop of the "V" in the chain stitch.
- Create a stack of three single crochets (counts as a double crochet) at the beginning for stability.
- Continue by working double crochets (DC) into every chain until the first marked stitch.
At the marked stitch, crochet:
- 2 double crochets,
- 2 chains,
- 2 double crochets (this creates the corner).
Repeat this process at the second marked stitch to form the second corner. Then, crochet double crochets across the remaining chains and slip-stitch to close the row.
5: Work the Next Rows
- Alternate between single crochet, half-double crochet, and double crochet stitches at the beginning and end of each row for a clean pattern.
- For corners, work into the chain spaces with:
- 2 double crochets,
- 2 chains,
- 2 double crochets.
- Repeat the pattern row by row, ensuring symmetry on both sides and checking stitch counts at intervals.
In the fifth row, finish with:
- 11 stitches on each side,
- 24 stitches across the middle,
- Chain 2 at each corner.
6: Stop Increasing and Strengthen the Sides
- In the sixth row onwards, stop increasing at the corners. Instead of 2 doubles, chain 2, and 2 doubles, simply work 2 double crochets into each chain space.
- Work regular double crochets across the rest of the stitches without increases.
7: Create Two Panels and Join Them
- After finishing seven rows, cut the ribbon for the first panel and burn the ends with a lighter to seal.
- For the second panel, don’t cut the ribbon. Leave it attached for the joining process.
- Place the panels with their front sides facing each other. Using the working ribbon, join the panels with slip stitches for a seamless look.
- Work slip stitches through all matching stitches on both panels.
8: Add the Magnetic Buttons
- Define the front and back sides of the bag. On the front panel, hand-sew the magnetic button in the center.
- Repeat this process for the back panel. Ensure the buttons align when closed.
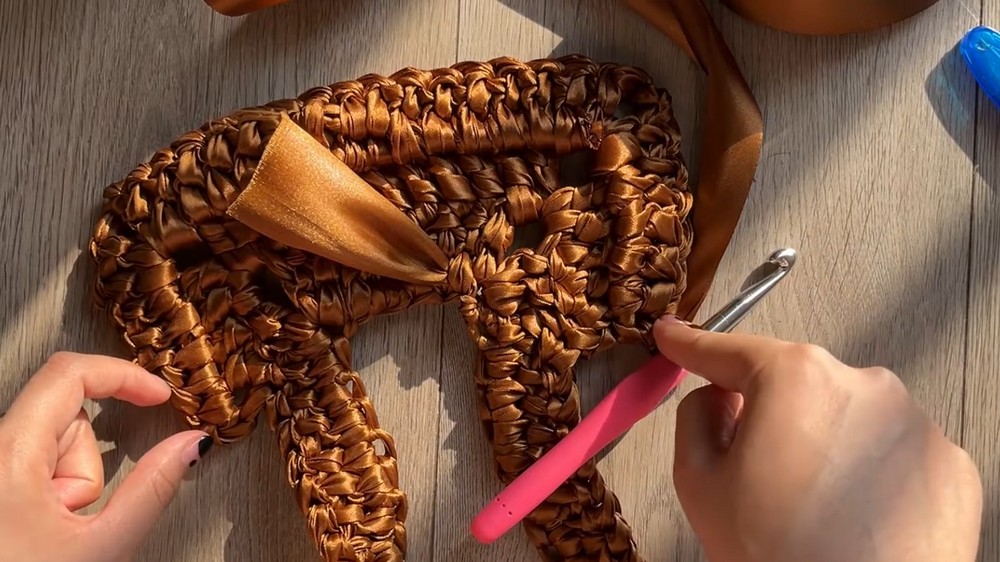
9: Add Decorative Bows (Optional)
- Cut a piece of ribbon to your desired length for the bow.
- Find the chain space you want to attach the bow to and tie a knot.
- Form the bow by adjusting the ribbon loops, ensuring the glossy side remains visible. Trim the ends at an angle and seal them with a lighter.
Special Features
- Customizable Design: You can modify the size, color, or embellishments (like bows) to suit your style.
- Elegant Finish: The glossy ribbon and magnetic buttons give the bag a polished, chic look.
- Durable and Sturdy: Using ribbon instead of yarn ensures the bag is both lightweight and strong.
- Creative Accessories: Adding optional bows allows for personal touches.
Level of Difficulty
The difficulty level is intermediate. While the base stitches are straightforward (single, half-double, and double crochet), managing the ribbon material, maintaining symmetry, and ensuring consistent tension can be challenging for beginners. Joining panels and adding decorative touches also require some experience.
Tutor's Suggestions
- Keep the Ribbon Tidy: Always hide the matte side while crocheting for a clean and glossy finish.
- Count Frequently: Symmetry is crucial in this project. Regularly count your stitches to avoid mistakes and uneven sides.
- Use a Larger Hook When Hiding Ends: A smaller 6 mm hook can help tuck in loose ribbon ends more effectively.
- Be Careful with the Lighter: Burn ribbon ends cautiously to avoid burning through the material.
Uses
- Stylish and practical handbag or clutch for casual outings.
- An elegant gift for friends, family, or loved ones.
- Can also be used as a lightweight storage bag for small items.
Materials
- 5 cm wide ribbon (7.5 rolls or 165 meters).
- Crochet hook (10 mm).
- Stitch markers (or use hoop earrings).
- Scissors, lighter, magnetic buttons.
Tip
When joining new ribbon rolls, tie the knot loosely on the wrong side of the work. After securing the knot, burn the ends and tuck them behind your stitches for a clean, professional appearance.
Conclusion
This ribbon crochet bag tutorial is a fantastic project for creating a chic yet functional accessory. With proper attention to detail, you can craft a symmetrical, glossy bag with added personal touches like bows or adornments. The step-by-step process ensures that even intermediate crocheters can confidently complete this project. Spend time on the embellishments, and enjoy your stylish, handmade creation!