
Cozy Crochet Fingerless Gloves Pattern With Everyday Fit
Boost everyday comfort with this Crochet Fingerless Gloves Pattern, offering flexible warmth, open fingertips, and cozy movement for errands.
Comfort and everyday practicality, this stylish accessory adds warmth while keeping hands free for daily tasks. The Crochet Fingerless Gloves Pattern focuses on a balanced fit that gently covers the wrists and palms while leaving fingers open for flexibility and ease of movement. Its clean structure highlights smooth stitch work and subtle detailing, creating a refined look that complements both casual and layered outfits.
Chic Crochet Fingerless Gloves Pattern for Comfort
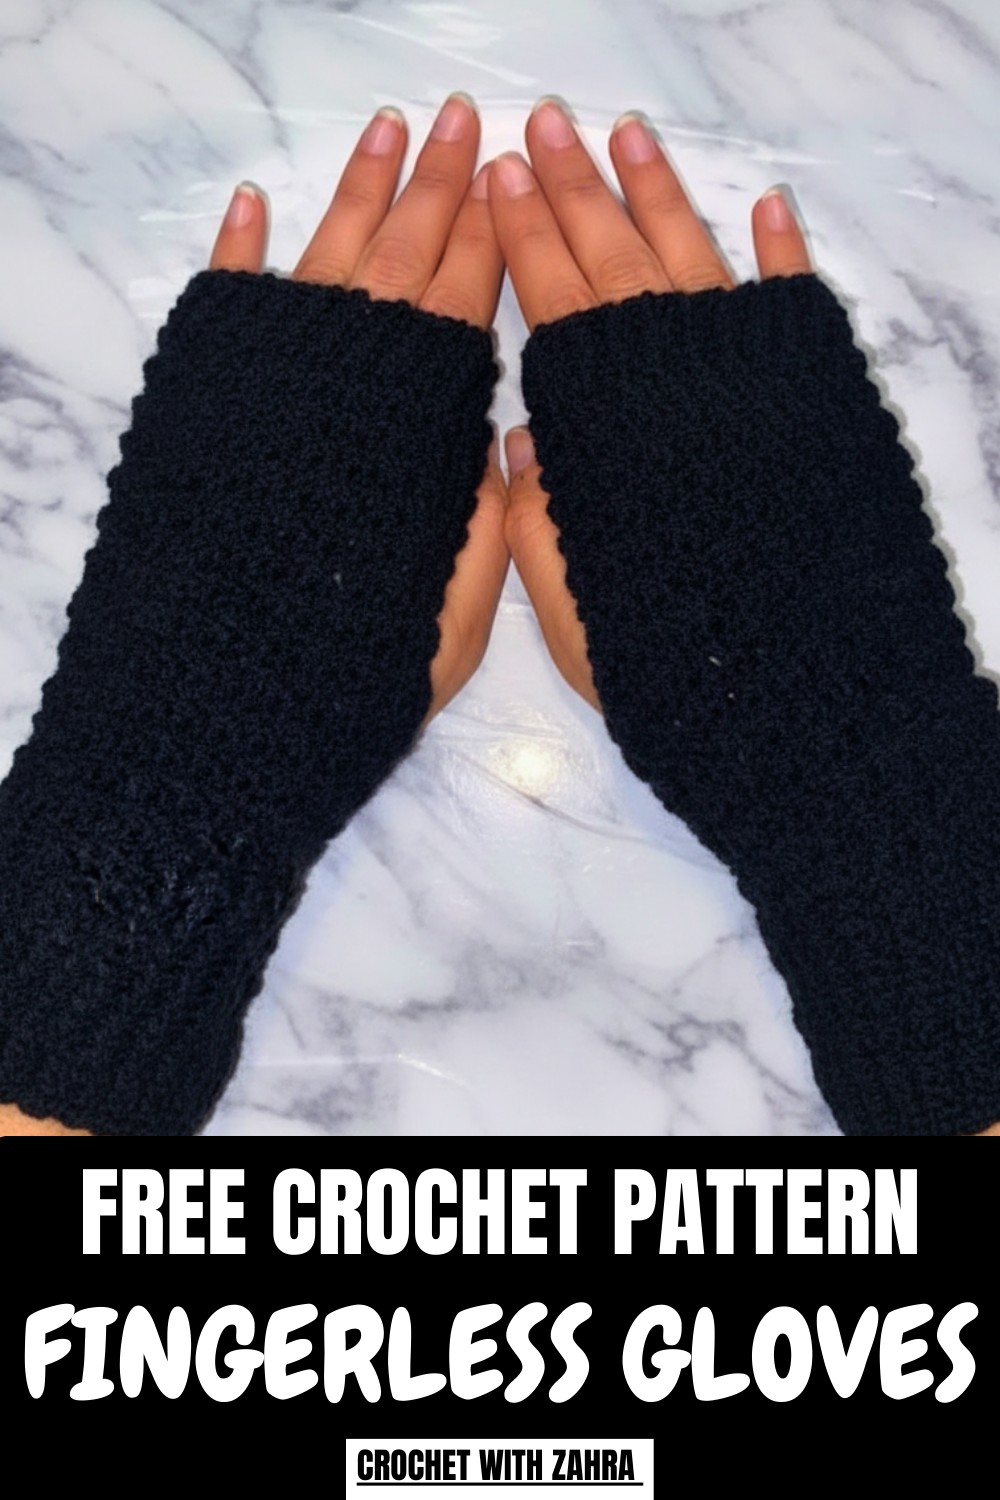
Ideal for cooler mornings, outdoor walks, or indoor use, the gloves provide just the right amount of insulation without feeling heavy. The pattern allows variation in length, texture, and color, making it easy to match personal style or seasonal wardrobes.

Soft yarn choices enhance comfort against the skin, while the finished design feels lightweight yet cozy. Overall, this pattern delivers a smart blend of function and style, offering a versatile accessory that feels modern, comfortable, and thoughtfully designed for everyday wear.
Step-by-Step Instructions
Materials Used:
- 3-ply yarn (any color of your choice)
- 3.5 mm crochet hook
- Stitch markers
- Scissors
Instructions:
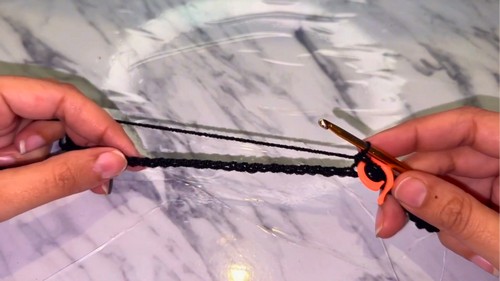
- Start with a Slip Knot and Begin the Foundation Chain:
- Make a slip knot and chain a total of 40 chains.
- Add one extra chain as the turning chain.
-
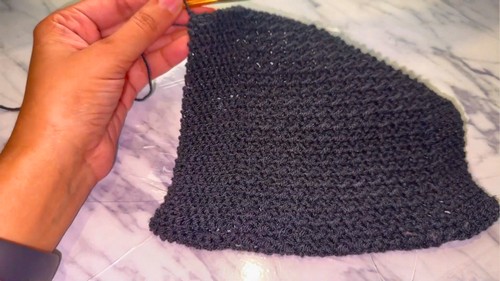
Divide the Work into Sections:
- 9 chains for the wrist ribbing.
- 5 chains for the finger ribbing.
- 26 chains for the center section, which will use the Even Moss Stitch.
-
Work the First Row:
- Begin with single crochets in the first 9 stitches (this creates the ribbing for the wrist).
- Place a stitch marker in the 9th stitch to mark the end of this section.
- Use the Even Moss Stitch:
- Start with a slip stitch.
- Alternate between a half-double crochet (HDC) and a slip stitch for the next 26 stitches.
- Ensure you start with a slip stitch and end with a half-double crochet.
- Work single crochets in the final 5 stitches (this creates the finger ribbing).
- Turn and Work the Next Rows:
- For ribbing areas (wrist and finger sections):
- On the good side, work single crochets in the back loop only.
- On the wrong side, work slip stitches in the back loop only.
- In the center section, continue with the Even Moss Stitch, alternating between slip stitches and half-double crochets. Always start with a slip stitch and end with a half-double crochet.
- For ribbing areas (wrist and finger sections):
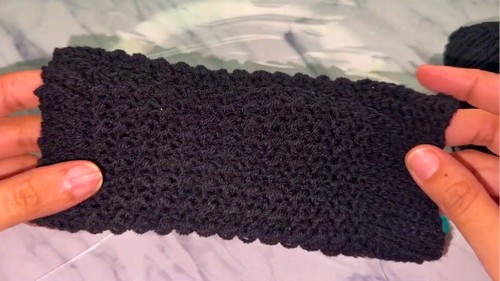
- Repeat the Pattern:
- Repeat the process for 42 rows in total, or adjust based on your wrist size.
- For a larger wrist, add one or two rows as necessary.
- Join the Ends:
- Once all rows are complete, fold the piece in half with good sides facing each other.
- Use slip stitches or a sewing needle to join the edges together.
- Leave a gap of 6-7 stitches for the thumb hole and adjust accordingly.
- Finish Off:
- After joining, cut the yarn and weave in the yarn ends to secure the glove.
- Turn the glove inside out to bring the good side to the outer part.

Special Features
- Uses the Even Moss Stitch, which alternates slip stitches and half-double crochets, creating a textured and stretchy pattern.
- The glove design incorporates built-in ribbing sections for the wrist and fingers, making it fit snugly.
- The method allows customization of both length and size, so you can adjust rows or foundation chains according to your hand's measurements.
Level of Difficulty
The tutorial is beginner-friendly, though having prior knowledge of basic crochet stitches like slip stitches, single crochets, and half-double crochets is helpful. The step-by-step guidance and repetition of the pattern make it accessible to newcomers and intermediate crocheters.
Tutor’s Suggestions
- Always ensure your stitch count is correct:
- Use even numbers for the foundation chains to maintain the Even Moss Stitch pattern.
- Work loose stitches, particularly with slip stitches, to avoid tension issues.
- Use a stitch marker to easily track sections like the wrist and finger ribbing.
Uses
- These gloves are practical and stylish, perfect for cold weather.
- A great option for gifting due to their stretchy, customizable design.
- A fun project to practice textured crochet stitches like the Even Moss Stitch.
Materials Recap
- 3-ply yarn
- 3.5 mm crochet hook
- Stitch markers
- Scissors
Helpful Tip
When working on the ribbing sections, always pay attention to the “good side” and “wrong side.” On the good side, use single crochets in the back loop, and on the wrong side, use slip stitches in the back loop. This creates a neat, stretchy ribbing effect that enhances the glove's fit.
Conclusion
This small-sized glove pattern using the Even Moss Stitch is not only practical and warm but also elegant in its simplicity. The tutorial by Crochet with Zara is a great way to learn and practice textured stitches, creating a timeless handmade accessory. By following the step-by-step instructions and customizing the size, you can create a perfect pair of gloves to suit your needs.