
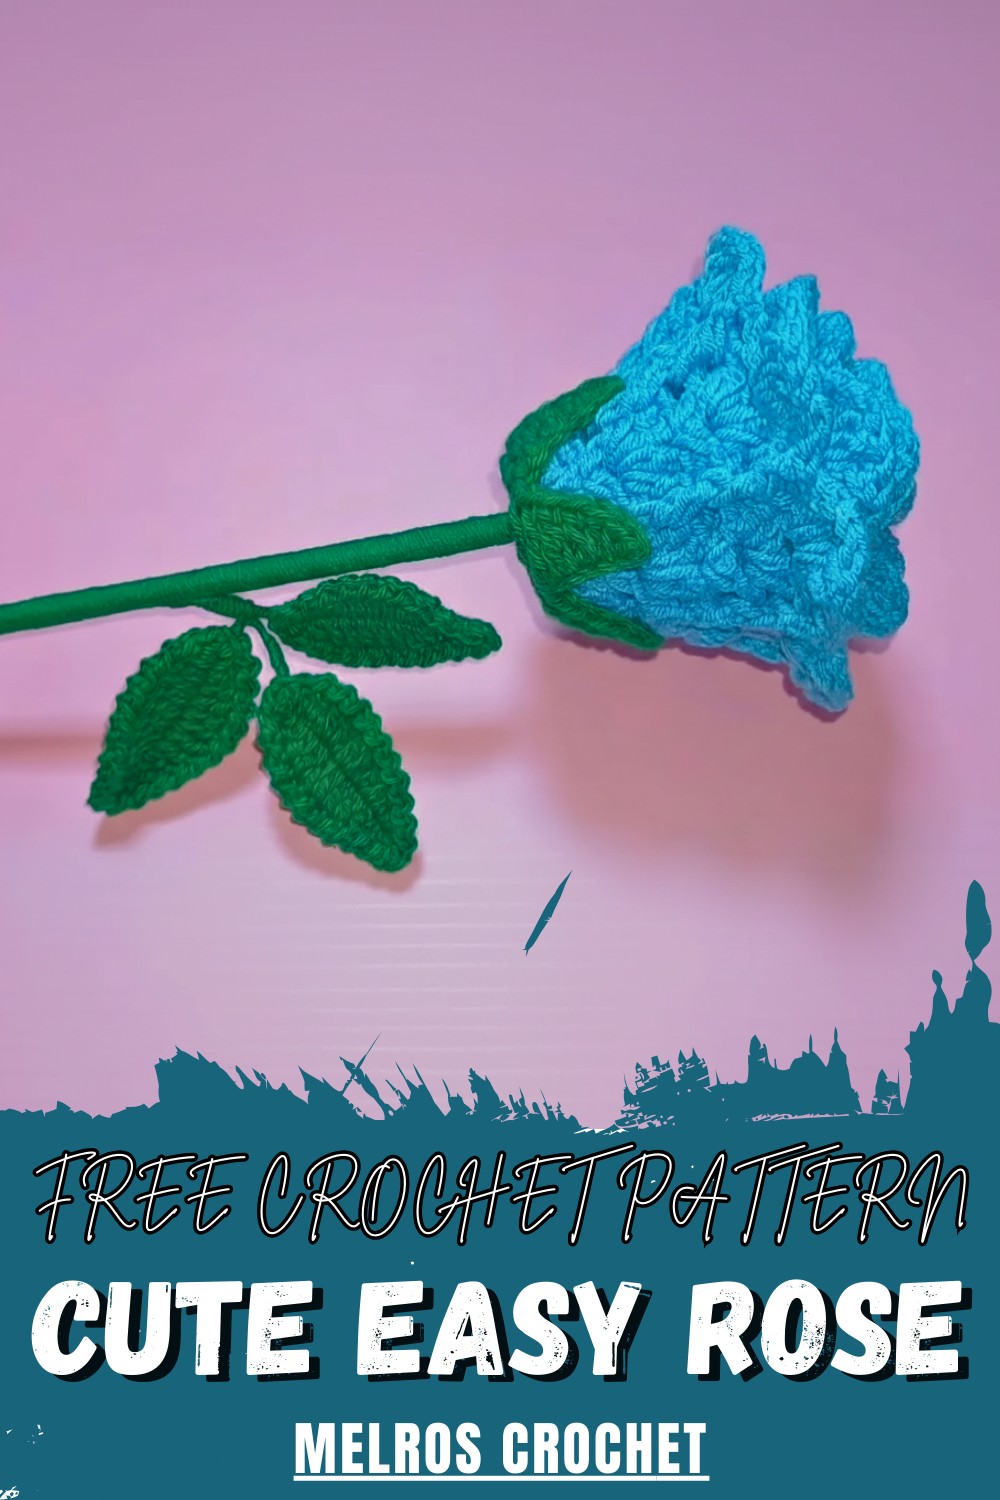
Layered Crochet Rose Pattern Designed for Realistic Blossoms
Sense classic floral charm with this Crochet Rose Pattern that's offering softly shaped petals suited for decor accents and special gifts.
Working with a high-quality floral design serves as a relaxing escape into a hobby that results in a gift that never withers. This Crochet Rose pattern is perfect for marking a special occasion like a birthday or Mother’s Day, offering a personal touch that a store-bought item simply cannot match. The process is therapeutic and provides a versatile way to decorate a home or add flair to an accessory like a hat or a bag.
Classic Crochet Rose Pattern Ideal for Floral Embellishments
One of the best features of this design is its adaptability, as you can easily adjust the size or color to fit a specific aesthetic. Including an additional element like a green sepal or a wired leaf adds a touch of realism and a professional finish to the work. This durable and lightweight decoration is excellent for a long-lasting centerpiece or even as a unique item for a small business.
Ultimately, this engaging activity turns a simple material into an elegant masterpiece that showcases your passion and skill. With its vibrant color and soft texture, this individual blossom brings a sense of warmth and charm to any setting.
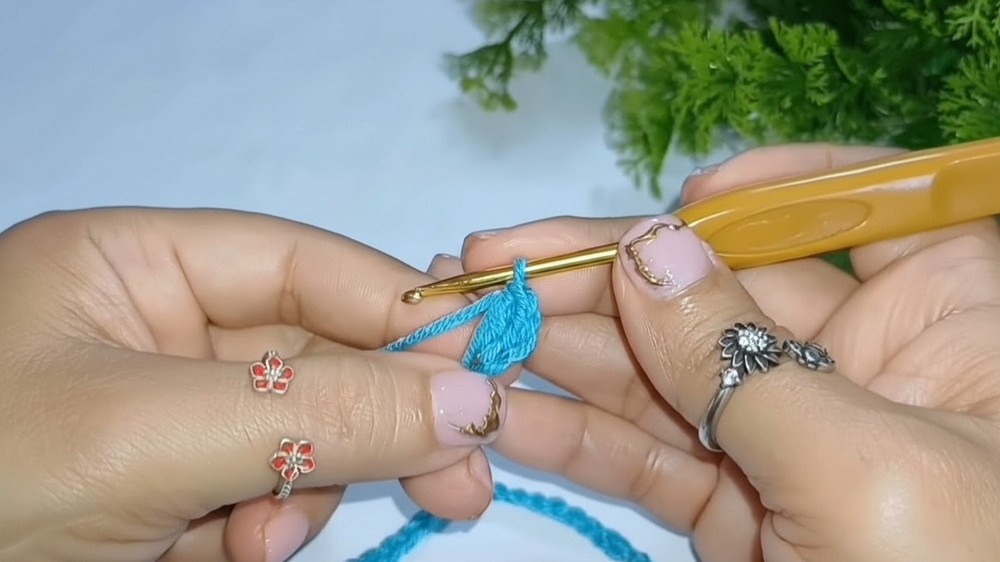
To begin this lovely project, start by forming a foundation of 70 chains using a 2.5mm hook and cotton yarn.
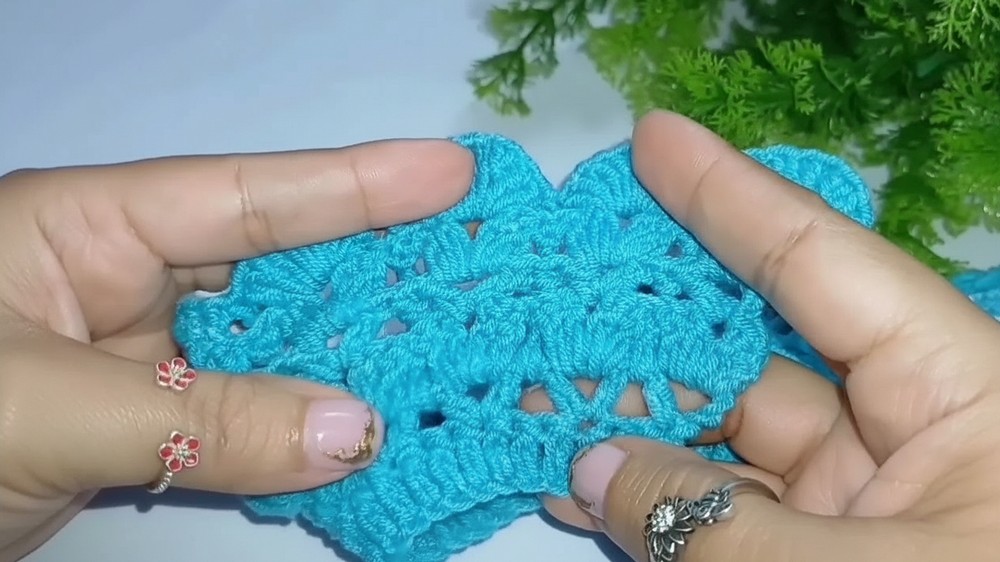
In the second row, work a series of high points across every chain, then move to the third row to establish "V" shapes by spacing out high points with two chains.
As the design progresses, incorporate reversible points by working through the back or front of the stitches to add depth.
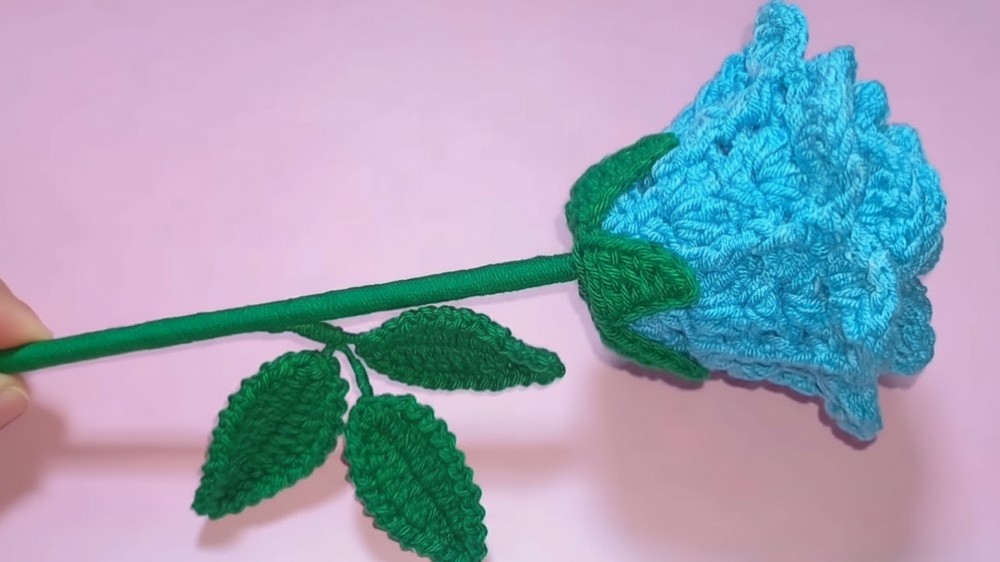
The final decorative layer involves making nine high points in each space to form the delicate, rounded edge of the petal, which is later rolled around a skewer and secured with glue.
This tutorial provides a complete guide to creating a stunning and realistic Crochet Rose. By following a multi-layered petal technique and adding a structured stem and leaves, you can craft a beautiful floral piece that works perfectly as a gift or home decoration.
Introduction
In this video, the tutor from Melros Crochet demonstrates a detailed, step-by-step process for making a large crochet rose. The project involves creating a long, intricate strip of petals that you later roll and assemble onto a stem, complete with a green calyx and wired leaves for a professional finish.
Materials
-
Yarn: Silvia Amigurumi (Green) for the leaves and calyx; Madame Cotón (Blue or your preferred color) for the rose petals.
-
Hook: 2.5 mm crochet hook.
-
Hardware: 1 mm wire for the leaves and a wooden skewer (brochette stick) for the stem.
-
Tools: Hot glue gun and scissors.
Step-by-Step Details
1. The Rose Petal Strip
-
Foundation: Start by chaining 70.
-
Row 2 (Base): Skip three chains and work one double crochet (dc) in the fourth chain. Continue with one dc in every chain across.
-
Row 3 (V-Stitches): Chain 6 (3 for height, 3 for separation), then work a dc in the same stitch to form a "V." Skip two stitches and repeat [1 dc, 2 ch, 1 dc] in the next stitch across the row.
-
Row 4 (Shells): In each "V" space, work [2 dc, 2 ch, 2 dc]. Between the "V" shells, work a single dc.
-
Row 5 (Back Post Texture): Repeat the "V" shells, but this time, work back post double crochets on the single dc from the previous row to add depth.
-
Row 6 (Front Post Texture): Repeat the shells, but work front post double crochets to maintain the 3D texture.
-
Row 7 (The Petals): In the center of each shell, work 9 dc to form a rounded petal. For better shape, make the middle stitches slightly taller than the outer ones. Work a back post dc between petals.
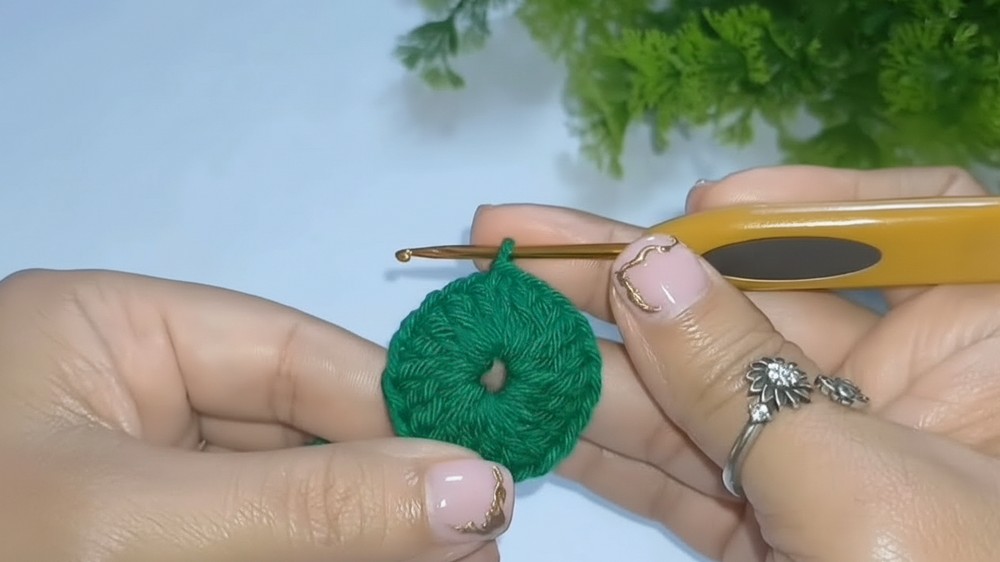
2. The Calyx (Sépalo)
-
Base: Create a magic ring and work 20 dc inside.
-
Leaves: Chain 7. In the second chain from the hook, work: 1 sc, 1 hdc, 1 dc, 1 extended dc, and 2 double dc. Skip three stitches on the base and slip stitch into the fourth. Repeat to create 5 leaves.
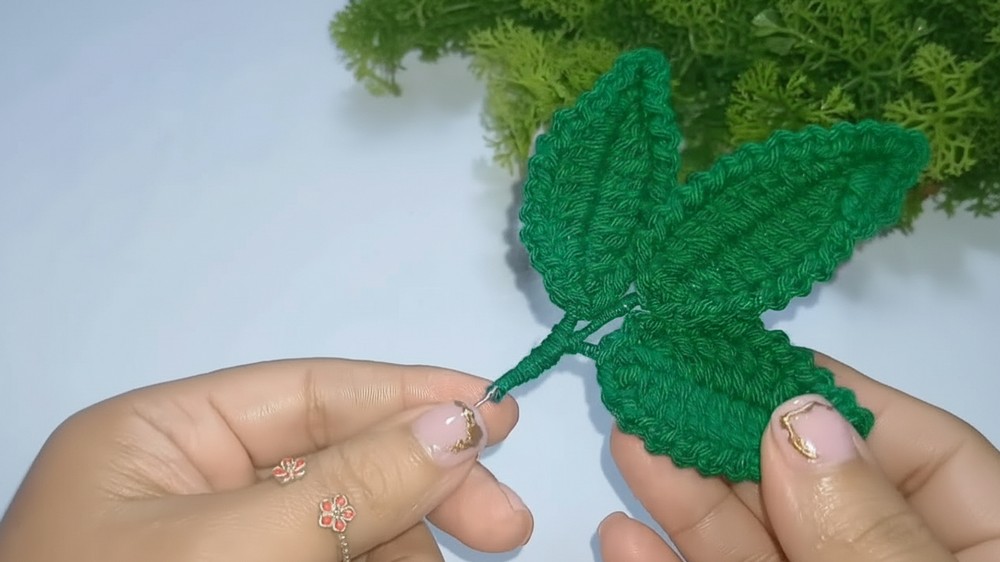
3. The Wired Leaves (Make 3)
-
Foundation: Chain 13. Place the wire along the chain.
-
Stitching: Work 1 sc, 1 hdc, 7 dc, 1 hdc, and 1 sc. Work 3 sc in the tip to turn and repeat on the other side.
-
Border: Work [1 ch, 1 sl st] in every stitch around the edge to create a textured, realistic leaf border.
-
Assembly: Wrap the wire stems with green yarn and group three leaves together to form a branch.
4. Final Assembly
-
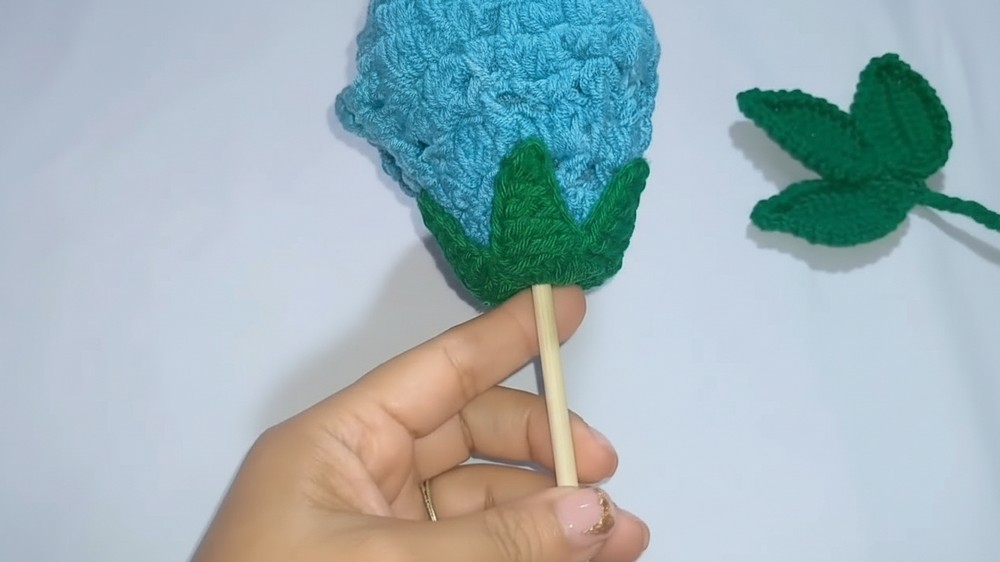
Apply hot glue to the end of your petal strip and begin rolling it around the tip of the wooden skewer.
-
Continue rolling and gluing along the base to keep the rose secure.
-
Slide the calyx onto the stick and glue it to the bottom of the flower.
-
Wrap the entire wooden stick with green yarn, attaching the leaf branch halfway down.
Special Features & Key Information
-
Special Features: The use of front and back post stitches creates a "reversible" texture that makes the petals look more organic and layered. The wired leaves allow you to bend and pose the rose naturally.
-
Level of Difficulty: Intermediate. While the stitches are basic, the construction of the post-stitch rows and the assembly requires patience and precision.
-
Uses: Perfect for Mother's Day, Valentine's Day, wedding bouquets, or permanent floral arrangements.
-
Tutor’s Suggestions:
-
Make the central stitches of the final petal row taller than the starting/ending stitches to give the petals a natural curve [08:07].
-
The project is versatile; you can change the petal colors while keeping the green base for different types of roses.
-
Pro-Tip
When rolling the rose, start with a very tight center for the "bud" and gradually roll more loosely as you reach the end of the strip. This creates the illusion of a flower that is naturally opening from the center.
Conclusion
Creating this crochet rose allows you to combine artistic stitching with structural assembly. The result is a high-quality, durable flower that captures the elegance of a real rose without the maintenance. Follow these steps to create a bouquet that will never fade!