
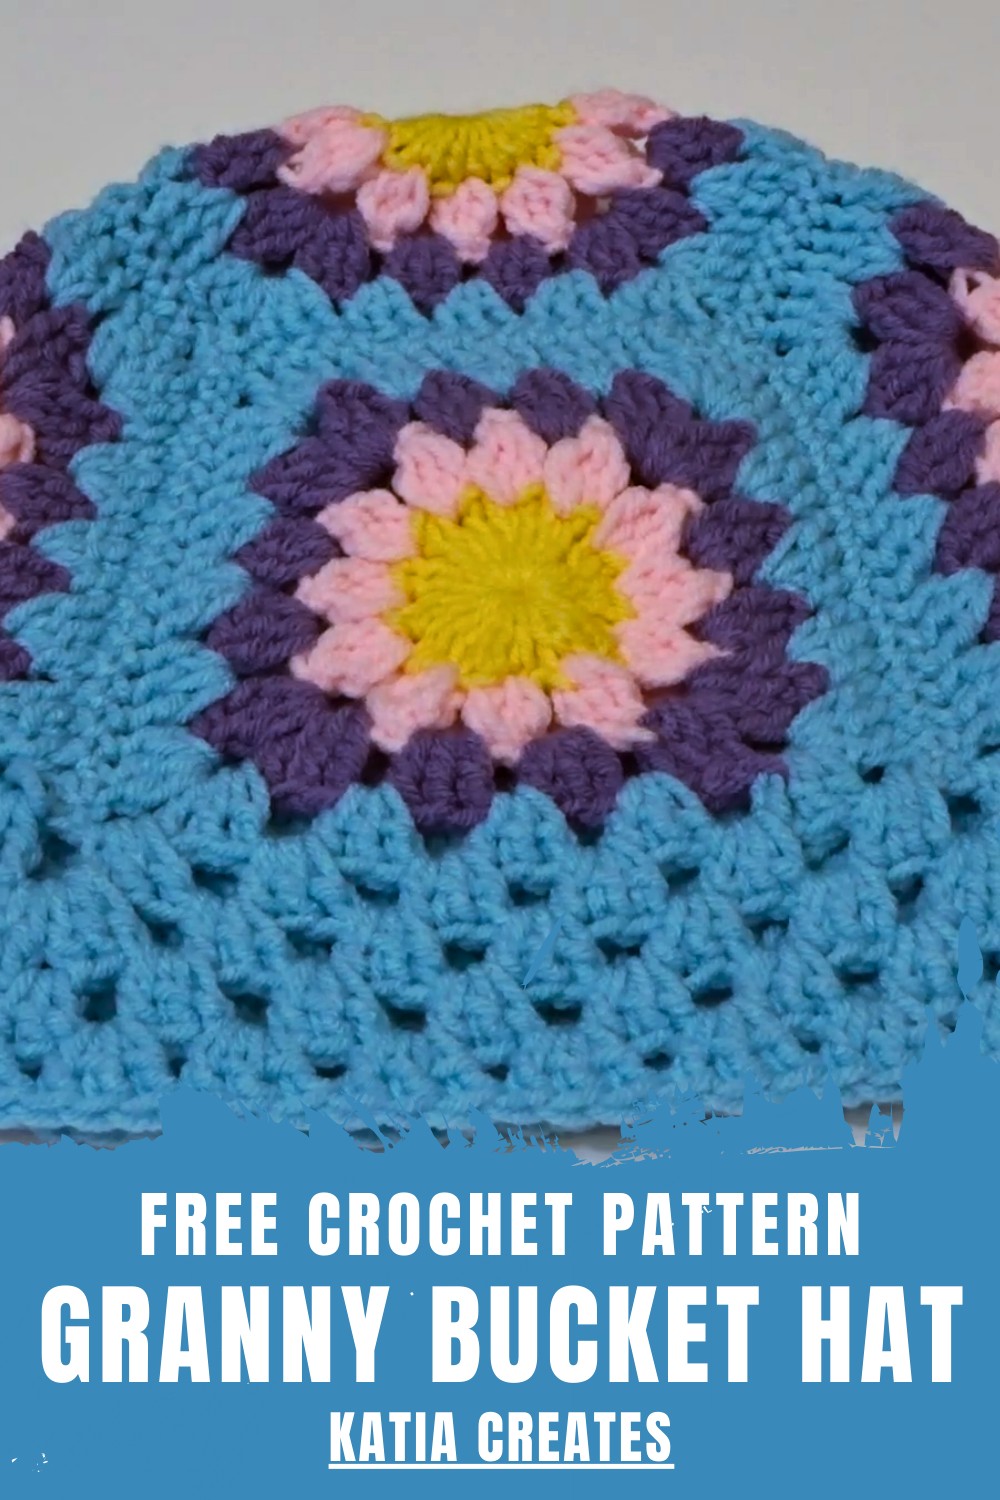
Pop Crochet Granny Bucket Hat Pattern for Summer Adventures
Step into style with the Crochet Granny Bucket Hat Pattern, a cozy and playful accessory that adds charm, texture, and fun to any outfit.
Ideal for adding both style and functionality to your wardrobe, this hat combines retro charm with modern crochet techniques. Its textured design creates a visually appealing pattern, while the soft, lightweight fabric ensures comfort and breathability for all-day wear.
Rock Crochet Granny Bucket Hat Pattern That Adds Fun Texture
The Crochet Granny Bucket Hat Pattern allows creator to customize colors, stitch styles, and brim lengths, making each piece unique and suited to personal taste. Its versatility makes it great for sunny walks, casual outings, beach trips, music festivals, or as a thoughtful handmade gift.
Combining practicality, vintage flair, and creative expression, this bucket hat is more than just an accessory—it’s a stylish statement piece that enhances both casual and seasonal outfits.
Step-by-Step Guide: Sunburst Granny Square Bucket Hat Crochet Tutorial
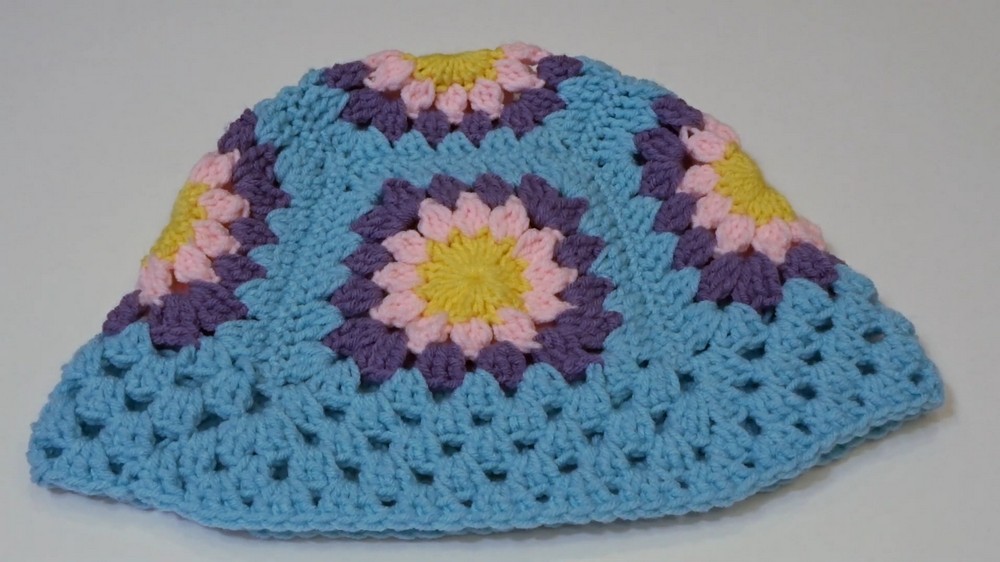
This crochet tutorial shows how to create a stylish and versatile bucket hat using Sunburst Granny Squares. The project incorporates cheerful colors, classic stitching, and a playful brim, making it perfect for beginners or intermediate crocheters. The hat is easy to customize by adjusting the granny square size or yarn color. Using 5 Sunburst Granny Squares, you’ll stitch them together and add a brim to achieve a fun and functional summer accessory!
Special Features
- Sunburst Granny Squares:
- The base design is built on colorful granny squares that add texture and a timeless, vintage look.
- Customizable Fit:
- Swap yarn weights, hook sizes, or square dimensions to adjust the hat's size.
- A smaller hook, such as 4mm or 4.5mm, can create a tighter fit for smaller head sizes.
- Playful Brim:
- Adds sun protection and a stylish flair to make this bucket hat both practical and fashionable.
- Easy-to-Follow Process:
- Clear guidelines make this project great for beginners. The tutorial includes tips for managing yarn tails, joining squares, and crocheting in rounds.
Level of Difficulty
Beginner to Intermediate:
- The individual granny squares use simple stitches (e.g., double crochet, slip stitch, chain).
- The brim and assembly may be slightly challenging for beginners but are manageable with the detailed instructions provided in the video.
- Understanding of basic crochet techniques such as the magic ring, double crochet clusters, and slip stitching is helpful.
Tutor's Suggestions
- Yarn Choice:
- Use #4 medium weight yarn (100% acrylic recommended in the tutorial for flexibility, but cotton yarn is also an option for a summer look).
- Hook Size:
- A 5mm crochet hook is used, though you can downsize to 4mm or 4.5mm for a smaller hat.
- Starting the Magic Ring: If you struggle with a magic ring, you can use an alternative method by chaining 5 and slip stitching to form a circle.
- Managing Yarn Tails:
- Tuck in yarn tails as you go to save time during finishing. Alternatively, cut tails shorter after joining squares to maintain a clean look.
- Customizing Fit and Size:
- Adjust the yarn type or make larger granny squares to create a looser, oversized fit.
Materials Required
- Yarn: Medium weight (categories 4/medium-weight acrylic or cotton). You will need multiple colors for the granny squares’ sunburst design.
- Hook Size: 5mm crochet hook (recommended), or use 4mm/4.5mm for a snug hat.
- Darning Needle: For weaving in yarn tails and joining squares together.
- Scissors
- Measuring Tape (optional): To measure the size of squares or ensure the circumference fits your head.
Step-by-Step Tutorial
1. Create the Sunburst Granny Squares
Each hat requires 5 granny squares (4 for the sides and 1 for the top).
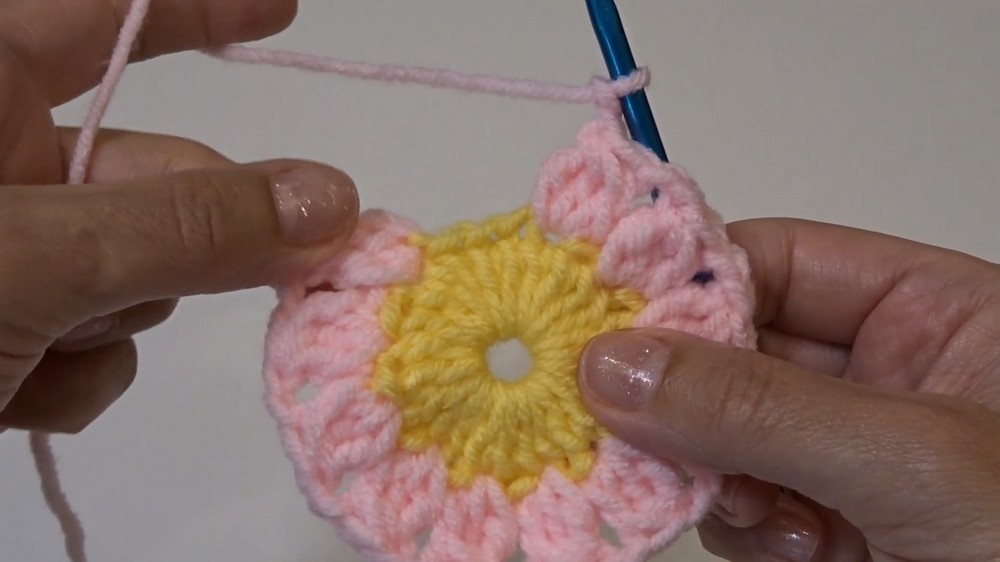
- Round 1: Begin with a magic ring or an alternative (chain 5, and slip stitch into the first chain to form a ring).
- Chain 2 (doesn’t count as a stitch).
- Work 24 double crochets into the ring.
- Pull the yarn tail to tighten the magic ring.
- Slip stitch into the first double crochet to close the round.
- Round 2: Change the yarn to another color.
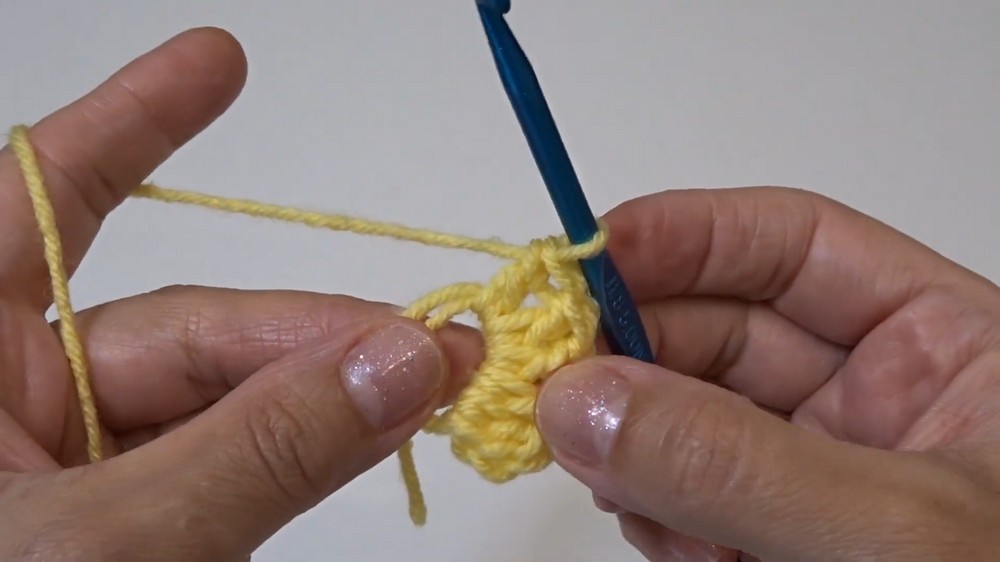
- Chain 2 and work your first 3 double crochet cluster (leaving the last loop on the hook).
- Skip one stitch, chain 2, and repeat the 3 double crochet clusters, skipping every other stitch.
- Complete 12 clusters total, separated by chain spaces. Slip stitch into the first cluster to join.
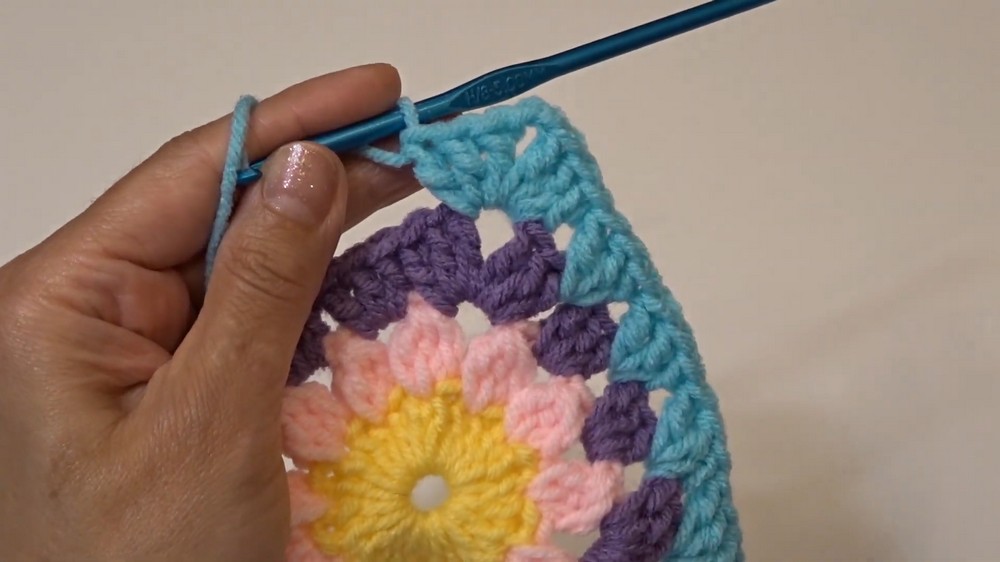
- Round 3: Turn the circle into a square by creating corners.
- Change to your third color yarn.
- Into a chain 2 space, chain 3 (counts as the first double crochet), and work 3 double crochets, chain 2, and 3 double crochets to create the first corner.
- Into each subsequent chain space, work 3 double crochets (no chain spaces between clusters). For corners, repeat 3 double crochets, chain 2, 3 double crochets.
- Complete the round and slip stitch into the top of the chain to join.
- Round 4 (Optional): Add a final round to extend square size (repeat the corner and cluster pattern). Fasten off, leaving a long yarn tail for sewing the squares together.
- Repeat to make a total of 5 granny squares.
2. Assemble the Hat
- Arrange the squares with 1 at the top (crown) and 4 around the sides.
- Whip Stitch Squares Together: Use the long yarn tail from one square to sew the squares on the wrong side (back side facing you).
- Align two squares at their edges.
- Insert the needle under both loops of one square’s edge and under the loops of the other square. Pull tight and repeat along the edges for neat seams.
- Continue until all squares are connected to form the hat structure (a cube-like shape).
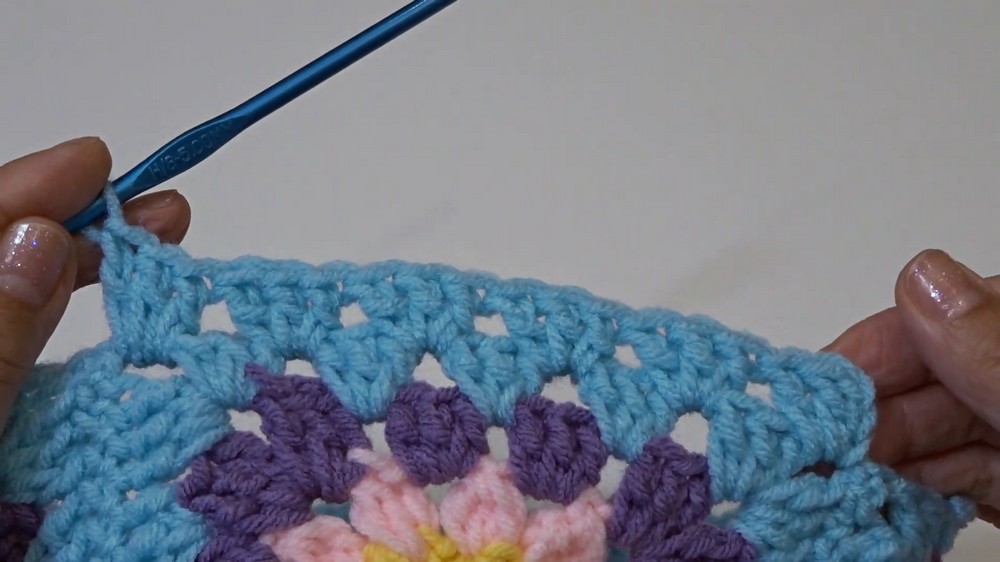
3. Add the Brim
- Start the Brim:
- Attach the main yarn color (turquoise) at any chain space along the bottom edge of the hat.
- Chain 3 and work 3 double crochets into every space between clusters around the base of the squares.
- Slip stitch to the starting chain to close the round.
- Round 2: Introduce increases for the brim flare.
- Work 3 double crochets, chain 1, 3 double crochets into every seam (where the squares join).
- In spaces between clusters, continue working 3 double crochets as normal.
- Repeat this increase pattern around the brim.
- Round 3+ (Optional): Continue with individual rounds of 3 double crochets between spaces. Adjust the brim’s size by adding multiple rounds until the desired length is achieved.
- Finish the Brim: Slip stitch into the first chain. Fasten off, weave in the yarn tails, and tidy up any loose ends.
Uses of the Bucket Hat
- Sun Protection: The wide brim provides extra shade for sunny days.
- Personalized Fashion Statement: With endless color options and variations, this hat is perfect for accessorizing any summer outfit.
- Handmade Gifts: This makes a thoughtful present for friends and family.
- Beginner Crochet Project: Great for practicing foundational crochet techniques, such as granny squares, slip stitching, and adding brims.
Tip for Success
When sewing the granny squares together, always work on the wrong side to keep stitches invisible from the outside. Additionally, ensure you align edges correctly to prevent uneven seams.
Conclusion
The Sunburst Granny Square Bucket Hat combines style, comfort, and customization into a fun and practical crochet project. Whether you’re a beginner looking to develop your skills or an experienced crocheter wanting to try something new, this tutorial offers clear, step-by-step guidance. With its playful colors and timeless design, this hat will quickly become a favorite summer accessory. Happy crocheting!