
Vibrant Crochet Smartphone Bag Pattern to Your Wardrobe
Carry your phone in style with a playful crochet smartphone bag that pops with color, adds charm, and brings a cheerful handmade touch to every day.
The little crochet phone bag looks super handy and stylish, perfect for carrying your phone everywhere. Its neat shape fits the phone snugly, and the texture of the stitches gives it a cozy, hand‑made charm. The mix of tall and short stitches creates a playful surface that makes the bag stand out.
Stylish Crochet Smartphone Bag Pattern to Carry Your Phone
This handmade piece is practical for school, outings, or casual trips, and the textured stitches give it a unique charm. Every row adds detail, making it a cute, functional accessory that anyone would love to carry.
To start, you make a chain of yarn that sets the bag’s width. Then, working in rounds, basic stitches like single crochet build up the sides, while occasional double crochet stitches and small gaps form a subtle pattern on the bag’s body.
This makes it look decorative while staying sturdy. As the piece grows taller, it slowly becomes a small pouch. Near the top, chains and loops are added so the bag can have a flap or button closure, keeping your phone safe.
A long strap is attached so the bag can hang from your shoulder or crossbody, leaving your hands free. Choosing bright yarns makes it cheerful, while soft tones give it a simple and elegant look.
Introduction
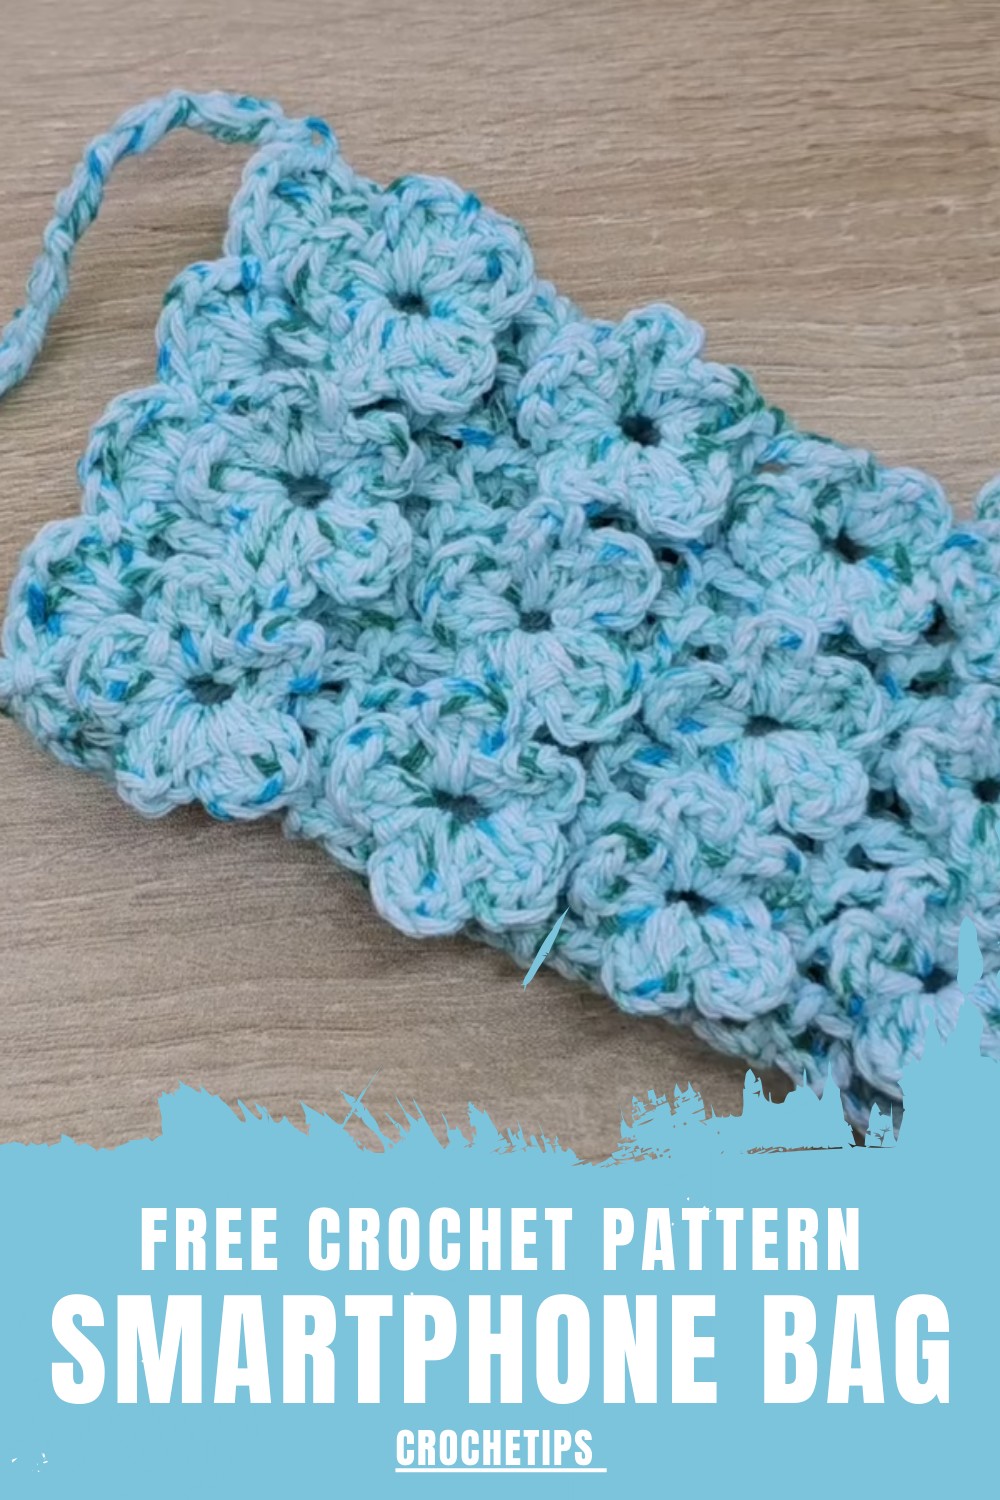
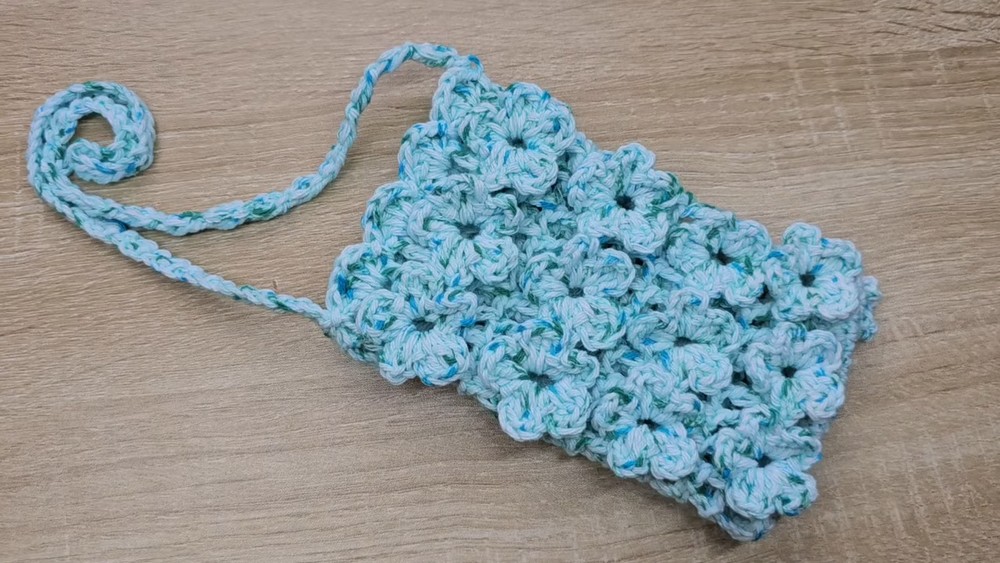
In this tutorial, CROCHETIPS teaches how to create a charming and practical crochet phone bag or small case. The design is characterized by its 3D floral texture and a delicate decorative border. It is a stylish accessory that is quick to make and can be used to protect your mobile phone or store small essentials.
Materials
-
Yarn: 3 mm thick yarn or wool in your choice of color.
-
Hook: 3 mm crochet hook.
-
Tools: Tapestry needle for weaving in ends and scissors.
Special Features
-
3D Flowers: The bag features an "intercalated" flower pattern where 5-petal flowers are worked directly into the mesh structure.
-
Mesh Foundation: The body is built on a grid of double crochets and chain spaces, which keeps the bag lightweight and breathable.
-
Custom Cord: The handle is made using a series of chain-2 and double crochet segments, creating a sturdy yet decorative strap.
-
Scalloped Border: The top edge is finished with a shell-stitch border (fan stitches) for an elegant look.
Level of Difficulty
Intermediate. While the base is simple, the 3D flowers require working around post stitches and turning the work to complete all petals. It is a great project for those familiar with basic stitches looking to try more textural work.
Step-by-Step Instructions
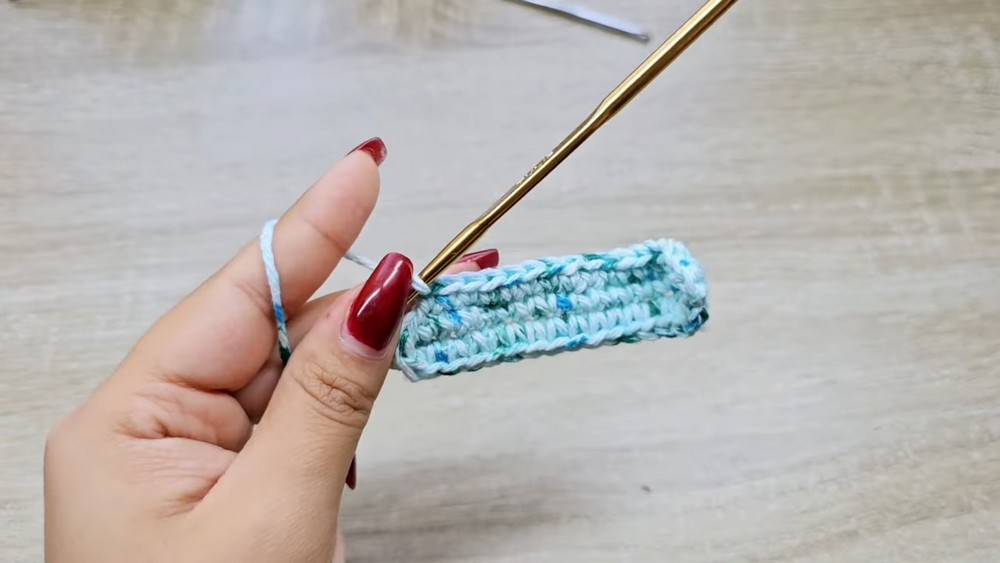
1. The Base
-
Foundation: Start by chaining 16 stitches.
-
Round 1: Skip one chain and work an increase (2 single crochets) in the next. Work 13 single crochets (sc) across, then 3 sc in the last chain to turn the corner. Work 13 sc on the other side and finish with an increase in the final space. Join with a slip stitch.
-
Round 2: Work a round of increases at the corners and plain sc in the middle sections to create a flat, oval base.
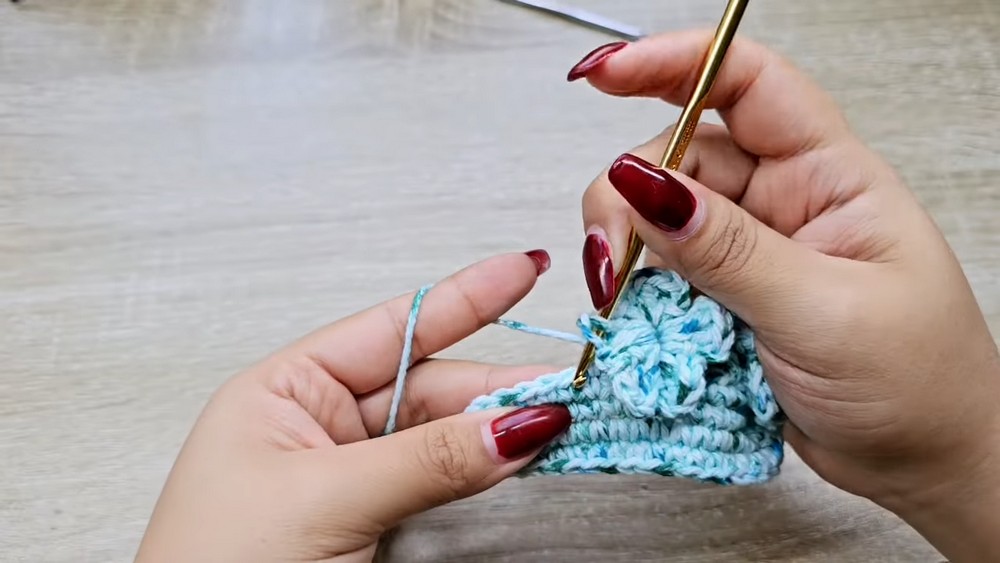
2. The Mesh and Flower Body
-
Grid Setup: Chain 4 (counts as 1 double crochet + 1 chain). Skip a stitch and work a double crochet (dc). Repeat this "dc, chain 1, skip 1" pattern to create a mesh grid around the entire bag.
-
Flower Construction: Flowers are worked over two adjacent dc stitches (forming a V-shape).
-
Work 2 petals on the first dc post, 2 petals on the second dc post, and the 5th petal in the center space between them.
-
Each petal consists of: Chain 2, 2 double crochets, chain 2, slip stitch.
-
-
Staggering: Every second round of flowers is shifted so they sit in between the flowers from the row below.
3. Height and Finishing
-
Repetition: Continue alternating rounds of mesh and flower rows until you have 4 rows of flowers (or your desired height).
-
Final Rounds: Work a few rounds of plain mesh grid to finish the top section.
-
Border: Work a shell border around the top: 2 dc, chain 1, 2 dc in one space, then a slip stitch in the next space.
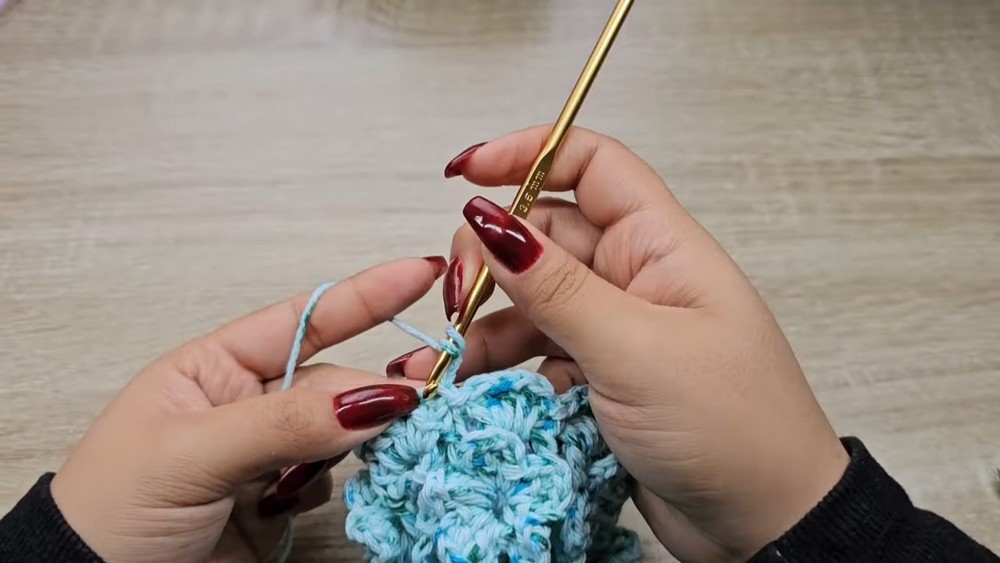
4. The Strap (Handle)
-
Technique: Chain 2, then work a double crochet into the base of the chain. Chain 2 again and work a dc into the point where the previous stitches joined.
-
Length: Continue until the strap reaches your desired length (crossbody or shoulder).
-
Attachment: Slip stitch the cord to the opposite side of the bag's rim and secure.
Tutor’s Suggestions
-
Yarn Matching: Use a yarn with good stitch definition to make the flowers pop.
-
Sizing: To make the bag larger or smaller, simply add or subtract from the initial foundation chain of 16 (ensure you adjust in pairs for the grid).
Conclusion
The 3D Flower Phone Bag is a beautiful blend of utility and delicate fiber art. The clever use of the mesh grid as a base for the flowers makes the construction seamless and avoids the need for sewing individual components. Whether as a personal accessory or a handmade gift, this bag is sure to impress with its intricate texture.
Tip: When working the row after a flower round, remember to catch the back of the top petal with a stitch. This keeps the flower flat against the bag and prevents it from drooping forward, maintaining a much neater and more structured appearance.