
Chic Crochet Beanie Hat Pattern to Keep You Comfy
Stay cozy and stylish with this Crochet Beanie Hat Pattern, perfect for cold days, casual wear, and adding a fun flair to outfits.
Perfect for adding both warmth and style to any outfit, the Crochet Beanie Hat pattern turns simple yarn into a soft, snug hat that feels just right for cool days. Its smooth, rounded shape fits comfortably on most heads, while the stitches create a clean, polished look that works with casual or trendy outfits.
Vibrant Crochet Beanie Hat Pattern to Brighten Cold Days
Options like a ribbed or plain brim give the hat a finished touch, making it versatile enough for everyday wear. The pattern stands out because it combines simplicity with flexibility. This pattern transforms simple yarn into a wearable accessory that blends comfort, fashion, and personal creativity, leaving you with a finished hat that’s both functional and stylish.
Basic crochet stitches are used in clear, step-by-step instructions, making it approachable for beginners while producing a professional-looking result.
Size adjustments are easy—extra rounds add height, and thicker yarn increases warmth. Different colors and textures allow personalization, giving each hat a unique look that matches your wardrobe or mood.
Ideal for chilly days, the beanie keeps heads cozy while adding charm and style.
Smaller versions make thoughtful handmade gifts, and creative textures or colors work well for craft fairs or charity projects.
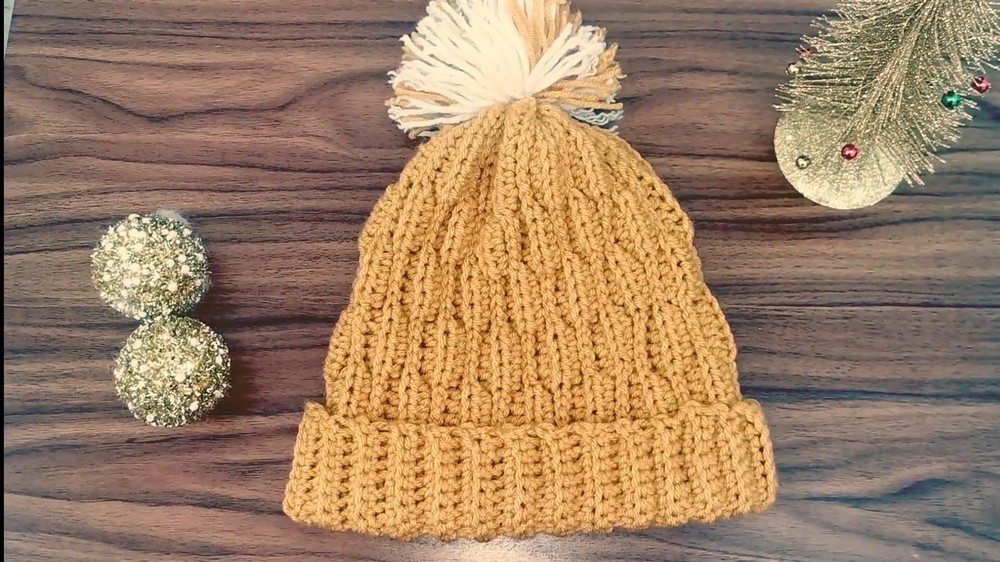
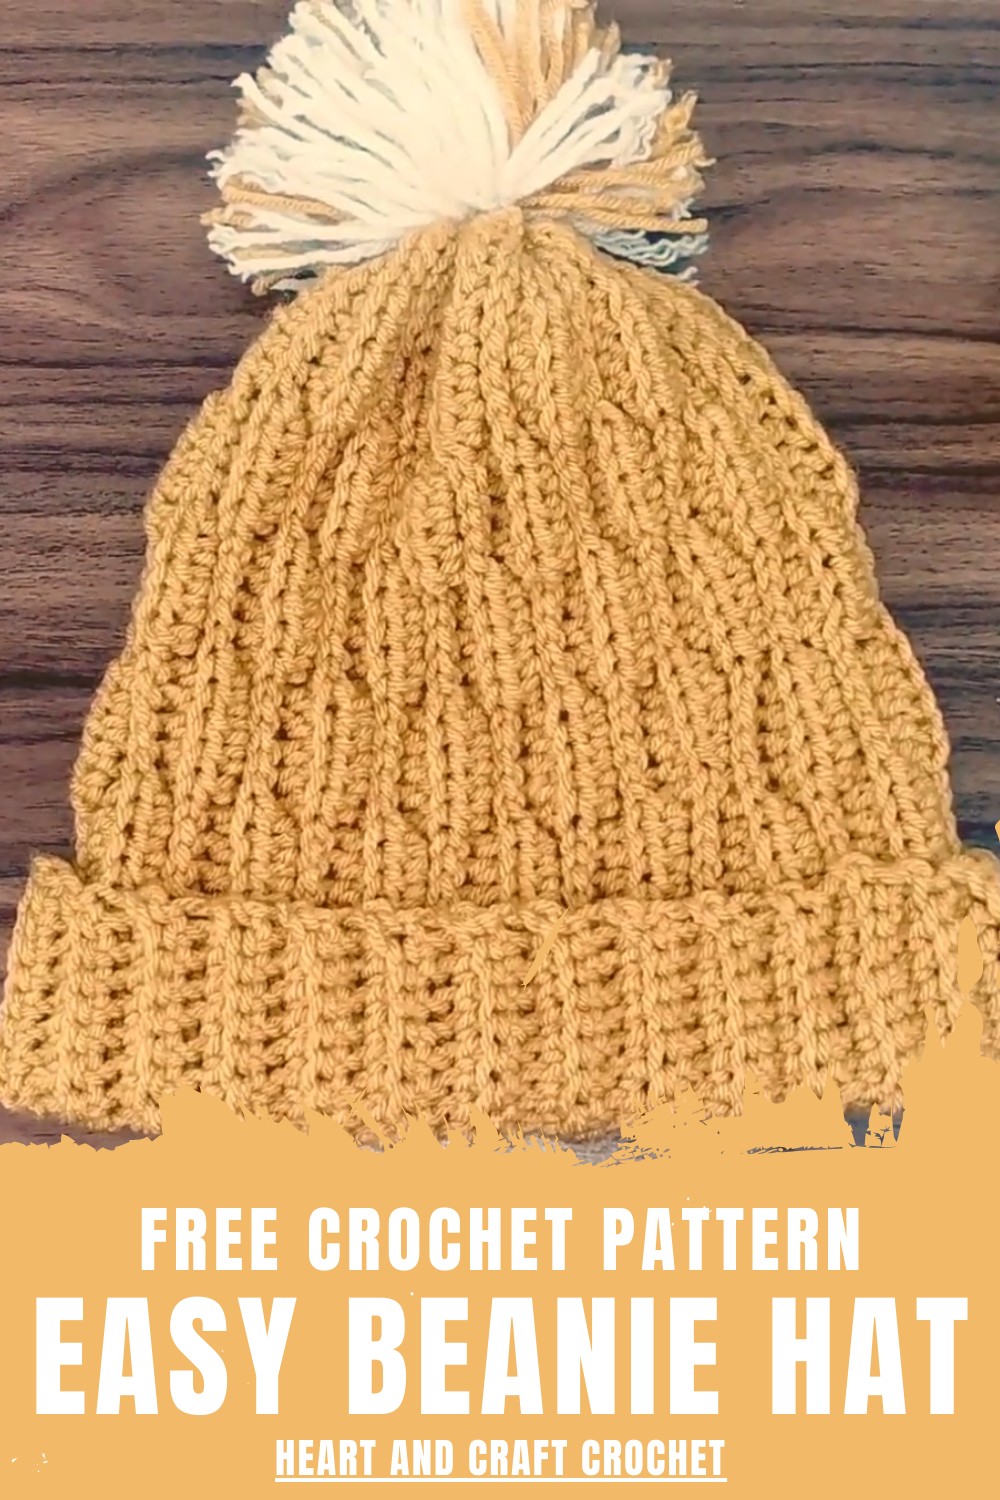
In this tutorial, Heart and Craft Crochet provides a clear guide on how to create the Easiest Crochet Beanie using a beautiful textured wave stitch. This project is specifically designed for those who want a quick, stylish winter accessory without complex shaping.
Introduction
The beanie features a rhythmic four-row repeat that creates a unique wavy pattern. It is worked as a flat rectangle and then seamed together, making it a stress-free project for anyone who can handle basic crochet stitches. The finished hat includes a ribbed brim and a cozy, textured body.
General Information
-
Materials:
-
Yarn: Medium worsted weight yarn (the tutor uses Himalaya Super Soft, similar to Red Heart Super Saver).
-
Hook: 5.0 mm crochet hook.
-
Tools: Yarn needle for seaming and scissors.
-
Optional: A pom-pom for the top.
-
-
Difficulty Level: Beginner Friendly. It uses basic stitches and a simple geometric construction.
-
Uses: A warm winter staple, perfect for personal use or as a handmade gift.
Step-by-Step Details
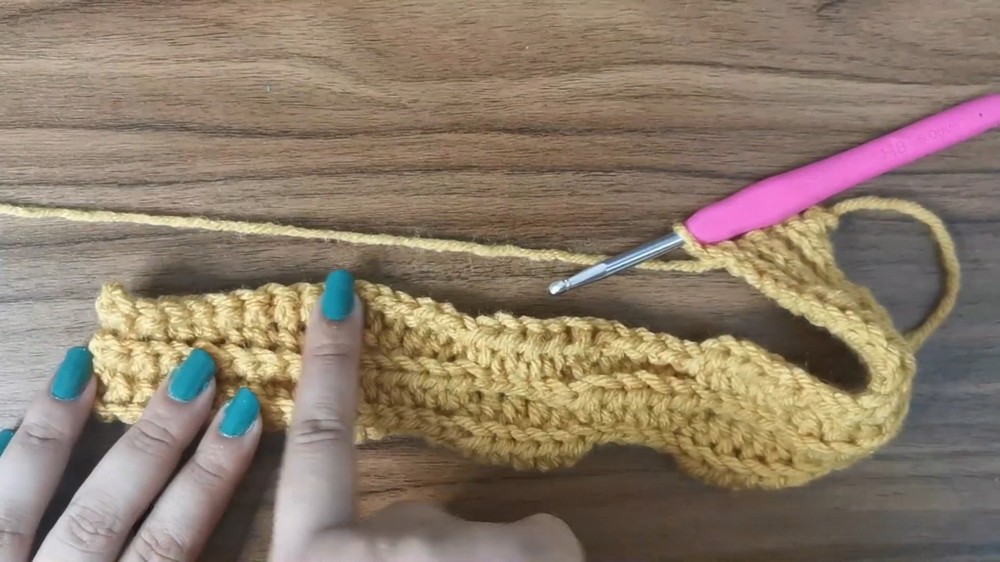
1. Foundation and Initial Row
-
Starting: Create a slip knot and chain 46.
-
Row 1: Skip the first stitch. Place 10 single crochets (sc) in the next 10 stitches. Then, work a repeat three times: 5 slip stitches (sl st) followed by 5 half-double crochets (hdc). Finish the row with 5 sl st.
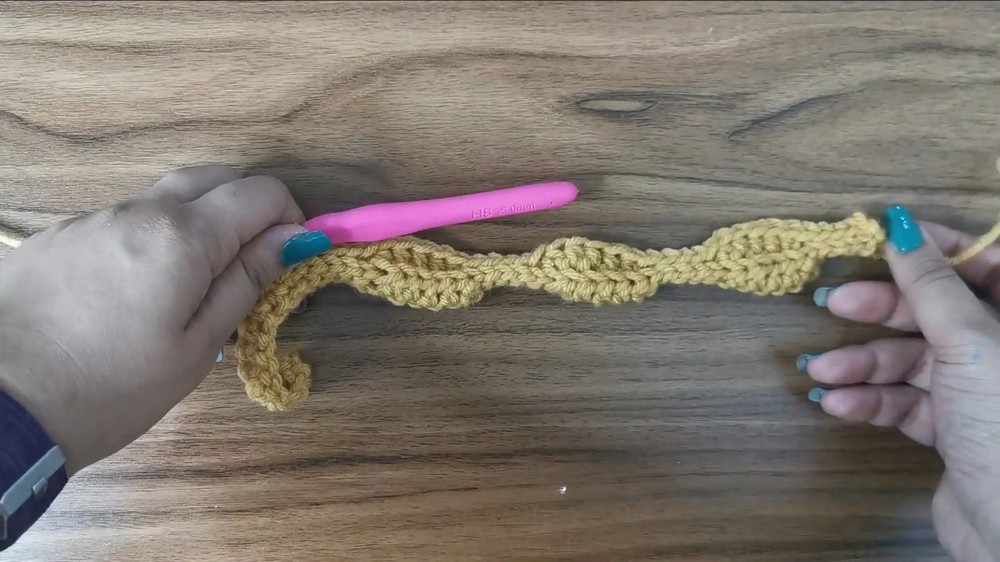
2. The Wave Pattern (4-Row Repeat)
-
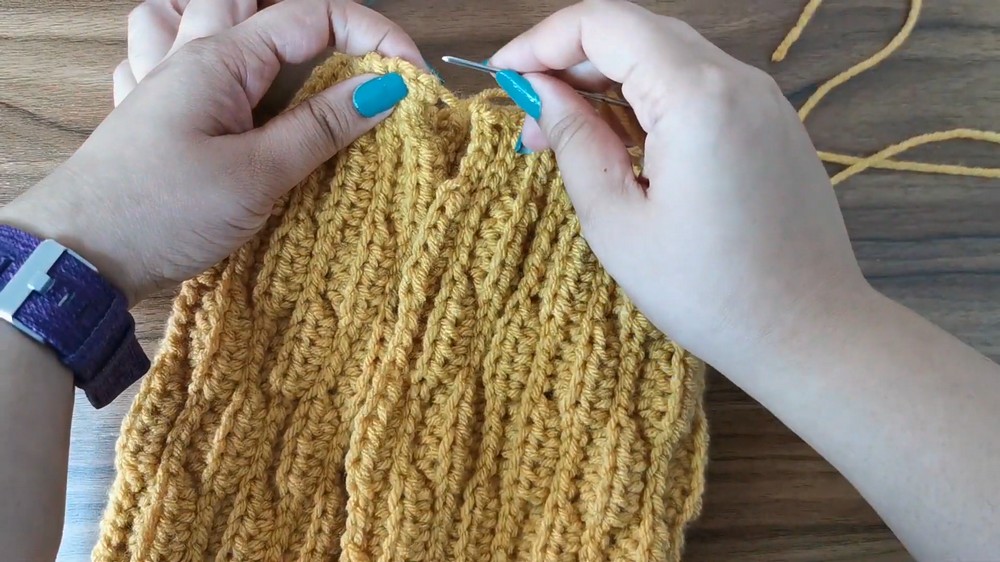
The Back Loop Rule: For the rest of the project, work only in the back loops to create a ribbed texture.
-
Row 2: Chain 1, turn. Work 5 sl st. Then, work the opposite of the previous row: 5 hdc followed by 5 sl st (repeat three times). Finish with 10 sc at the end (the brim).
-
Row 3: Chain 1, turn. Work 10 sc. To create the "wave," place hdc on top of previous sl st and sl st on top of previous hdc. Follow the pattern: 5 hdc, 5 sl st (repeat three times). Finish with 5 sl st.
-
Row 4: Chain 1, turn. Work 5 sl st. Repeat the sequence: 5 sl st, 5 hdc (repeat three times). Finish with 10 sc.
-
Row 5: This starts a new wave. Work 10 sc, then 5 sl st, then 5 hdc (repeat three times). Finish with 5 sl st.
3. Building the Body
-
Repeat rows 2 through 5 13 more times (or until the rectangle is long enough to wrap around your head). The side with 10 sc will always be the brim, and the side with 5 sl st will be the top of the hat.
4. Assembly and Finishing
-
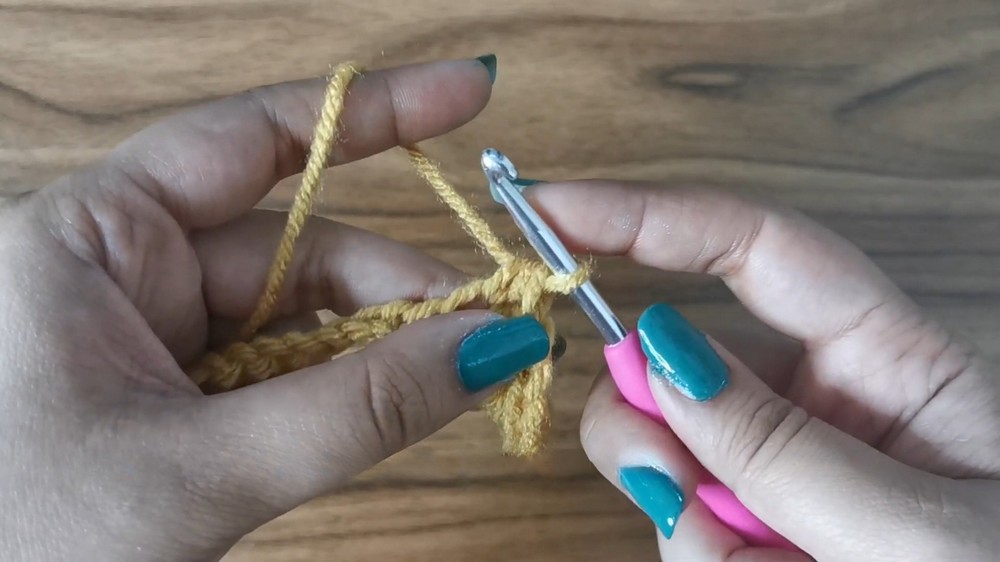
Seaming: Fold the rectangle in half. Use a yarn needle to sew the two short ends together. The wave pattern is designed so the ends fit together like puzzle pieces.
-
Closing the Top: Thread yarn through the top stitches (the 5 sl st edge) like a drawstring. Pull tightly to cinch the top shut and tie a secure knot.
-
Brim and Pom-Pom: Fold up the bottom 10-sc section to create a brim. Optionally, attach a pom-pom to the top for a classic winter look.
Special Features
-
Puzzle-Piece Seaming: The wave stitch is clever because the final row and the first row interlock perfectly, making the seam almost invisible.
-
Built-in Ribbing: By working in the back loops and using sc for the first 10 stitches, the hat naturally forms a snug, stretchy brim without any extra steps.
Tutor’s Suggestions
-
Stitch Contrast: The goal is to always place a half-double crochet over a slip stitch from the row below (and vice versa) to build the wavy "peaks and valleys."
-
Folding the Brim: The brim is not sewn in place, giving you the flexibility to adjust the hat's length whenever you wear it.
Conclusion
This beanie project is a fantastic introduction to textured crochet. The wave stitch provides a professional, high-end look while maintaining a simple construction that even a novice can master in an afternoon.
Final Tip: Because this is a four-row repeat, keep a tally or a piece of paper nearby. Write down the row numbers and cross them off as you complete them; this prevents you from losing your place if you take a break.