
Playful Crochet Mini Easter Bunny Pattern To Boost Your Easter
Hop into fun with the Free crochet Mini Easter Bunny Pattern, with simple instructions, fast stitching, and an adorable bunny ready to charm any space or gift.
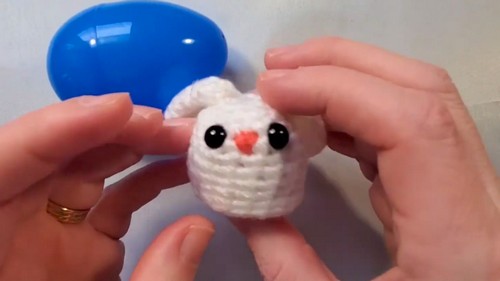
With its delightful charm and compact design, this crochet bunny is a perfect addition to Easter celebrations and beyond. This tiny creation stands out for its customizable beauty—you can make it in a variety of yarn colors to match your festive theme. Its small size allows it to fit snugly inside a plastic Easter egg, making it ideal for Easter egg hunts or a creative basket filler.
Sweet Crochet Mini Easter Bunny Pattern Perfect for Table Decor
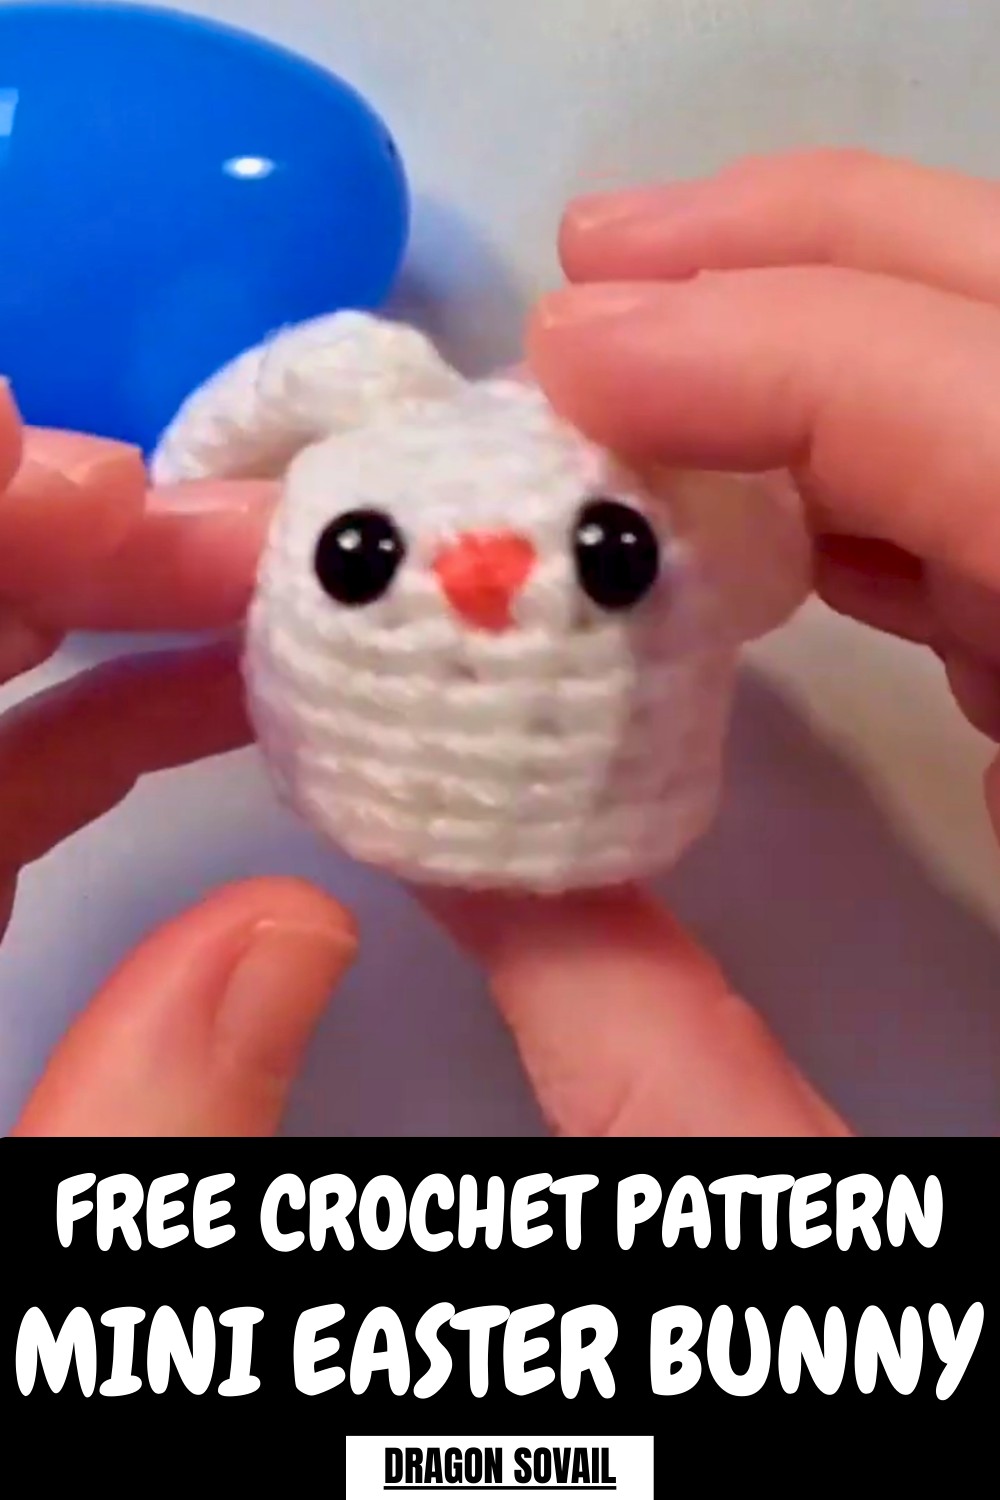
Apart from looking adorable, this bunny serves as a meaningful, handmade gift that shows love and thoughtfulness. Adding finishing touches, such as blush on the cheeks or a heart-shaped detail near the tail, makes it unique and even more special.
The project is beginner-friendly and uses simple techniques like single crochet, increases, and invisible decreases. Whether as a candy alternative or a timeless keepsake, this bunny promises joy and creativity for any recipient. Bring out the spirit of spring with this lovely handmade project.
How to Crochet a Mini Easter Bunny: Step-by-Step Guide
Materials Needed
You will need these materials to crochet the Easter bunny:
- White Yarn: Soft yarn (any color can be used for variety).
- Scrap Yarn: For the bunny’s nose and optional details like a heart.
- Polypill Stuffing: Or leftover yarn scraps for stuffing.
- Plastic Easter Egg: A 3.5-inch long egg with a width of 2 inches works well.
- Safety Eyes: Optional—you can also embroider the eyes or use felt pieces.
- 3.25 mm Crochet Hook: Perfect size for the bunny pattern.
- Scissors: For cutting the yarn.
- Yarn/Tapestry Needle: For sewing parts together and weaving in ends.
- Optional Makeup: Low-cost makeup can be used to add blush to the bunny’s cheeks or color inside its ears.
Uses
- A fun addition to Easter egg hunts.
- A lovely handmade gift for kids or loved ones.
- Works as an alternative to candy-filled Easter eggs.
- Cute spring decorations for tables or baskets.
Special Features
- A floppy-eared design for cuteness and portability.
- Customizable colors for yarn, eyes, and details.
- Compact size designed to fit inside a plastic Easter egg.
- Minimal materials are required for this fun project.
- Personalized finishing touches, such as blush or a heart-shaped detail, make it unique.
Level of Difficulty
This project is Beginner-Friendly. The pattern primarily uses single crochet, increases, decreases, and simple sewing techniques for attaching parts. It’s manageable for newbies, as the small size keeps the process fast and straightforward.
Step-by-Step Instructions
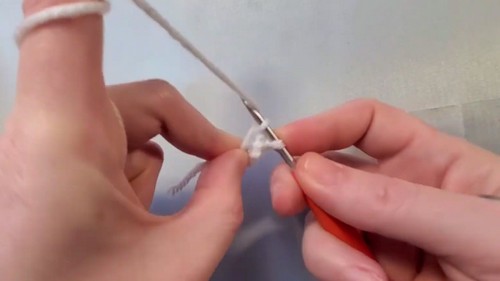
1. Start with the Bunny’s Body
- Begin with a magic ring. Wrap the yarn around your fingers, pull it into a loop, and secure it with a chain.
- Row 1: Single crochet (SC) 4 times into the ring. Tighten the tail slightly to close the ring.
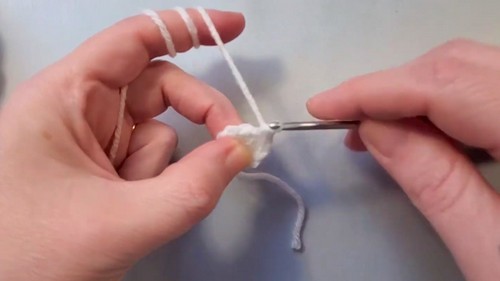
- Row 2: Increase in every stitch (SC twice in each of the 4 stitches) to get 8 stitches.
- Row 3: Increase again by crocheting two in the first stitch, then one in the next stitch—repeat this pattern to reach 12 stitches.
- Row 4: Increase from 12 to 16 stitches. Use the pattern: Two SC in the first stitch, one SC in the next two stitches, and repeat.
2. Build the Bunny's Body
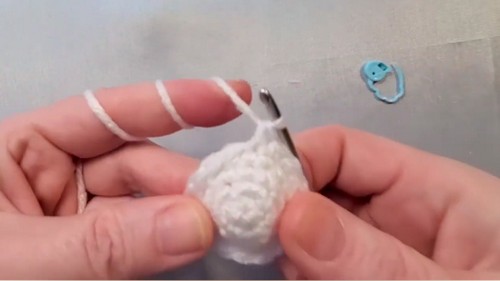
- Rows 5-11: Work without any increases—single crochet (16 stitches) for seven rows.
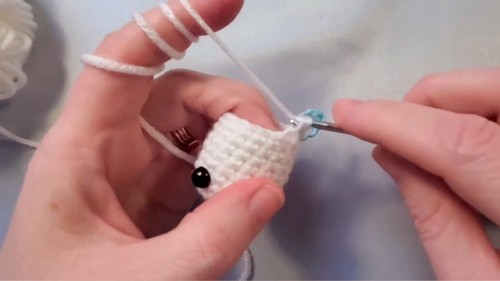
- Insert the safety eyes (or embroider them) between rows 5 and 6, leaving about four stitches between the eyes.
- Begin stuffing the bunny lightly while continuing to crochet.
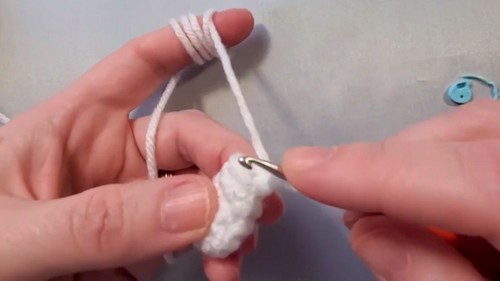
3. Shape the Base of the Bunny
- Row 12: Single crochet in the back loop for all 16 stitches—this creates a flat base for the bunny so it can sit properly.
- Row 13: Start decreasing to shape the bunny’s base. Use an invisible decrease: Pull the front loops of two stitches together, crochet through them, and then single crochet in the next two stitches. Repeat the decrease pattern to drop to 12 stitches total.
- Row 14: Decrease to 8 stitches using the pattern: Invisible decrease and one single crochet.
- Row 15: Decrease all the way around until only 4 stitches remain, closing the base.
- Pull the yarn tight, and use the yarn needle to sew the remaining gap shut.

4. Make the Bunny’s Ears
- Start with a magic ring and SC four stitches into the ring.
- Row 2: Increase from 4 to 6 stitches by crocheting two SC in the first stitch and one SC in the next. Repeat.
- Row 3: Increase to 8 stitches using the pattern: Two SC in the first stitch, one SC in the next two stitches.
- Rows 4-5: SC in each stitch, keeping 8 stitches.
- Row 6: Decrease from 8 stitches to 6 using the invisible decrease pattern.
- Rows 7-8: SC in each stitch for two more rows. Finish off with a slip stitch and leave a tail for sewing.
- Sew each ear to the top of the bunny’s head. The tutorial suggests floppy ears, but you can adjust their positioning for a different style.
5. Add the Bunny’s Tail
- Start with a magic ring and SC six stitches into the ring.
- Rows 2-3: SC into each stitch (6 stitches total).
- Sew the tail to the bottom center of the bunny. You can use the leftover tail yarn as stuffing for the tiny tail.
6. Final Details: Adding the Nose and Decorations
- Use pink scrap yarn to embroider the bunny's nose in a small "V" shape between the eyes.
- (Optional) Add a tiny heart detail with yarn below the nose.
- If desired, use makeup to apply blush to the bunny’s cheeks and gently color the insides of the ears.
Tutor’s Suggestions
- Adjust the ears’ shape and positioning based on how they’ll fit inside the egg (floppier ears are easier to manage).
- Use leftover yarn scraps for stuffing to make it economical.
- Don’t overstuff the bunny to ensure it sits flat on surfaces.
- Be patient with the tiny stitches, as working with such a small project can be fiddly at first.
Conclusion
This Easter bunny crochet project is a quick, easy, and fun way to add a personal touch to seasonal celebrations. The finished bunny’s charm and detail make it a delightful alternative to traditional Easter treats or decorations. With minimal materials, it’s an ideal stash-busting project and perfect for creating small gifts that carry a handmade touch. Customizable and enjoyable to create, this bunny brings festive joy to Easter baskets or egg hunts!
Bonus Tip
Use pastel or multicolored yarn to make your bunny even more festive and spring-inspired! Experiment with different color combinations for a unique collection of bunnies.