
Must-Have Crochet cassette tote bag Pattern for Casual Chic Vibes
Carry style and function effortlessly with this Free crochet cassette tote bag Pattern perfect for everyday use, personalized colors, and handmade charm.
This tote exudes charm and functionality, making it a standout accessory for daily use. The Crochet cassette tote bag pattern offers a perfect blend of style and practicality, resulting in a bag that is both visually appealing and highly useful.
Everyday Ready Crochet cassette tote bag Pattern for Stylish Carrying
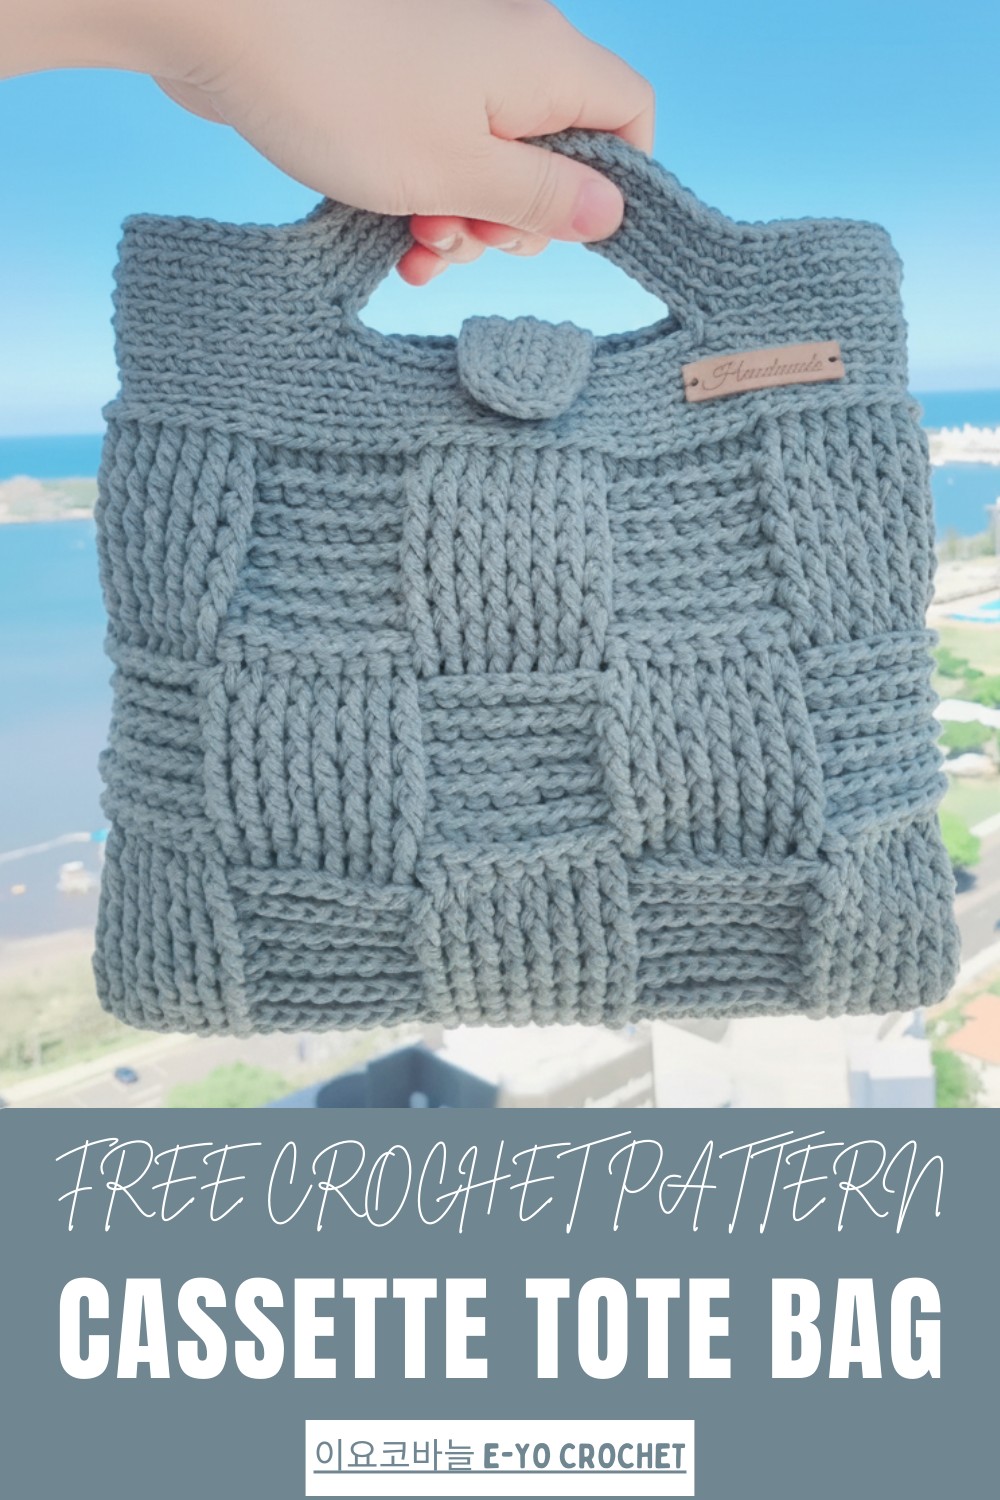
Its structured yet soft shape creates a neat, balanced look, while the textured crochet stitches give it a cozy, handmade feel. Lightweight but sturdy, it is ideal for carrying books, groceries, or everyday essentials without losing its form.
Materials
Assemble the following items to create your Cassette Tote Bag:
-
Yarn: Phil Twist Macrame or similar bulky macrame/cord yarn (70% Cotton, 30% Polyester, approx. 250g/250m).
-
Crochet Hook: A 4 mm crochet hook.
-
Tools: Scissors, a yarn needle (or tapestry needle) for sewing and weaving in ends, and stitch markers.
-
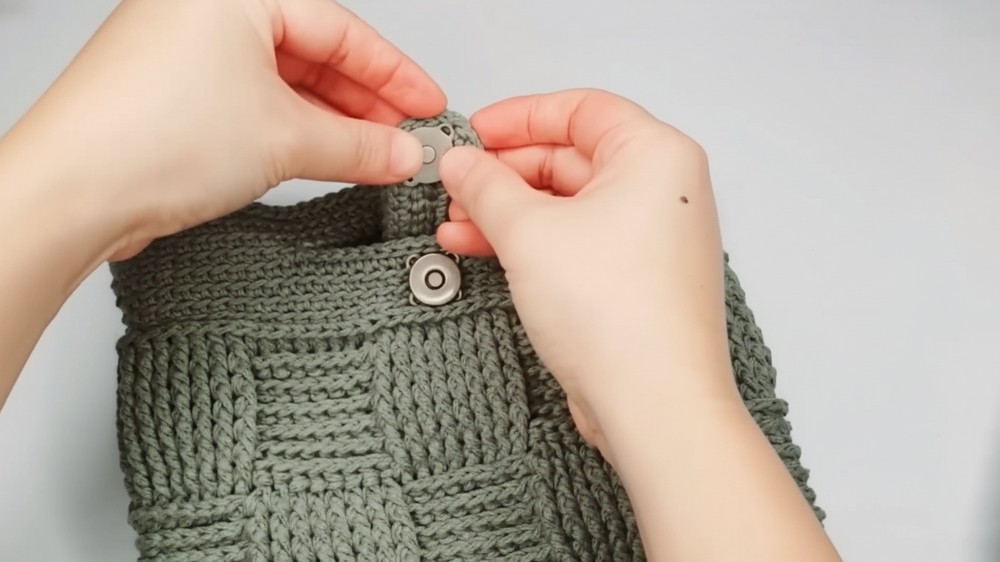
Optional: A magnetic snap closure.
Uses
-
Tote Bag: Serve as a practical, fashionable handheld tote bag for everyday use.
-
Storage: Carry simple personal belongings, such as a wallet, phone, and keys.
-
Convertible Style: Easily convert the tote into a shoulder bag or crossbody bag by attaching a separate long strap to the handles.
Special Features
-
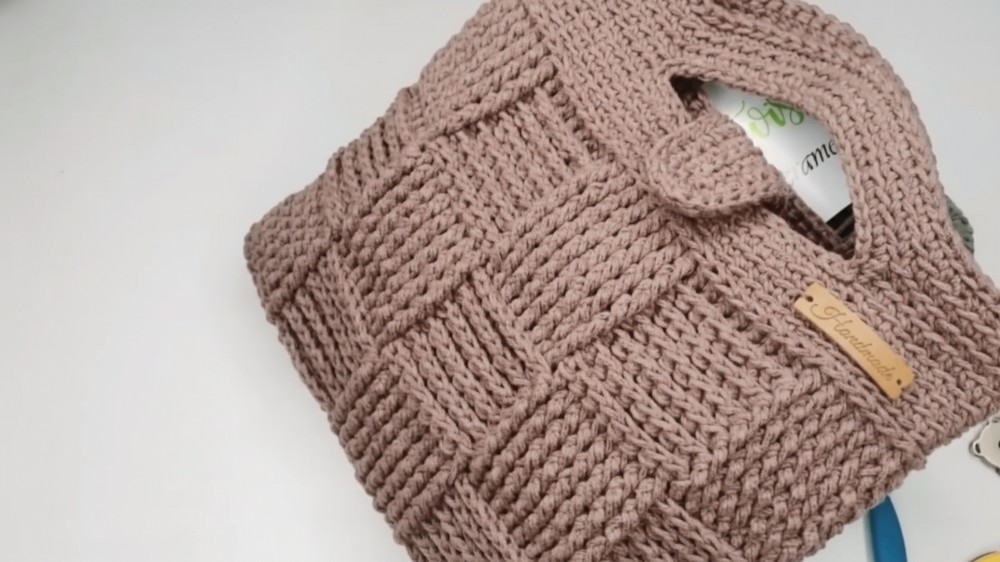
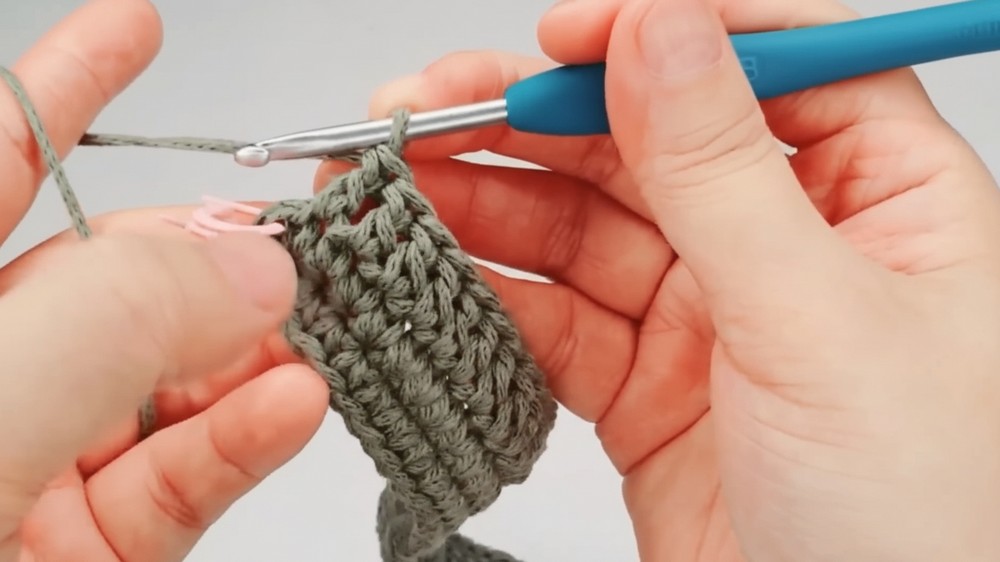
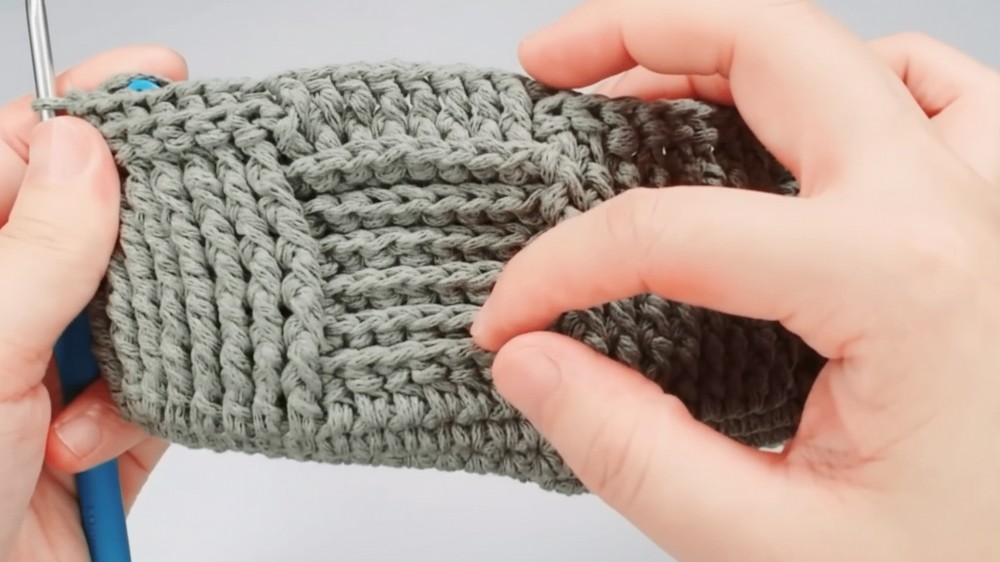
Cassette Pattern: Achieve the striking square/cassette pattern by alternating blocks of Front Post Double Crochet (FPDC) and Back Post Double Crochet (BPDC).
-
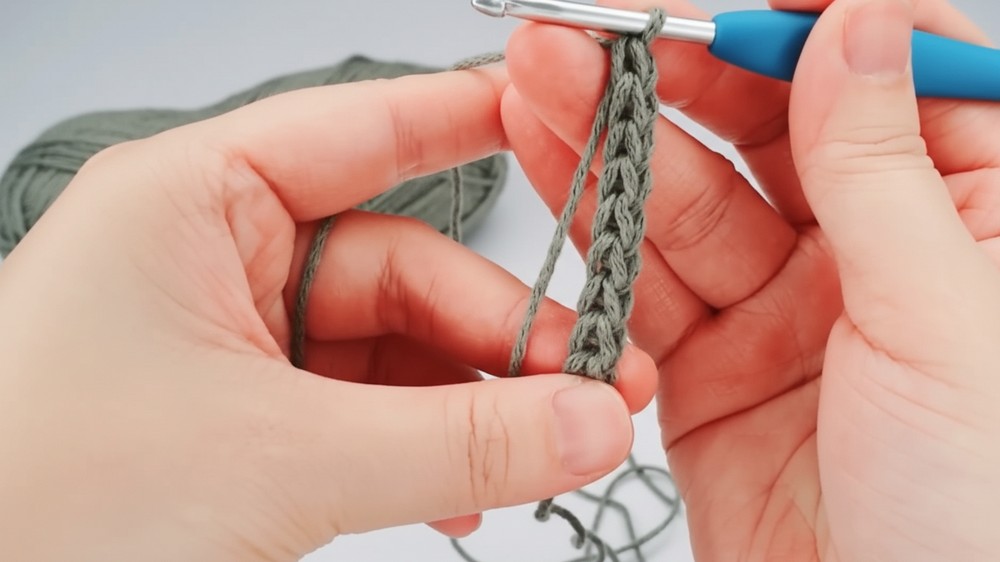
Structural Base: Begin the bag with a Double Chain (이중 사슬뜨기) foundation, which creates a very stable and non-stretching bottom for the bag.
-
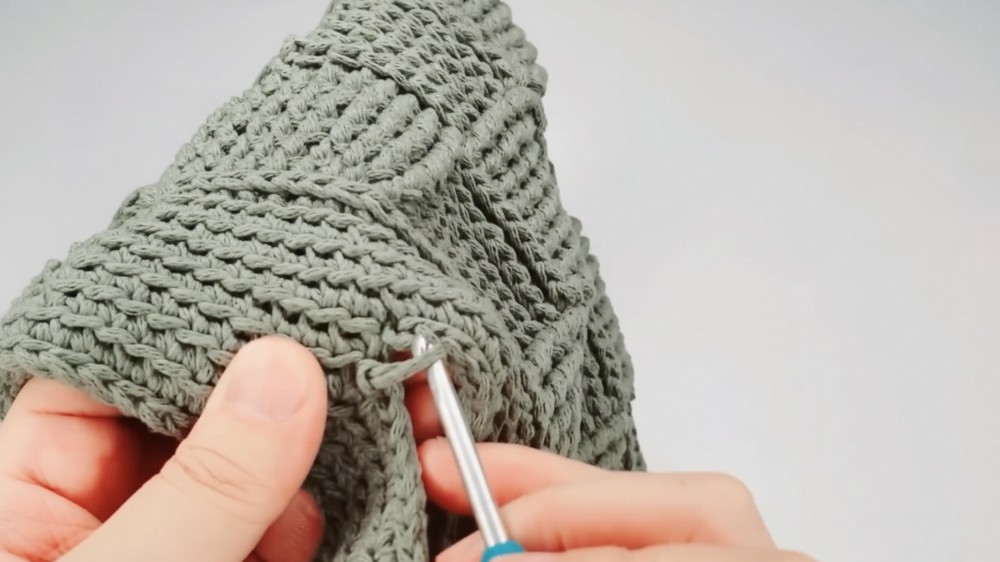
Integrated Handles: Form the handles by using a chain-space technique on the final rounds, creating clean, integrated openings.
-
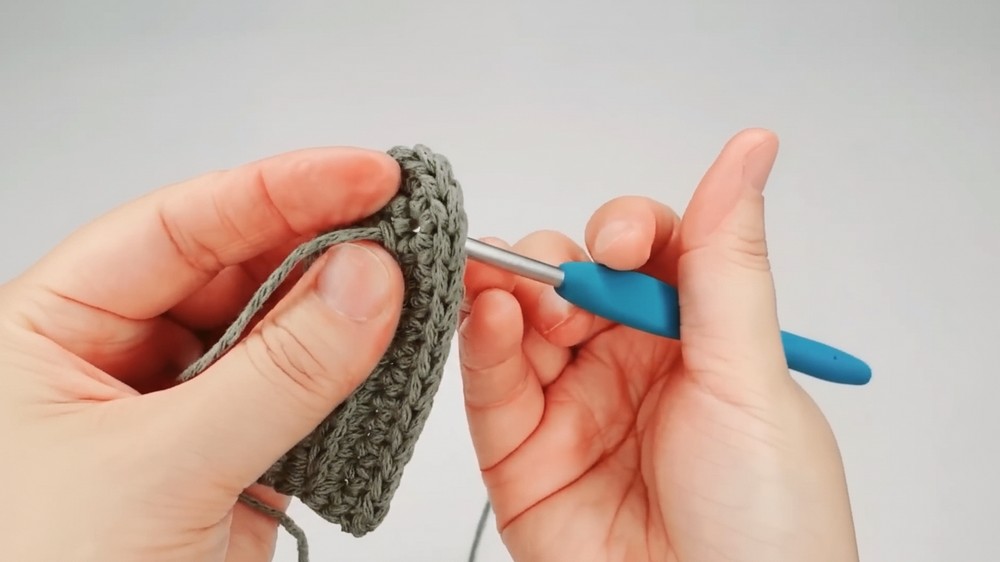
Clean Finish: Apply a full round of Slip Stitches around the top edge and the handle openings to give the bag a neat, professional, and reinforced edge.
Level of Difficulty
Intermediate. This project requires comfort with basic stitches and introduces the specialized post stitch techniques (FPDC and BPDC) necessary for the main body pattern. The Double Chain foundation and working stitches into the back loop only for the handle base also demand focused concentration.
Tutor's Suggestions
-
Start with a Long Tail: When creating the initial Double Chain, leave a long yarn tail (about 1.2 meters), which is approximately four times the length of the base.
-
Reinforce the Base: When working the first Single Crochet round, crochet over the long tail from the double chain. This technique significantly reinforces the base, preventing it from drooping or stretching.
-
Avoid Holes: When working the handle opening (the chain space), work the first and last stitches right next to the chain in a regular Single Crochet (through both loops), instead of the back loop only, to ensure the handle connection point is strong and prevents large gaps.
-
Finish with Sl St: Do not skip the final Slip Stitch (Sl St) round around the top edge and the handle holes. This step makes the edges noticeably thicker, sturdier, and more polished.
Crochet cassette tote bag
The bag’s design also shines in versatility. It works beautifully as a casual handbag, a small shopping tote, or even a creative accessory to complement various outfits. Choosing your own colors and adjusting the size allows you to personalize it fully, making it a reflection of your style.
The crochet technique ensures durability and helps the bag maintain its shape, meaning less worry about sagging or wear.
Beyond practicality, the bag carries an aesthetic appeal that draws attention. Its handmade charm adds warmth and personality, turning a simple tote into a stylish statement.
For anyone looking to add a functional yet beautiful piece to their collection, this tote pattern delivers on all fronts combining elegance, durability, and everyday usability in one thoughtful design.
Conclusion
You have successfully crocheted the Cassette Tote Bag! By mastering the post stitch pattern and the specialized foundation, you have created a beautifully textured and stable bag. This piece now stands ready for use as a stylish accessory or as a foundation for adding your own embellishments, like a long shoulder strap.
Tip
For a beautifully clean and seamless finish on the Slip Stitch Edging (both the top rim and the handle holes), use a yarn needle to invisibly join the last Slip Stitch to the first Slip Stitch after cutting the yarn. This avoids an obvious step/gap where the final Sl St was made.