
Trendy Crochet Mochi Cat Pattern Fun To Display
Cuddle up with a crochet Mochi Cat using this free pattern, perfect for adding a cute handmade touch to gifts, décor, or playful collections.
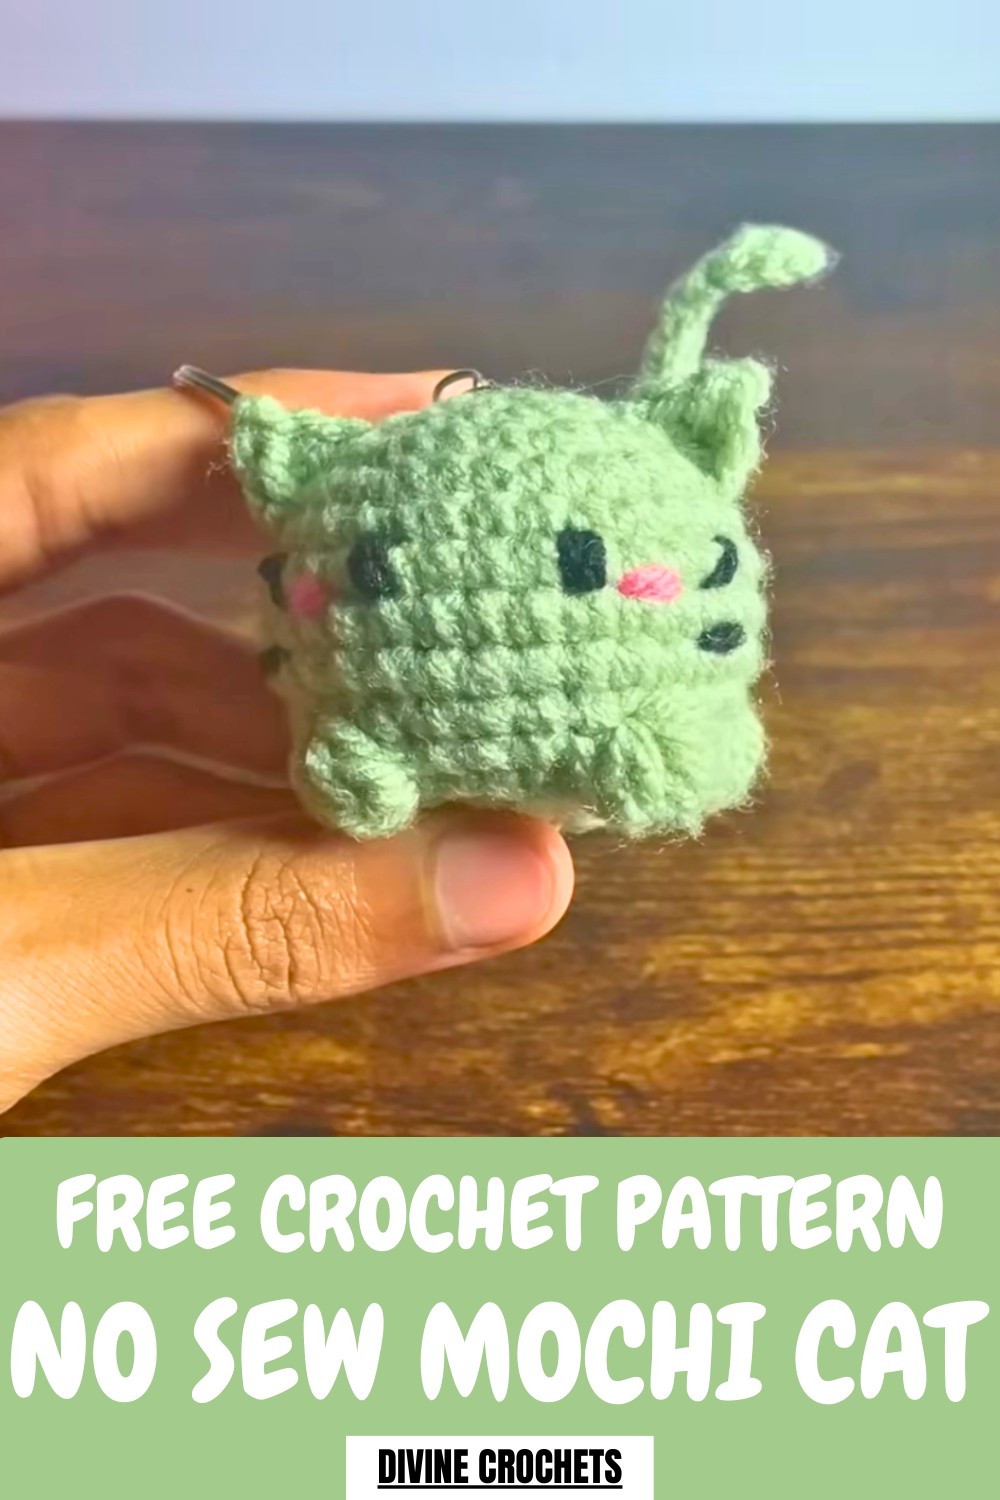
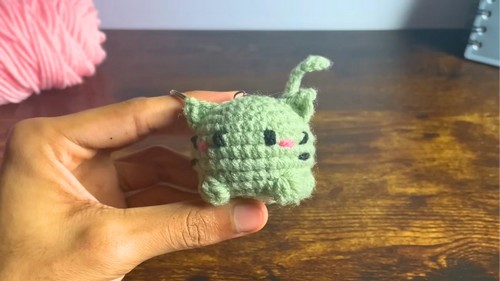
Creating something adorable and personal can be incredibly rewarding. The Crochet Mochi Cat Pattern lets you design an irresistibly cute, plump little feline with its rounded body, delicate ears, rosy cheeks, and playful whiskers. Its compact size and charming details make it perfect as a gift, keychain, bag accessory, or even a decorative desk buddy.
Cozy Crochet Mochi Cat Pattern Perfect For Decor
Personalization is a breeze—you can choose unique colors and expressions, ensuring that every mochi cat reflects a bit of your creativity.
Tip
For extra character, experiment with variations—add a bow, colorful stripes, or even a small heart to make each mochi cat unique!
Step-by-Step Guide to Creating the Mochi Cat Crochet Pattern
Special Features
- Adorable Design: The mochi cat features charming details such as blush cheeks, embroidered eyes, playful whiskers, and tiny ears.
- Functionality: Attach a keyring to use this as a bag charm, keychain, or even a cute decor piece for your workspace.
- Beginner-Friendly Pattern: The tutorial employs simple stitches, making it accessible for individuals new to crochet.
- Personalization: Use colors of your choice for the body, whiskers, blush, and ears to match your creative flair.
Level of Difficulty
This project is beginner-friendly, and the tutor makes a point to provide simple, easy-to-follow instructions for every step, ensuring even first-time crocheters can comfortably complete the pattern. At the same time, intermediate crocheters can enjoy the intuitive flow of the project while adding their own creative touches.
Materials You'll Need
To create your mochi cat, gather the following:
- Yarn: Weight-four yarn in your desired color for the body, small amounts of black yarn (eyes/whiskers), and pink yarn for blush.
- Crochet Hook: 3 mm crochet hook.
- Tools: Scissors, yarn needle, and a stitch marker (such as bobby pins or paper clips).
- Stuffing: Polyfiber stuffing or yarn scraps.
- Key Ring: To turn your mochi cat into a functional keychain.
Step-by-Step Instructions
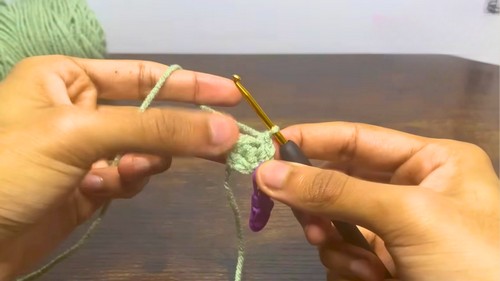
1. Create the Slip Knot and First Stiches
- Begin by forming a slip knot with your yarn. Follow the technique shown to ensure the loop is neither too tight nor too loose.
- Learn the correct method to hold the yarn and the crochet hook (choose between the knife grip or pencil grip).
- Create a chain of four stitches and join the ends with a slip stitch to form a beginner-friendly magic ring.
2. Round 1: Form the Base
- Place six single crochets within the magic ring. Use the yarn tail to close the ring snugly.
- Mark your first stitch with a stitch marker to keep track of the round’s start.
3. Expand the Circle with Increases
Proceed with multiple rounds to build the rounded base of the mochi cat:
- Round 2: Place two single crochets in each stitch (increase) to total 12 stitches.
- Round 3: Alternate between single crochet and increase across the stitches for 18 total.
- Round 4: Alternate two single crochet + increase for 24 stitches.
- Round 5: Alternate three single crochet + increase for 30 stitches.

4. Shape the Body
- For Rounds 6-8, continue with simple single crochet without increases to maintain the cylindrical shape of the body.
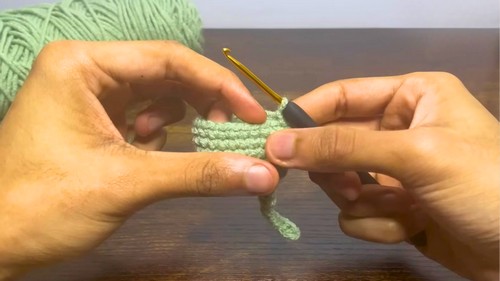
5. Create the Tail
- After Round 8, start on the tail by chaining 18 stitches.
- Slip stitch down the chain and attach it seamlessly to the mochi cat.

6. Decreasing to Close the Shape
- Round 10: Begin decreases by using the pattern three single crochets + decrease.
- Round 12: Move to single crochet + decrease for further tapering.
- Round 14: Decrease across all stitches to create a small opening.
- Close the base’s hole by threading the tail through the remaining front loops with a yarn needle. Pull it tight for a clean finish.
7. Add Face Details (Eyes, Blush, Whiskers)
Using black yarn, embroider the mochi cat’s eyes by counting up to Round 7 on the body as a guide:
- Eyes: Stitch two rounded lines on either side with appropriate spacing. Tie off and tuck excess yarn.
- Blush: Use pink yarn to stitch cute blush dots beneath the eyes.
- Whiskers: With black yarn, stitch thin whiskers diagonally outward from the blush spots.
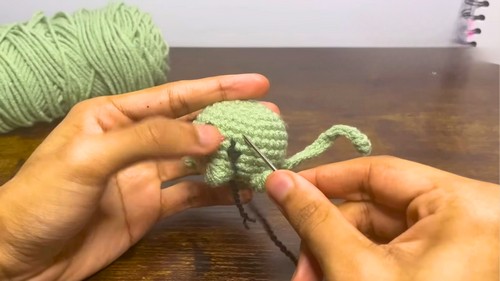
8. Attach the Ears
- Create the ears right above the whiskers between Rounds 5 and 6.
- For each ear, chain three, slip stitch into the second chain, and double crochet into the third chain to form the ear structure.
- Attach and secure with a slip stitch.
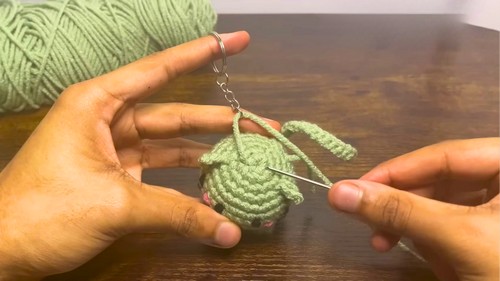
9. Attach the Keyring
- Sew the keyring onto the top of the mochi cat using the yarn and needle. Secure tightly to make your crochet piece functional.
Tutor's Suggestions
- Stitch Markers: Always use stitch markers to ensure that you don’t lose track of your rounds or stitches.
- Tension Control: Avoid tight stitches to ensure easier handling and neater results.
- Be Gentle: When closing openings or shaping, pull gently to avoid distorting the design.
Uses
- Perfect as a keychain, bag charm, or even a desk trinket.
- A charming handmade gift for friends, especially those who love cats.
- Great practice for basic crochet techniques and working in rounds.
Conclusion
Crocheting the mochi cat is a fulfilling and beginner-friendly project that allows you to develop basic crochet skills while creating something adorable and functional. The detailed tutorial ensures an enjoyable crafting experience, with a clear path to achieving professional-looking results through simple techniques. Try making several in different colors to brighten your day or someone else’s!