
Wonderful Free Crochet Bandana Pattern to Rock with a Plain Tee
Crochet your way to chic with this exciting free bandana pattern and create a stylish handmade accessory that’s perfect for any outfit.
Turn heads with a stylish bandana that combines charm and versatility in the easiest way possible. This triangular crochet accessory is not only lightweight but also effortlessly chic, making it perfect for all occasions. Whether you’re heading to a summer picnic or want a creative twist to your festival outfit, this bandana will add just the right touch of personality to your look. The artistic arrangement of chains and treble stitches builds triangular rows, forming an accessory that’s simple yet full of character.
Free Crochet Bandana Pattern to Keep Hair Back on Walks
The best part? Channel Hatice EŞişizade brings this timeless design to life with her clear and engaging tutorials on YouTube. With easy steps, the process becomes less daunting and more enjoyable, even for beginners. She guides you with precision as you work through each triangular segment and finish off with neat edges that offer a polished look. Her teaching style is perfect for crocheters of all skill levels.
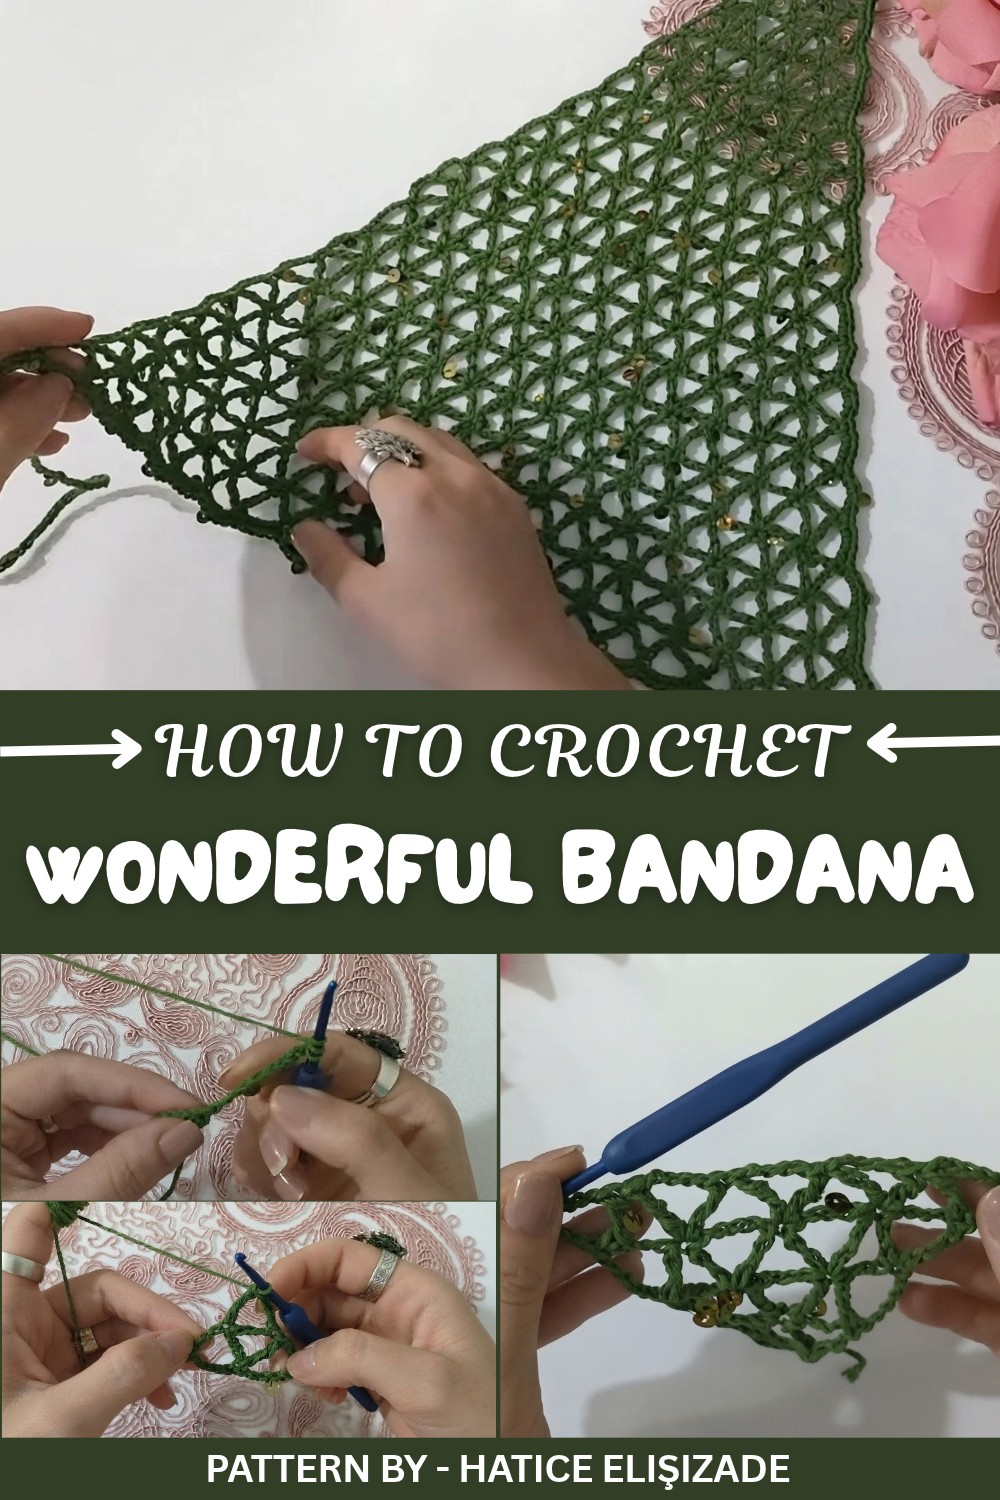
What makes this bandana unique is the attention to detail in its structure. The organized triangular shapes make it visually appealing, while the option to add ties or bows allows for a personal touch. No matter its size, the bandana maintains its comfortable and lightweight nature, making it a versatile accessory for daily wear or special occasions.
With just some yarn, a hook, and a little patience, this bandana quickly turns into a beautiful addition to your wardrobe. It’s not just about utility, this bandana is a bold fashion statement that's adaptable and fun. Try it out, and let your creativity shine.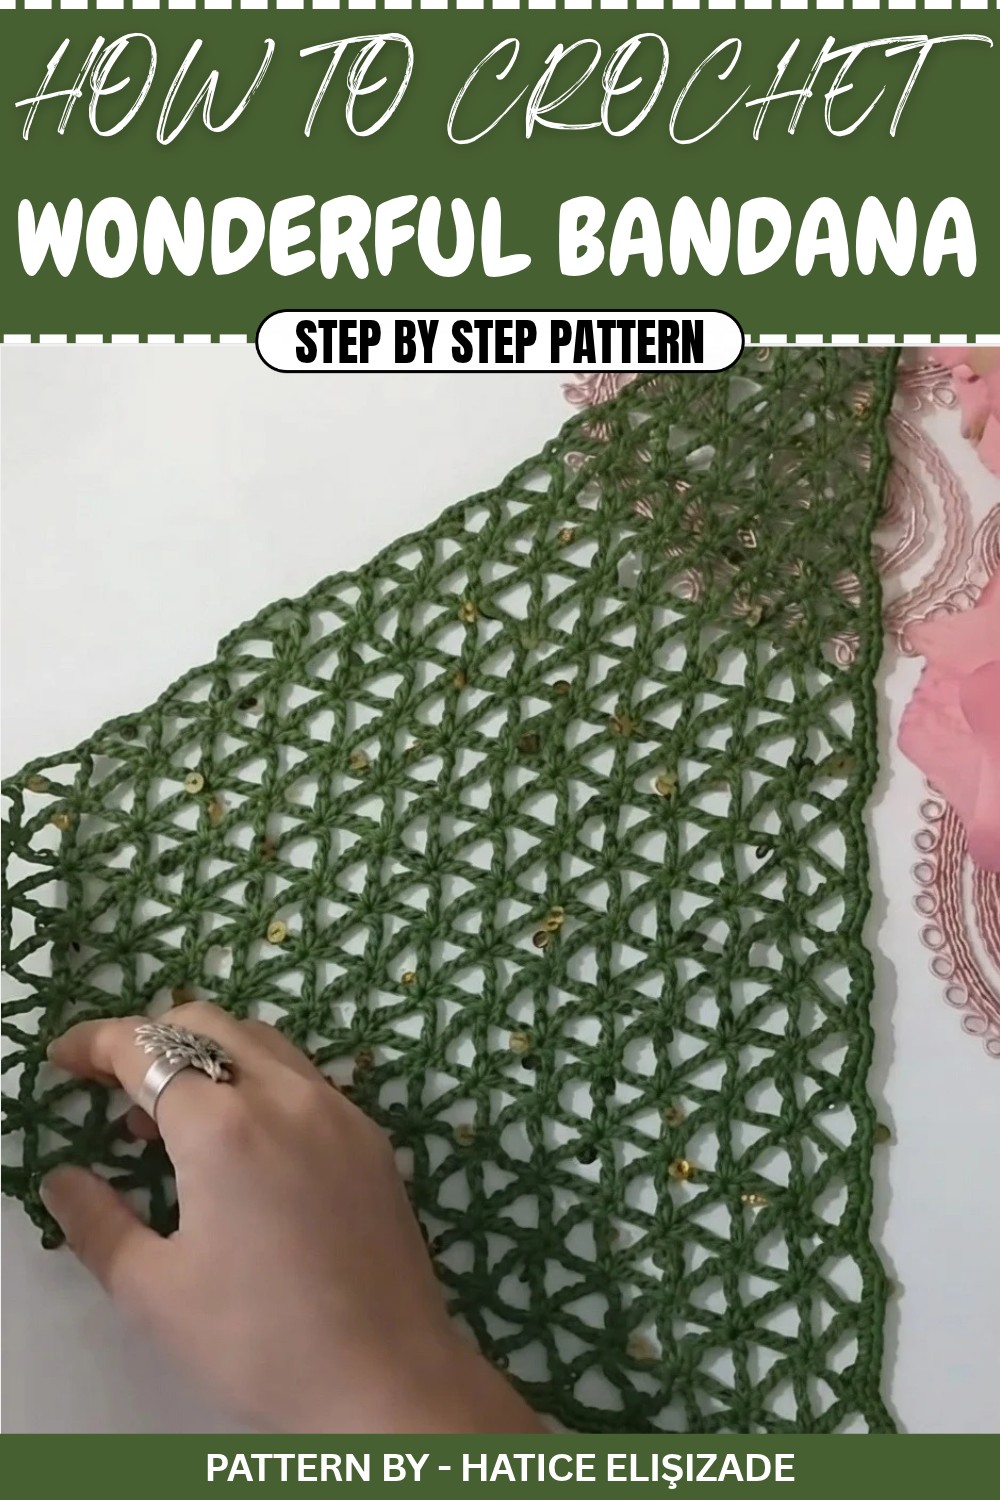
Beginner Friendly Crochet Bandana Pattern
Quick Overview Of Pattern
- Worked from the tip of a triangle upward.
- Built with:
- Chains (CH)
- Treble (triple) crochets (TR)
- Increase happens at the edges by working TR, CH 4, TR.
- No chains between motif “triangles”; you connect using a single TR.
- Finish with a single crochet border around all edges.
- Add 55 chain ties on both sides.
- Optional bow: chain 100 and work SC across, then shape and attach.
Notes
- The pattern is written in rows, turning at the end of each row.
- The start of rows uses CH 9 to form the side edge and height.
- In the body of the bandana, every motif unit is:
- TR into space, CH 4, TR into the same space (this makes a small open triangle).
- Between these motifs, you move directly into the next space with a TR without chaining.
- The main shaping and widening of the triangle happen at the edges where you repeat TR, CH 4, TR.
- The designer’s sample has 40 little triangles across the top edge, but this will vary with yarn thickness.
Skill Level
- Beginner
Uses only chains, treble crochets, and single crochets, with simple repetition.
Materials
- Yarn: Light or medium weight yarn (the designer used a relatively light yarn).
- Hook: 3 mm crochet hook (or size suitable for your yarn).
- Scissors.
- Tapestry needle for weaving in ends.
Measurements / Sizing
- The final size depends on:
- Yarn thickness.
- Number of rows you work.
- In the tutorial, the top edge has 40 triangular units when the bandana is complete.
- Work until the triangle comfortably reaches your desired bandana size (from forehead to back of head).
Gauge
Gauge is not critical for this pattern, but the structure expects:
- Chains and treble crochets to be even and not too tight.
- Triangle grows steadily as you repeat the pattern.
You can make a small swatch (a few rows) and see if you like the fabric’s openness and drape; adjust hook size if needed.
Stitch Abbreviations
- CH – Chain
- TR – Treble (triple) crochet
- SC – Single crochet
- St – Stitch
- YO – Yarn over
Special Stitches
Treble (Triple) Crochet (TR)
- YO twice.
- Insert hook into the indicated stitch/space.
- YO, pullup a loop (4 loops on hook).
- YO, pull through 2 loops (3 loops remain).
- YO, pull through 2 loops (2 loops remain).
- YO, pull through the last 2 loops.
This pattern uses TR almost everywhere in the main triangle.
The Crochet Pattern
Getting Started
Foundation
- Make a slipknot and place it on your hook.
- CH 9.
Row 1
- YO twice.
- Insert the hook into the first chain you made (closest to the slipknot).
- Work 1 TR into this chain.
- This TR plus the CH 9 creates your first long loop and the start of the triangle.
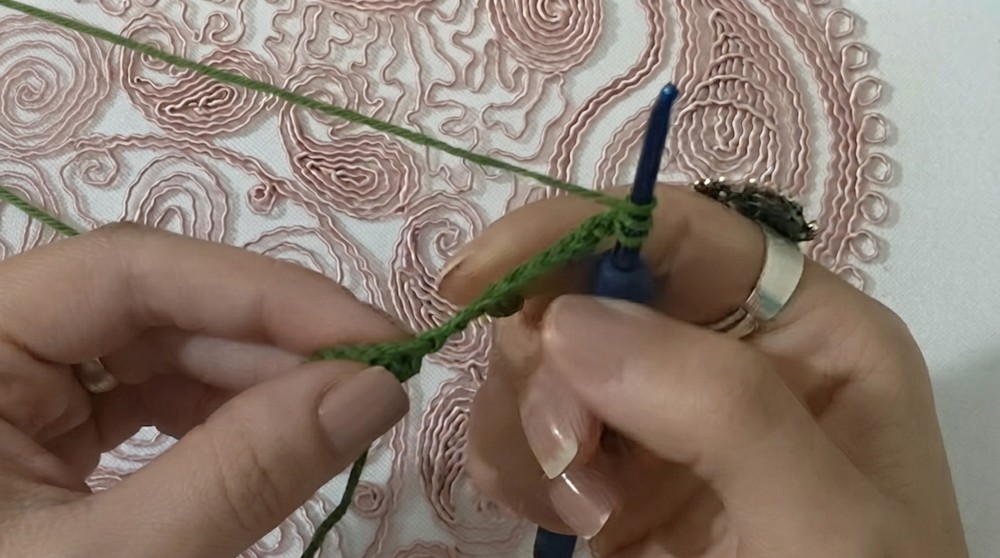
You now have a narrow triangular start.
Row 2
- CH 9, then turn your work.
- YO twice and insert your hook into the previous connection point (the top of the TR or the point where your previous CH loop is attached to the body).
- Work 1 TR there to close the new CH 9 loop onto the previous row.
- Now, from the base edge, count 4 chains upwards along the edge.
- YO twice, insert hook into that 4th chain, and work 1 TR.
- CH 4.
- Into the same point where you just made that TR, work another TR.
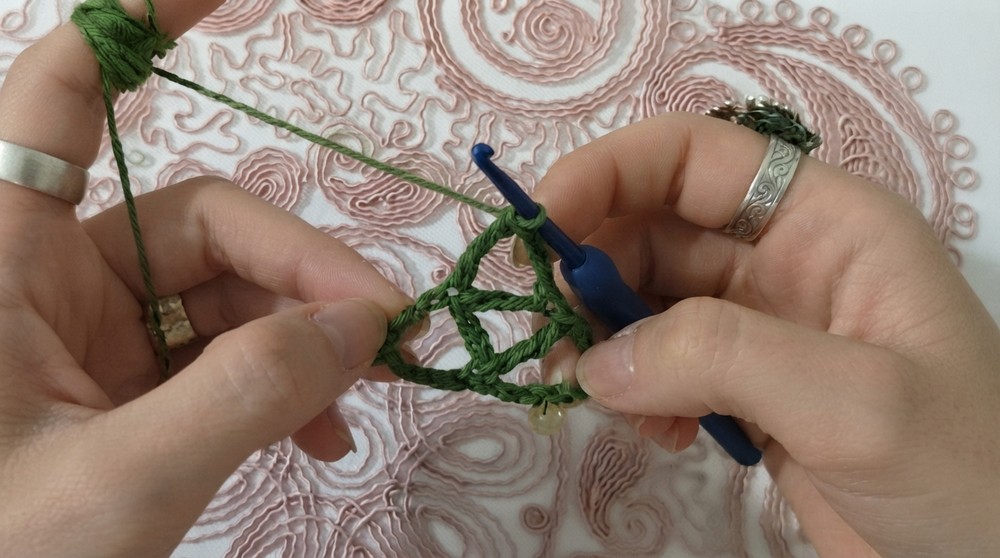
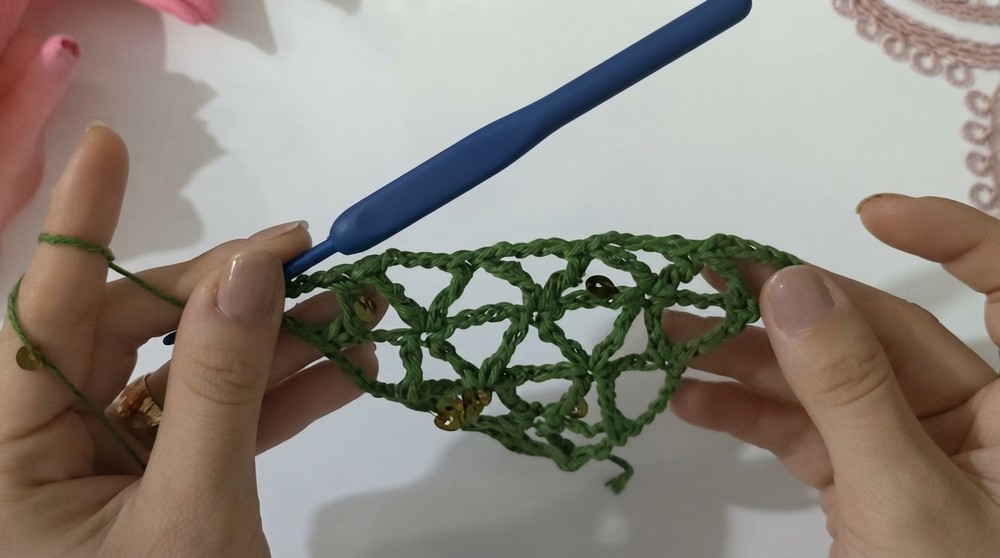
This makes your first small open triangle on the second row:
- TR, CH 4, TR into the same space.
General Pattern Logic – Increasing Phase
From here, the bandana grows using a repeating logic.
Beginning of Each Row
- At the end of a row, turn the work.
- CH 9.
- Turn fully so you can work back across the row.
The CH 9 forms a side edge and provides height for the new row.
Edge Work After Turning
- After the CH 9, YO twice.
- Insert hook into the base of that CH 9 loop (where it should connect into the body).
- Work 1 TR to attach the new CH 9 loop to the bandana.
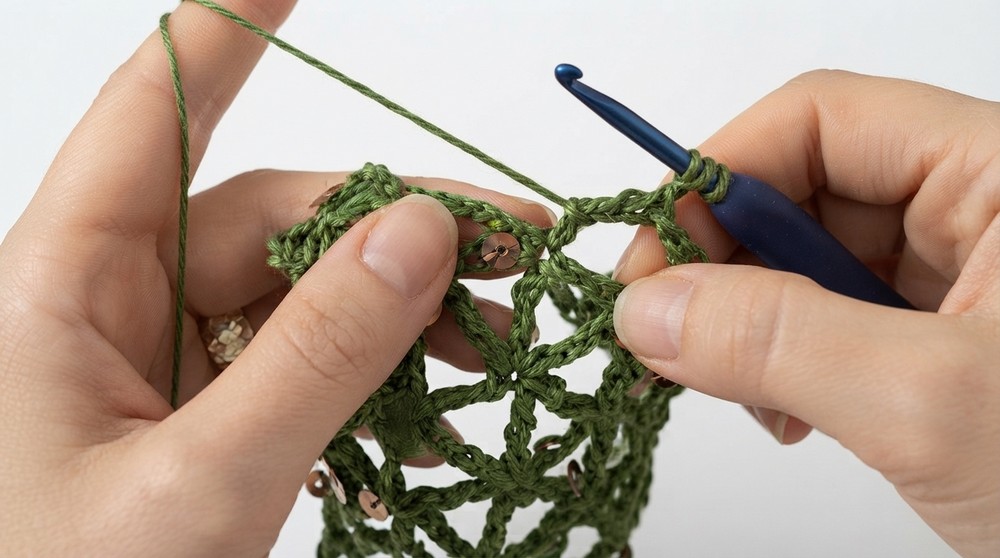
This secures the edge and creates the new outer corner.
Building Each Row – Triangle Units
Now you will move across the row, creating repeated triangular motifs.
For each space (the open area formed by CH 4 between TRs in the previous row):
- YO twice, insert the hook into the space.
- Work 1 TR into the space.
- CH 4.
- Work 1 TR into the same space.
This creates one open triangular unit (TR, CH 4, TR).
Connecting Between Triangles
After completing a triangle (TR, CH 4, TR):
- Move to the next space in the row.
- YO twice and insert hook directly into that next space.
- Work 1 TR.
- From this TR, proceed with CH 4, TR into the same space to form the next small triangle.
Important:
- Do not CH between triangle units when moving across the row.
- The connection to each next space is done only with a TR.
So across the row you repeat:
- Into each space: TR, CH 4, TR.
- Then directly TR into the next space (no CH in between) and again CH 4, TR in that same new space.
Edge Increases
The triangle grows from the edges:
- At the start of a row:
- CH 9, TR into the base of that CH 9 to secure the side.
- At the end of the row:
- When you reach the final available space or chain edge:
- Work TR, CH 4, TR into that outermost point.
- When you reach the final available space or chain edge:
This consistent addition of TR, CH 4, TR at the side edges steadily widens the triangle.
Repeating the Rows
Continue repeating rows as follows:
- Turn, CH 9, TR into the base.
- Work across:
- For every space:
- TR, CH 4, TR into the same space.
- Move to the next space by a single TR (no CH between spaces).
- For every space:
- At the last space/edge, make sure to finish with TR, CH 4, TR to keep increasing.
Work this pattern until the bandana reaches your desired size.
The original maker continues until there are about 40 triangle motifs along the top edge of the bandana.
Border
Once your triangle is the desired size:
- Attach yarn (if needed) at any point on the edge.
- Work SC evenly all around the entire bandana edge:
- Along straight edges:
- Place SCs into each stitch or space.
- Along the side edges with tall TRs and chains:
- Place SCs into chain spaces and tops of TRs so the edge looks balanced.
- Along straight edges:
The video notes a simple approach:
- In each gap or along each segment, work SCs so that the edge is neat and even.
- No special or complex border is used; just basic SC around.
Ties
To make the bandana wearable:
- On one top corner of the bandana, attach yarn if needed.
- CH 55 to form a tie.
- You can leave it as is, or optionally work back along this chain with SC to make a thicker tie, then fasten off.
- On the opposite top corner, repeat:
- Attach yarn.
- CH 55 for the second tie.
- Again, you may SC back along if desired.
These two ties allow you to secure the bandana at the back of your head.
Optional Bow Detail
You can add a bow to the tip of the bandana:
- Attach yarn (or use a separate piece).
- CH 100.
- Work SC into each chain across (one SC in every CH).
- Fasten off, leaving a tail if you want to use it to tie the bow.
- Shape this strip into a bow:
- Fold the strip so the ends meet or overlap.
- Pinch the center to create the bow shape.
- Wrap yarn around the middle tightly and knot or sew to secure.
- Attach the bow to the tip of the bandana:
- Either sew it with a tapestry needle or tie it using the yarn tail around the tip.
Assembly & Finished Size
- Weave in all yarn ends securely using a tapestry needle.
- Lay the bandana flat and check:
- Triangle is even.
- Border is neat.
- Ties are secure and similar in length.
- For a reference size:
- The sample bandana has 40 small triangles along the top but you can stop earlier or add more rows to adjust size.
Conclusion and Ending Words
This bandana pattern is light, simple, and grows quickly once you understand the logic of TR, CH 4, TR into spaces and TR only moves between spaces. It is ideal for beginners but flexible enough to adapt into other projects like tops or shawls by simply continuing the same repeat.
You can vary yarn thickness, colors, and edging details to create different looks from the same base pattern. Enjoy making and customizing your bandana, and use this structure as a base for many other airy crochet designs.