
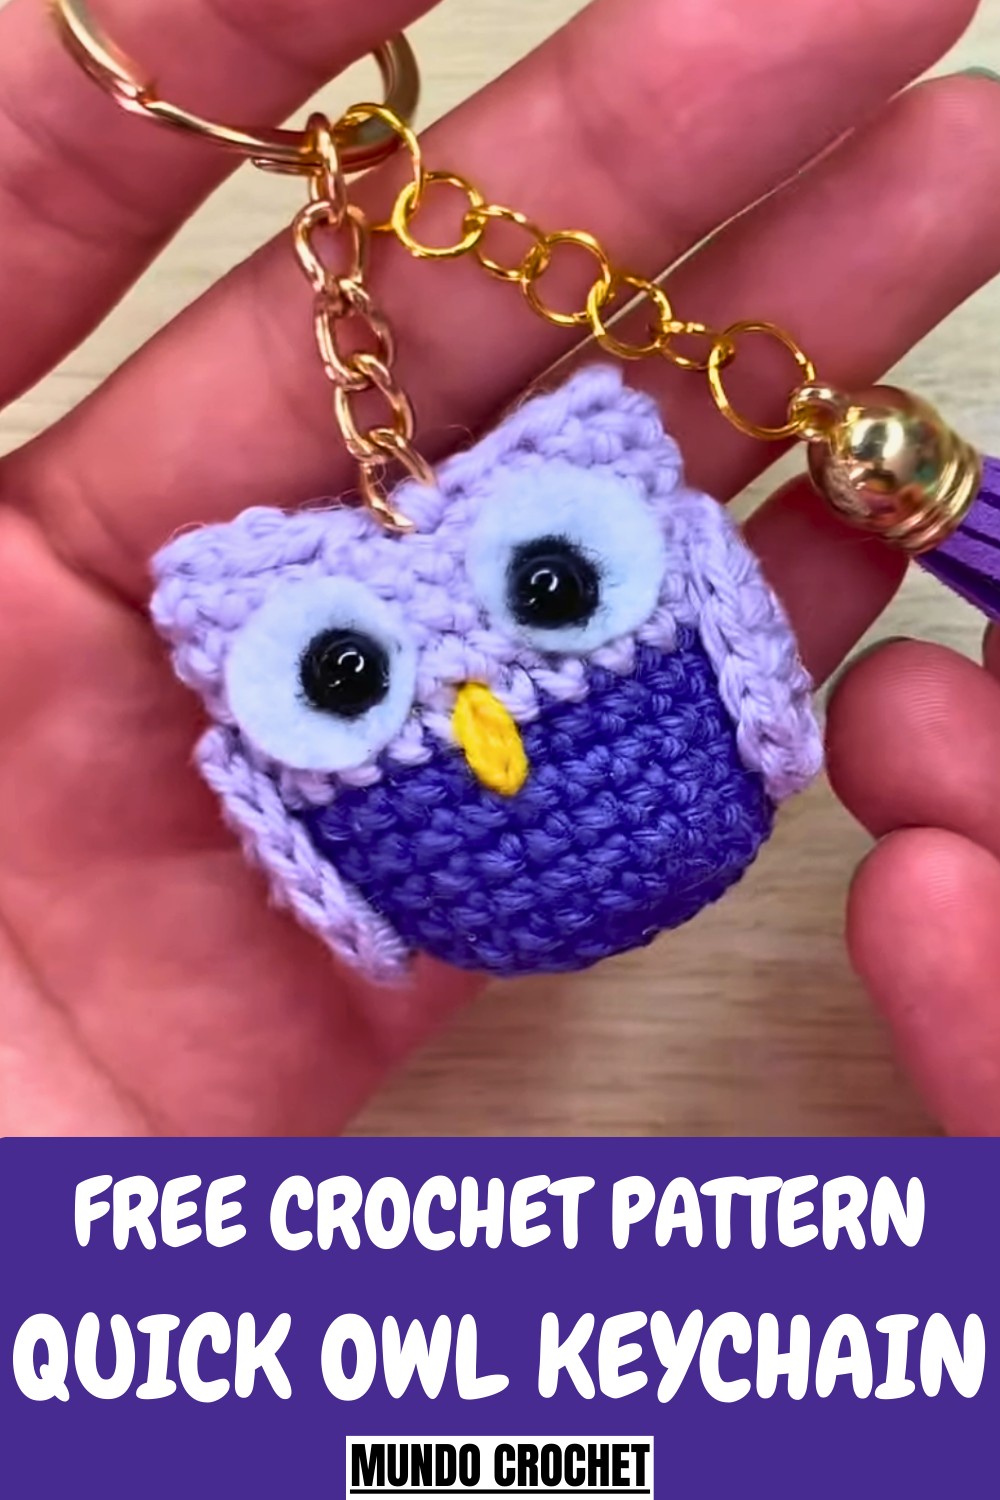
Perch in style with this Free crochet Owl Keychain Pattern, making cute, charming keychains that bring whimsy, personality, and a playful handmade touch to any set of keys.
Bring charm and creativity to your accessories with the delightful Crochet Owl Keychain Pattern, a perfect project for crafters of all levels. This miniature owl design, featuring intricate stitches, vibrant colors, and adorable details like wings and expressive eyes, adds personality to bags, keys, or even holiday gifts.
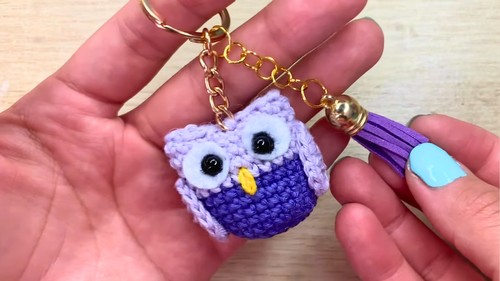
Cute Crochet Owl Keychain Pattern To Brighten Your Bag
The pattern encourages skill development, particularly in color changes and simple shaping techniques. Compact in size yet full of character, it’s ideal for personal use, thoughtful handmade presents, or even selling at craft fairs. With its versatility and playful aesthetic, this pattern lets you craft a piece that’s equal parts fun and functional.
Pro Tip
When embroidering small details like the beak, avoid using long thread lengths, as this may increase tangling. Work in short, clean sections to achieve a tidy finish.
Step-by-Step Tutorial for Crochet Owl Keychain
Uses
- Personal Gift: Make it in your friend’s favorite colors for a personalized touch.
- Sell Online or at Craft Markets: These make excellent and compact sale items.
- Decorative Piece: Use as keychain accessories, bag charms, or even holiday ornaments.
Materials Needed
- Crochet hook
- Yarn in multiple colors (base body, wings, and optional beak embroidery)
- Magic ring technique knowledge
- Fiberfill for stuffing
- Wool needle
- Felt or fabric for eye details
- 6 mm safety eyes (optional, can use embroidery if unavailable)
- Keychain ring
- Scissors
- Glue (optional, for attaching parts)
Step-by-Step Instructions
1. Making the Magic Ring for the Body
- Begin with a magic ring.
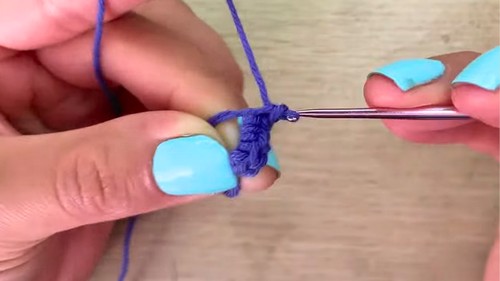
- Raise a chain to secure it, then create 8 single crochets inside the ring.
- Tighten the smaller strand to close the magic ring.
2. Round 2: Increasing Stitches
- Work 8 increases (two single crochets in the same point) around the previous stitches.
- Use a stitch marker for the first point to track your progress.
- By the end of this, you should have 16 stitches.
3. Round 3: Building Shape
- Create 1 single crochet and an increase in the next stitch.
- Alternate between single crochet and an increase for the entire round.
- At the end of this round, you will have a total of 24 stitches.
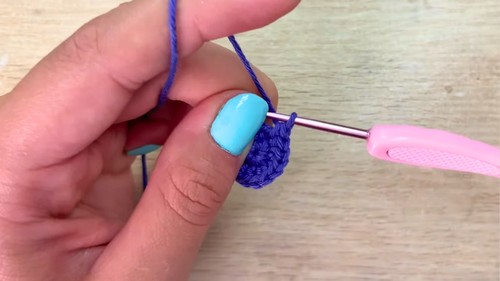
4. Rounds 4-8: Base Body Formation
- Work stitch over stitch without any increases or decreases.
- Maintain 24 stitches at the end of each round.
5. Adding New Color: Rounds 9-13
- After Round 8, change to a new color for the upper part:
- Insert your hook into the two bars of the previous work.
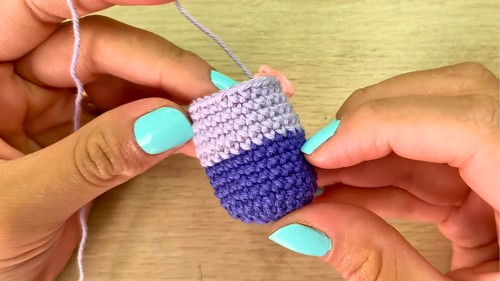
- Attach the new yarn color and make a single crochet to secure it.
- Insert your hook into the two bars of the previous work.
- From Round 9 to Round 13, maintain 24 stitches and cut off the yarn of the prior color.
6. Adding Eye Details
- Cut two small felt (or fabric) circles for the base of the eyes.
- Insert 6 mm safety eyes into the felt circles.
- Affix the eyes between Round 10 and Round 11.
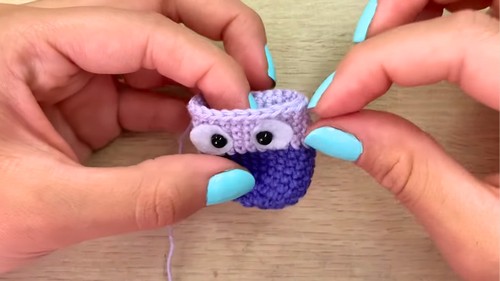
- Count three single crochet stitches between the eyes to ensure symmetry.
- If safety eyes aren’t available, embroider the eyes instead.
7. Embroidering the Beak
- Use yellow yarn to create the beak:
- Insert the needle between both eyes at row 10.
- Make a couple of horizontal stitches to form a diamond-like beak.
- Knot and cut the excess thread when finished.
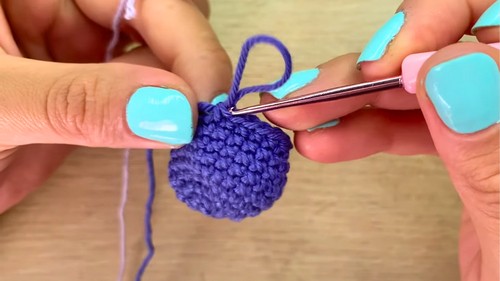
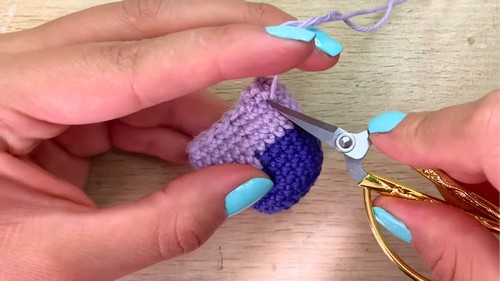
8. Stuffing and Closing the Body
- Fill the owl body with fiberfill to give it a plump shape.
- Use a wool needle to close the project by sewing and hiding the loose ends.
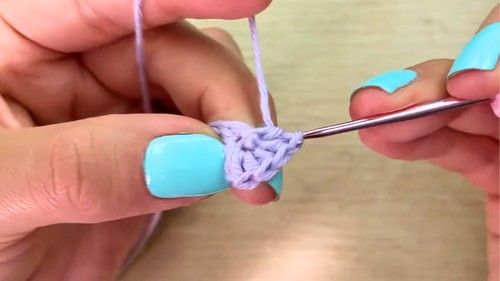
9. Making the Wings
- Use the same yarn color as for the upper body:
- Chain 5 stitches to begin.
- Crochet half double crochets (HDC) from the second chain to the last.
- In the last chain, make 5 half-double crochets into the same space to create a rounded wing tip.
- Continue back along the chain with 3 half-double crochets.
- Slip stitch into the first point and cut the yarn (leave a long strand for sewing or glue attachment).
- Repeat to create a second wing.
10. Attaching the Wings
- Attach the wings to the body using either glue or sewing for a secure finish.
- Position them slightly below the eyes to achieve a symmetrical look.
11. Adding the Keychain Ring
- Use a thread and needle to secure the keychain ring:
- Stitch through the back of the owl and come out at the center top of the body.
- Add the keychain ring, then make multiple stitches to tightly secure it.
- Hide and cut any excess thread once done.
Special Features
- The owl’s versatility – customize it with your favorite colors or create seasonal variations.
- Its compact and polished size makes it ideal as a keychain, gift, or charming decor piece.
- The use of felt for eyes and embroidery for details adds a personal and unique touch.
Level of Difficulty
The tutorial is beginner-friendly with straightforward techniques like magic rings, increases, and single crochets. It also introduces slightly advanced elements, such as switching yarn colors, embroidery, and assembling parts.
Tutor’s Suggestions
- Use a stitch marker to avoid losing track of your rounds when increasing and decreasing.
- Tighten the magic ring well to avoid leaving gaps at the base.
- When changing colors, pull gently to keep transitions neat and seamless.
Conclusion
The Crochet Owl Keychain is a delightful and rewarding project that ensures a beautiful final product. Its versatility, ease of crafting, and cute design make it a must-try project for anyone eager to create something special.


