
Step into vibrant fashion with this Free Crochet Top Pattern, offering elegant, colorful, and eye-catching designs for any wardrobe.
Delicate details and a touch of artistic elegance make crochet top a standout choice for anyone seeking both style and functionality. Designed to complement a variety of outfits, they are perfect for casual wear, summer outings, or layered looks that exude sophistication. Their lightweight and breathable nature offers unmatched comfort, ensuring they remain a go-to option during warmer seasons.
Boho Crochet Top Pattern That Inspires Summer Vibes

With endless possibilities for customization, from vibrant colors to intricate designs, they can be tailored to suit individual tastes and preferences. Whether paired with high-waisted jeans, flowy skirts, or even chic swimwear, this top elevate any outfit with their timeless charm. Known for their versatility, they seamlessly balance simplicity and refinement, making them a desirable piece for everyday wear or special occasions.
Step-by-Step Details
Step 1: Materials Needed
- Yarn: Double knitting yarn (330m, 100g). For crop tops, one ball suffices; for longer or large-size tops, use two or more balls.
- Crochet Hook: Size 4mm (recommended for double knitting yarn).
- Extras: A yarn needle, scissors, and stitch markers (optional for marking armholes or key stitches).
Step 2: Starting the Foundation
- Make a Slip Knot: Create a slip knot and chain 13 stitches for all sizes (small, medium, and large).
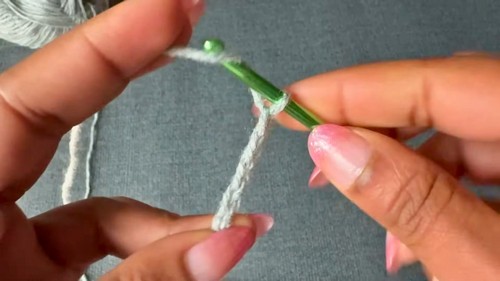
- First Row:
- Turn the chain to its back to work into the loops.
- Skip 4 chains. In the 5th chain, make the following:
- Two double crochets.
- Chain two.
- Two double crochets. This forms one shell.
- Skip two chains and, in the next chain, repeat the same shell (2 double crochets, chain 2, 2 double crochets).
- Skip the next two chains; end the row with one double crochet in the last chain stitch.
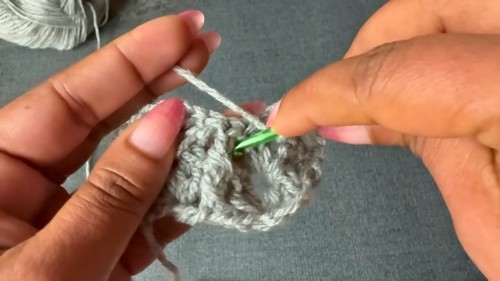
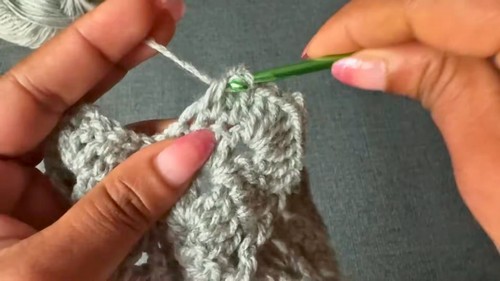
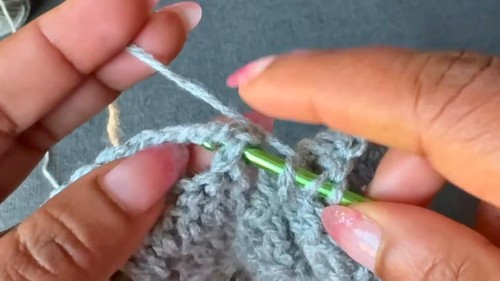
3: Working the Rows
- Continue working the rows by following this pattern:
- Row 2 starts with chain 3, turn the work, and always create shells in the chain-2 spaces.
- Use back post double crochet for the middle stitches between the shells, giving the top a textured look.
- Alternate between front post and back post double crochets, as described in the tutorial.
Each row expands slightly to create the width and flow of the top, with additional double crochets worked into the chain-2 spaces of each shell. The rows build upon each other using the same foundational pattern.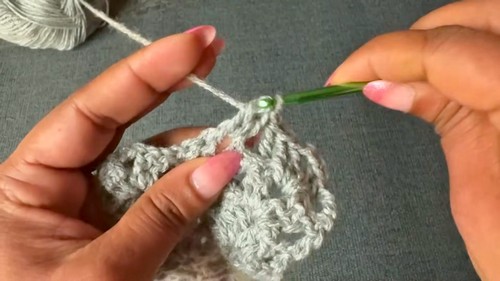
4: Increasing Stitches
- After completing 6 rows, start increasing stitch clusters in each row.
- For example, in Row 7, shells are expanded to include 3 double crochets with the chain-2 space between.
- By Row 13, each shell contains 4 double crochets, separated by chain-2 spaces.
- Continue increasing stitches gradually across rows while maintaining the shell pattern. This ensures the top’s width grows evenly.
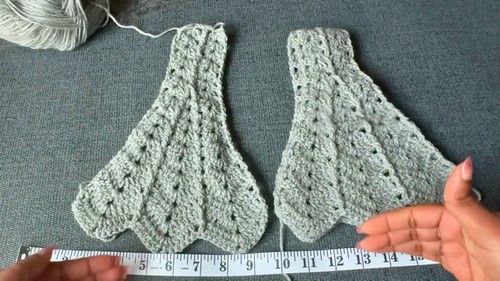
5: Customizing the Top Size
- To create the front panel, follow these size adjustments:
- Small size (30-inch bra size): Stop at Row 16.
- Medium size (32-inch bra size): Continue to Row 18; the front panel measures 16 inches.
- Large size: Add additional rows with larger shell sizes (e.g., 5-6 double crochets per shell).
6: Back Panel
- Repeat the steps for the front panel to create an identical back panel.
- Measure to ensure each panel matches in size and shape (e.g., a medium size’s panel measures approximately 40cm wide and 28cm long).
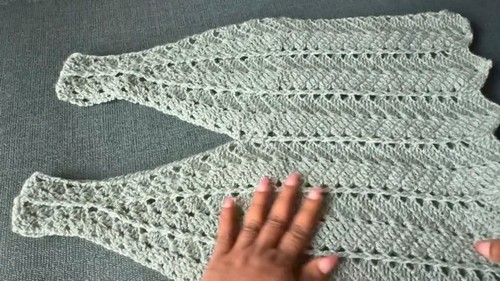
7: Joining The Panels
- Place the front and back panels together, ensuring the edges align properly.
- Use a yarn needle to sew the panels together along the sides, leaving space for the armholes and neckline. Adjust the armhole size based on preference.
- Ensure stitches are tight and secure at both sides.
8: Adding the Body
- With the panels joined, start working in the round for the body section.
- Continue the same shell pattern around the bottom edge of the panels.
- This section can be customized for:
- Crop top: Stop after 7 rounds.
- Full-length top: Continue up to 14 rounds or more.
- Adjust the size by decreasing (5 double crochets per shell) or increasing (7 double crochets per shell) in each round.
9: Add Finishing Touches
- Add a final round with single crochets and double crochets for a clean and elegant hem.
- If the armholes feel too large, add a few rows along the edges to decrease their size.
- Make necessary adjustments to achieve the desired fit.
Special Features
- Adaptability: The pattern allows for creating small, medium, or large tops by simply adjusting the number of rows and stitches.
- Back and Front Post Crochets: These create a textured, ribbed design, adding a professional look to the top.
- Quick Completion: Experienced crocheters can finish a medium-sized top in a few hours. Beginners may complete it within a day.
- Customizable Length: Whether you want a crop top or a longer tunic, the same pattern can be extended or shortened.
Level of Difficulty
This project is beginner-friendly. While some post stitches (front/back post double crochet) may initially be tricky, the overall pattern involves repeating simple shell stitches, making it accessible to those new to crochet or transitioning to intermediate projects.
Tutor's Suggestions
- Use Proper Yarn: Choose double knitting yarn or other medium-weight yarns with elasticity for the best results.
- Alternate Colors: Add stripes or color changes to accentuate the top's design.
- Count Stitches Constantly: Ensure each row maintains its pattern for consistent sizing.
- Take Measurement Breaks: Keep checking the width and length of the panels to ensure they align with your desired size.
Uses
- Fashionable Wear: Ideal for summer – pair it with skirts, jeans, or shorts.
- Layering Piece: Use it as a casual crop top or tunic to layer over tank tops or dresses.
- Gift Idea: A handmade crochet top makes a thoughtful and stylish gift for friends or family.
Materials
- Yarn: Double knitting yarn (330m per ball, 100g recommended).
- Crochet Hook: 4mm hook.
- Yarn Needle: For sewing panels and weaving in ends.
- Scissors: To cut yarn after tying off.
- Optional: Stitch markers for easier navigation.
Tip
To create clean, professional-looking seams when joining the front and back panels, line up the stitches carefully and use a flat slip stitch or invisible seam. This will prevent bulky edges and ensure the top retains a polished, symmetrical look.
Conclusion
The crochet top presented in this pattern is a perfect project for crocheters of all skill levels. With an easy-to-follow shell stitch pattern and step-by-step instructions, creating this lovely top becomes a fun and rewarding experience. The versatility of the design allows for endless customization, whether you prefer a crop top or a longer style.


