
Stay cozy and stylish with the Crochet Ribbed Mock Neck Sweater Pattern, featuring textured stitches, a snug fit, and a chic, modern winter look.
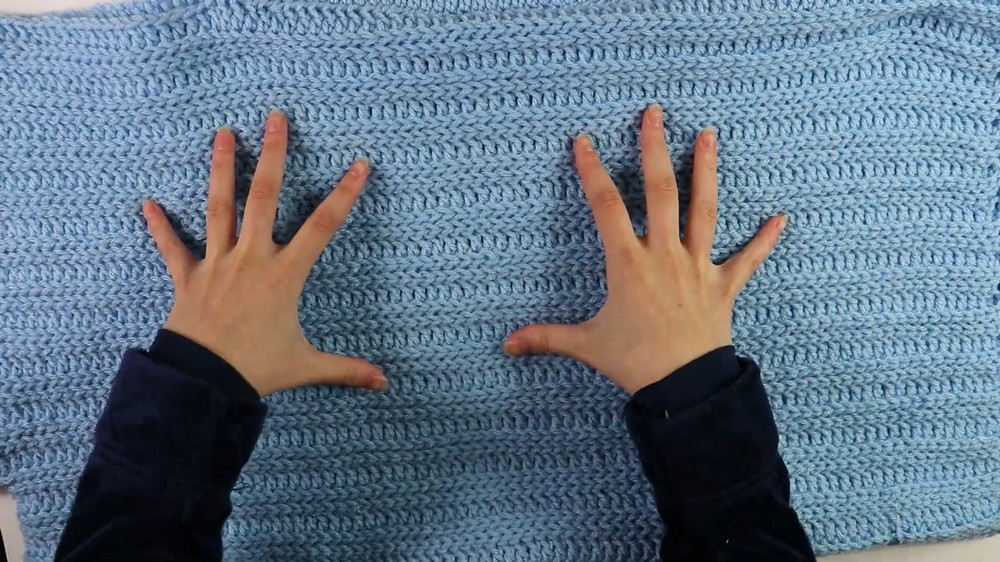
Combining warmth and style, the ribbed mock neck sweater offers a modern take on classic knitwear. Its textured ribbing provides natural stretch, ensuring a comfortable fit that adapts to different body shapes while maintaining a sleek silhouette. The mock neck design protects against cooler air without feeling restrictive, making it ideal for layering under jackets or wearing alone.
Cozy Crochet Ribbed Mock Neck Sweater Pattern Soft And Snuggly
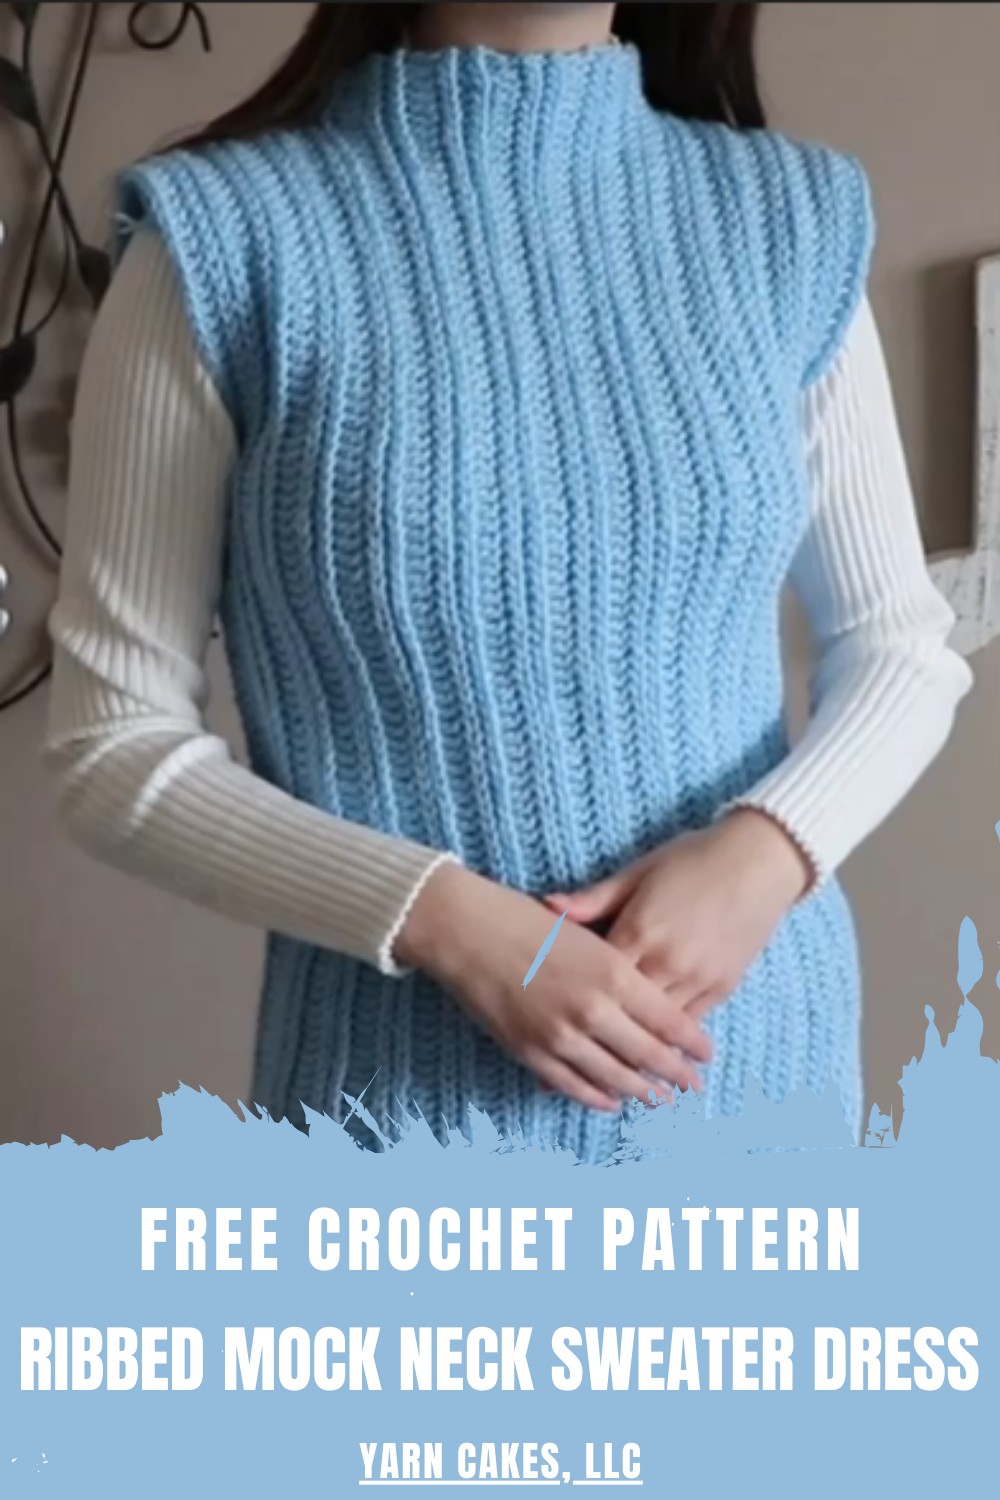
Soft, high-quality yarn gives long-lasting comfort, while the durable construction ensures the sweater keeps its shape over time. Perfect for everyday wear, it pairs effortlessly with jeans, skirts, or trousers, making it suitable for casual outings, work, or relaxed weekends. The ribbed pattern not only adds visual interest but also enhances elasticity and resilience, offering practicality alongside elegance.

Crochet Ribbed Sweater
1. Materials Needed
Before starting, gather the following materials:
- Yarn: Category 4 yarn (medium worsted weight).
- Hook Size: 5mm crochet hook.
- Tapestry Needle: For seaming and weaving in ends.
- Scissors: For cutting the yarn.
2. Making the Bodice
Step 1: Start with the Foundation Chain
- Make a slip knot (any method you prefer).
- Create a chain of 89 stitches for the foundation. (Adjustable for size: refer to the written pattern for alternative sizes.)
Step 2: Row 1 - Double Crochet Row
- Skip the first chain and insert your hook into the second chain.
- Work a double crochet (dc) into each of the chains across the row. (To work a double crochet: yarn over, insert your hook into the chain, yarn over and pull through, yarn over and pull through 2 loops, then yarn over and pull through the last 2 loops.)
- At the end of the row, chain 1 and turn your work.
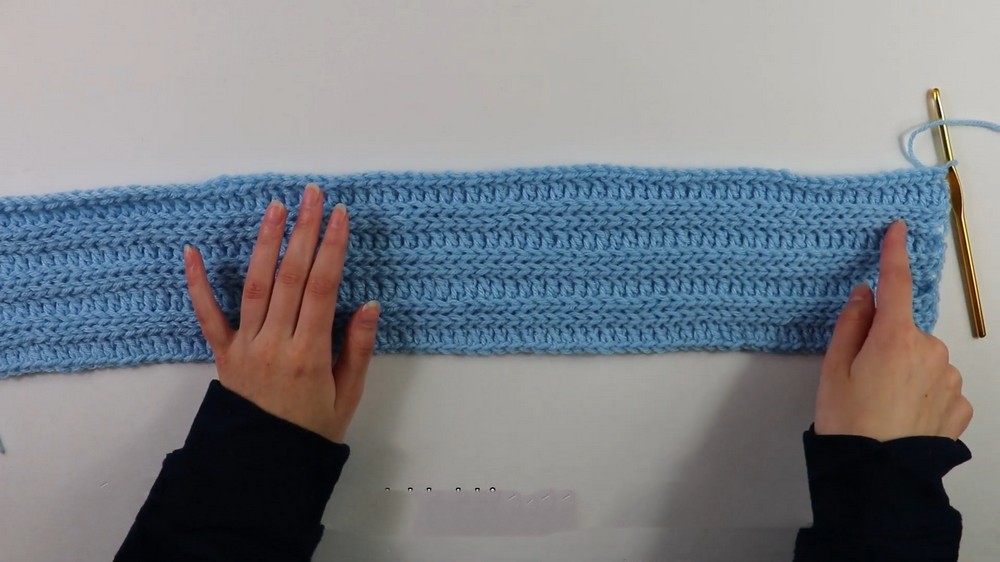
Step 3: Row 2 - Back Bar Slip Stitches
- Skip the turning chain; it does not count as the first stitch.
- Insert the hook into the back bar of the stitch, yarn over, and pull through both loops (slip stitch).
- Repeat this back bar slip stitch into each stitch across the row.
- At the end of the row, chain 1 and turn your work.
Step 4: Rows 3–4
- Repeat Row 2 (back bar slip stitches) for two more rows. This creates a ribbed texture.
Step 5: Row 5 - Back Bar Double Crochets
- Work back bar double crochets by inserting the hook into only the back bar of each stitch.
- Complete the row, chain 1, and turn.
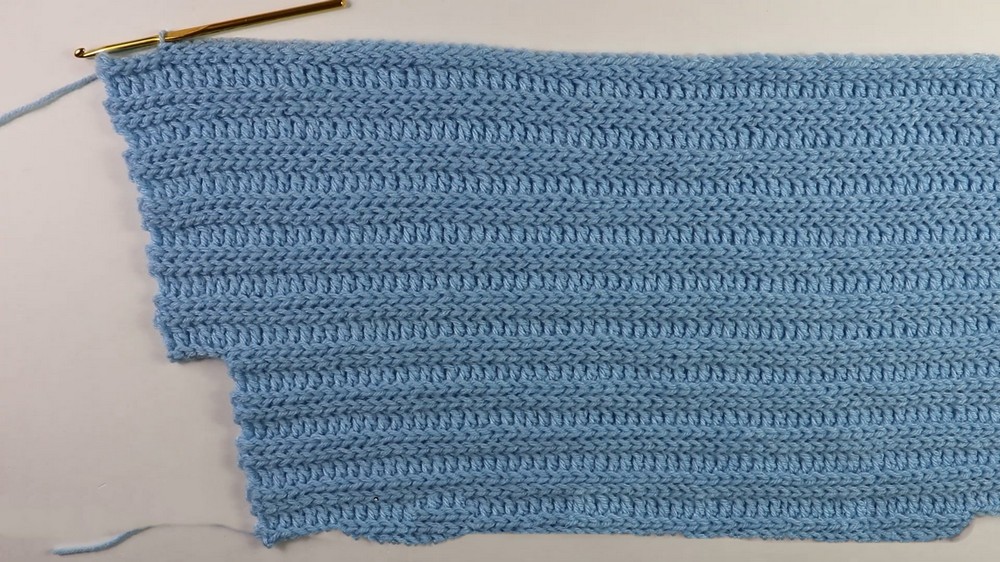
Continue the Pattern for 22 Rows
- Repeat Rows 2–5 (three back bar slip stitch rows followed by one back bar double crochet row) until you have a total of 22 rows.
3. Add the Neck Portion
Step 1: Start the Neck Region (Row 15)
- Follow your ongoing pattern for Row 15 (either a back bar slip stitch or a back bar double crochet row, depending on your row sequence).
- At the end of the row, chain 6 stitches to extend the neck area.
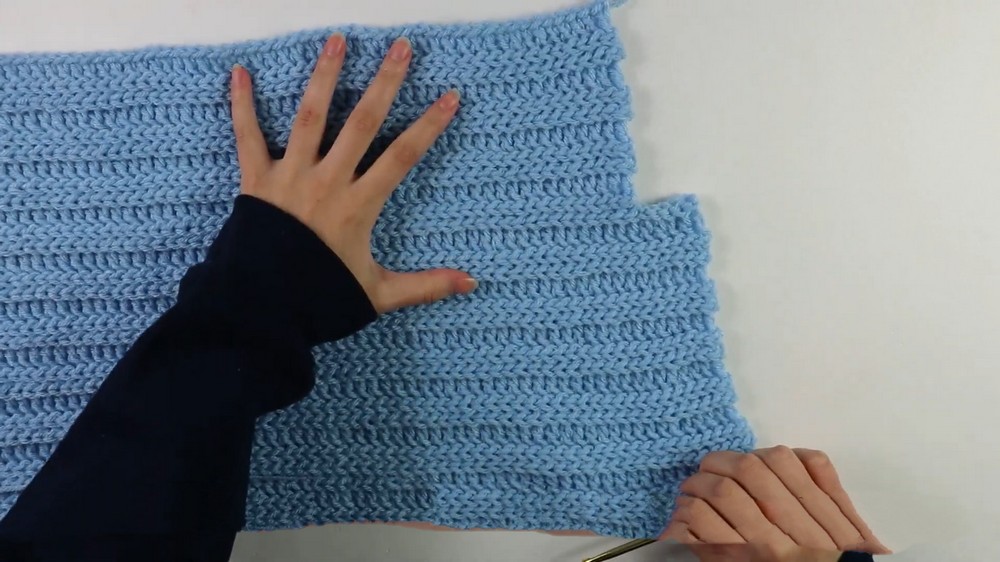
Step 2: Row 16 Onwards
- Continue your pattern, working into the chain stitches and across the row.
- Repeat the same stitch pattern (three back bar slip stitch rows followed by one back bar double crochet row) until you have a total of 38 rows.
4. Create the Other Shoulder Strap
Step 1: Section for the Shoulder
- Once you’ve completed your neck section, leave a gap for the neck opening by working into only one side of your project to create the first shoulder strap.
- Work an additional 14 rows, following your stitch sequence.
Step 2: Mirror the Second Shoulder Strap
- Repeat the process on the opposite side, ensuring you have a strap matching the first.
- Once complete, fasten off and weave in any loose ends.
5. Add the Bottom Border
Step 1: Foundation for the Border
- Begin with a chain of 19 stitches.
Step 2: Row 1 - Single Crochets
- Skip the first chain and work single crochets (sc) all the way across.
- Chain 1 and turn.
Step 3: Rows 2–54
- Work back bar single crochets in each row for the ribbed look: insert your hook into the back loop of each stitch and complete a single crochet.
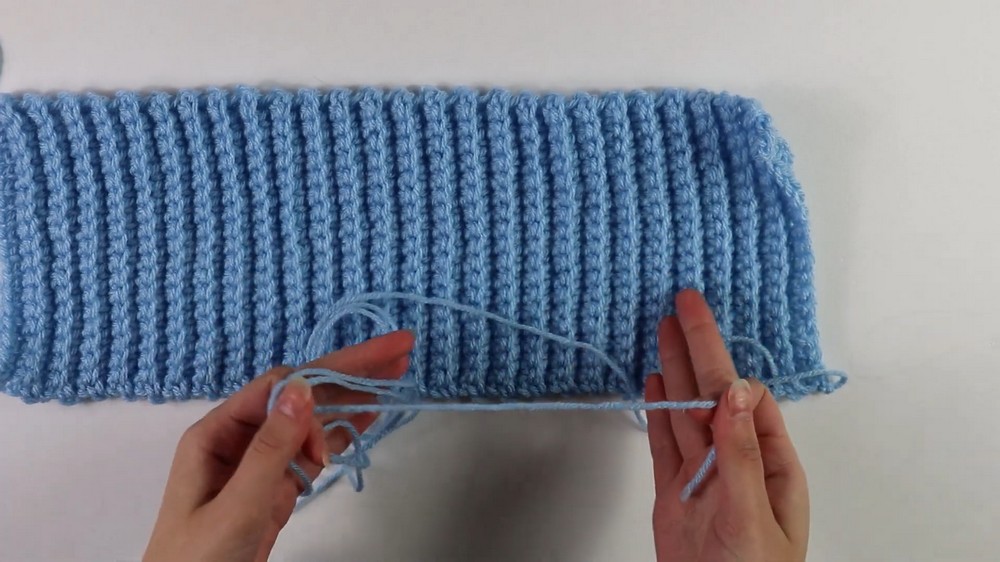
- Repeat this for 54 rows total, then fasten off and leave a long tail for seaming.
Step 4: Repeat for the Second Border
- Create an identical second bottom border by repeating the same steps.
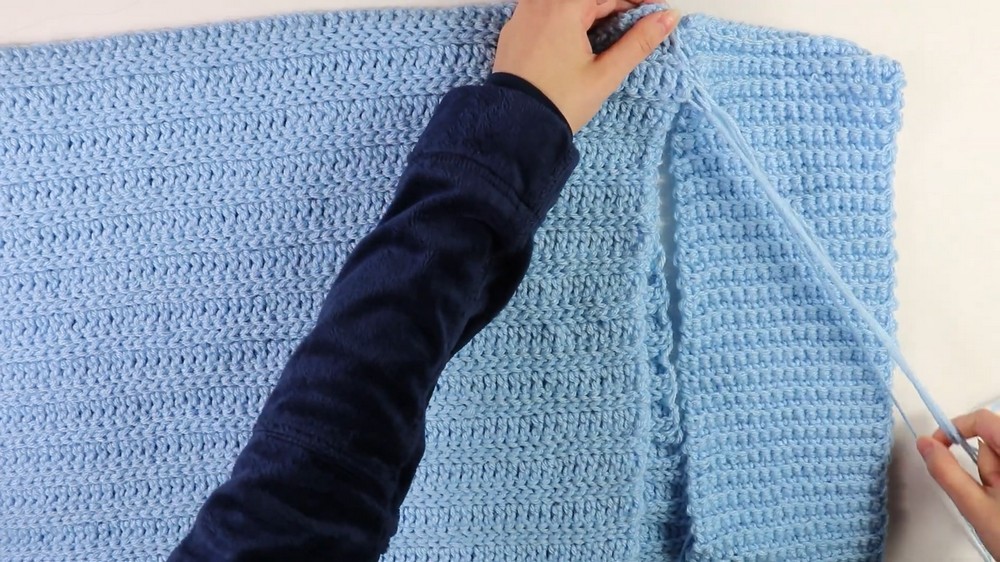
6. Assembly and Seaming
- Position the front and back panels together with the wrong sides facing out and good sides facing in.
- Align the bottom borders to the bodice and whip stitch them together.
- Seam up the sides, ensuring to leave a 7.5-inch armhole at the top.
- Seam the shoulder straps and neck section, leaving space for the head opening.
- Finish by flipping the sweater so the right side faces out.
Special Features
- Ribbed Design: The back bar technique creates a beautifully ribbed texture throughout the sweater.
- Mock Neck: A stylish detail that adds elegance to the sweater.
- Size Customization: Instructions are included for sizes ranging from small to 3XL, ensuring inclusivity for various body types.
Level of Difficulty
This project is intermediate level. While the stitches (double crochet, slip stitch, and single crochet) are relatively simple, the intricate back bar technique requires some experience and attention to detail. Additionally, seaming and assembling may pose minor challenges for beginners.
Tutor’s Suggestions
- Consistent Tension: The tutor emphasizes maintaining consistent tension to ensure an even ribbed texture.
- Customize Length: You can easily adjust the length of the sweater, neck, or sleeves based on your preferences.
- Read the Written Pattern: For size customization, refer to the accompanying written pattern to stay aligned with your size requirements.
Uses and Benefits
The ribbed sweater is perfect for:
- Everyday Wear: A cozy and stylish addition to your wardrobe.
- Layering: Ideal for colder seasons or under jackets.
- Gifting: A thoughtful handmade gift for friends and family.
Tip for Success
When creating the ribbing (back bar stitches), ensure you consistently hook into the correct loop to maintain uniformity in texture. Using stitch markers can also help keep track of pattern repeats.
Conclusion
This ribbed sweater tutorial is an excellent guide for crocheters looking to create a versatile and stylish garment. With clear instructions and opportunities for customization, this project promotes skill development while offering a functional reward: a cozy sweater! Follow the steps carefully, enjoy the process, and wear your handmade masterpiece with pride.
If you found this tutorial helpful, don't forget to like and subscribe to the creator's channel!


