
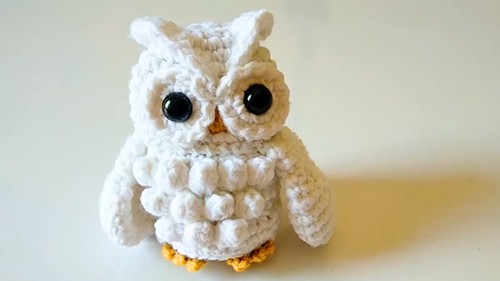
Hoot with delight with this Free Crochet Owl Amigurumi Pattern, adding a cute, playful touch to your décor, desk, or charming handmade gifts.
Adding whimsical charm to a room or gift collection can be simple and enjoyable. A Crochet Owl Amigurumi Pattern allows you to create a detailed, adorable owl that can sit on a shelf, hang as a keychain, or serve as a thoughtful present. This pattern gives full control over color, size, and facial expressions, making each owl unique and personal.
Charming Crochet Owl Amigurumi Pattern with Feathered Fun

Working on it encourages patience, creativity, and focus while producing a durable, high-quality item that mass-produced alternatives often cannot match. Owls symbolize wisdom and charm, and a crocheted version brings that playful energy into your home or workspace. Following a crochet owl amigurumi pattern is both relaxing and rewarding, resulting in a tangible, delightful creation. It combines decoration, creativity, and fun, offering a one-of-a-kind piece that brings joy to both the maker and anyone who receives it.
How to Crochet a Detailed Amigurumi Character – Step-by-Step Guide
Materials Needed
- Yarn:
- Main Yarn: Six-ply yarn for the body. (Alternatively, combine two three-ply yarns to achieve six-ply thickness.)
- Additional Yarn Colors: Use various yarn colors for details like wings, eyes, and the body texture.
- Crochet Hook:
- Size 3.0mm crochet hook (for precision and tight stitches).
- Stuffing Material:
- Fiberfill or leftover yarn to stuff the body and add shape.
- Additional Tools:
- Yarn needle (for sewing parts together and weaving loose ends).
- Scissors (to cut yarn).
- Stitch marker (optional, to track rounds).
- Optional Decorative Items:
- 12mm safety eyes (or yarn eyes if you prefer).
- Glue (to secure small details like embellishments or small parts).
Uses of the Amigurumi Character
- Home Decorations: The character can serve as a table or shelf ornament.
- Gift Item: Create it as a thoughtful handmade present for friends or family.
- Toy: It can act as a lightweight and safe toy for children.
- Crochet Learning Object: It’s an excellent project to practice and master advanced crochet techniques.
Special Features
- Highly Detailed: The project has intricate elements like pops for texture, wings, and eyes, giving it a 3D appearance.
- Layered Construction: It uses several steps for different parts (body, wings, eyes), showcasing how to build and assemble amigurumi.
- Triple Chains and Bobbles: The design uses structural crochet techniques like five half-double crochets in one stitch for pops and triple chains for shaping.
- Customizable: You can adjust yarn colors or features to personalize the character.
Level of Difficulty
Intermediate to Advanced
- While the tutorial uses basic stitches (single crochet, half-double crochet, magic ring), the details like pops, careful assembly, color changes, and shaping require attention and patience.
- Beginners can attempt this project but should familiarize themselves with individual techniques before starting.
Tutor’s Suggestions
- Understand the Magic Ring: This project heavily relies on the magic ring for various parts, from the body to wings. Master this technique before starting.
- Count Stitches Accurately: To avoid mistakes, use a stitch marker or mark key points (e.g., where pops or increases are added).
- Stuff as You Go: Periodically add stuffing while crocheting to ensure proper shape and firmness for the character.
- Take Breaks During Tedious Parts: Sewing and making pops can take time – take breaks if you feel your hands cramping.
- Adjust Pop Placement Symmetrically: When creating pops, maintain symmetry to ensure that the design looks balanced.
- Securely Sew Parts Together: Use extra care when sewing wings, eyes, and other components to the body for durability and alignment.
Step-by-Step Instructions
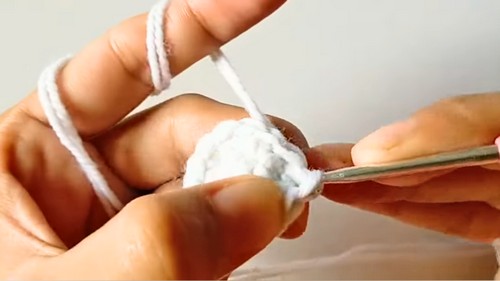
Step 1: Crochet the Body
- Start with a Magic Ring:
- Create a magic ring and chain 1.
- Work 6 single crochets into the ring, then pull the ring tight to close.
- Round 2 (Increase):
- Make 2 single crochets in each stitch (total: 12 stitches).
- Round 3 (Continue Increasing):
- Make 1 single crochet in the first stitch, then 2 single crochets in the next stitch. Repeat this pattern (1 SC, 2 SC) to the end (18 stitches).
- Make 1 single crochet in the first stitch, then 2 single crochets in the next stitch. Repeat this pattern (1 SC, 2 SC) to the end (18 stitches).
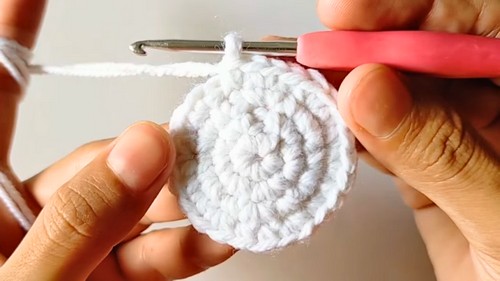
- Round 4 (Widen the Circle):
- Crochet 1 SC in the next 2 stitches, then 2 SC in the third stitch (SC, SC, INC) around (24 stitches).
- Round 5–9:
- For these rounds, crochet 1 single crochet into each stitch (no increases).
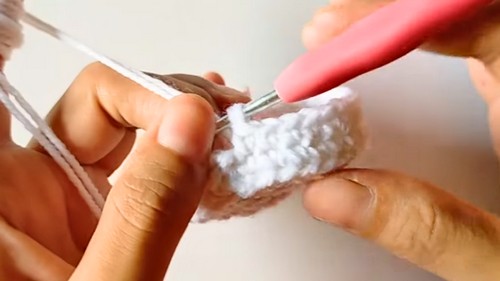
- For these rounds, crochet 1 single crochet into each stitch (no increases).
- Shape the Top:
- Decrease by crocheting individual decreases and single crochet rounds to shape the body. Stuff the body before closing completely using slip stitches.
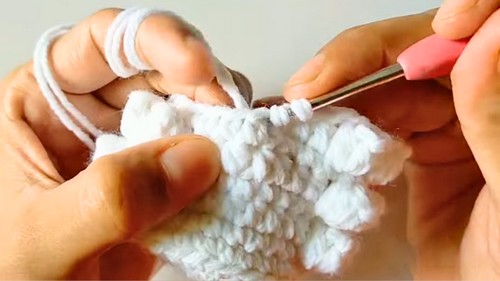
Step 2: Add Pops (Bobbles) for Texture
- Half-Double Crochet Pops:
- Identify sections for pops. Into one stitch, crochet 5 half-double crochets, then pull the first loop over the last to make the pop.
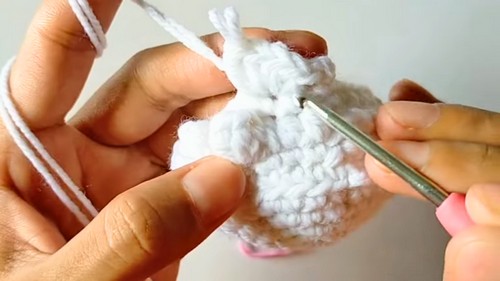
- Create pops evenly spaced for a textured design. Ensure symmetry by counting stitches.
- Identify sections for pops. Into one stitch, crochet 5 half-double crochets, then pull the first loop over the last to make the pop.
- Alternate Pops and Chains:
- Between pops, crochet a half-double chain or single crochet for spacing.
- Between pops, crochet a half-double chain or single crochet for spacing.
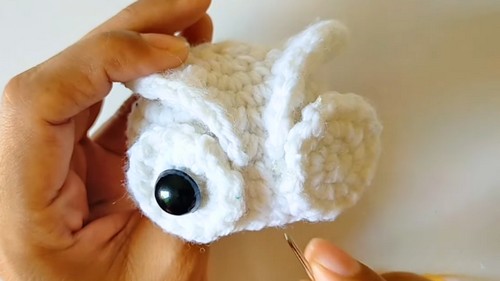
Step 3: Crochet the Eyes
- Magic Ring for Eyes:
- Make a magic ring and add 6 single crochets. Pull tight to close the ring.
- Round 2:
- Make 2 single crochets in each stitch (12 stitches).
- Shaping the Texture:
- Create slip stitches in the back loop only for associated textures. This design gives the eyes a more defined look.
- Secure Eyes:
- Add safety eyes (or embroidered ones) to the finished crochet eye.
Step 4: Create the Wings
- Magic Ring Start:
- Create another magic ring, chain 1, and single crochet to start forming the base shape.
- Rounds for Wing Growth:
- Gradually increase single crochets for the first few rounds. Then work single crochets to maintain size.
- Attach the Wings:
- Sew the completed wings symmetrically to the body using yarn and a darning needle.
Step 5: Assemble the Character
- Sew the Eyes:
- Attach the eyes to the body just above the midpoint. Ensure symmetry and secure with tight stitches or glue.
- Attach the Wings:
- Align the wings on either side of the body. Sew carefully to ensure they stay in place.
- Finish with Pops:
- Add the remaining pops (if not completed earlier) and finalize placement for aesthetic balance.
- Add the remaining pops (if not completed earlier) and finalize placement for aesthetic balance.
Conclusion
Congratulations! You’ve completed your crochet amigurumi character. This project showcases your mastery of detailed crochet techniques while creating a vibrant and dynamic design. Whether used as a gift, decoration, or functional toy, the finished piece reflects your creativity and talent. With practice, you can experiment with other colors or add new elements to make each piece unique.
Pro Tip
When working on pops or new techniques, practice on a swatch first to perfect stitches before attempting them on the final project. This helps prevent mistakes and maintains consistent tension throughout!


