
Cute companion created with this Free Crochet Bear Head Pattern that's perfect for toys, gifts, or adding a playful touch to any project.
A small creation emerges from yarn, shaped into a bear head full of charm and personality. The Crochet Bear Head Pattern guides each stitch to form soft curves and expressive features, resulting in a piece that is both playful and inviting. It works beautifully for toys, decorative accents, or thoughtful handmade gifts, transforming simple materials into heartwarming creations.
Delightful Mini Crochet Bear Head Pattern Perfect Accent Piece
Following the pattern encourages focus, patience, and fine motor skill development, making the crocheting process as rewarding as the finished product. Its versatility allows experimentation with colors, sizes, and expressions, ensuring every bear head is unique and personalized.
Perfect for nurseries, cozy corners, or special gifts, it adds warmth and character wherever it is used. Combining creativity, practicality, and charm, this pattern transforms yarn into a memorable, handmade piece that delights both the maker and the recipient, offering a sense of accomplishment and joy with every stitch.
Step-by-Step Details
1. Starting with the Magic Ring
- To begin, hold the yarn around your left hand and wrap it twice around your index finger.
- Create a loop by tucking the yarn under itself, then pinch the intersection with your thumb and middle finger.
- Insert your crochet hook, make a slipknot, and tighten it. This forms the magic ring, the foundation for the bear toy's base.
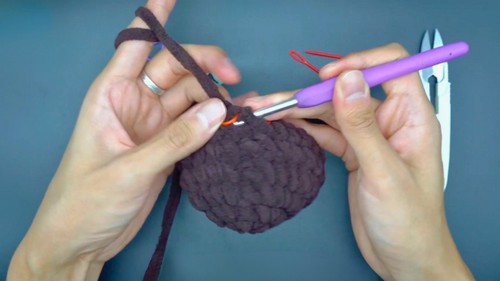
2. Round 1: Crocheting Single Crochets in the Magic Ring
- Make 8 single crochets into the magic ring. To do a single crochet:
- Insert the hook into the ring, grab the yarn, and pull it back (two loops on hook).
- Yarn over and pull through both loops.
- After completing all 8 stitches, pull the loose yarn tail to tighten the ring and close the opening. Mark your last single crochet for later reference.

3. Round 2: Increasing the Circle
- Slip stitch into the first single crochet from Round 1 to connect, then create a turning chain with a chain stitch.
- In this round, crochet 2 single crochets (an increase) into each stitch from the previous row (8 increases in total).
- At the end of this round, you will have 16 single crochets. Count your stitches to ensure accuracy, marking the last stitch.

4. Round 3: Alternating Single Crochets and Increases
- Start with a slip stitch to connect, followed by a chain stitch.
- For this round, crochet 1 single crochet in the first stitch and 2 single crochets (increase) in the next. This pattern forms a group. Repeat this pattern for 8 groups in total.
- At the end of this round, you will have 24 single crochets. Ensure you mark the last stitch for accuracy.
5. Rounds 4 to 6: Maintain the Shape
- Crochet 1 single crochet into each stitch for the next three rounds, maintaining the stitch count at 24. Don’t forget to mark the first and last stitches, as well as to slip stitch at the end of each round.
- By now, the round shape of the doll’s body begins to form.
6. Round 7: Decreasing the Stitches
- Follow a pattern of 1 single crochet followed by a decrease for 7 groups. To decrease:
- Insert the hook into the first stitch, grab the yarn and pull it back (2 loops on hook).
- Then, go into the next stitch, grab the yarn, and pull it back (3 loops on hook).
- Finally, yarn over and pull through all 3 loops.
- After this round, the stitch count is reduced, and the shape becomes slightly tapered.
7. Round 8: Crocheting Decreases Only
- In the final round of the body, create 8 decreases in a row, closing the bear’s rounded shape.
- Once completed, leave a 15 cm yarn tail, cut the end, and thread it through a darning needle. Tighten and sew the bottom opening closed by going through the front loop of each stitch, then pull the thread tight and tie off.
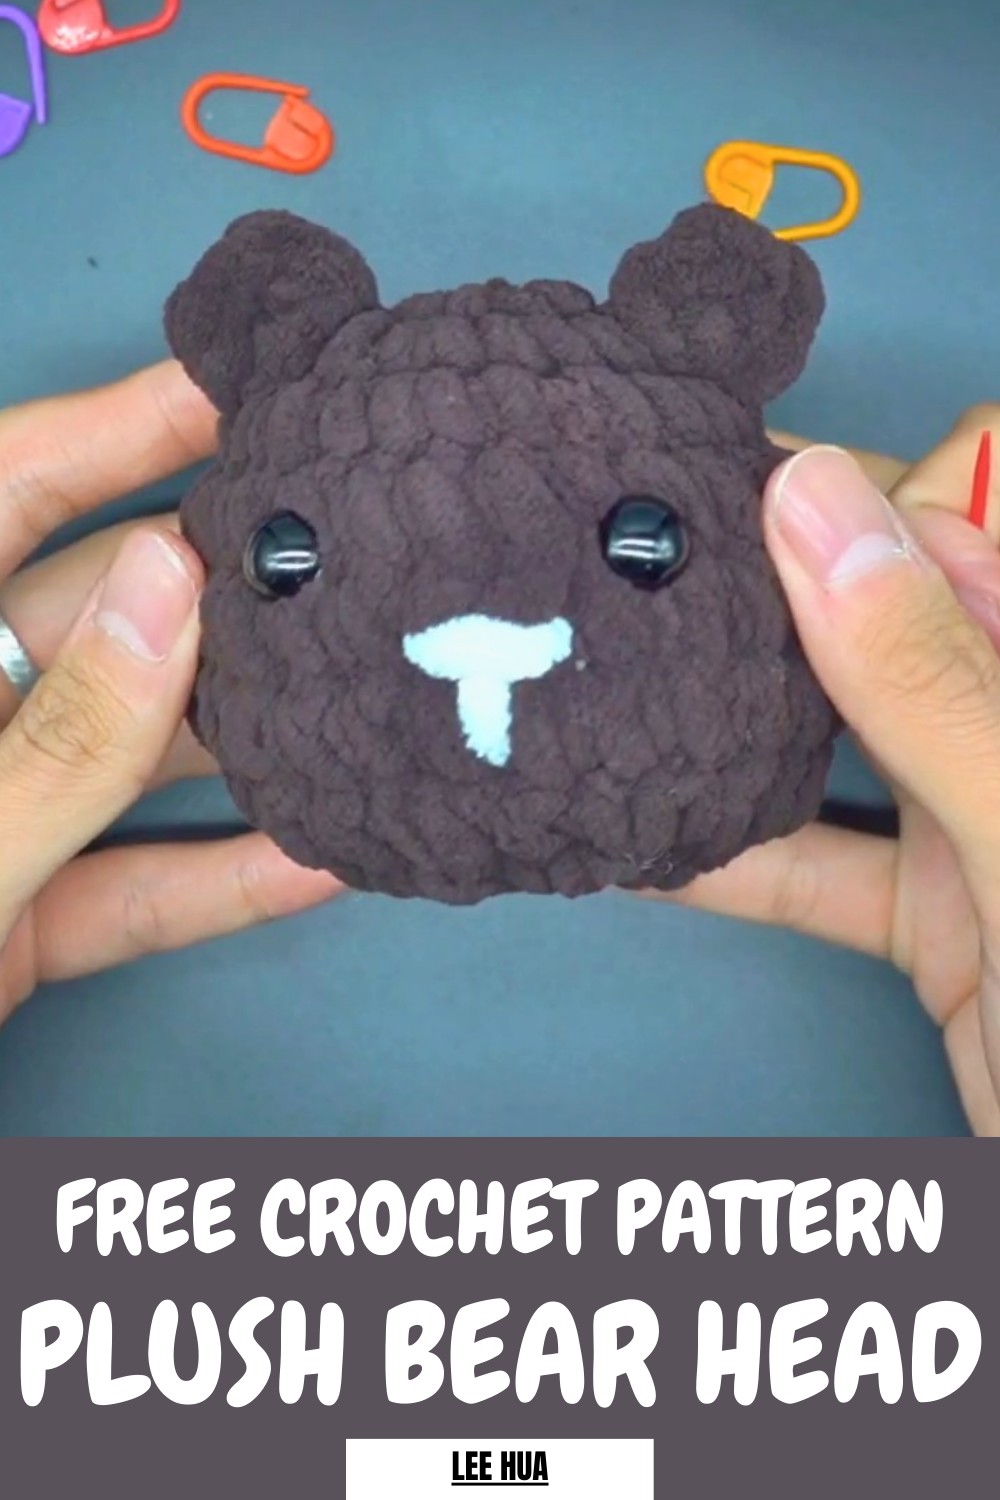
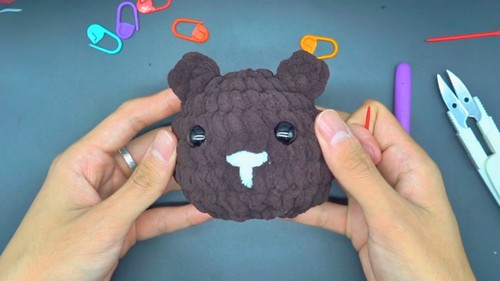
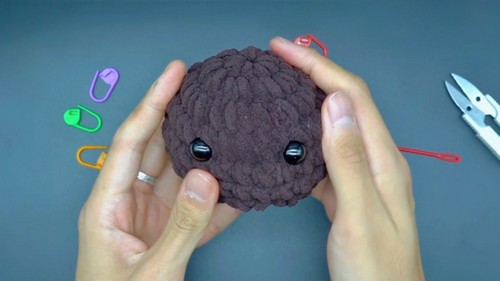
8. Attaching the Eyes
- Using safety eyes with plastic pads, place them between rounds 4 and 5 on the face side, spaced 5 stitches apart. Attach the plastic pads from the inside to securely hold them in place.
9. Stuffing the Body
- Add soft filler cotton to the body, making sure not to overstuff. This keeps the doll soft and squishy.
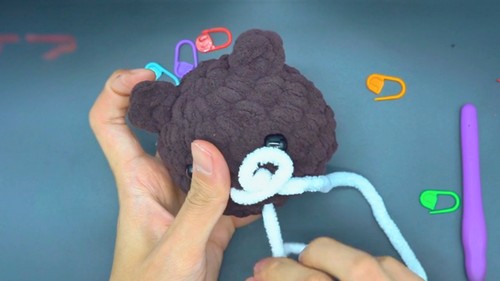
10. Adding the Ears
- Find the ear positions, aligning them between rounds 2 and 3, on the same line as the eyes. Use brown yarn to attach the ears:
- Crochet a chain stitch, followed by 2 double crochets, another chain stitch, and a slip stitch.
- Leave a 5 cm yarn tail, cut and weave it into the doll. Repeat for the second ear, making sure they are symmetrical.
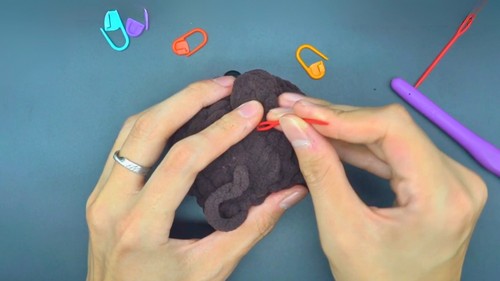
11. Final Touches: Adding the Nose and Mouth
- Use white yarn to embroider the nose and mouth in simple outlines.
Special Features
- The magic ring technique ensures the base closes neatly with no gaps.
- Symmetrical design allows for balanced placement of eyes, ears, and features.
- The bear’s elastic and soft texture makes it ideal for use as a toy or decoration.
- The process is highly customizable—you can use different yarn colors or change the size by using thinner or thicker yarns and hooks.
Level of Difficulty
Beginner to Intermediate. While most of the stitches (single crochet, slip stitch, chain stitch, double crochet) are beginner-friendly, techniques like the magic ring and decreases can be slightly tricky for first-timers.
Tutor’s Suggestions
- Practice stitches, especially single crochets and decreases, slowly and steadily if you're new to crochet.
- Always mark the first and last stitches of each round to avoid losing your place.
- Count your stitches regularly to ensure precision, particularly in rounds that involve increases or decreases.
- When attaching the eyes, try different positions to find the most suitable placement for your bear’s “expression.”
Materials Needed
- Brown yarn (main body and ears)
- White yarn (nose and mouth outline)
- Safety eyes with plastic pads (for durability and safety, especially if intended for kids)
- 5 mm crochet hook (size may vary based on yarn thickness)
- Soft filler cotton
- Scissors
- Darning needle for sewing and weaving ends
Tip
To keep your bear soft and plush, ensure to lightly stuff the body with cotton—too much stuffing can make the bear stiff and harder to shape properly.
Conclusion
This crochet bear pattern offers a delightful way to enhance your crochet skills while crocheting an adorable keepsake. Whether you’re a beginner eager to learn new stitching techniques or an experienced crocheter seeking a fun weekend project, this toy creation will bring a smile to your face.


