
How to Quick Crochet Twisted Headband Pattern for Cozy Style
Easily solve your cold-weather wardrobe woes with a Free Crochet Twisted Headband Pattern for trendy, heat-locking comfort.
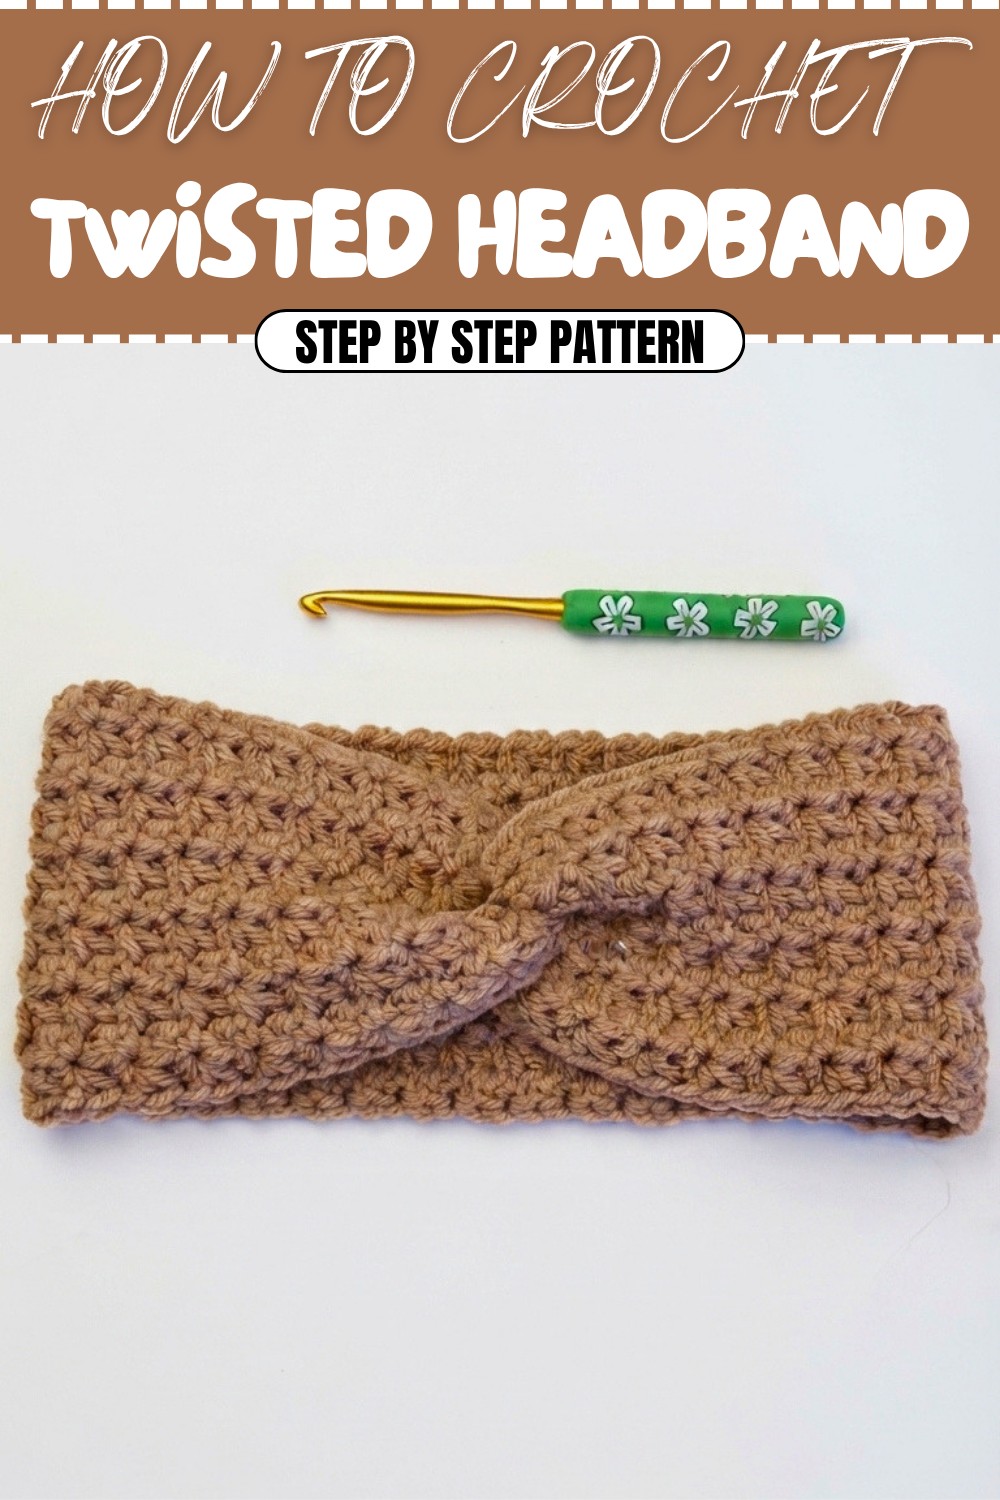
A handmade accessory that effortlessly combines comfort and style can brighten up any chilly day. This pattern features the Trinity stitch, a unique technique where three single crochets are worked together to create a beautiful textured fabric that feels both soft and stretchy. The charming twisted detail in the center adds a fashionable touch that makes this headband pattern truly special.
Free and Chic Crochet Twisted Headband Pattern for Everyday Wear
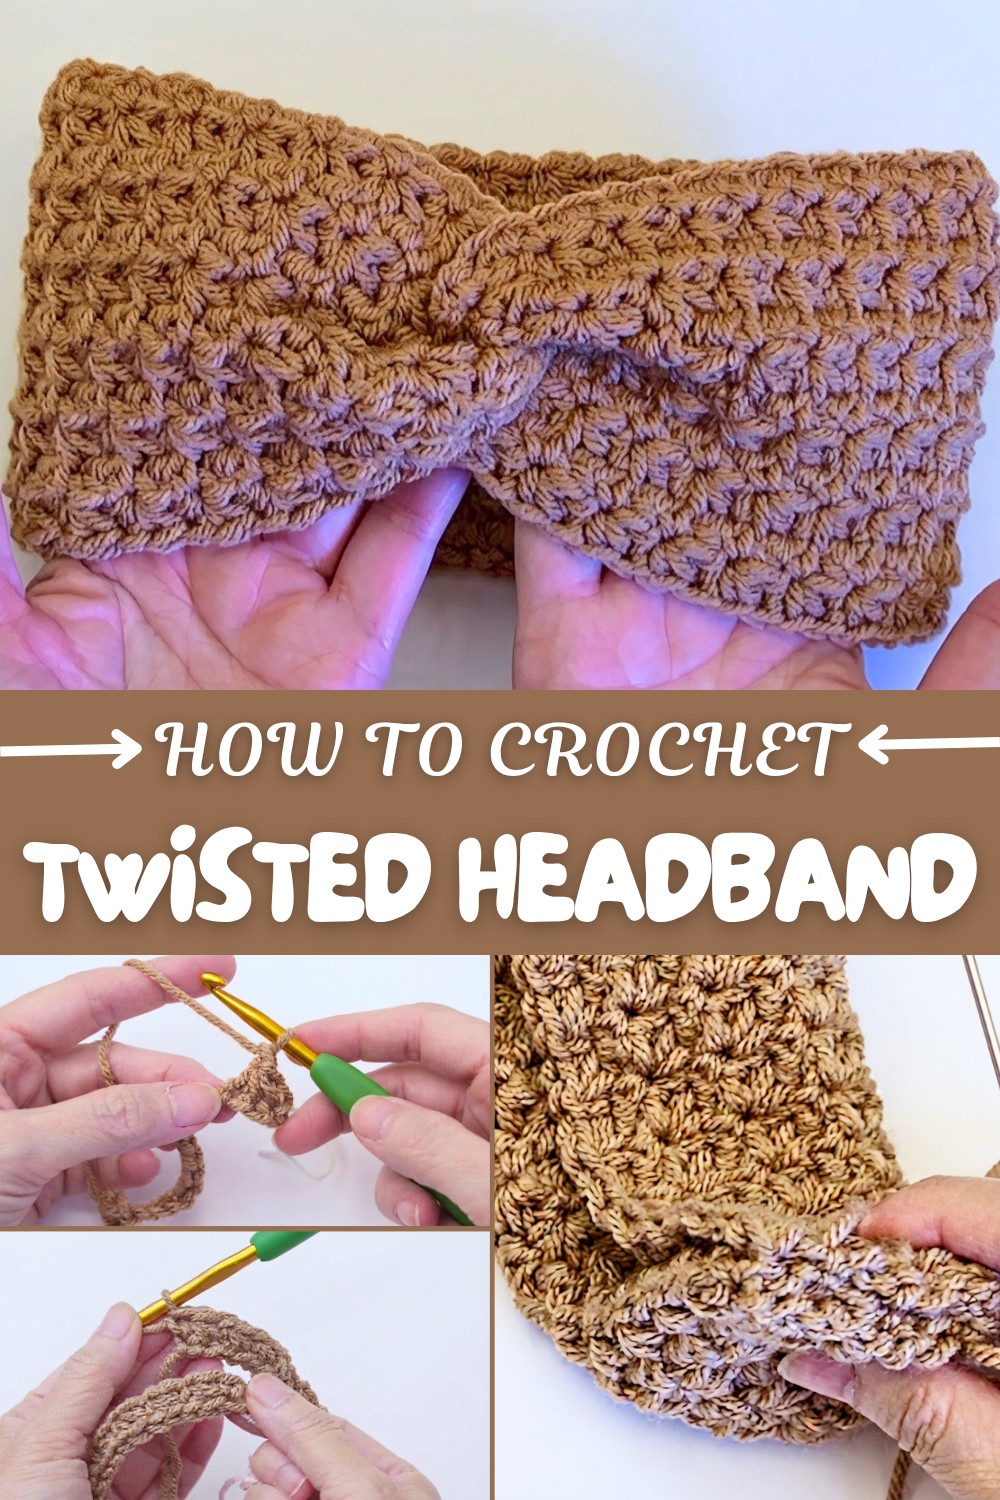
The project begins with an odd-numbered chain to ensure a snug fit, ideal for most head sizes. The stitch pattern alternates between single crochet and single crochet three together, creating neat rows and columns full of depth and interest. One of the highlights of this project is how the two ends are cleverly folded and slipped into each other before being sewn with a whip stitch. This finishing touch forms the iconic twist that gives the headband a modern, elegant look. The final width is about nine inches, making it a cozy fit that holds hair back comfortably.
This stitch technique opens up many creative possibilities beyond just headbands. The Trinity stitch can be used to make scarves, cowls, or blankets with lovely texture and stretch. It’s also a great way to practice working with stitch groups and shaping your projects in interesting ways, allowing you to add beautiful and unique details to all kinds of crochet accessories.
Trinity Stitch Ear Warmer – Step-by-Step Crochet Pattern
Crochet this stylish Trinity Stitch Ear Warmer in just a few hours for a cozy, snug fit with a beautiful textured finish. The trinity stitch creates a striking pattern of rows and columns with a slight twist in the final assembly, making this piece both functional and elegant.
This ear warmer is a beginner-friendly project, using the trinity stitch to create a textured design. It’s versatile, trendy, and can be customized to various sizes simply by adjusting the length of the starting chain. A clever twist at the seam makes this ear warmer look effortlessly chic, perfect for fall and winter.
Skill Level & Terminology
- Skill Level: Beginner
- Terminology: Pattern uses US crochet terms
If you are comfortable working single crochets and chaining, this pattern is a great opportunity to practice the trinity stitch.
Materials & Tools
- Yarn: Size-4 medium-weight yarn (e.g., worsted weight)
- Approximately 75 g for one medium-sized ear warmer
- Color of your choice
- Crochet Hook: Size 6mm (J/10)
- Notions:
- Yarn needle (for sewing and weaving in ends)
- Scissors
- Optional stitch markers
Gauge
For trinity stitch made with a 6mm hook using size-4 yarn:
- 14 stitches x 10 rows = 4 x 4-inch square
Abbreviations
Here’s a handy list of all the abbreviations used in this pattern:
- ch: Chain
- sc: Single Crochet
- sc3tog: Single Crochet Three Together
- st: Stitch
- sts: Stitches
- YO: Yarn Over
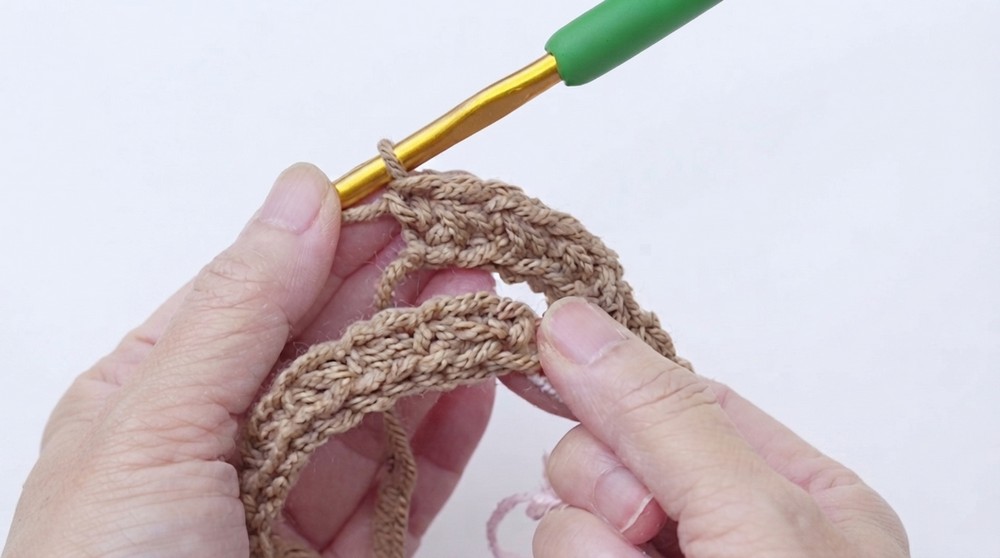
Special Stitch Instructions
Trinity Stitch (sc3tog):
This unique stitch joins three adjacent stitches into one and is the cornerstone of the ear warmer pattern.
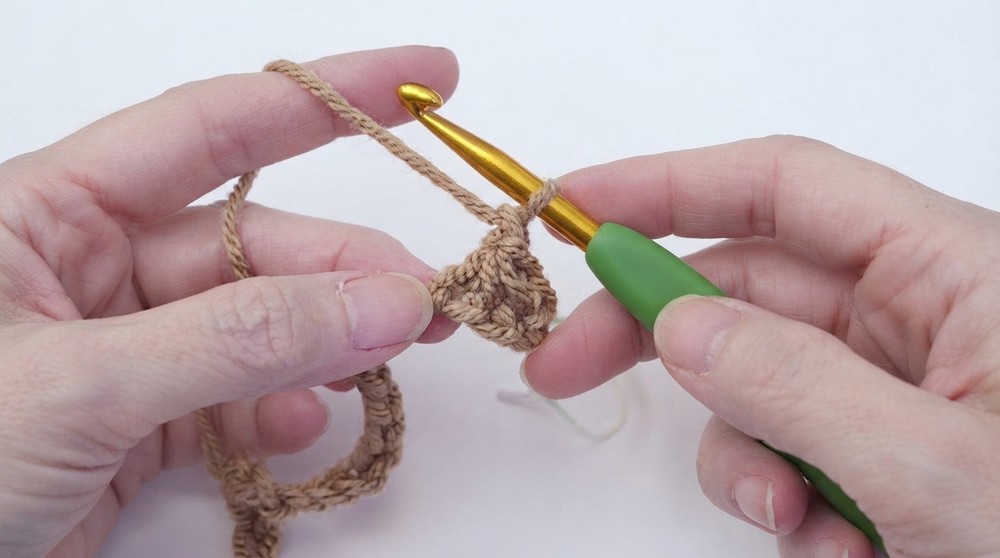
- Insert hook in the same stitch as the last worked stitch, YO and pull up a loop.
- Insert hook into the next stitch, YO and pull up a loop.
- Insert hook into the subsequent stitch, YO and pull up a loop.
- You should now have 4 loops on the hook. YO and pull through all 4 loops.
- Ch 1 to secure the trinity stitch.
Tip: Keep the chain 1 loose to make stitches easier to work into later.
Finished Size
- Width: 9 inches
- Circumference: 18 inches (fits most adult head sizes)
If you require a larger or smaller size, adjust the starting chain in odd-number multiples.
What You’ll Learn & Why You’ll Love This
From this pattern, you’ll learn:
- How to crochet the trinity stitch, a beautiful yet simple textured stitch.
- Techniques for creating neat edges and seamless joins with a whip stitch.
- Assembling the piece to form a stylish twisted ear warmer.
This pattern’s simplicity makes it beginner-friendly, while the textured trinity stitch adds character and charm. The snug, cozy fit and lovely twist make it a perfect gift or customizable accessory you’ll use again and again!
The Pattern Itself
Getting Started
The ear warmer is worked flat as a rectangle using the trinity stitch, then sewn together into a round with a twist to add interest.
Step 1. Beginning the Chain
- Start with a slip knot on your hook.
- Ch 75 (or any multiple of odd-numbered chains) to make a length approximately 18 inches long.
Step 2. Trinity Stitch (Row-by-Row)
Row 1:
- Ch 1, skip the first chain.
- Work 1 sc into the second ch.
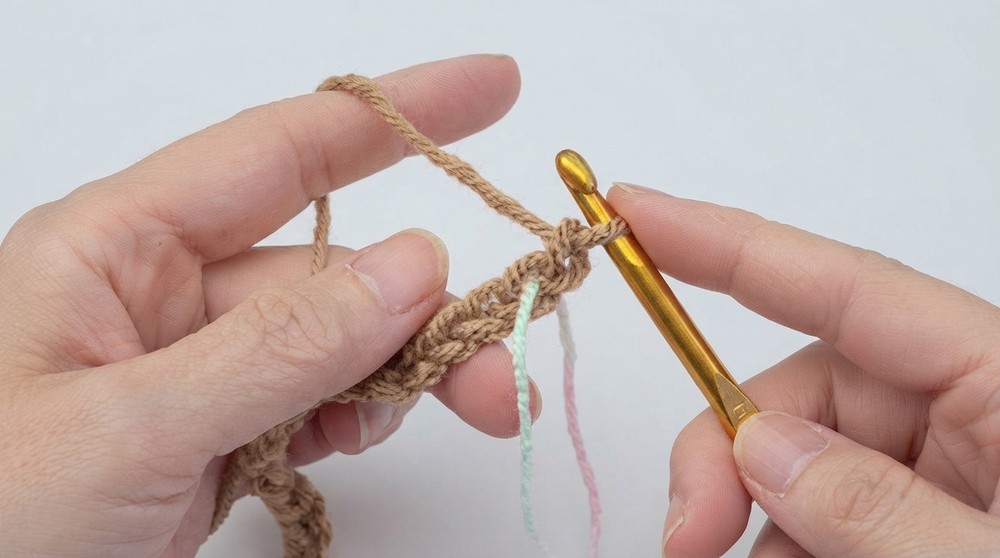
- Begin Trinity Stitch:
- Insert hook into the same chain as the last worked stitch, YO and pull up a loop.
- Insert hook into the next chain, YO and pull up a loop.
- Insert hook into the subsequent chain, YO and pull up a loop.
- You now have 4 loops on the hook.
- YO and pull through all 4 loops, then ch 1.
- Continue across the row.
- After the last sc3tog, do not ch 1. Instead, sc in the last stitch to close the row.
At the end of Row 1, you should have started and ended with a single crochet, bookending the trinity stitches neatly.
Row 2:
- Ch 1 and turn.
- Work 1 sc into the first stitch (this is the last stitch of the previous row).
- Begin Trinity Stitch:
- Insert hook into the same stitch, YO and pull up a loop.
- Insert hook into the next stitch, YO and pull up a loop.
- Insert hook into the following stitch, YO and pull up a loop.
- You now have 4 loops on the hook.
- YO and pull through all 4 loops, then ch 1.
- Continue repeating trinity stitch across the row.
- Finish the row by working a sc in the last stitch (the chain 1 space from the previous row).
The trinity stitch always draws the first loop from the last worked stitch of the previous trinity.
Rows 3–12:
- Repeat Row 2 for a total of 12 rows, or until your desired width is achieved.
Once you’ve completed Row 12, ensure the ends match neatly with an even number of stitches.

Before cutting the yarn:
- Leave a 15-inch tail for sewing the pieces together during assembly.
After working all rows, you’ll have a beautifully textured rectangle with consistent rows and columns formed by the trinity stitches and chain spaces.
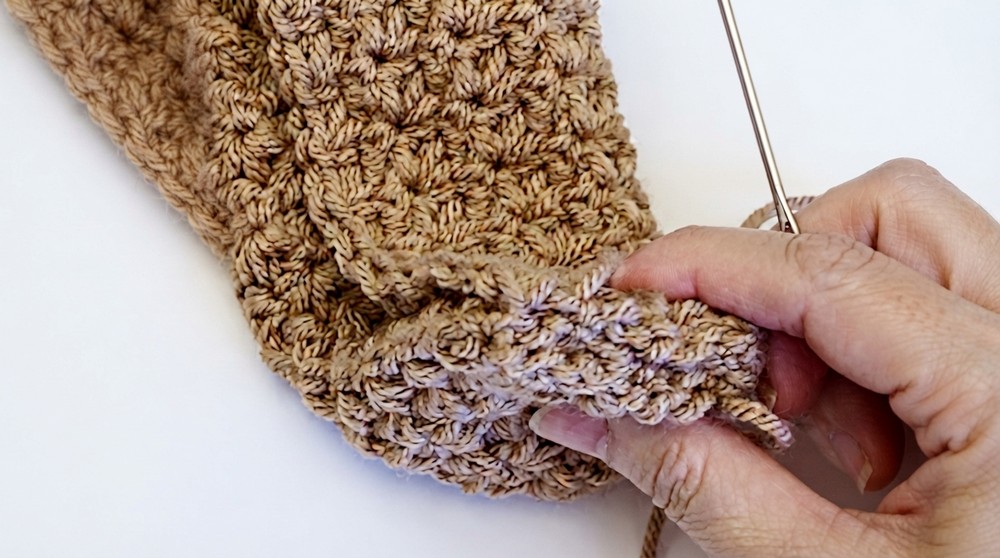
Step 3. Sewing the Ear Warmer Together
- Lay the finished rectangle flat.
- Fold each long end in half and mark the centers with a stitch marker to keep placement symmetrical.
- Bring the two folded ends facing each other.
- Slip one half into the other to create an interlocking fold. This will produce the twisted effect when joined.
Step 4. Whip Stitch the Seam
- Thread the 15-inch tail onto a yarn needle.
- Align the four layers evenly where the ends meet.
- Using a whip stitch, sew through all four layers.
- Work across the seam, making small but firm stitches for a secure join.
Optional: For stronger seams, sew back through the piece in reverse with another round of whip stitches.
- Once finished, slip stitch, fasten off, and weave in all loose ends.
Step 5. Finishing Touch
- Turn the ear warmer inside out so the seam is hidden and the twist is on the outside.
- Shape and adjust the twist to lay evenly across the front of the warmer.
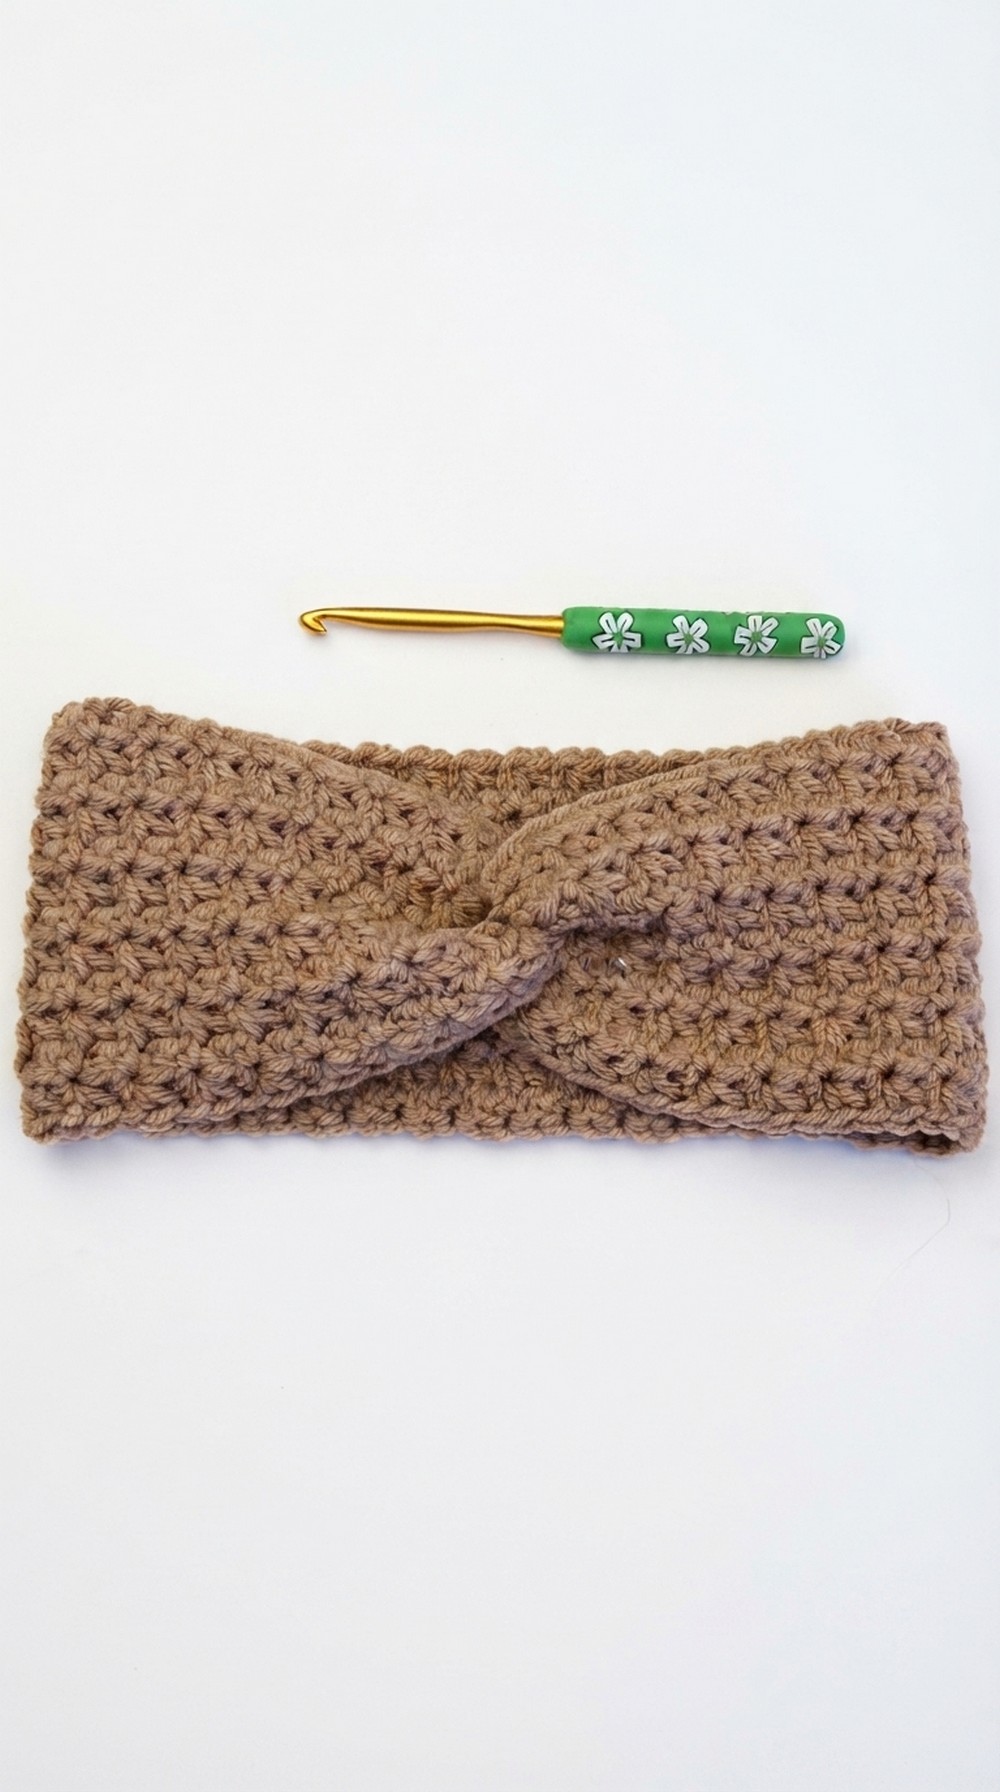
Your finished ear warmer has a chic, twisted design with prominent rows and columns of textured trinity stitches.
Assembly & Finishing
- Weave in loose ends: Make sure all yarn ends are secured properly.
- Block if needed: Light blocking can help even out the edges and stitches for a polished look.
Why You’ll Love This Pattern
The Trinity Stitch Ear Warmer is a quick and rewarding project that results in a stylish and practical accessory. It’s perfect for gifting since it uses minimal yarn, and the texture is both modern and classic. Whether you make it in neutral tones or bold pops of color, the twisted design and textured stitches are sure to catch everyone’s eye.