
How to Make a Stylish Free Crochet Canvas Bag Pattern Yourself
Give your busy mornings a cheerful touch using the Crochet Canvas Bag Pattern for a handy piece to carry your lunch and small essentials to work or college.
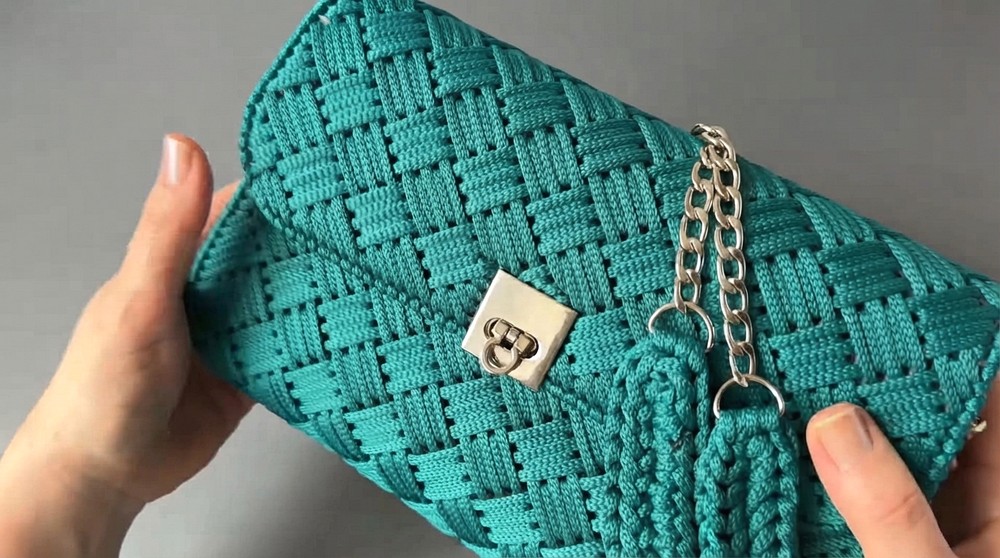
Who doesn’t love a stylish accessory that’s practical and charming all at once? This canvas bag is more than just a handy carrier, it’s a statement of originality. With soft textures and a sea wave hue, it’s perfect for spring and summer outings, walks, or even casual errands. The bag is lightweight yet sturdy, and its clean finish makes it something you’ll want to show off everywhere you go.
The true beauty of this bag lies in its thoughtful construction. Using polyester cord, the design focuses on creating seamless diagonal patterns that completely cover the canvas base. Each section comes together with precision, forming visually striking geometric clusters that make the bag stand out. Whether adding brass rings, clasps, or straps, the extra touches take it to the next level of elegance while remaining practical for daily use.
Free Crochet Canvas Bag Pattern to Carry Your Market Finds
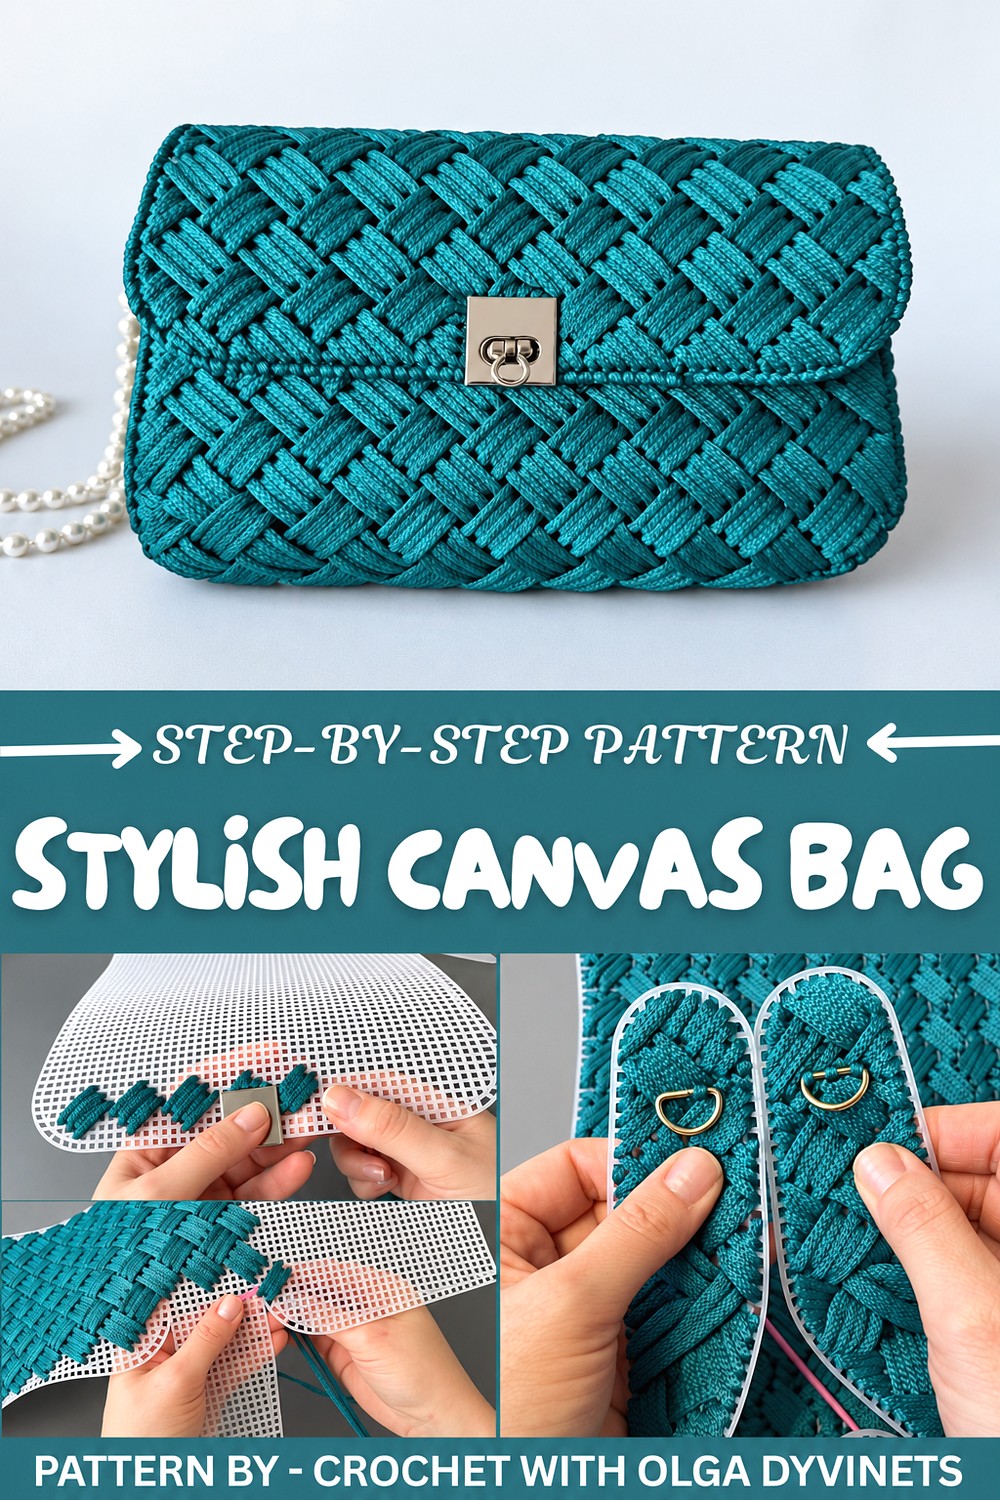
On Crochet with Olga Dyvinets!!!, Olga breaks down every single step with such clarity and patience that you’ll find it enjoyable to follow along, no matter your skill level. Her tips are not just about technique; they’re layered with helpful tricks such as managing cord ends by melting them for a smooth finish. From customizing the lining to perfectly placing the semi rings for straps, Olga ensures your work stays neat and professional.
This isn’t just a bag, it’s a piece of art that’s all about personality and utility. Keep it classic with neutral colors or go bold with brighter shades. Whatever your choice, this bag will become your favorite spring or summer companion, seamlessly blending charm and functionality.
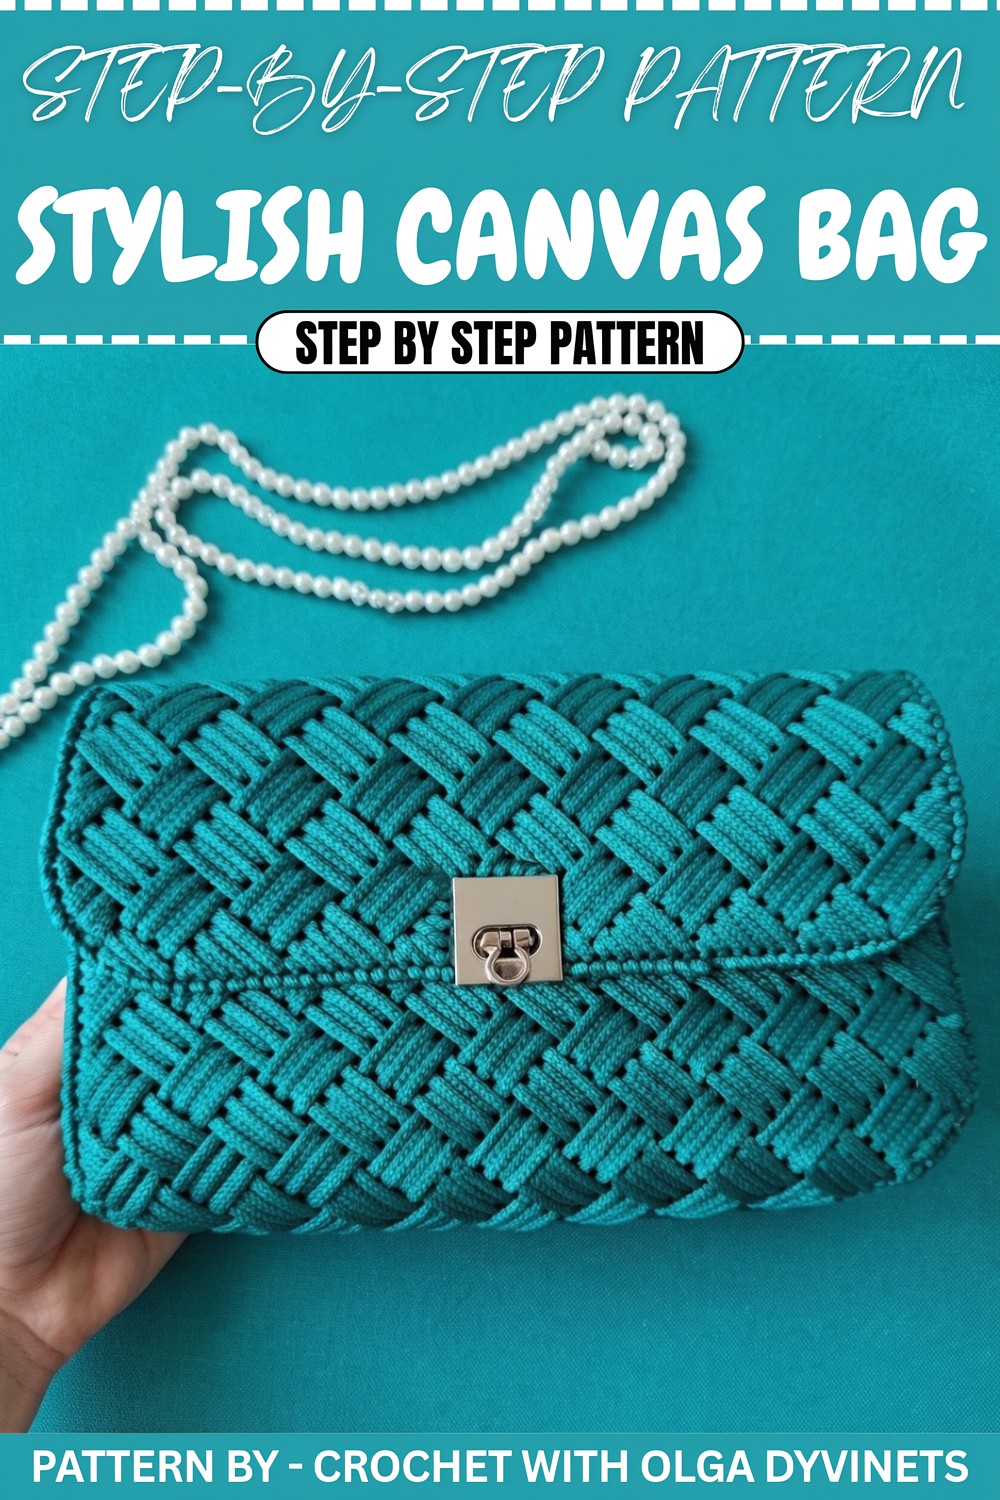
Clear & Accurate Construction Guide: Stylish Canvas Bag Pattern
This step by step guide will help you create a beautiful and durable canvas bag. Please follow every detail for a clear and seamless construction process.
Materials Needed
Before you begin, make sure you have the following materials and tools ready:
Materials:
- Plastic canvas: 15 cm x 24.5 cm (grid size: 2–3 mm).
- Polyester cord: 3 mm thickness, approximately 80–100 meters.
- Hardware:
- 2 carabiners.
- One metal chain (120 cm) for the bag strap.
- 2 D rings (half rings).
- One bag lock of your choice.
Tools:
- Large eyed needle for threading the cord.
- Scissors for cutting.
- Lighter to melt and seal the cord ends for a neat finish.
Step by Step Instructions
1. Preparation
- Start by preparing the plastic canvas. If your chosen lock requires a custom cutout in the canvas, take these steps:
- Place the lock on the canvas to determine where the center cut is needed.
- Carefully cut away just enough of the plastic in the center to allow the lock to fit. Use a sharp knife or scissors for precision.
- Install the lock directly onto the canvas at this stage.
- Mark the center of the canvas with a colored thread to help you align the remaining work accurately.
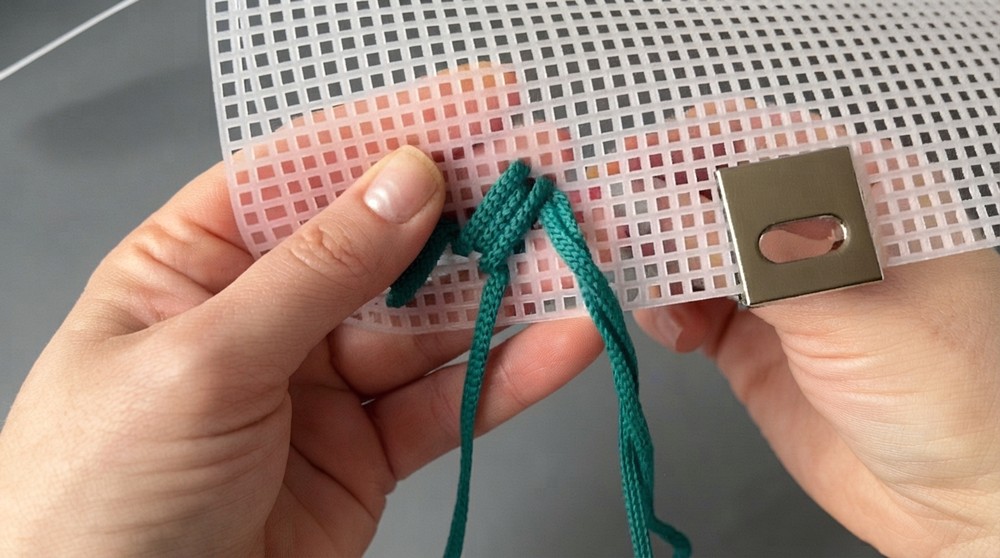
2. Preparing the Cord
- Cut a manageable length of your polyester cord—approximately 300 cm to start.
- Use a lighter to melt the ends for 1–2 seconds. This prevents the cord from fraying.
- Flatten the melted ends by squeezing them gently. Flattening helps you easily thread the cord through the needle.
3. The Stitch Pattern
- Starting the Stitching:
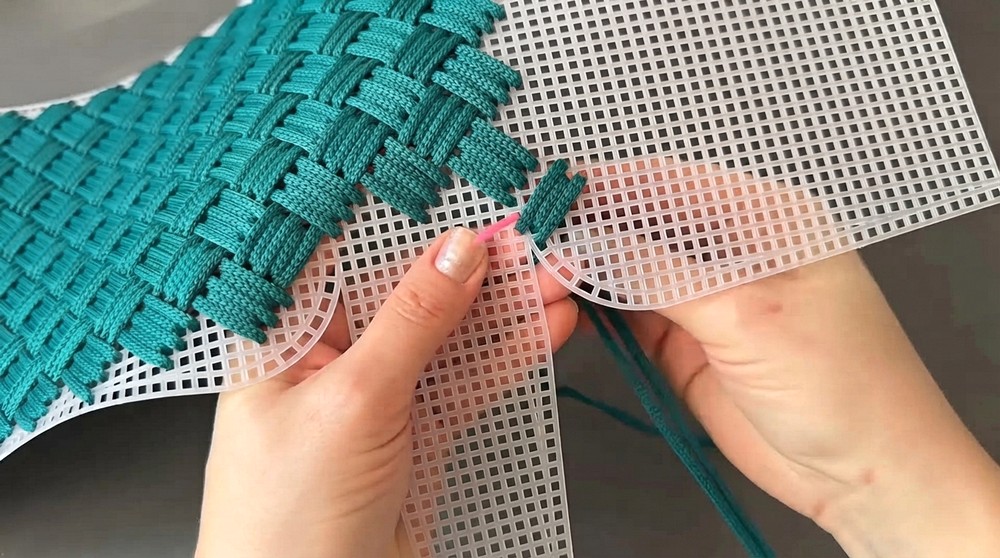
- Begin at one corner of the canvas. Insert the needle with the cord through the first square at an angle for a diagonal pattern.
- Creating Diagonal Strips:
- Stitch diagonally from one square to another to form a single long strip spanning 5 squares.
- Each "element" in the pattern will consist of 5 diagonal strips:
- 3 long diagonal strips (spanning 5 squares each).
- 2 short diagonal strips (spanning 4 squares each).
- Progression:
- Create these elements one by one, ensuring your alignment is neat and no gaps are visible.
- Leave empty spaces of 3 squares between one set of diagonal strips and the next for proper alignment.
- Tips:
- Pull the cord firmly but not too tightly to avoid uneven tension or sagging.
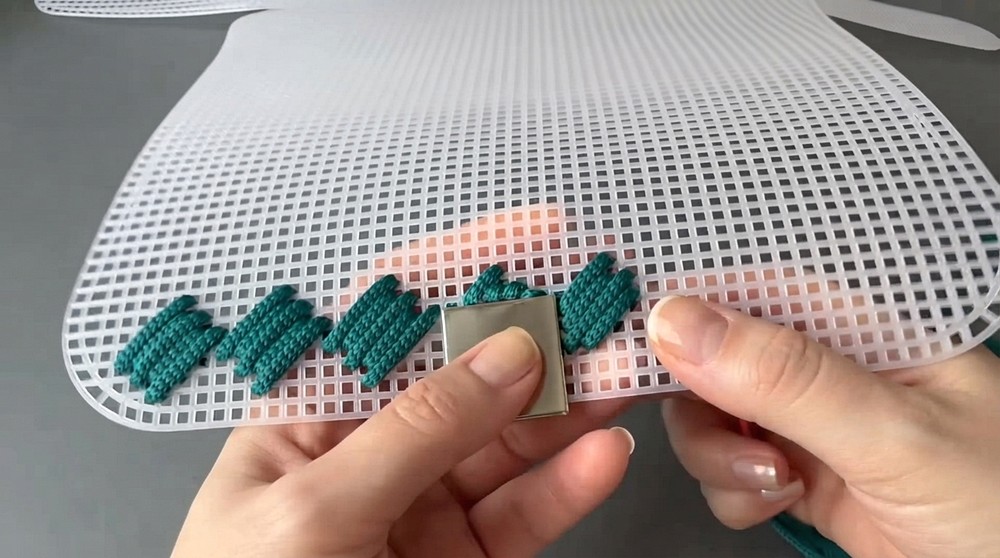
4. Creating the Bag Body
- Continue the diagonal stitch pattern across the entire main canvas at an even pace.
- When you approach the lock or central cut on the canvas:
- Work around the lock, making sure the stitches align visually, and the canvas remains covered.
- If you encounter narrow sections, improvise by shortening the diagonal strips, as needed, to maintain the overall design.
- After completing the front and back sides of the bag's main panel, inspect for any gaps. If needed, adjust tension or patterns to even things out.
5. Stitching the Side Panels
- Move to the side panels of the canvas. The technique here is essentially the same as the main body:
- Use diagonal stitches for coverage.
- Work row by row to ensure every square is filled.
- Mark the corners carefully to ensure all edges are aligned when assembling the bag later.
- Once the entire side panels have been covered, check for gaps and tighten where necessary. For the smaller holes or corners, use abbreviated diagonal stitches to ensure there are no visible open spaces.
6. Attaching Hardware
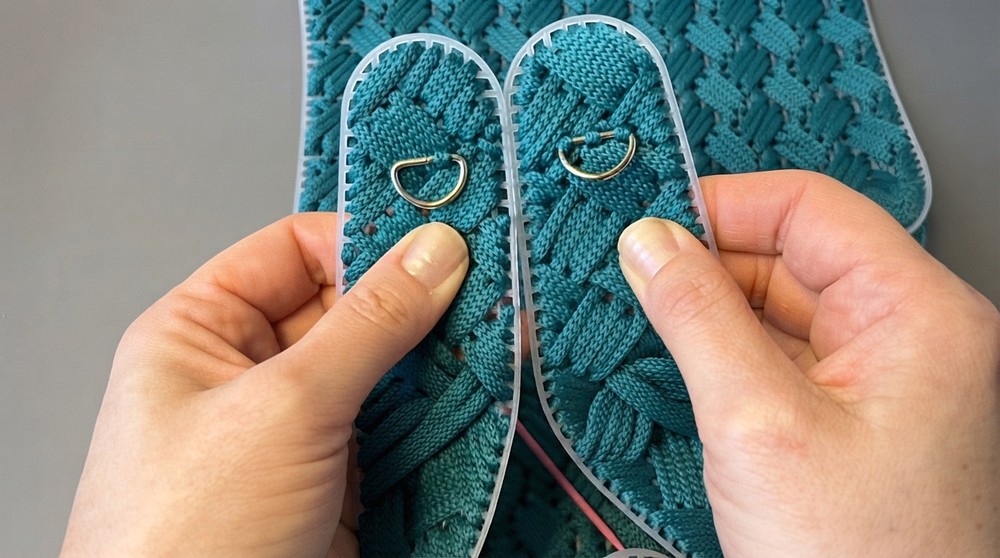
- D Ring Installation:
- Position the D rings on each side panel (near the top corners).
- Secure each ring by threading a small loop of cord through the canvas and around the D ring.
- Secure the cord inside the panel with firm knots and seal the ends with the lighter.
- Bag Lock:
- If you haven’t added the lock to the canvas yet, carefully install it now.
- Ensure that it aligns perfectly, ensuring the closure mechanism opens and locks without obstruction.
7. Lining and Final Assembly
- Creating the Lining:
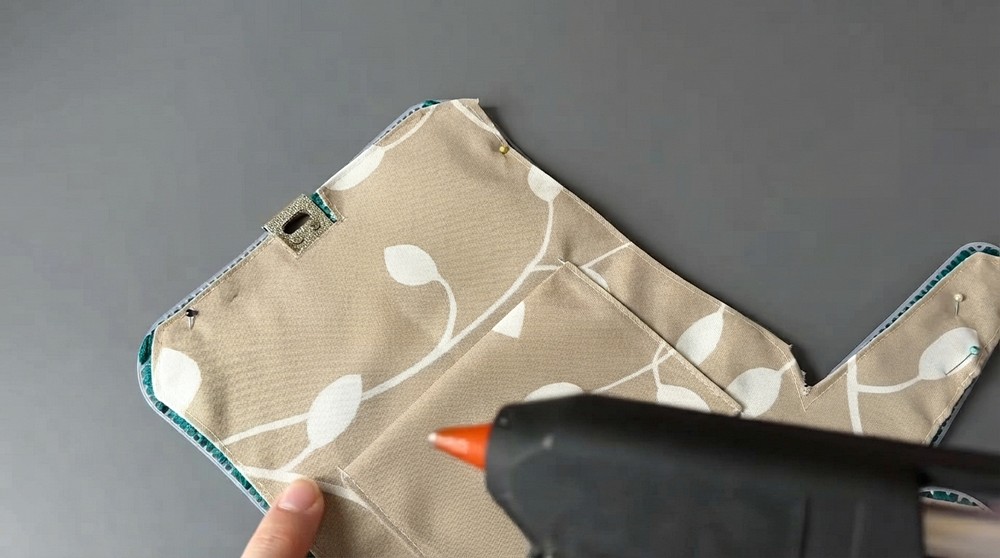
- Using a piece of fabric, trace the outline of your canvas, leaving an extra 5 mm seam allowance along the edges.
- Cut the fabric carefully and sew small notches where the zipper or lock would fit.
- Attaching the Lining:
- Place the lining inside the canvas body and secure it in place using clips.
- Carefully sew the edges of the fabric onto the canvas. If sewing isn’t an option, use a glue gun to attach the lining securely.
- Whip Stitching for Assembly:
- Use the cord to whip stitch the side panels to the main canvas body. Ensure every stitch is tight and no white canvas edges are visible.
- Work through the holes on the edges at an even distance, creating a polished and professional join.
- Securing Hardware:
- Finally, attach the chain handle to the D rings using 2 carabiners.
- Adjust to ensure the handle is the appropriate length.
Finishing Touches
- After stitching everything together, inspect the bag for any loose ends or gaps. Reinforce areas that may weaken with use.
- Ensure the lock functions smoothly and aligns properly.
Assembly & Finished Size
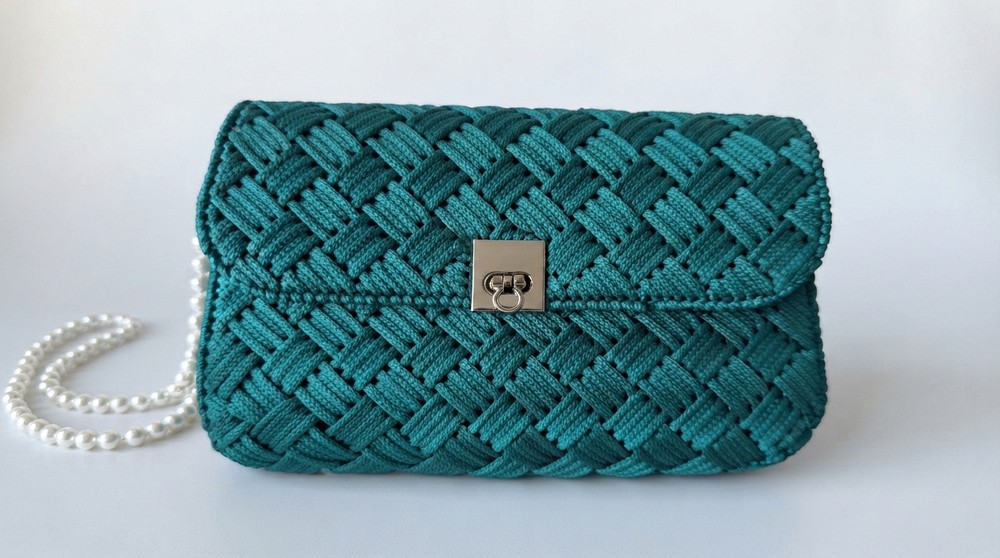
- The finished bag is lightweight, functional, and visually stunning.
- Final weight: Approximately 260 grams.
- With its compact dimensions, this bag is perfect for casual or seasonal use.
Conclusion
Congratulations, By following this detailed guide, you’ve just crafted a custom and stylish canvas bag that combines practical functionality with unique design. The use of polyester cord not only adds durability but also creates an elegant pattern that transforms the bag into a statement piece.
Try out different cord colors or hardware to personalize your design even further.