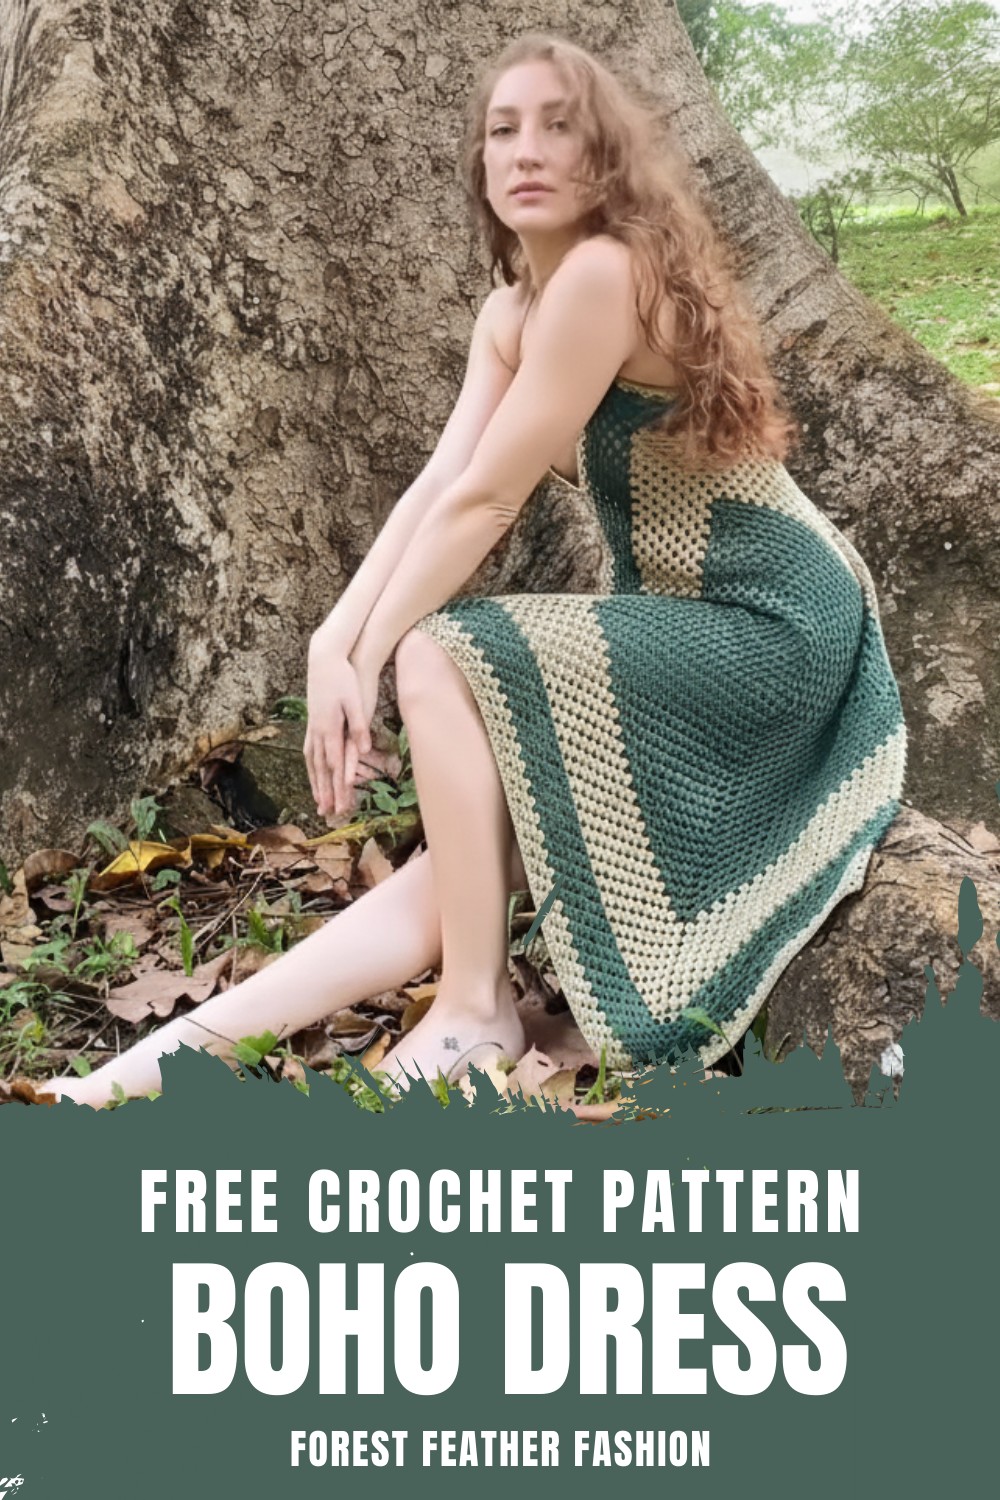
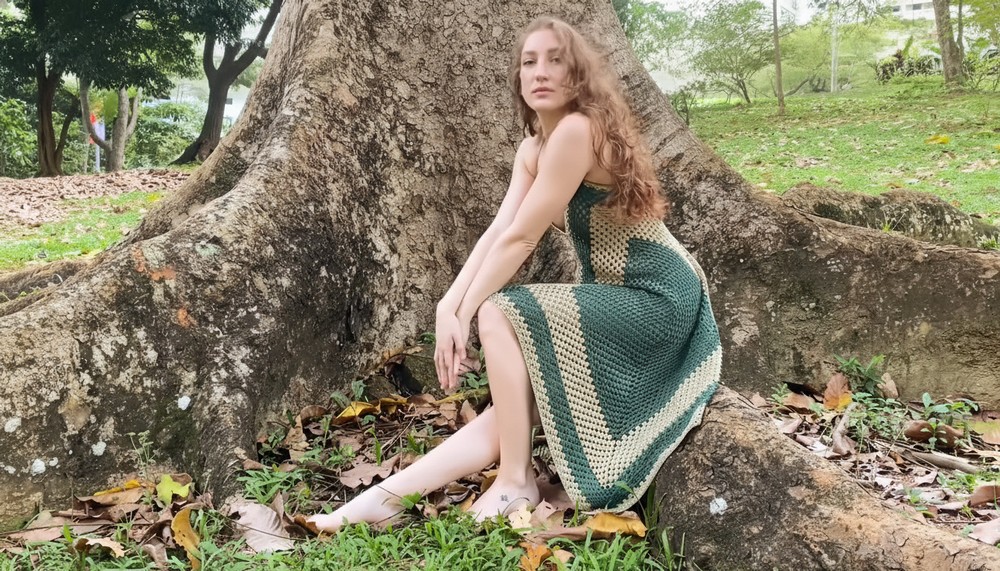
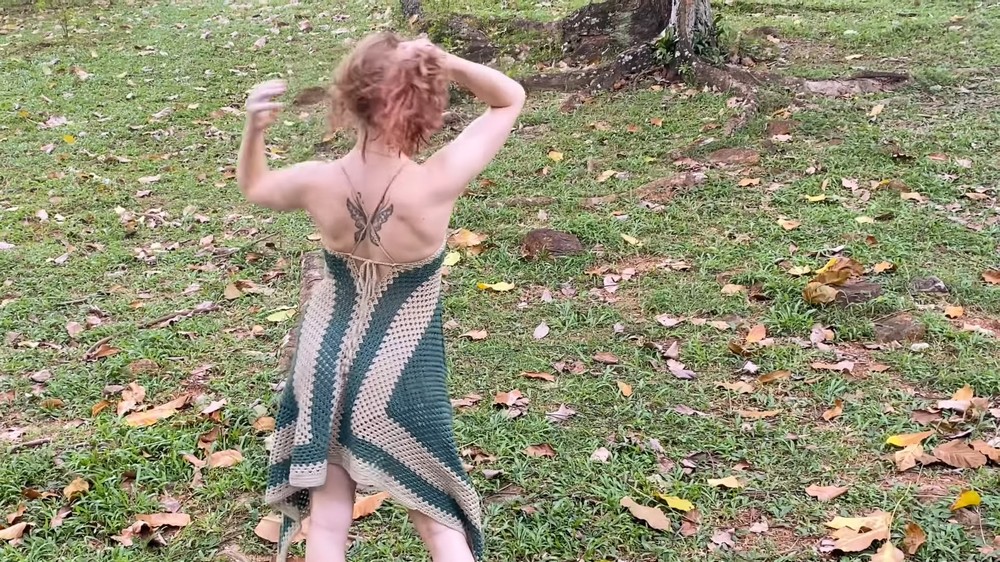
Simple Yet Elegant Crochet Boho Dress Pattern for a Stylish Statement
The versatility of this pattern makes it easy to adapt and personalize. Whether you prefer vibrant colors that crochet a bold impression or soft, earthy tones for a natural vibe, every detail can reflect your unique taste. Following a crochet boho dress pattern is more than just a project; it’s a relaxing activity that lets you focus and unwind while building something beautiful from scratch.
Beginners can learn simple techniques while seasoned crocheters master intricate stitches to create standout designs. This pattern allows anyone to bring their creativity to life in the form of a wearable masterpiece. Practical and fashionable, a handmade pattern elevates your wardrobe with a personal touch and the satisfaction of knowing that every stitch was made entirely by you.
Materials Needed
- Yarn (colors of your choice; lightweight cotton blend recommended; approximately 800 grams total)
- 3.5 mm crochet hook
- Stitch markers
- Yarn needle
- Scissors
- A cup of tea or coffee for relaxing during crochet breaks
Special Features
- Customizable Colors: You can use any number of colors to crochet unique patterns and personalize the dress.
- Versatile Design: You can add rows, adjust the v-neck, or modify the straps to achieve the desired fit and style.
- Meditative Process: The repetitive crochet movements make the process relaxing and therapeutic.
- Lightweight Cotton Blend Material: The dress uses lightweight yarn suited for airy, comfortable wear.
Difficulty Level
Beginner-Intermediate: The instructions are beginner-friendly, but creating large granny squares and assembling the dress requires some patience and precision.
Step-by-Step Process
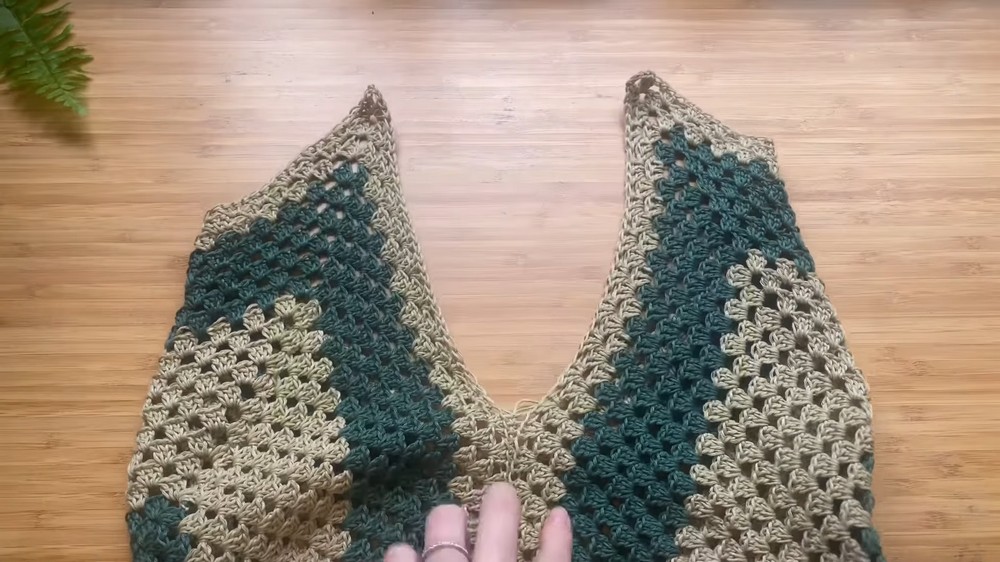
Part 1: Making Granny Squares
- Start with a Slip Knot: Wrap the yarn around your index and middle finger to make an X, loop under the first strand, pull tight with your hook, and prepare to crochet.
- Chain Four: Insert your hook into the first chain and make a slip stitch to form a loop.
- Create the Granny Square Pattern:
- Chain three and add two double crochets into the center.
- Chain three and add three double crochets for each corner. Repeat four corners total to complete one round.
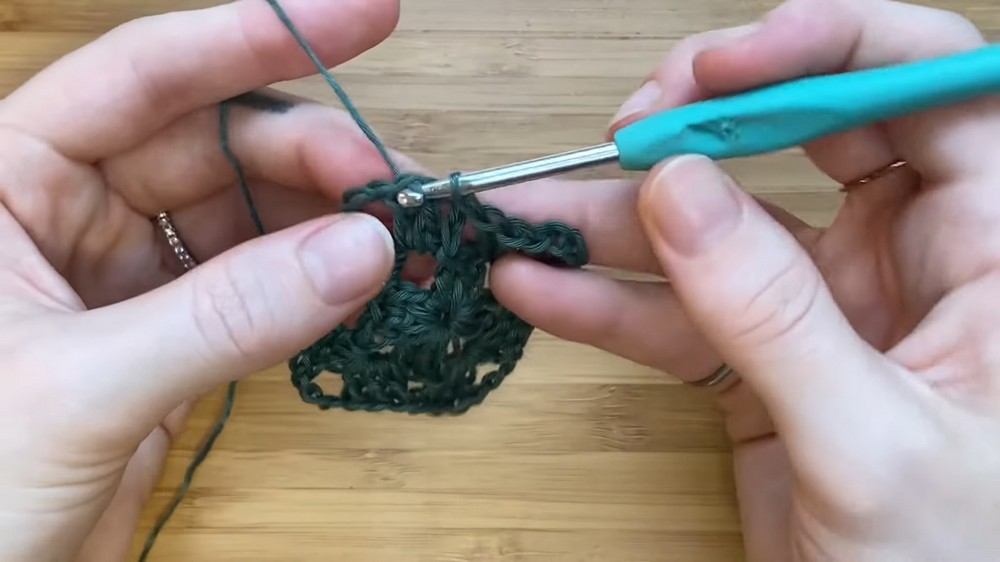
- Finish off with a slip stitch in the third chain of your starting sequence.
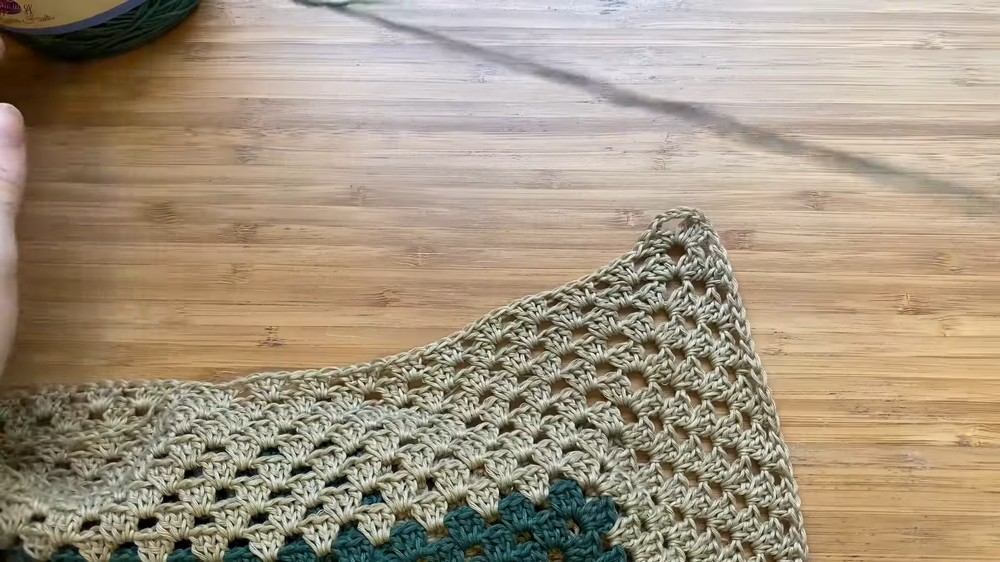
- Expand the Square: Continue repeating the granny square pattern by slip-stitching into the corner, chaining three, and adding double crochets until the square reaches your desired size. It recommends having one granny square approximately 31.8 inches from corner to corner, but you can make adjustments based on your height and preference.
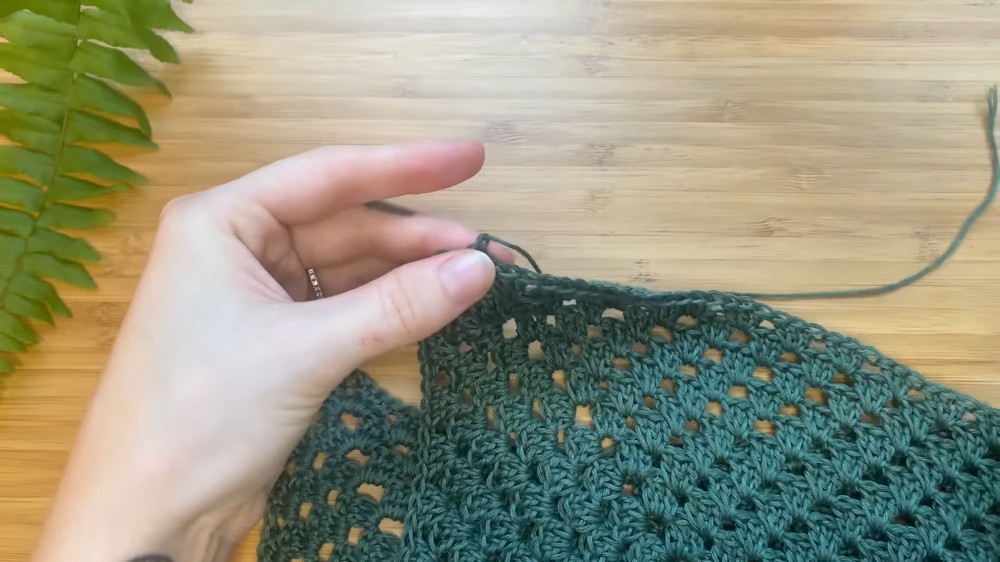
- Adding Colors: Change colors by tying off the current skein, and pulling a new color through a corner space. Add rows in your new color and continue the granny square pattern.
2: Assembling the Dress
- Measure Length and V-Neck:
- Ensure the squares are long enough for your body. If not, add additional rows.
- For the v-neck, measure from the front corner to where you'd like the neckline to end ( recommends ~5.5 inches).
- Ensure the squares are long enough for your body. If not, add additional rows.
- Position the Squares: Lay one square on top of the other (right sides facing). Use stitch markers to measure and mark where the two squares need to be joined.
- Join Squares:
- Use the slip stitch on back method. Insert your hook into the back loops of the corresponding stitches, pull yarn through, and tie off.
- Repeat the joining process for both the front and back edges.
- Create Straps:
- Start at the mid-back by securing your yarn and making single crochets along the neckline.
- At the corner spaces, chain the desired length for the straps (Candice made hers 30 inches long).
- Work single crochets back along the strap and then continue across the neckline.
- Repeat this process for the other strap.
- Start at the mid-back by securing your yarn and making single crochets along the neckline.
3: Finishing Touches
- Add optional rows to make the straps thicker or to lengthen the hemline of the dress.
- Lace the straps at the back by weaving them through the spaces between double crochet clusters.
Uses
- Perfect for casual wear, beach cover-ups, or party outfits.
- It can be styled for festivals or layered over undershirts for colder weather.
- Excellent for expressing creativity through color patterns and design.
Tutor’s Suggestions
- Relax and Enjoy: Take breaks to appreciate the creative process and enjoy the meditative benefits of crochet.
- Personalize the Design: Candice emphasizes adapting the pattern to suit your style. Use as many colors as you want to make the dress uniquely yours.
Materials Tips
Ensure your yarn is lightweight, especially if creating a flowy summer or boho-style dress. A cotton or cotton-blend yarn works well for this project, as it is breathable and comfortable.
Conclusion
With this tutorial, you can crochet a beautiful Forest Fairy Dress that combines creativity and practicality. Whether you’re a beginner looking to sharpen your crochet skills or an advanced crocheter exploring new patterns, this project offers all the tools to design a one-of-a-kind outfit.
Final Tip
Pay attention to your measurements as crochet stretches over time. Ensure proper sizing to create a garment that fits you perfectly!