
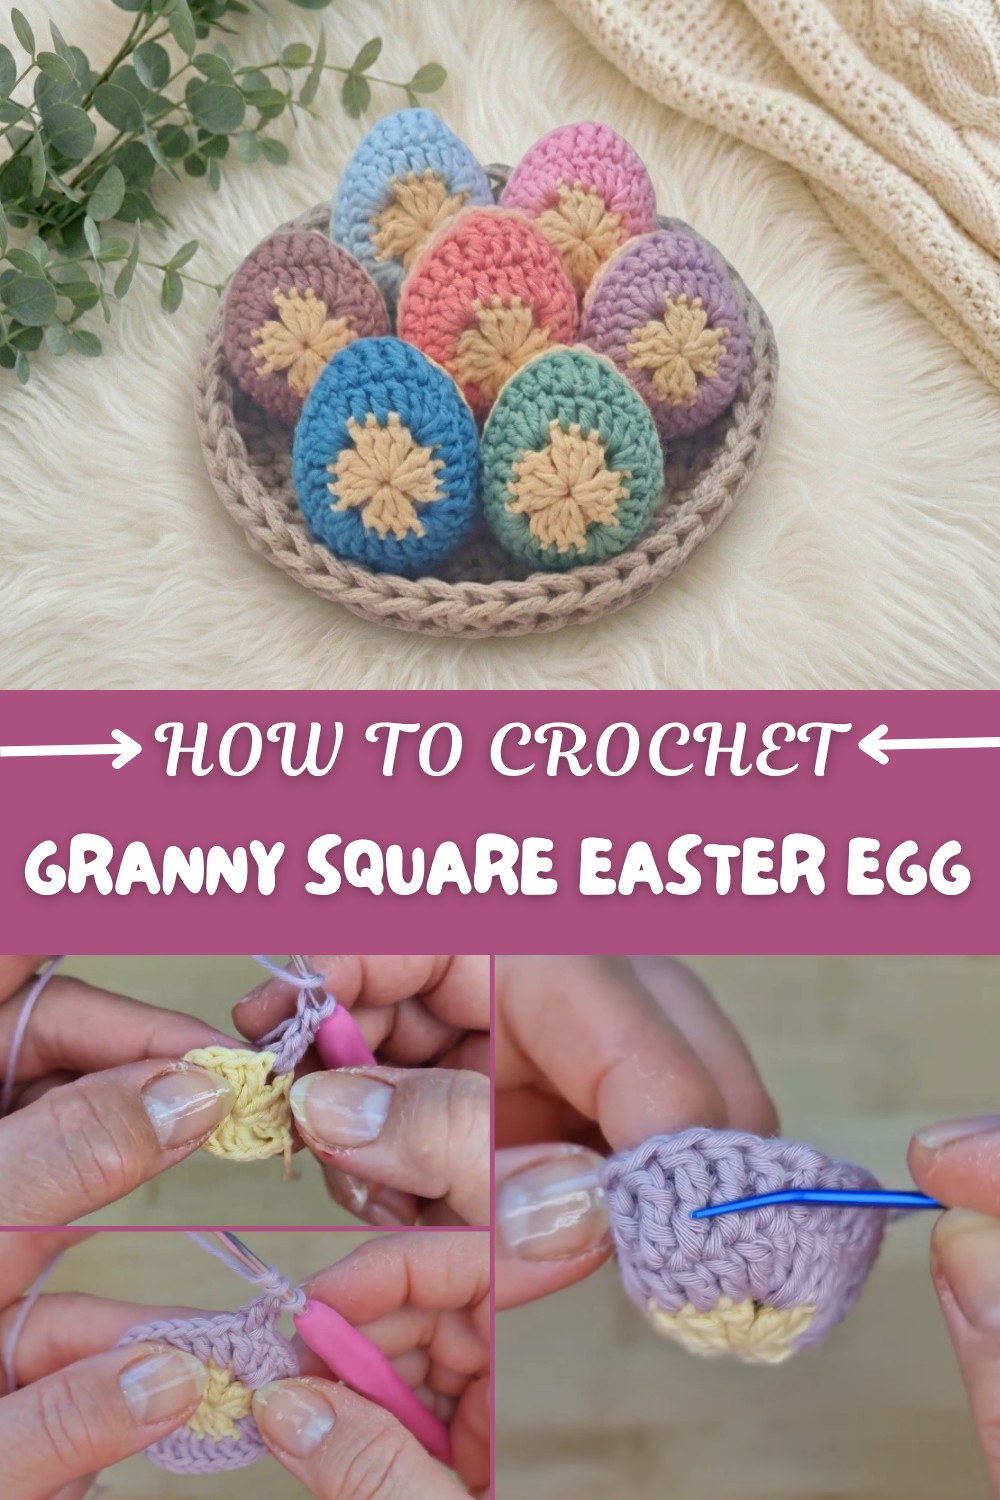
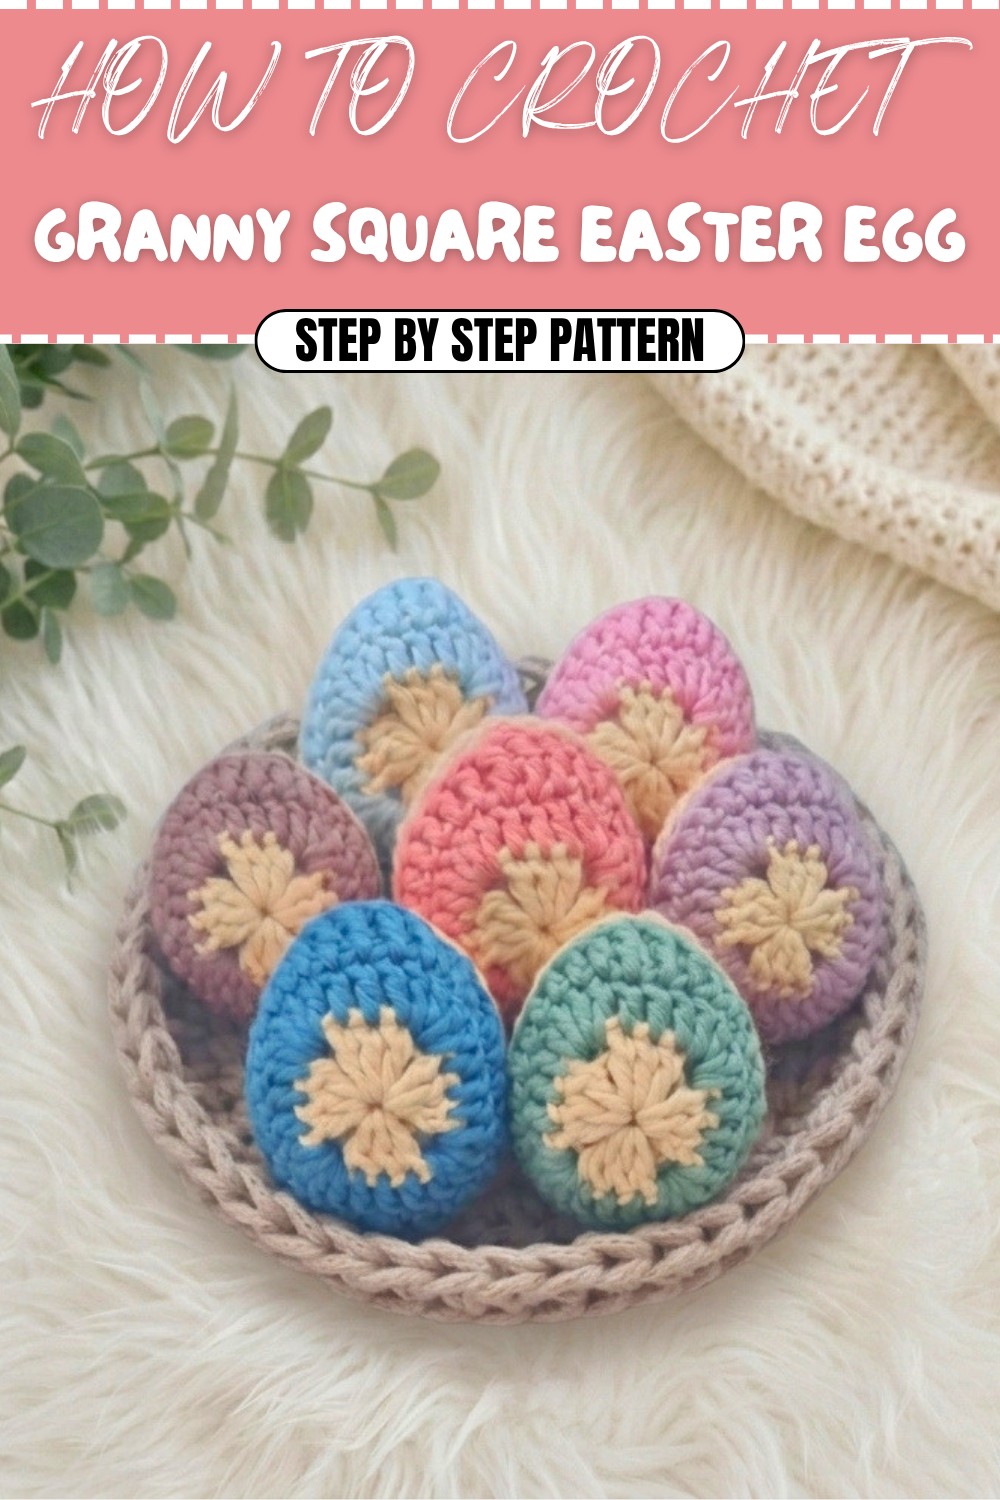
Granny Square Easter Egg Pattern – Free Crochet Design
If you’re looking for an uplifting and creative way to celebrate Easter, crafting these adorable granny square Easter eggs is truly rewarding! Not only are they sweet, soft, and vibrant, but the process is so quick and enjoyable that you’ll find yourself making a whole basketful in no time. Jump into this delightful pattern to brighten your home, gift to loved ones, or simply savor the satisfaction of creating something beautiful.
Free Crochet Granny Square Easter Egg Pattern for Spring Decor
Why This Pattern Stands Out
- Stitches Used: The pattern relies on basic yet effective crochet techniques. You’ll use the Magic Ring to start, then work rounds of Double Crochet (dc), and add height with Treble Crochet (tr) at the egg’s top for that classic, oval shape. An Invisible Join creates a seamless finish.
Where and How to Use: These eggs are perfect for Easter baskets, table décor, gift-giving, or even garlands. Their soft cotton makes them suitable for children.
- Useful and Attractive Qualities:
- Quick to Make: Great for last-minute gifts or decorations.
- Customizable: Experiment with colors and sizes.
- Unique Shape: The use of treble crochet gives a distinct height, making these eggs stand out from standard granny motifs.
What makes this pattern especially interesting is its fusion of classic granny square methods with playful seasonal charm. The dual colors and plush texture offer not just visual appeal, but also a delightful tactile experience. With simple stitches and a creative assembly, the Free Crochet Granny Square Easter Egg Pattern is accessible, motivating, and perfect for sharing—turn your next crafting session into a burst of springtime joy!
Crochet Granny Square Easter Egg Pattern
Welcome to this step-by-step pattern for making adorable, two-tone color block crochet Easter eggs. These little eggs make perfect springtime table décor, Easter gifts, or a charming display for your home. The pattern is simple, quick, and a great way to use up leftover yarn in a rainbow of colors.
Skill Level & Terminology
Skill Level: Beginner/Easy
Terminology: US Crochet Terms are used throughout.
Materials & Tools
- Yarn: Double Knitting (DK), 100% organic cotton preferred (such as Knitcraft ‘It’s Only Natural’). Two colors—one for the center panel, one for the outer.
- Crochet Hook: 3mm (or size needed for gauge)
- Tapestry/Darning Needle: For sewing pieces together and weaving ends.
- Scissors: For snipping yarn.
- Stuffing: Polyester toy filling or yarn scraps.
Gauge
Gauge is not crucial for this small project, but for reference:
4 rounds in double crochet (dc): approx 4 x 4 cm.
Abbreviations List
- MC – Magic Circle
- ch – Chain
- sl st – Slip Stitch
- dc – Double Crochet
- tr – Treble Crochet
- st(s) – Stitch(es)
- rep – Repeat
Special Stitch Instructions
- Magic Circle (MC): Form a ring with your yarn and crochet your stitches into the adjustable loop.
- Standing Stitch: Used for joining a new color directly with a dc (optional – you may start with ch 3).
- Invisible Join: A method of joining rounds with a seamless finish. See instructions under “Assembly & Finishing.”
Finished Size
Each egg measures approx 6-7 cm (2.5–2.75”) tall when stuffed firmly.
In this pattern, you’ll learn how to crochet a soft, plump Easter egg using basic stitches. We’ll create two flat panels featuring a colorful center and a contrasting border before seaming and stuffing for a perfect egg shape. These are fast, fun, and ideal for both beginners and intermediate crocheters.
Pattern
Make 2 Panels per Egg (Front & Back)
Center Panel (Color A)
- Step 1:
- Make MC.
- Ch 3 (counts as 1 dc), 2 dc in MC.
- Ch 2.
- (3 dc in MC, ch 2) rep 3 more times (for a total of 4 dc clusters with ch-2 corner spaces).
- Pull MC tight.
- Ch 2 and sl st to top of initial ch-3.
- Fasten off.
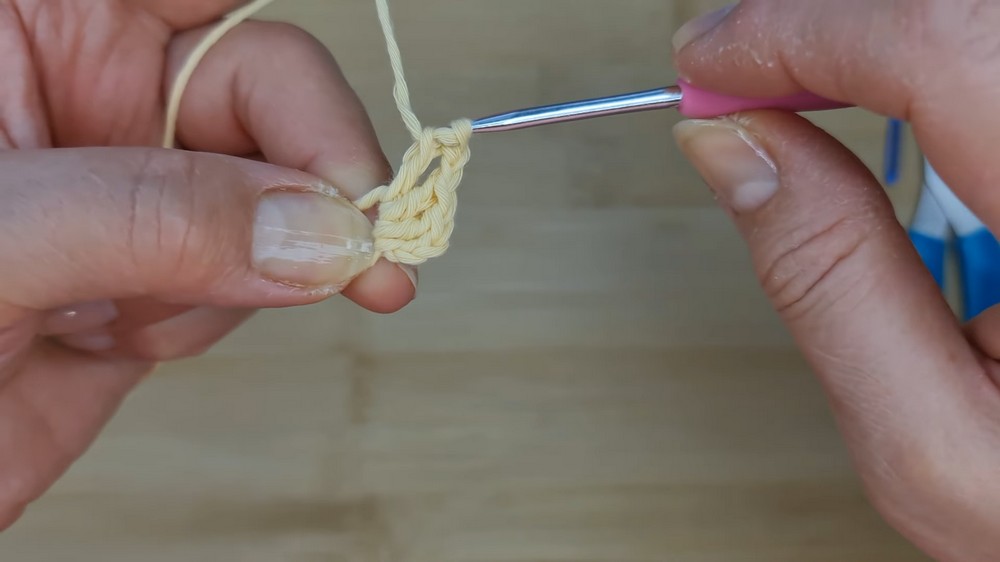
You’ve now made a small square with four corners. If you’re not following the pattern format, just make a tiny granny square with 4 clusters of 3 dcs, each separated by ch-2 spaces.
Outer Panel (Color B)
- Step 2:
- Join new color in any corner ch-2 space (standing dc or ch 3).
- Dc in same space (2 dc in corner now).
- Dc in each dc across the next side (total of 3 dc).
- 4 dc in next corner ch-2 space.
- Dc in each dc across the side (total of 3 dc).
- 4 dc in next corner, and so on, working around all four corners.
- Continue:
- Working around the square so each corner ch-2 space gets 4 dc, and in between, dc in each st (across the 3 dc). At end, sl st to top of starting dc or ch-3 to close round.
- Do not fasten off.
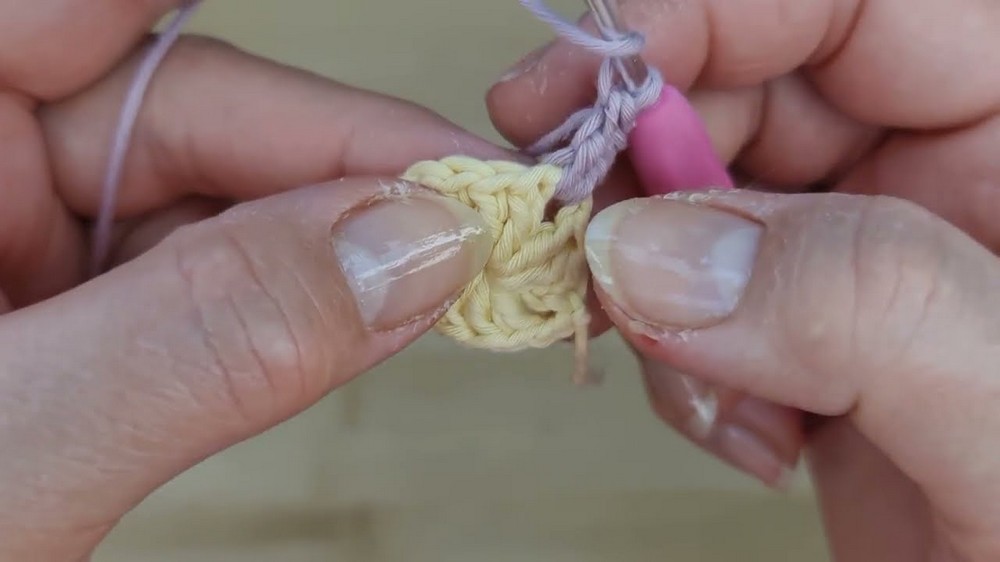
After this round, your square is starting to look rounder. Just add double crochets in each stitch, putting 4 dcs in each corner space.
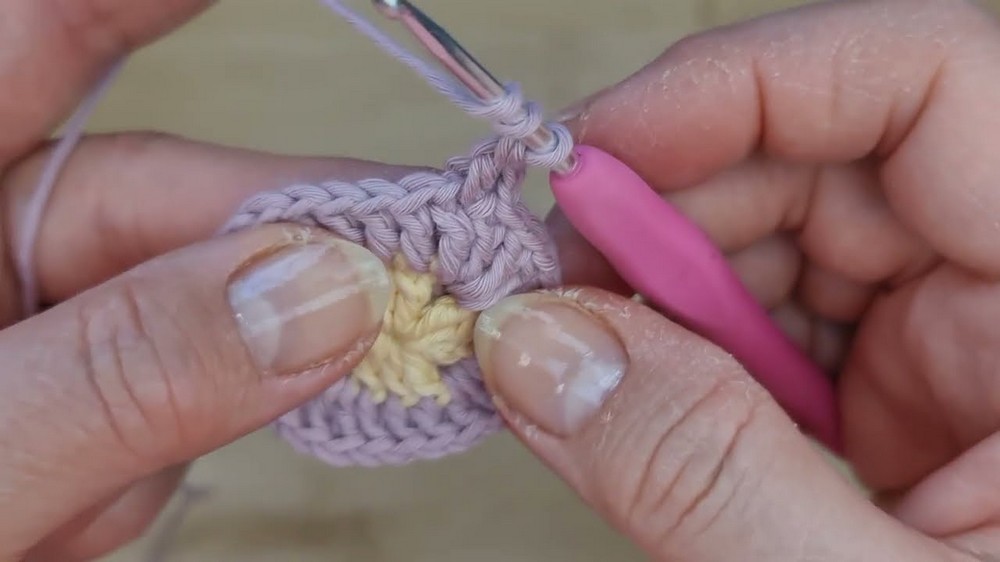
Final Shaping Round
- Step 3:
- Ch 3 (counts as dc).
- Dc in next st.
- Tr in next 3 sts.
- Dc in next st.
- Dc in each st around to next set of 3 sts at the bottom.
- For the next 3 bottom sts, [dc in first st, 2 dc in next, dc in last st].
- Continue dc in each st to starting ch-3.
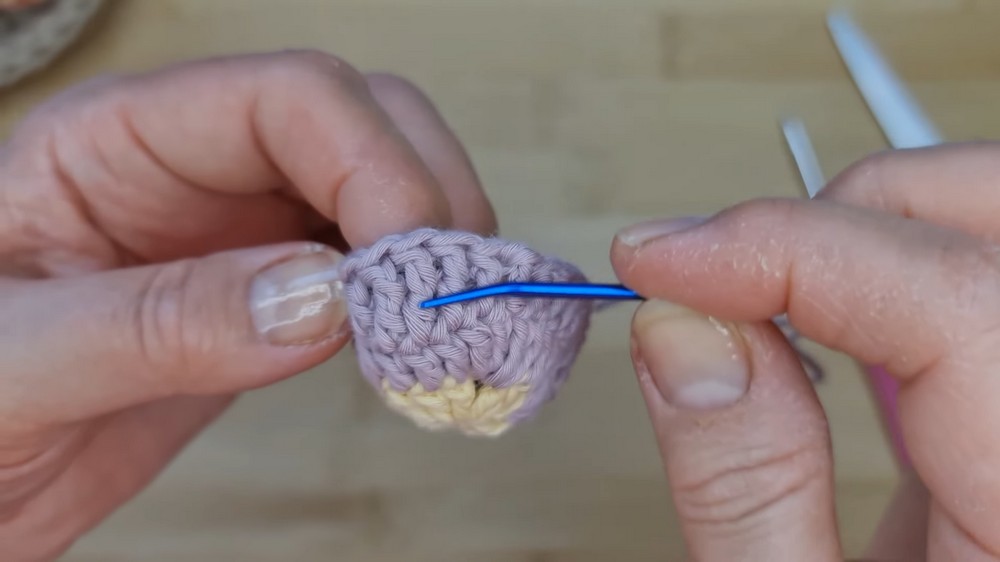
- Invisible join: Cut yarn, leaving a long tail (for sewing). Pull up the loop and use the tapestry needle to join invisibly (see assembly).
This round creates the “egg” shape. You work three tall treble crochets across the top, double crochets along the sides, and add extra increases at the base middle to form an oval.
Assembly & Finishing
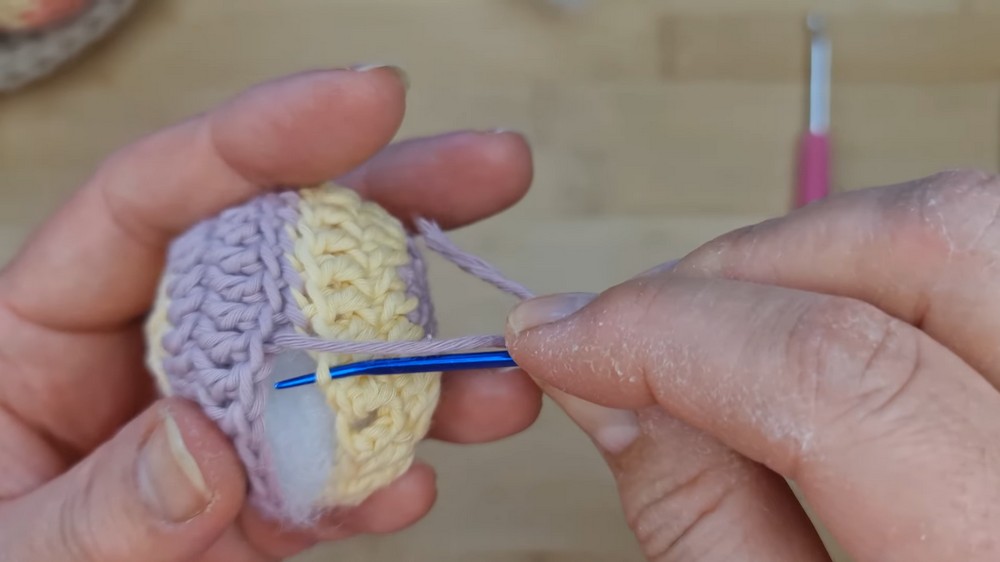
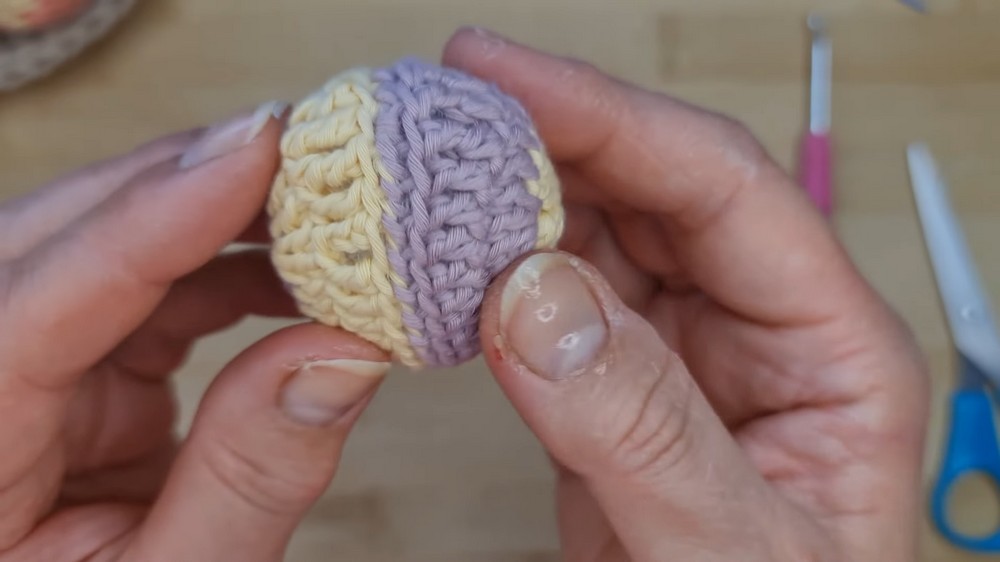
- Step 4: Make two identically shaped pieces.
- Weave in all but the long sewing tail.
- Place panels together, right sides facing out. Align the center top treble crochets and begin sewing through back loops only of both pieces, working around egg with a whip stitch for a neat ridge.
- Once almost closed, stuff egg firmly so it is plump and smooth.
- Sew up the remaining opening.
- Insert needle into egg, bring out elsewhere, and trim yarn for a clean invisible finish.
If you don’t read written patterns: Just make two oval panels as described, place them together back-to-back, and sew most of the way around, stuff, then sew the rest and hide the joining yarn.
Pattern Notes
- Begin each panel with a magic ring for the neatest start.
- Keep stitches firm and stuffing snug for best shape.
- Try stripes, solids, or even variegated yarns for different looks.
- Multiple eggs in assorted colors look great arranged in a tray or basket.
For Beginners
If you are new to patterns:
Start by making a small square centered in a magic circle, add a border of double crochets (making more stitches at the corners), then work a final round that shapes the square into an oval (with some tall stitches at the top and increases at the base). Make another piece just like it, then sew them together back to back, stuffing as you go!
About This Pattern
- Getting Started: This pattern uses only a few basic stitches (chain, double crochet, treble crochet, slip stitch) and you’ll stitch in rounds for the egg panels, then join them together.
- Stitches Used:
- Magic Ring, Chain, Double Crochet (dc), Treble Crochet (tr), Slip Stitch (sl st), and Whip Stitch for seaming.
- Customizing:
- Change up the color order, try stripes or speckles, or make your eggs in one or two colors as preferred.