
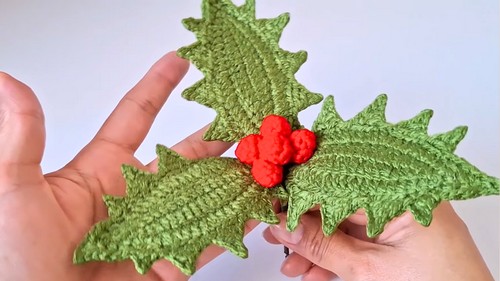
Create festive décor with this Free crochet Christmas Holly, bringing bright holly accents that bring classic holiday charm to any season.
This is a delightful way to bring festive charm into your holiday crafts and décor. A Crochet Christmas Holly Pattern captures the timeless beauty of holly leaves and berries, adding an elegant seasonal touch to any project. Whether you use it to embellish wreaths, create unique tree ornaments, decorate gift wraps, or design handmade table runners, this pattern is versatile and perfect for infusing Christmas spirit into your home.
Vibrant Crochet Christmas Holly Pattern For Festive Projects

With a Crochet Christmas Holly Pattern, you can combine creativity with festive flair—producing charming decorations that bring joy and warmth to your celebrations.
Tip
Iron to Set the Shape: To permanently remove any curl or warping from the leaf and ensure your beautiful picot points lay flat and crisp, run a warm hair straightener (flat iron) gently over the surface of the finished leaf after securing the wire. This gentle application of heat is key to setting the fibers and achieving the final, polished look.
Uses
-
Adorn Christmas wreaths and garlands.
-
Decorate holiday centerpieces or mantels.
-
Attach to gift wrapping as a reusable embellishment.
Materials
-
Yarn: 100% acrylic yarn, 2 mm thickness, in:
-
Olive Green: For the leaves.
-
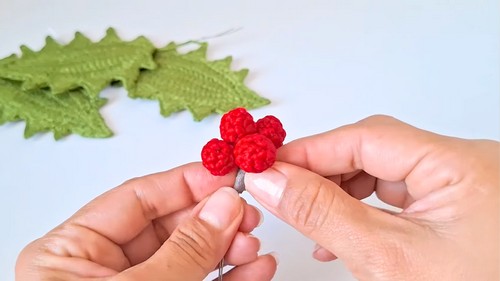
Red: For the berries.
-
-
Crochet Hook: A metal hook, size 4 (typically 2.0 mm, suitable for fine yarn).
-
Wire: Wire of Gauge #22 (approximately 1 mm thick).
-
Three pieces, each 30 cm long (for the leaves).
-
One piece, 20 cm long (for the berry stem).
-
-
Notions: Stitch marker, scissors, blunt tapestry/canvas needle, cutting pliers, Floratape (floristry tape) in green or brown, and a candle/lighter and a hair straightener/flat iron for heat finishing.
Special Features
-
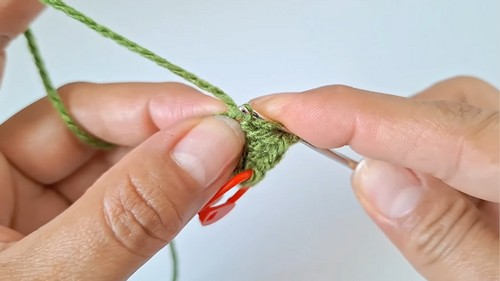
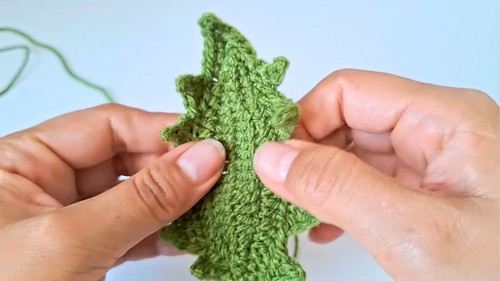
Poseable Leaves: You crochet the holly leaves directly around a doubled length of wire, which makes each finished leaf fully bendable and posable, allowing you to shape the ornament realistically.
-
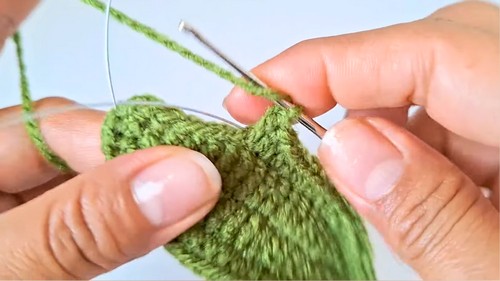
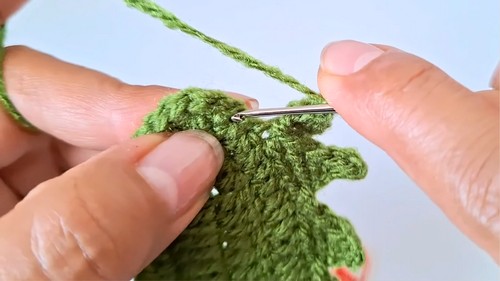
Structured Spiky Edge: The final round of the leaves uses a complex combination of slip stitches and various height stitches (HDC, DC, DTR) to create defined, three-dimensional picot points, accurately mimicking the spiky edge of a natural holly leaf.
-
Heat Finishing Technique: You use a flame and a hair straightener to gently fuse the acrylic fibers. This process eliminates fuzziness, sets the leaf shape, and makes the small tips of the picots sharper and more refined.
-
Floristry Assembly: You use Floratape to wrap the stems of the leaves and berries together, providing a professional, natural-looking stem for easy arrangement in your decorations.
Level of Difficulty
The tutor describes this project as Super Easy and Fast [00:27]. However, due to the need for precision in working the complex picot border and managing the wire integration, you should consider this an Intermediate project for best results.
Tutor's Suggestions
-
Maintain Yarn Weight: Ensure you use 2 mm thick yarn so that the holly maintains the intended size and structure.
-
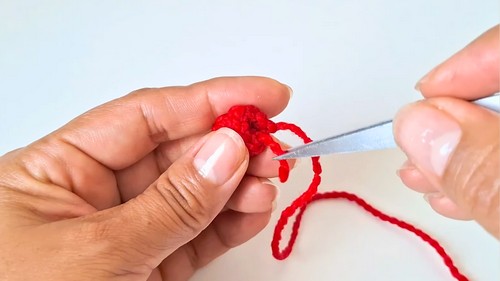
Handle with Pliers: When performing the heat finishing technique, use cutting pliers to hold the small berries to prevent burning your fingers.
-
Weave the Wire: Make sure you tightly encase the wire within the stitches of the leaf's second round to ensure the piece is sturdy and the wire is invisible.
-
Check Pico Spacing: When working the spiky edge, carefully count the stitches you skip (3 or 4) between each point to ensure the edge is even and lies flat.
The intricate design of holly leaves pairs beautifully with bright red berries, making it ideal for traditional holiday color schemes.

Crocheters of all skill levels can enjoy crafting this pattern, with beginners focusing on simpler leaves and intermediate crafters exploring layered or textured styles. You can even customize the look by using metallic yarns, softer pastels, or sparkly threads for a contemporary twist.
Beyond its aesthetic appeal, this pattern offers lasting benefits. Holly motifs are lightweight, reusable, and durable, allowing them to be stored easily and enjoyed for years to come.
Creating these handcrafted accents also makes for wonderful and thoughtful gifts during the holiday season.
Step-by-Step Details
Create this beautiful, custom-made Christmas holly ornament using crochet! This project is perfect for adding a handmade touch to your holiday decor. You will learn to incorporate wire for fully poseable leaves and utilize a special finishing technique to make your holly look professionally structured and refined. Use this piece to decorate wreaths, garlands, centerpieces, or any cozy spot in your home.
Conclusion
Congratulations! You have successfully completed this elegant and sturdy crochet Christmas holly. This detailed piece, featuring wired, poseable leaves and a professional floristry-wrapped stem, is now ready to be incorporated into your holiday decorations, bringing a sophisticated, handmade charm to your home.


