
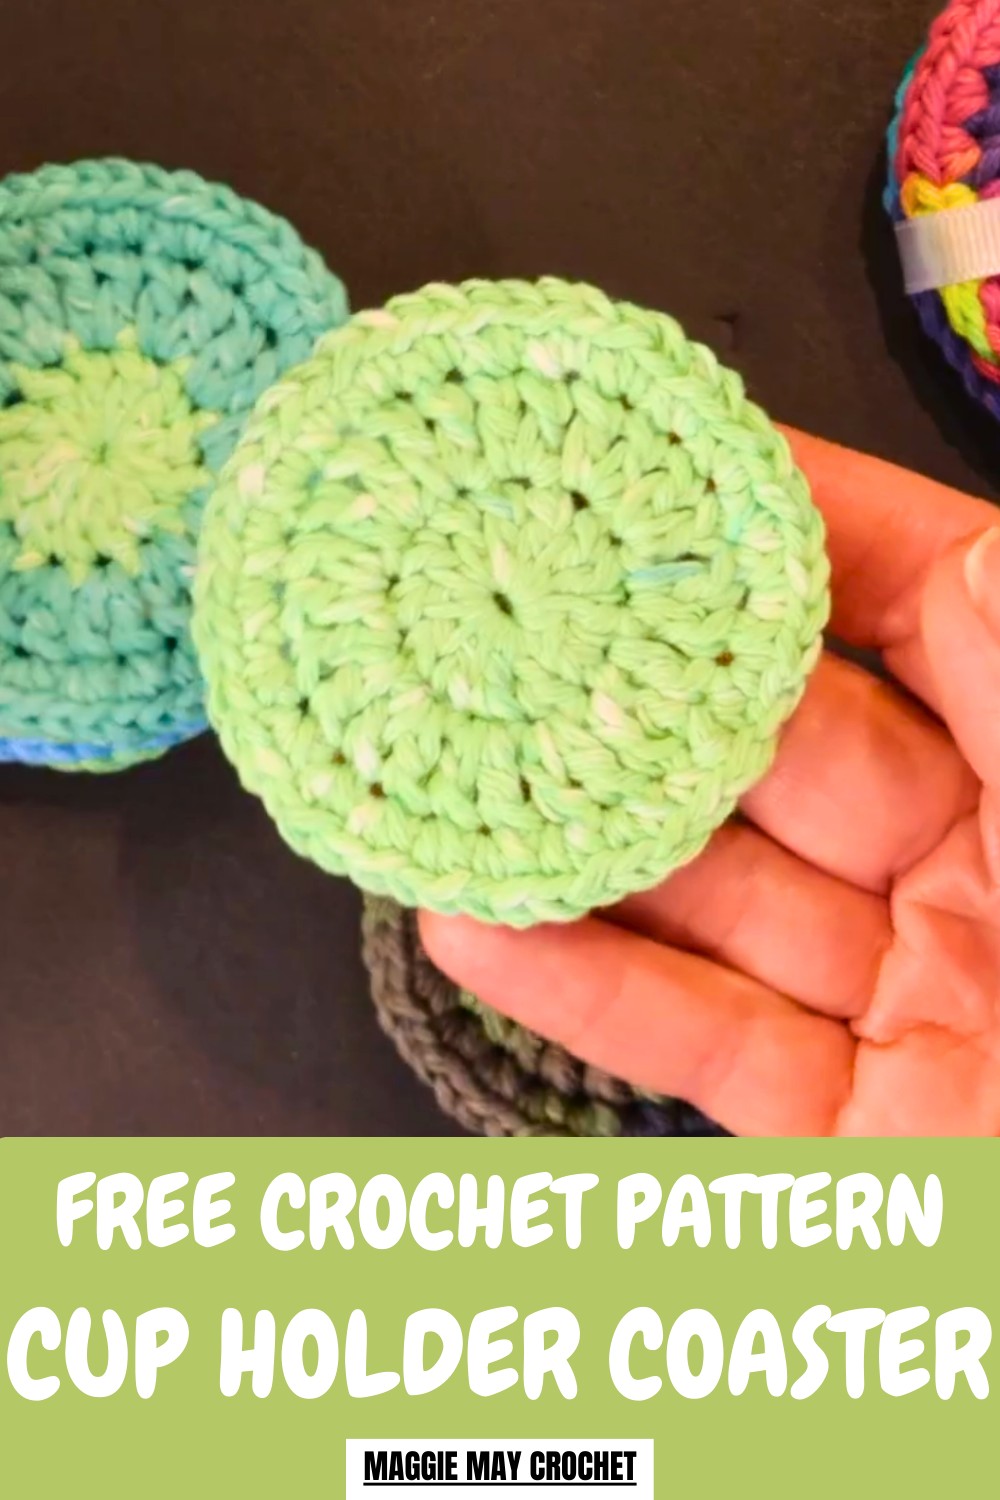
Protect surfaces in style with this Crochet Coaster Pattern, featuring a charming design perfect for decor, gifts, and cozy table settings.
Enhancing a living space with a touch of handmade luxury becomes effortless when utilizing a Crochet Coaster Pattern. This guide serves as a blueprint for a functional piece of art that protects delicate surfaces from moisture and heat while adding a layer of sophisticated texture to a coffee table or dining set. The finished product often features intricate lace-like details or bold, modern geometric shapes, providing a visually stunning foundation for any glassware.
Colorful Crochet Coaster Pattern That Brightens Any Space
One primary advantage is the immense versatility in design, allowing for the use of absorbent cotton or shimmering metallic threads to match a specific seasonal decor or a celebratory theme. This pattern enables the production of a durable, washable accessory that maintains its beauty through daily use.
Ultimately, the result is an elegant, high-quality item that reflects a refined aesthetic and personal care, making every beverage service feel like a special occasion in a well-appointed home.
Step-by-Step Crochet Coaster Pattern
Special Features
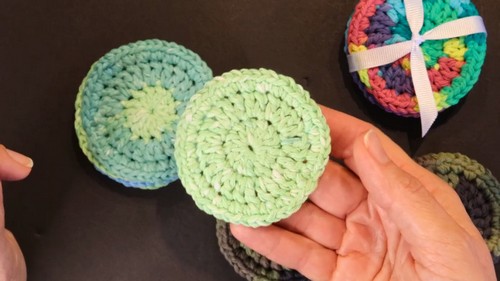
- Custom Fit for Cup Holders: The coasters are designed to fit snugly in car cup holders, offering a practical way to keep them clean.
- Absorbent Material: Cotton yarn ensures that the coasters absorb spills effectively and are easy to wash.
- Simple Stitches: Only three basic crochet skills are used—magic circle, double crochet, and single crochet. This simplicity makes it accessible for beginners.
- Quick & Versatile Project: These coasters work up fast and use minimal yarn, which makes them ideal for leftover scraps and gift sets.
Level of Difficulty
The project is beginner-friendly, but it requires knowledge of the magic circle, single crochet, and double crochet stitches. While the tutorial is straightforward, the creator notes that working with cotton yarn can feel stiff compared to acrylic yarn. Beginners may need patience when handling the yarn and weaving in ends, but the step-by-step guidance makes it approachable for all skill levels.
Materials Needed
- Crochet Hook: 4 mm crochet hook.
- Yarn: Cotton yarn, such as Sugar’n Cream (100% cotton, medium weight #4).
- Cotton yarn is preferred for absorbency and durability.
- Darning Needle: Used for weaving in ends.
- Scissors: For cutting yarn tails.
- Measuring Tape: Optional, for ensuring the coaster fits your specific cup holder.
Step-by-Step Instructions
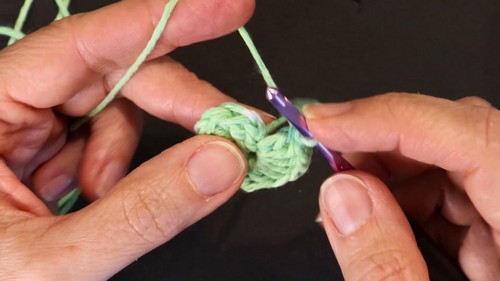
Step 1: Start the Magic Ring
- Create a magic circle and chain 2 (this does not count as a stitch).
- Work 12 double crochets (DC) into the magic ring.
- Pull the yarn tail to cinch the ring tightly.
- Join to the first double crochet using a slip stitch.
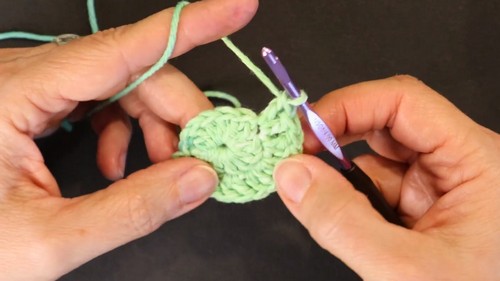
Step 2: Build the Second Round
- Chain 2.
- Work 24 double crochets by placing 2 DC into each stitch from the previous round.
- Begin your stitches in the space created by the chain 2.
- Continue working around until you reach the start of the round.
- Place the final DC into the space just before the chain 2.
- Join to the first double crochet using a slip stitch.
3: Final Round – Single Crochets
- Chain 1.
- Place 2 single crochets (SC) into each double crochet from the previous round.
- This round creates a flat edge and increases the stitch count to 48 single crochets.
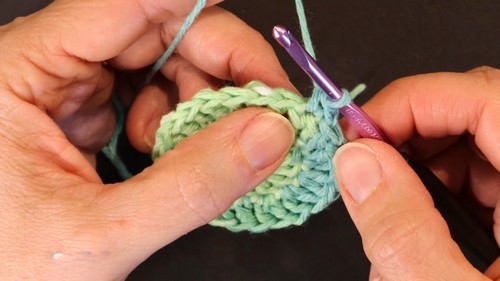
- Continue working around until you reach the start of the round.
- Join to the first single crochet with a slip stitch.
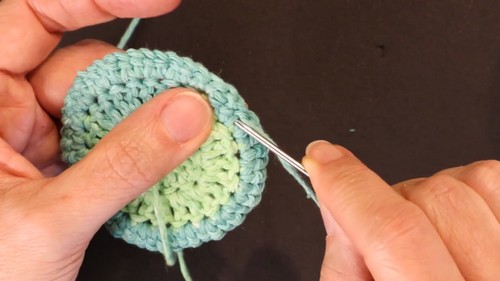
4: Weave in Ends
- Cut the yarn, leaving a long tail for weaving.
- Use the darning needle to weave the tail into the back side of the coaster.
- Work small, tight stitches to secure the yarn and prevent unraveling.
- Cinch the tail from the magic ring tightly before weaving it in.
- Trim excess yarn.
5: Test Fit
- Place the coaster into your car’s cup holder to ensure it fits snugly.
- The creator notes that she removed her cup holder inserts to clean them thoroughly before placing the coasters inside.
- If necessary, adjust the coaster size in future projects by adding or reducing rounds.
Tutor’s Suggestions
- Choose Cotton Yarn: While acrylic is easier to work with, cotton is better for absorbency, making the coasters more practical.
- Start with Acrylic Yarn: Beginners may find cotton yarn stiff to use. Practicing with acrylic can help build confidence before working with cotton.
- Take Your Time: Cotton yarn requires deliberate and smooth movements to avoid splitting stitches.
- Make Sets: Create coasters in groups of four for gifts or replacements. This way, you can swap dirty coasters while washing the others.
- Keep Coasters Flat: Ensure stitches are even and counted correctly to maintain a flat shape.
Uses
- Car Accessories: Protect your car’s cup holders from crumbs, spills, or moisture.
- Reusable & Washable: Coasters are easy to clean—simply toss them into the laundry (avoid the dryer).
- Gift Sets: Perfect as stocking stuffers or small gifts for friends and family. Create them in themed colors for holidays or special occasions.
- Scrap Yarn Projects: These coasters are ideal for using leftover yarn from other projects.
Tip
For beginners, crocheting with cotton yarn can feel stiff. Try pulling your stitches gently but deliberately to avoid jerkiness. If the yarn feels tight, work with smaller sections when weaving ends to make the process easier.
Conclusion
This easy car coaster pattern is a practical and fun project that combines functionality with creativity. The step-by-step instructions make it accessible even for beginners, while experienced crocheters will enjoy how quickly these coasters work up. Using absorbent cotton yarn ensures the coasters look great and serve a purpose by keeping cup holders clean.


