
Free Lime Keychain pattern for Colorful Accessories
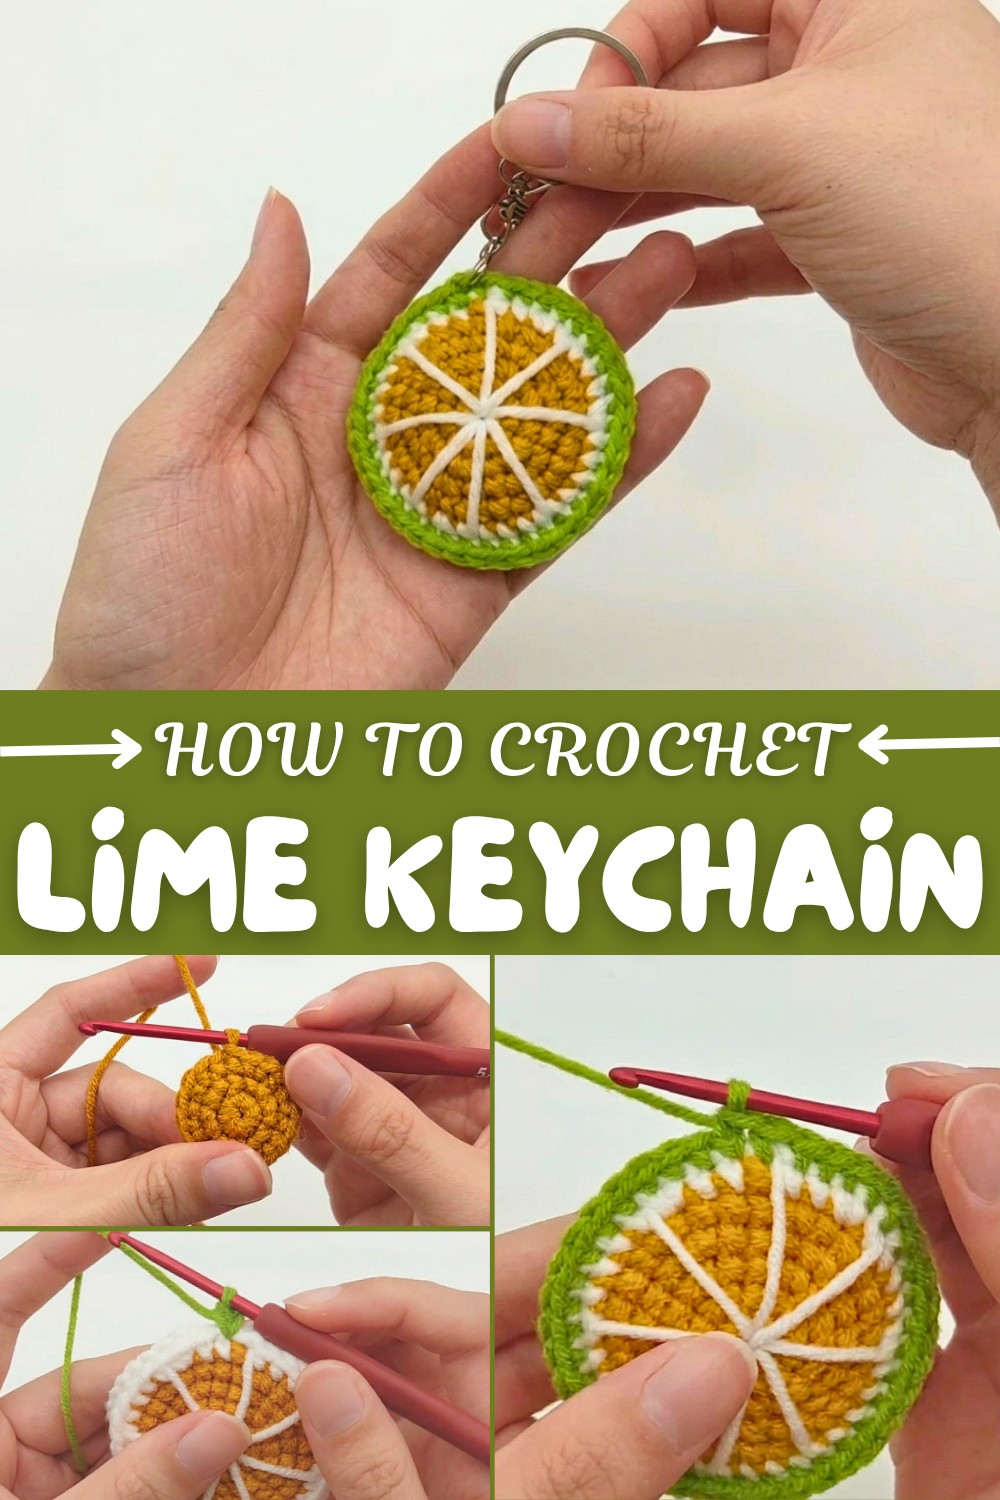
Fresh citrus charm shines through Free Crochet Lime Keychain Pattern featuring fun inspired detail and cheerful style for keys and bags.
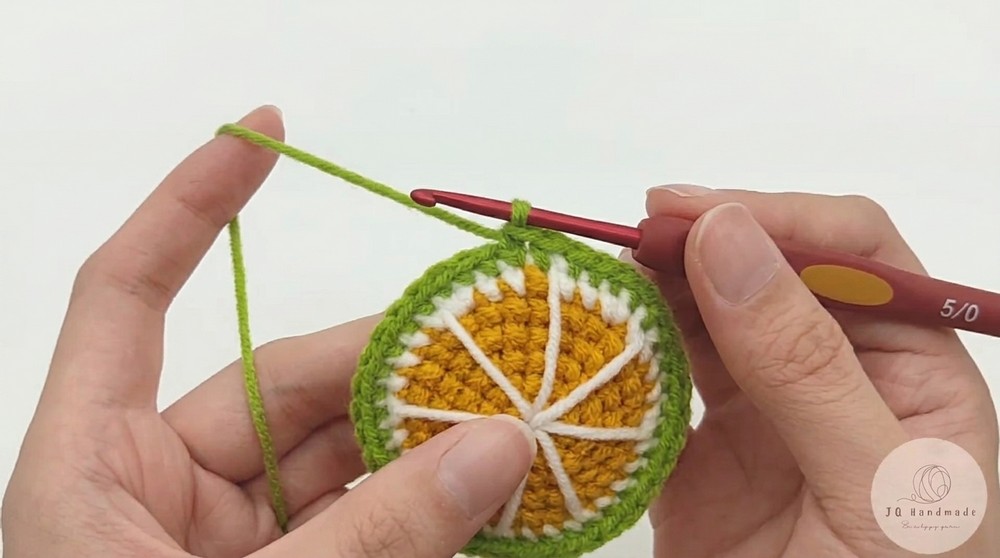
If you enjoy making quick and cute projects, the free crochet lime keychain pattern offers a fun way to add a splash of color to your accessories. This playful little lime slice features a round, slightly textured body created by working single crochet stitches in the round, capturing the vivid contrast between the bright green peel and crisp white flesh. Its compact size makes it perfect to carry on a keyring or attach to bags, making it both practical and charming.
Free Lime Keychain pattern for Fresh and Fun Crochet
Ideal for those comfortable with basic crochet techniques like working in the round, increases, decreases, and color changes, this keychain strikes a nice balance between simple construction and eye-catching detail. The pattern starts with a magic ring and builds up the lime’s shape by gradually increasing stitches, allowing you to see your mini lime take form round by round. Choosing a cotton or cotton-blend yarn is wise here, as it gives just enough firmness to highlight the stitch definition and ensures the finished piece stays durable while remaining soft to the touch.
The design draws from the simple beauty of citrus fruits, celebrating their fresh, summer vibe in a tiny, handmade accessory. It’s great as a thoughtful gift for friends or to brighten up your own key holder. Plus, there’s plenty of room for creativity—you can customize the size by adjusting yarn thickness and hook size, or add embroidery to replicate the lime’s segments in finer detail. This project is perfect for adding a personal touch and practicing foundational crochet skills in a delightful, practical way.
Crochet Lime Slice Keychain Pattern
Welcome to this beginner-friendly tutorial for crocheting a delightful Lime Slice Keychain. This pattern is designed to help you practice basic crochet skills including working in the round, increasing, decreasing, and color changes. The finished product is a cute and compact keychain, perfect as a gift or personal accessory.
Skill Level & Terminology
- Skill Level: Beginner
- Terminology: US crochet terms are used throughout. Familiarity with basic crochet stitches is recommended before beginning this project.
Materials & Tools
- Medium weight yarn (3-ply or 4-ply recommended) in:
- ochre (main color)
- White (for inner slice details)
- Dark green (for peel edge and final rounds)
- Crochet hook: 3.0 mm
- Stitch marker
- Yarn needle
- Fiberfill stuffing
- Keychain hardware (optional)
- Scissors
Gauge
While gauge is not critical due to the small size of the keychain:
- Aim for approximately 20 stitches and 20 rows in single crochet over a 10 cm square with your chosen hook and yarn.
- Adjust hook size to meet your desired tightness and fabric density.
Abbreviations
- ch – chain
- sc – single crochet
- inc – increase (2 sc in one stitch)
- dec – decrease (single crochet 2 stitches together)
- sl st – slip stitch
- sts – stitches
Special Stitch Instructions
Magic Ring
Create a loop of yarn, pull through a small loop to crochet into. This technique eliminates the hole in the center when crocheting in the round.
Increase (inc)
Work two single crochet stitches into the same stitch.
Decrease (dec)
Insert hook into two stitches, pull up a loop through both, yarn over and pull through loops on hook to form one stitch (single crochet two together).
Finished Size
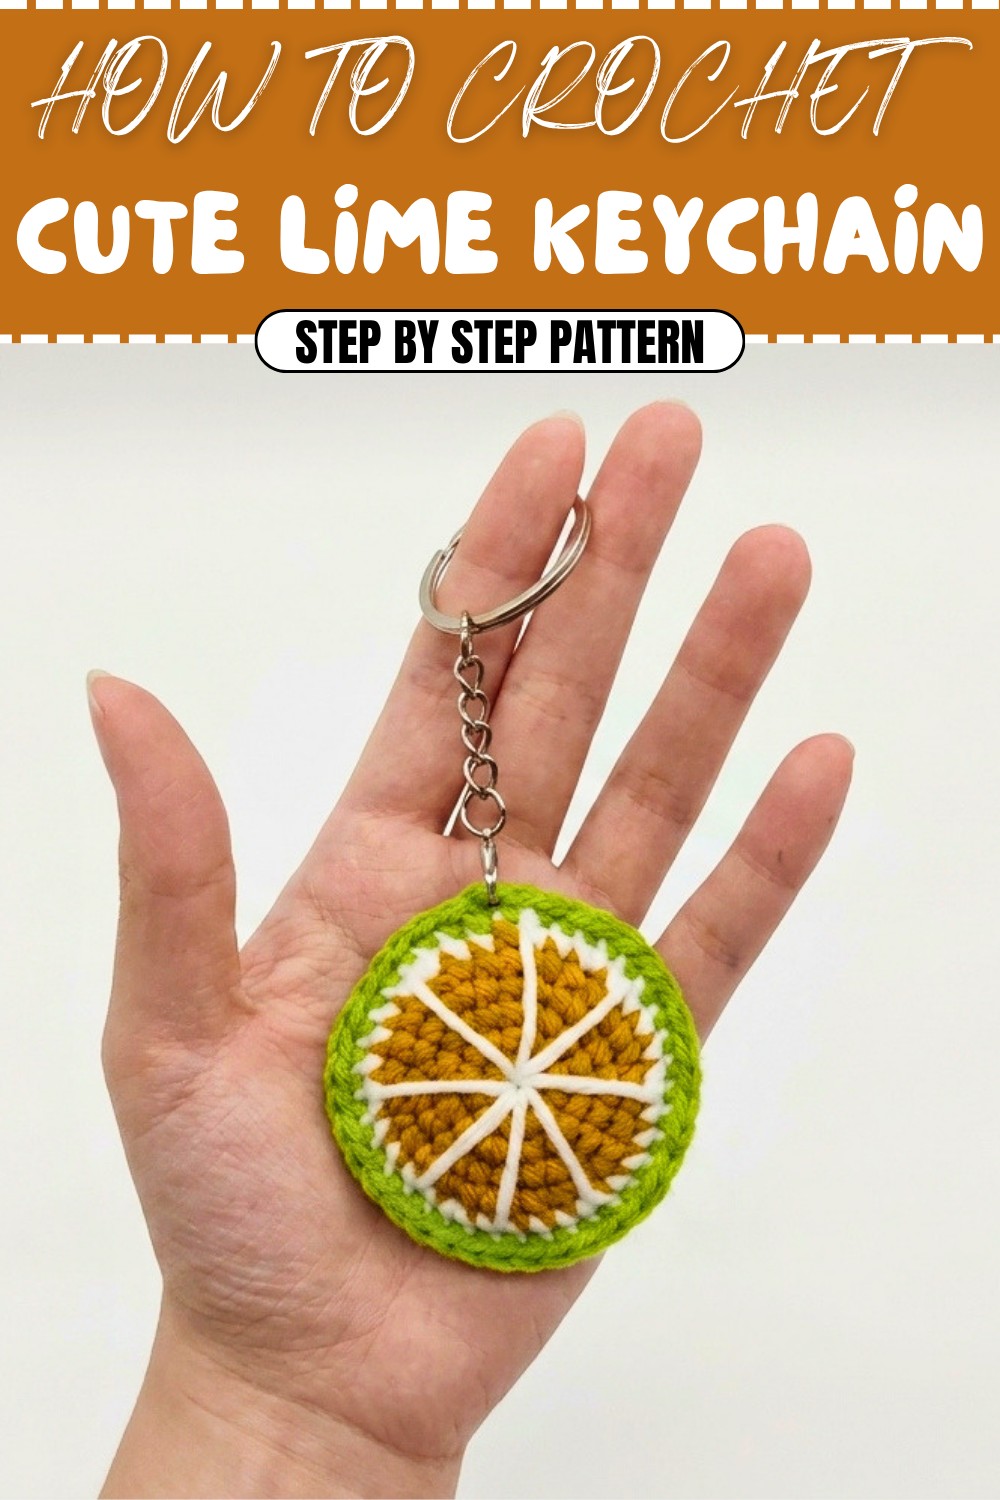
The completed lime slice keychain will measure approximately 6 cm in diameter, ideal for a keychain or bag accessory.
Pattern Instructions
Starting the Lime Slice Base
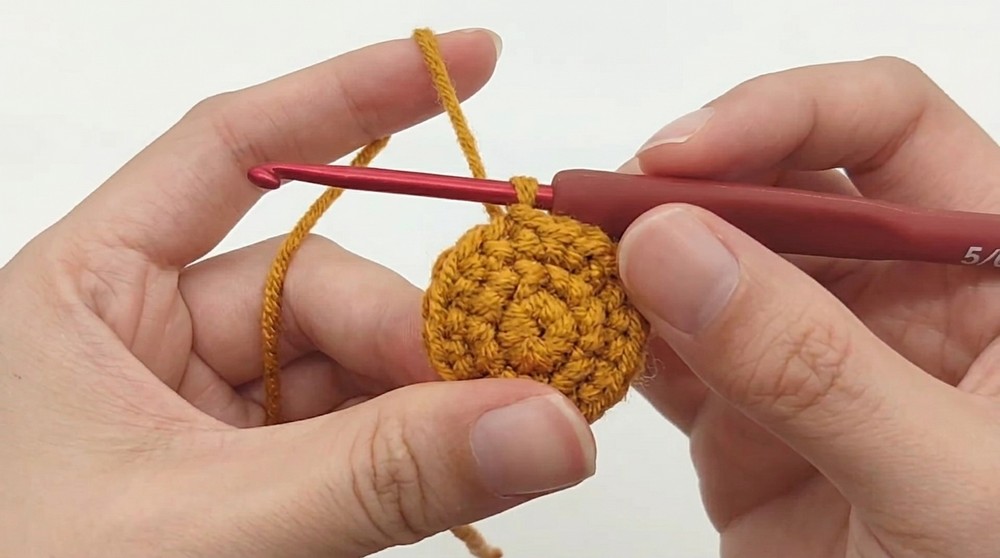
- Row 1:
- Begin with a magic ring.
- Work 6 single crochets (sc) into the magic ring.
- Slip stitch (sl st) into first sc to close the round.
- Place stitch marker in first stitch to help track your rounds.
This forms the small base circle representing the core of the lime slice.

Row 2
- Chain 1 to start.
- Work 6 increases (inc) — two single crochets in each stitch around (12 sts total).
- Slip stitch to first stitch and chain 1.
The round doubles the stitches, enlarging your lime base smoothly.
Row 3
- Chain 1.
- 1 sc, 1 inc repeat across the round (18 sts).
- Slip stitch and chain 1.
Further increases help the lime slice form a rounded, wider shape.
Row 4
- Chain 1.
- 1 sc, 1 inc, 1 sc repeat to maintain stitch growth (24 sts).
- Slip stitch and chain 1.
You continue to shape the slice with this staggered increase pattern.
Row 5
- Chain 1.
- 3 sc, 1 inc repeat around (30 sts).
- Slip stitch and chain 1.
This round thickens the lime base, adding height.
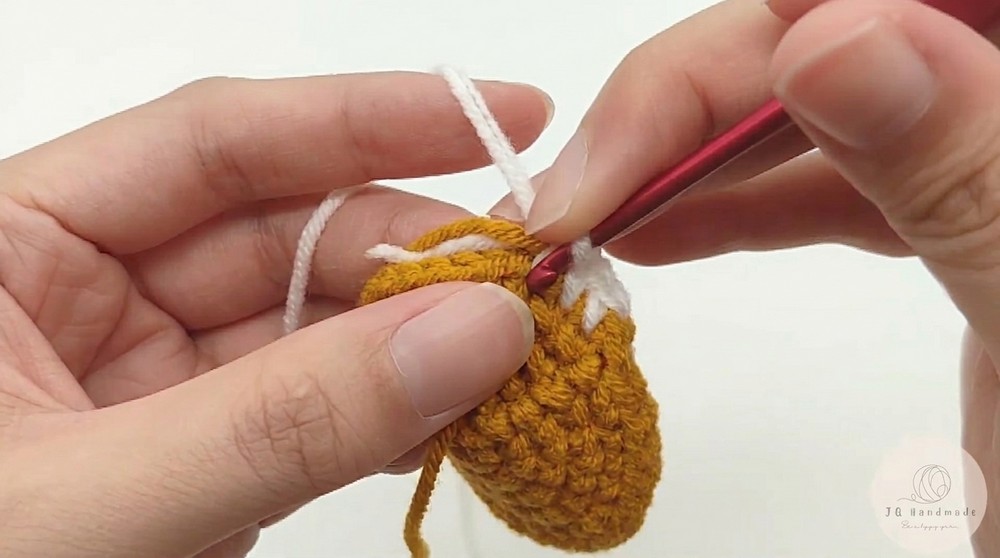
Row 6 (Color Change to White)
- Without chaining, change yarn color to white.
- 2 sc, 2 inc repeat six times (36 sts).
- Slip stitch and chain 1.
The white color simulates the lime’s flesh and adds visual contrast.
Rows 7 - 15
- Chain 1.
- Work 1 sc in each st around for these rows (36 sts per round).
- Slip stitch and chain 1 at the end of each row.
These rounds build the white flesh section with consistent height and smooth texture.
Row 16 (Tapering Begins)
- Chain 1.
- 2 sc, 1 dec repeat six times (30 sts).
- Slip stitch and chain 1.
Here you begin shaping the slice by decreasing for the lime edge.
Row 17
- Chain 1.
- 1 sc, 1 dec repeat six times (20 sts).
- Slip stitch and chain 1.
The slice narrows further, defining its round shape.
Row 18
- Chain 1.
- Make 6 decreases (dec) evenly spaced (14 sts).
- Slip stitch and chain 1.
- Cut yarn leaving a tail for closing.
Final tapering round for the main base, preparing for closure and assembly.
Stuff the lime slice firmly with fiberfill to form a plump shape before finishing.
Decorating the Lime Segment
- Using white yarn and a yarn needle, embroider wedge-shaped lines radiating from the center, mimicking lime segments.
This embroidering step brings realism and detail to your lime slice.
Making Two Slices
- Repeat the above steps to make a second identical lime slice.
- Align both slices with right sides facing out for assembly.
Joining the Two Slices
- Using green yarn, join both slices by inserting your hook through corresponding stitches on both slices.
- Work single crochet stitches evenly around to join.
- Hide yarn tails between the slices as you crochet, keeping the join neat and clean.

Joining the two halves creates a reversible lime slice, giving dimensionality and strength.
Final Edge and Keychain Loop
- After joining, crochet an additional round of single crochets along the edge using dark green yarn for peel color contrast.
- Stuff keychain fiber cotton inside before completely closing.
- Add a slip stitch, chain a few stitches to form a loop, and attach your keychain ring.
The color discrepancy adds the finishing touch to the lime peel, completing the keychain look.
Assembly & Finishing
- Ensure all yarn ends are woven securely inside the lime slice to prevent unraveling.
- Add any additional details or reinforce the joining stitches as necessary.
- Attach keychain hardware securely to your loop.
- Your charming lime slice keychain is now ready to use or gift!
Pattern Overview: How to Start and Stitches Used
You start with a magic ring and crochet rounds of single crochet (sc) stitches, gradually increasing to form a round disc. Use increases (inc) to expand the rounds and decreases (dec) to taper the shape. You will change colors strategically to simulate the lime flesh and peel, and join two halves together with slip stitches and single crochet. Embroidery adds the crucial segment details for realism.
Key Stitches:
- Magic ring for foundation
- Single crochet (sc) for dense fabric
- Increase (inc) to expand shape
- Decrease (dec) to taper edges
- Slip stitches (sl st) to join rounds and close work
Tips for Success
- Keep tension consistent for neat shaping and easier joining.
- Use a stitch marker to track the start of rounds, especially in continuous rounds.
- Stuff firmly but not overly tight to maintain shape and longevity.