
Free Crochet Star Pouch Pattern to Hold Small Items
Wrap your small treasures in a cozy crochet star pouch with this free pattern, perfect for party favors, tiny gifts, coins, or keeping little surprises safe.
Looking for a charming way to store your small essentials? This Free Crochet Star Pouch Pattern offers the perfect balance of style and functionality. With its eye catching star shape and soft textures, it not only keeps your items secure but also adds a distinctive flair to your collection of accessories. Whether it's for your keys, earbuds, or tiny treasures, this pouch stands out with its unique personality.
Pattern by CrochetLilWeaves
The project involves crocheting two star shapes and then seamlessly joining them together to form a compact yet durable pouch. The five point design is accentuated by soft curves and a defined structure, brought to life using lightweight yarn. A loop closure at one of the star’s tips acts as a functional feature, making it easier to secure your items inside.
Free Crochet Star Pouch Pattern for Small Crochet Lovers
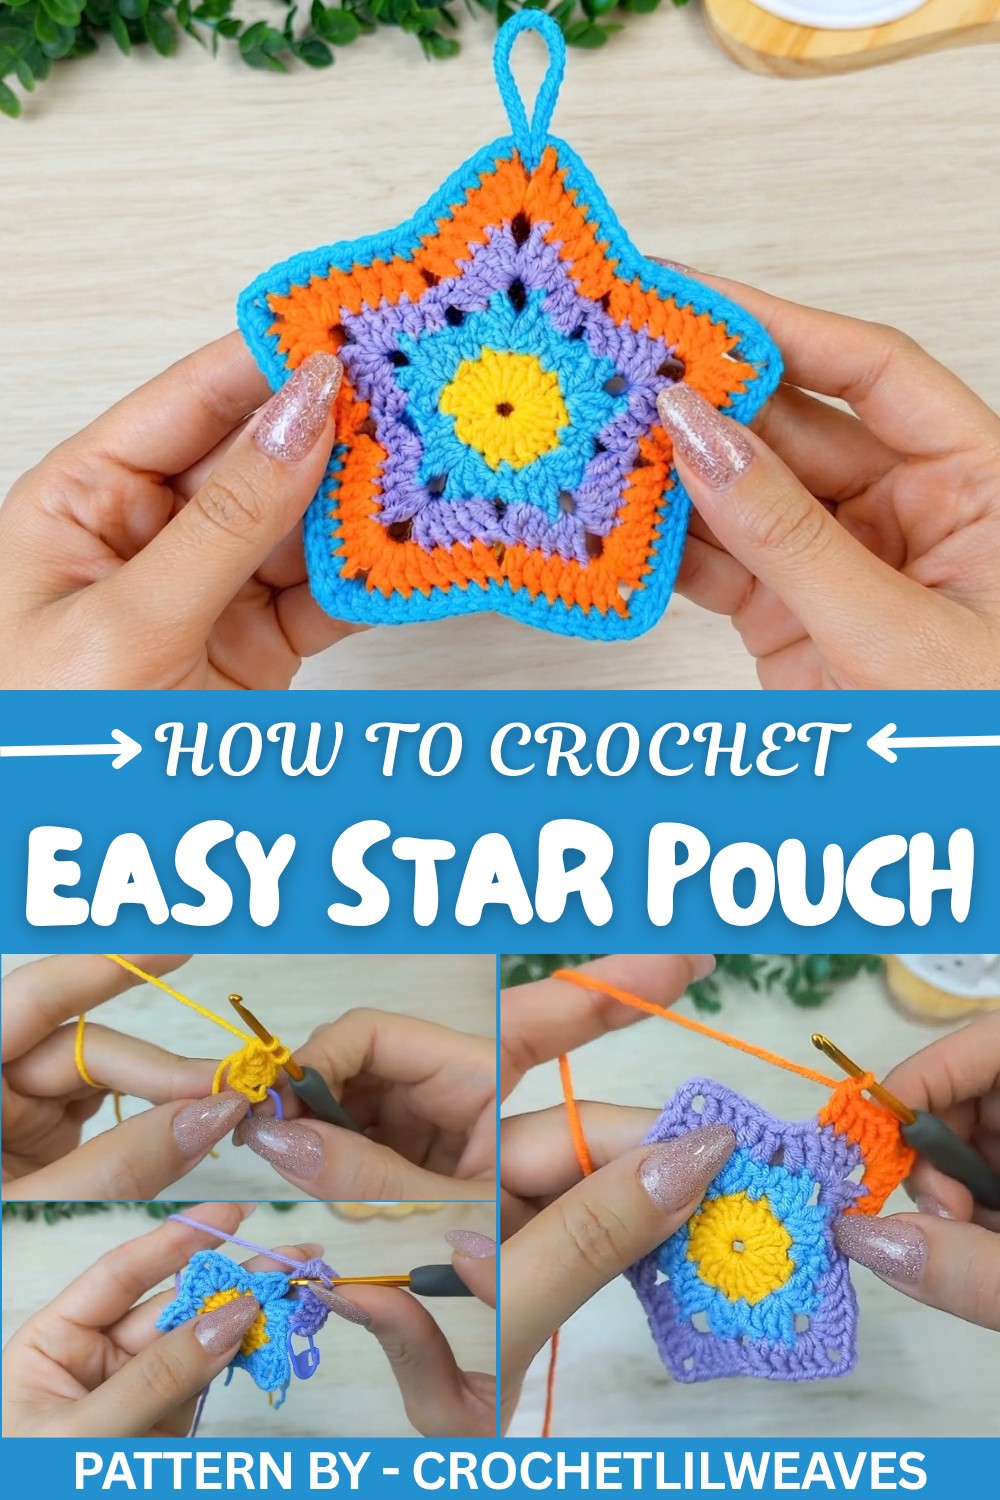
Bright colors can make this piece pop, while earth tones or pastels give it a more delicate and sophisticated aesthetic. Single and double crochet stitches are paired with fan stitches to give the pouch its texture, simple techniques, arranged thoughtfully, result in a striking finish.
The star shape was drawn from nighttime skies, reflecting both whimsy and charm. Lightweight yarn is your best option here for achieving the neat, defined edges needed to give the star its clean lines. For a lovely, polished look, consider weaving in the ends carefully or using contrasting yarn for the joins to highlight the details.
This pouch is an enjoyable project for those looking for something small yet rewarding. Whether intended for gifting or personal use, its versatility ensures it will be appreciated every time you use it.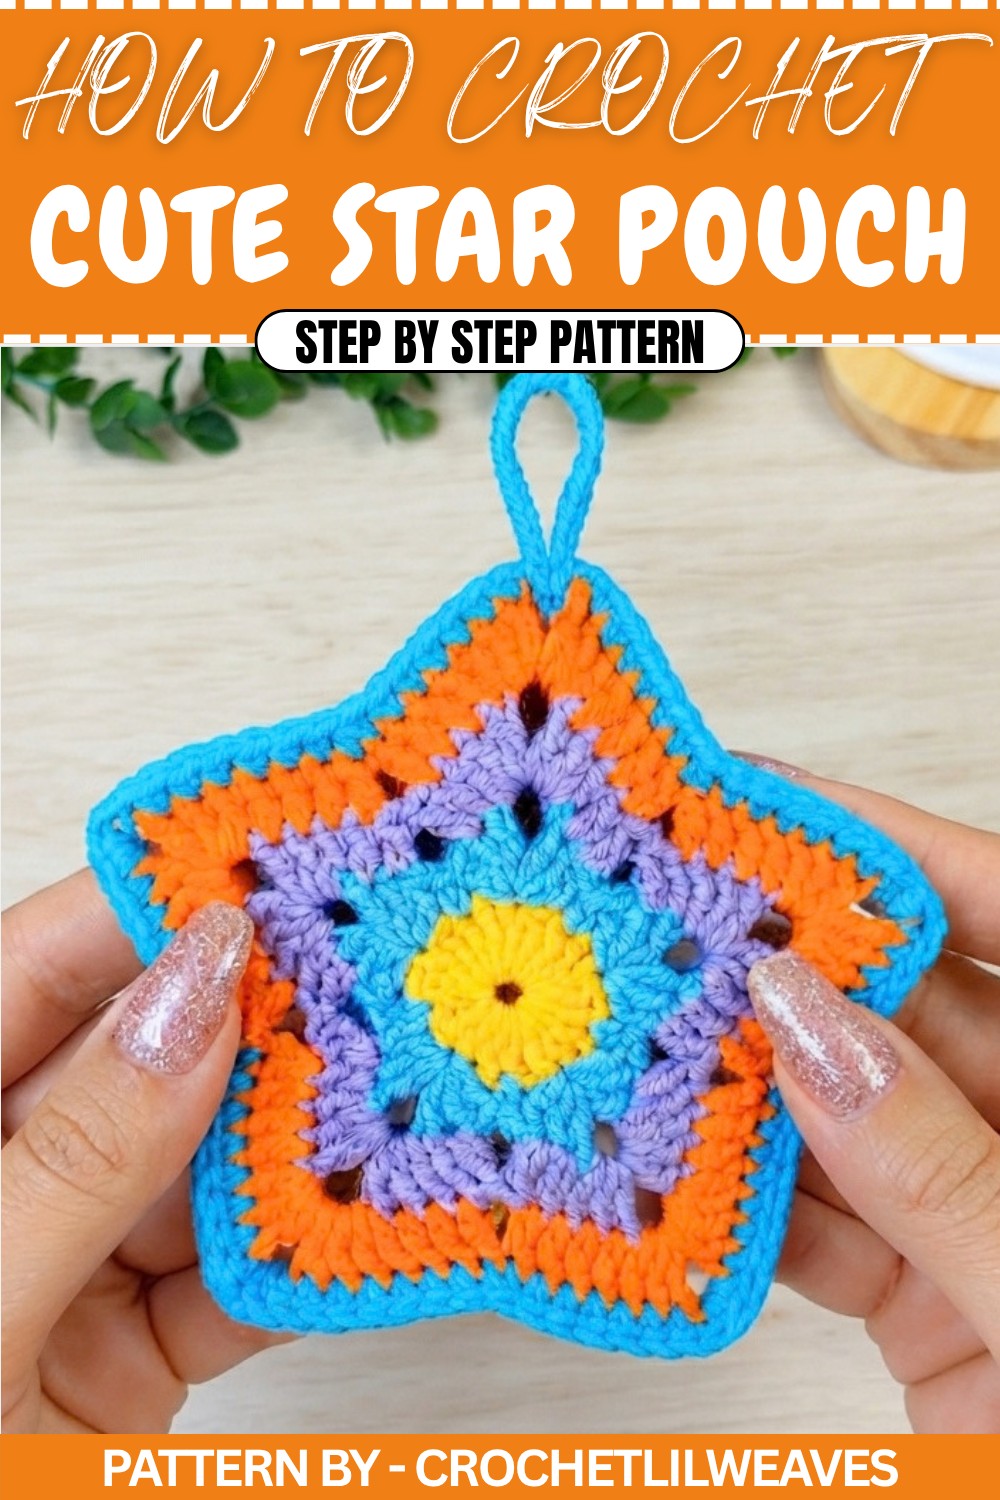
Crochet Star Pouch Pattern
In this pattern, we'll create a charming crochet star pouch. This pouch is perfect for holding small essentials like keys, lip balms, AirPods, or any other small items. The star pouch consists of two separate star shaped pieces stitched together, creating a lovely handmade item perfect for gifts or personal use.
Quick Overview of Pattern
- Project Name: Crochet Star Pouch
- Purpose: Create a star-shaped pouch designed for small storage purposes.
- Includes: Instructions for creating the star shapes, assembling the pouch, and adding a hanging loop.
Notes
- Two identical star-shaped pieces are created separately and then joined together.
- The project involves multiple colors of yarn for a beautiful, vibrant design, but it can be customized according to preference.
- A hanging loop is included in the second star piece for ease of use or hanging as an ornament.
Skill Level
Beginner to Intermediate: Familiarity with basic stitches (chain, single crochet, double crochet, slip stitches), magic ring, and simple decreasing techniques is required.
Materials
- Yarn: Category 2 yarn in five colors.
- Hook: 2.5 mm crochet hook.
- Tools: Scissors, stitch marker, yarn needle.
Stitch Abbreviations
- CH: Chain
- SC: Single Crochet
- DC: Double Crochet
- SS: Slip Stitch
- Dec SC: Decrease Single Crochet
Special Stitches
Fan Stitch:
- (3 DC, CH 3, 3 DC) worked into the same stitch or space.
- Always used for the star points and created in CH spaces.
The Crochet Pattern
Piece 1: First Star
Round 1:
- Make a slip knot:
- Wrap the yarn around your pinky from front to back and over your index finger. Pinch the loop with your thumb and middle finger.
- Place the hook under the yarn and pull it through to form a loop on your hook.
- CH 6:
- Yarn over and pull through the loop on your hook (6 times).
- Form a ring:
- Insert the hook into the first chain, yarn over, and pull the loop through both loops on the hook.
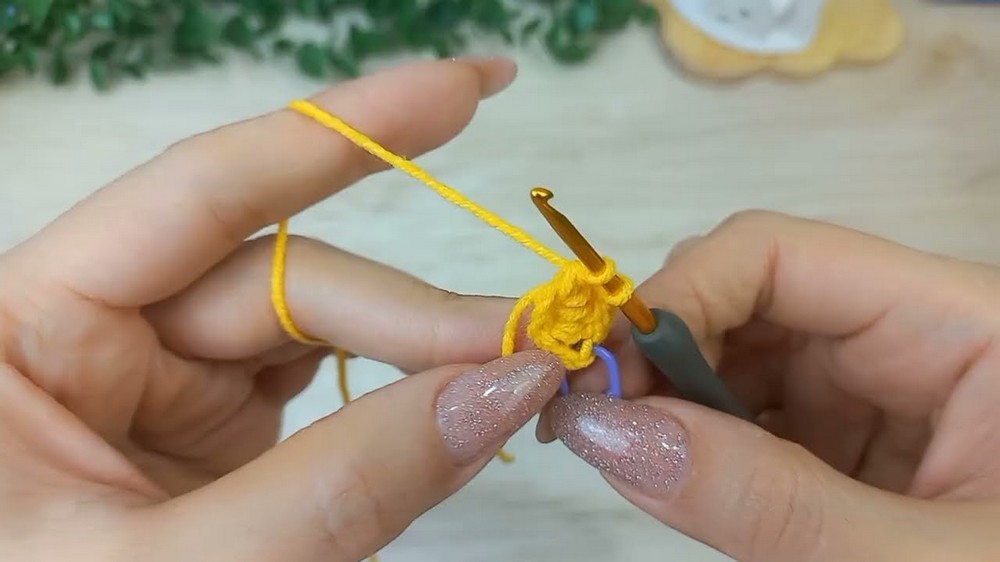
- Work 20 DCs into the ring:
- Start with CH 3 (counts as the first DC). Place a stitch marker in the third chain.
- Yarn over, insert the hook into the ring, yarn over again, and pull through to create a loop (3 loops on the hook).
- Yarn over again and pull through two loops, then yarn over and pull through the remaining two loops. This completes 1 DC.
- Repeat until you have 20 total stitches, including the initial CH 3.
- Close the round:
- Pull the beginning tail to close the ring completely. Insert your hook into the top of the initial CH 3 (marked) and work SS to join.
Round 2:
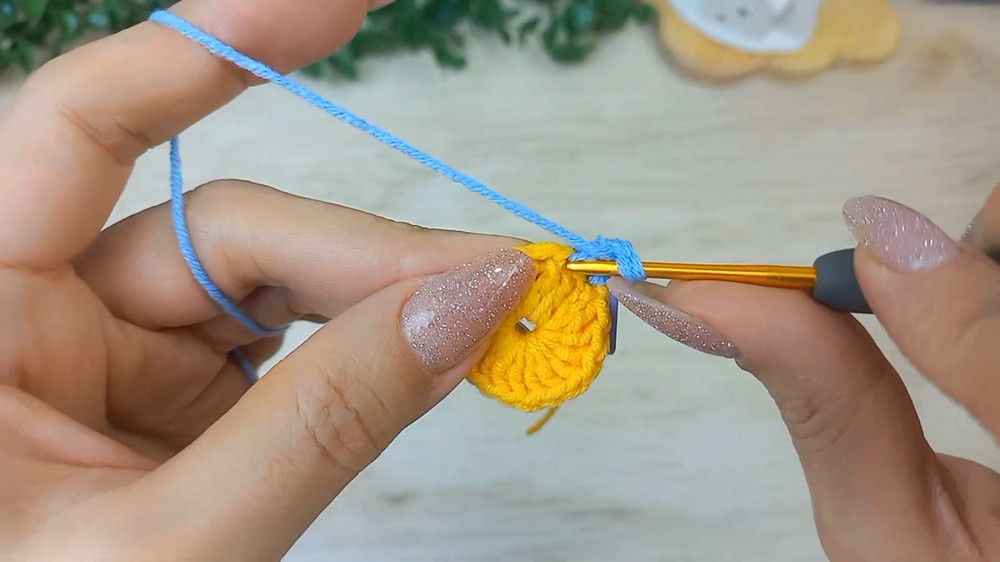
- Attach your second color yarn to the top of the marked CH 3 and secure with a slip knot, then CH 1 to join.
- Start the first fan stitch:
- Skip the first DC. In the next DC, work:
- 3 DCs
- CH 3
- 3 DCs (all into the same stitch).
- Skip the first DC. In the next DC, work:
- Skip the next DC. Work 1 SC into the next DC.
- Continue the pattern:
- (Skip 1 DC, work fan stitch into the next DC; skip 1 DC, work SC into the next DC).
- Repeat this sequence around the ring.
- Finish the round:
- Complete the last SC and join the round with a SS by inserting the hook into the top of the initial SC. Tie off the yarn.
Round 3:
- Attach the third color yarn to the second DC of the fan stitch. Secure with CH 2, counting as the first DC of the round.
- Work stitches around the piece:
- Work 1 DC into the next two DCs (of the fan stitch).
- Skip the last DC of the fan stitch.
- Work fan stitch (3 DC, CH 3, 3 DCs) into the chain 3 space from the fan stitch in the previous round.
- Repeat the sequence:
- (Skip the first and last DC of the fan stitch, and work 1 DC into the 2 middle DCs. Make a fan stitch in the CH 3 space.)
- Repeat until the round is complete.
- Finish the round:
- Work a slip stitch into the first DC and tie off the yarn.
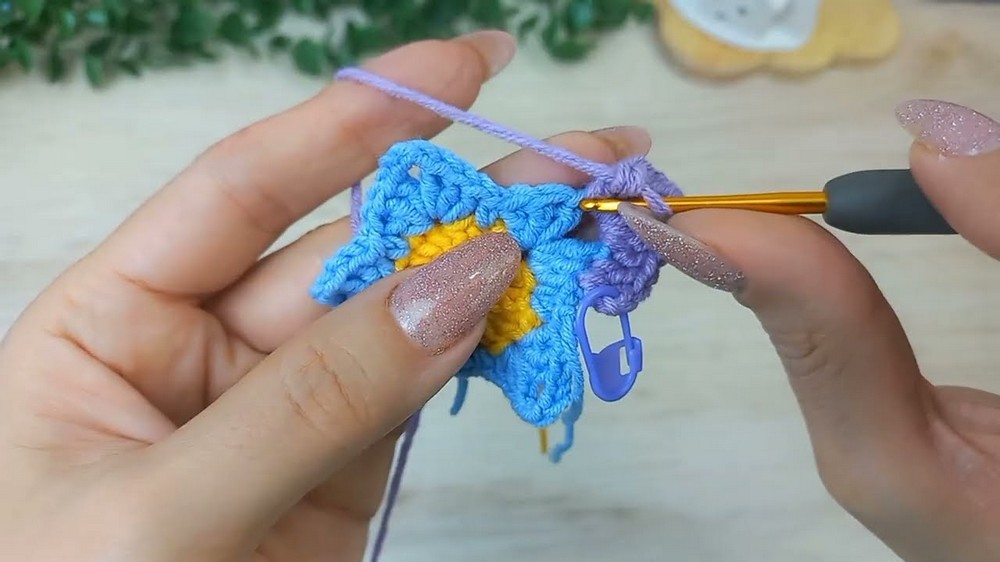
Round 4:
- Attach the next color yarn to the second DC of any fan stitch. CH 2 (counts as the first DC).
- Work around:
- Make 1 DC into the next 4 stitches of the same fan stitch.
- Into the **CH 3 space, make the fan stitch (3 DC, CH 3, 3 DC).
- Continue with 1 DC into the next 4 stitches.
- Repeat this sequence for the entire round.
- Skip the first and last DC of each fan stitch from Round 3. End the round with a slip stitch to the beginning DC. Tie off the yarn.
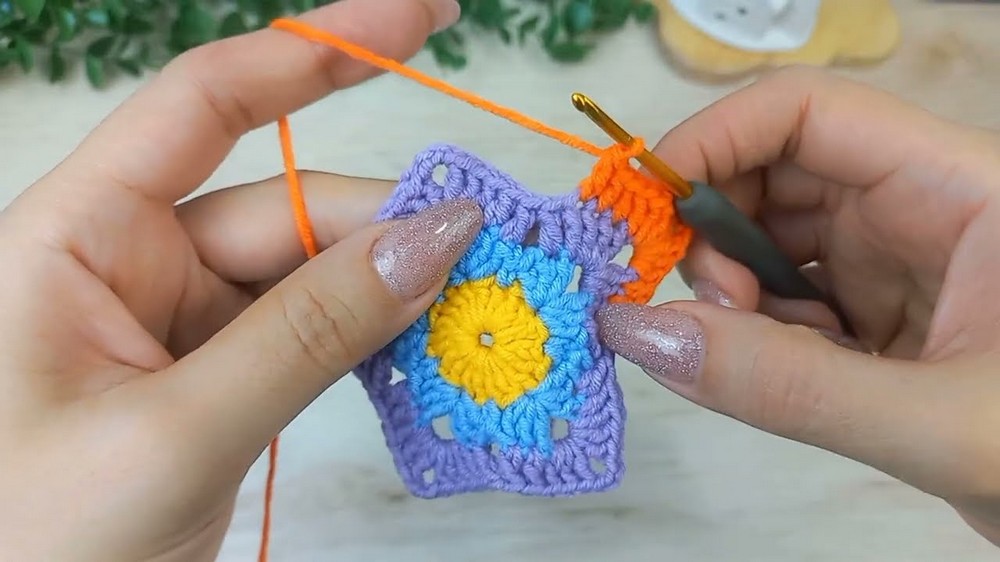
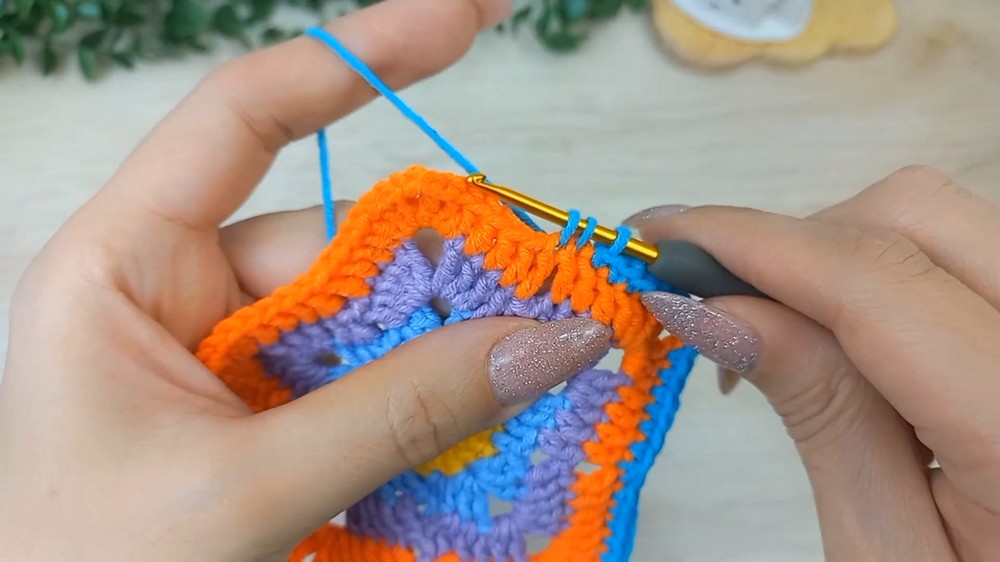
Round 5 (Final Round for Piece 1):
- Attach the last color yarn to the second DC of one fan stitch. CH 1.
- Work as follows:
- Make 1 SC into each of the next 5 stitches.
- Work 3 SCs into the CH 3 space of the fan stitch.
- Continue with 1 SC into the next 5 stitches.
- Skip the last DC of the fan stitch. Make a Dec SC over the last DC and the first DC of the next fan stitch.
- Repeat the sequence (SC, fan, SC, Dec SC) for the rest of the round.
- At the end, join with a SS to the first SC. Tie off yarn and weave in ends to finish Piece 1.
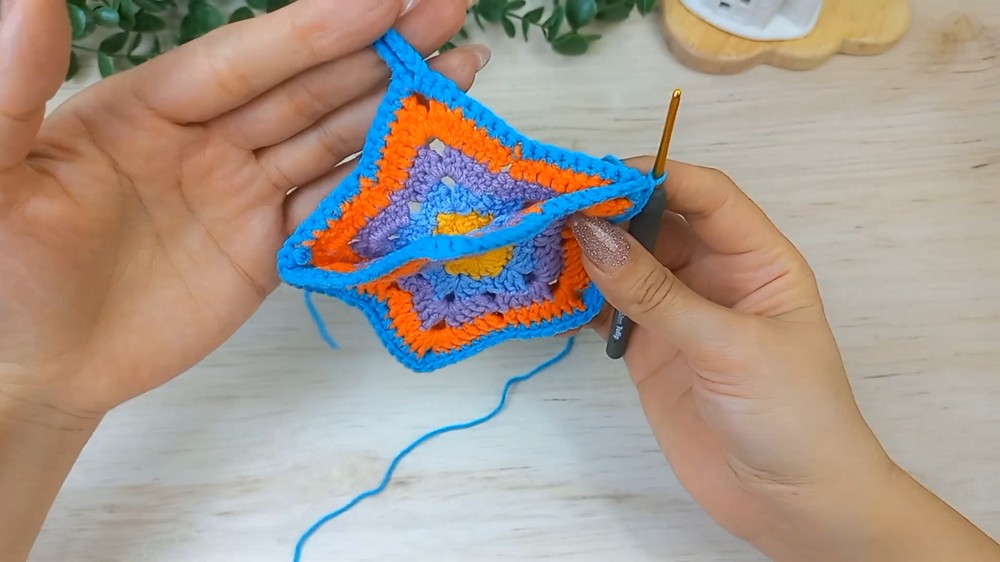
Piece 2: Creating the Second Star
Repeat Rounds 1–4 of Piece 1 exactly. In Round 5, create the hanging loop:
- When you reach the chain 3 space of a fan stitch, work:
- 2 SC into the CH space.
- CH 30.
- Slip stitch back into the same CH space.
- Make 2 additional SCs in the CH space.
- Continue working the round as specified for Round 5.
Assembly
- Place both stars back to back, with the loop at the top.
- Starting at one of the corners, use the last yarn and a crochet hook to join the stars with Slip Stitches.
- Insert the hook through the corresponding stitches of both layers.
- Grab the yarn and pull through both layers and the loop on the hook.
- Join 3 sides only, leaving the top two sides open for the pouch.
- At the end, tie off and weave in all ends using the yarn needle.
Finished Size
- Width: Approx. 8–10 cm.
- Height: Approx. 8–10 cm.
Conclusion
Your adorable crochet star pouch is now complete. This little pouch is perfect for storing small essentials or gifting. You can customize the colors and size to suit your needs, and even add embellishments like beads or buttons.