
Free Crochet Plastic Bag Holder Pattern for Every Yarn Lover
Give your plastic bags a proper place with this Free Crochet Plastic Bag Holder Pattern that’s perfect for saving space and keeping things neat.
A crochet plastic bag holder is the perfect solution for keeping your plastic bags organized and accessible. This handy project combines functionality with charm, offering a tidy storage spot that also adds a touch of personality to your space. Shaped like a sleek tube, the bag holder is designed with a textured stitch pattern that’s both classic and practical, making it a simple yet stylish addition to your kitchen or pantry.
Pattern By: Amira Crafts
Practical Free Crochet Plastic Bag Holder Pattern
The texture comes from straightforward stitches and subtle post stitch details that give it depth and character without feeling overly complicated. It features an elastic bottom, allowing bags to easily be pulled out, while a neat crochet cord at the top ensures convenient hanging. The size is customizable, you can adjust the height or width to suit your needs, whether you’re storing a few bags or looking for a larger container.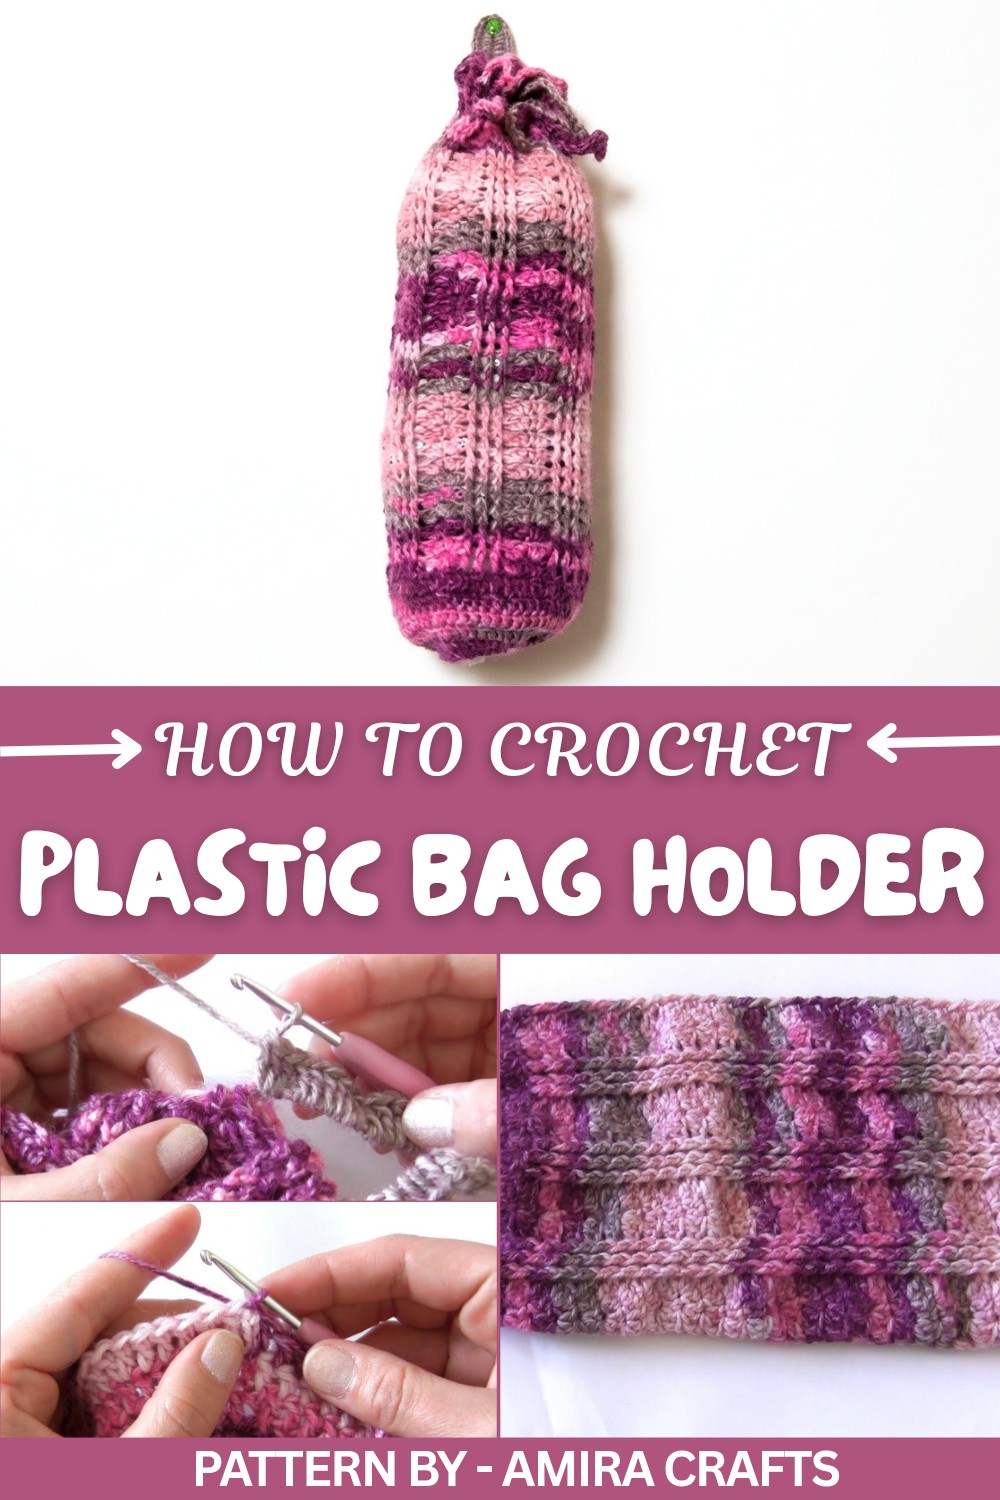
A thicker yarn works well here, not only for durability but also because it enhances the definition of the stitches, helping their texture stand out. Choose neutral shades for a minimalist look, or go bold with bright hues to make it a fun accent for your home.
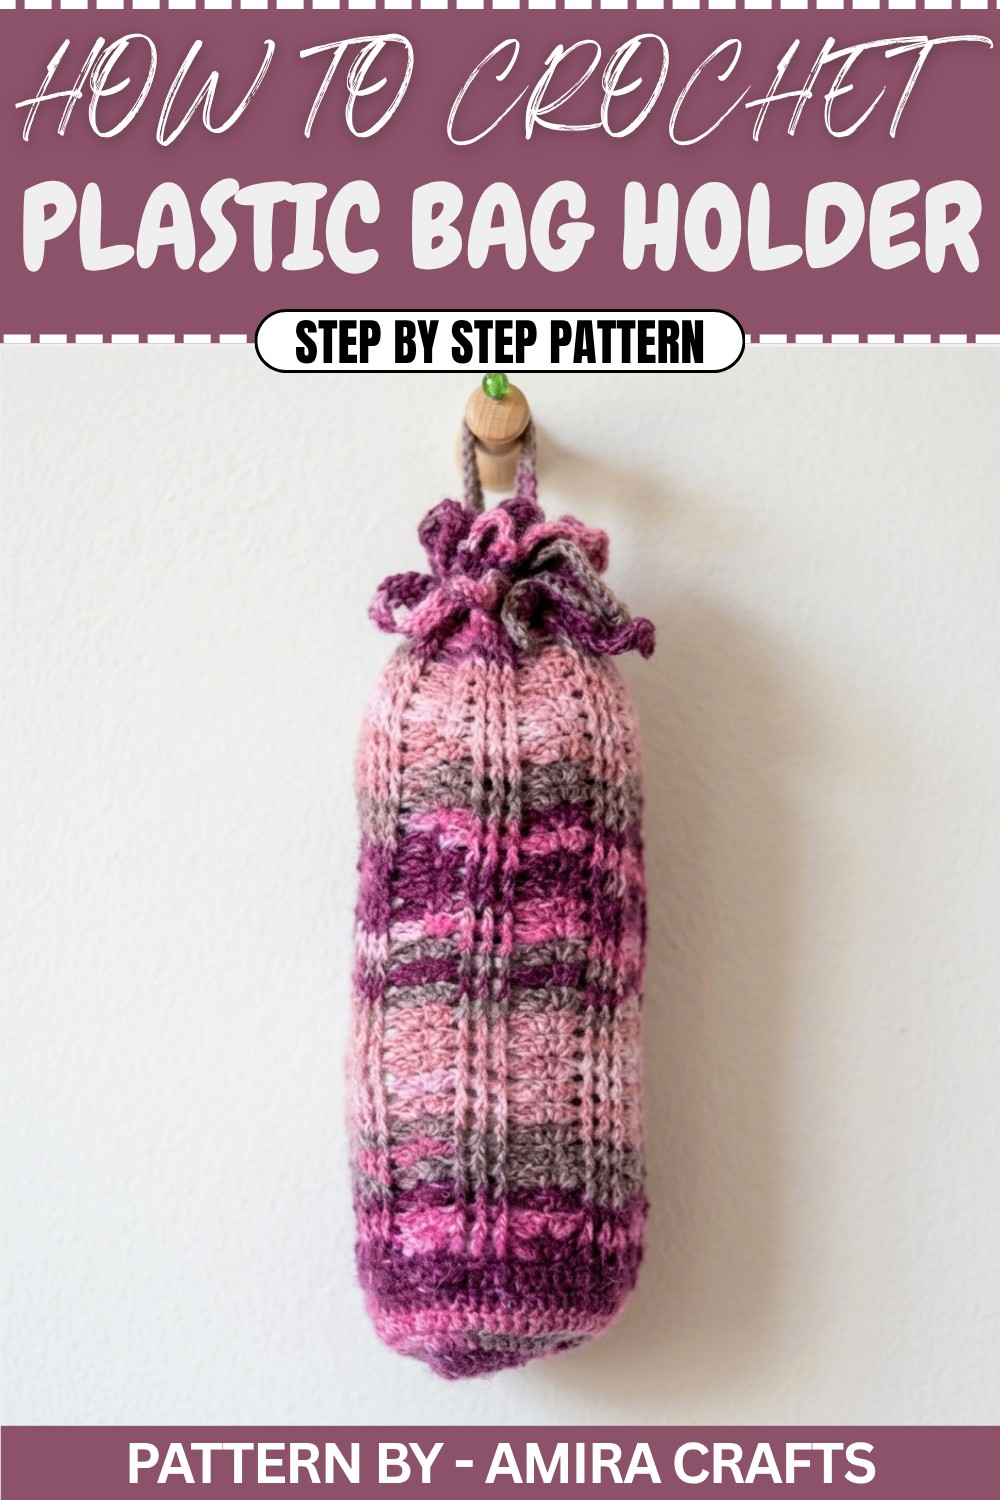
This bag holder also makes a thoughtful gift for housewarmings and holidays. Its practicality combined with a personal handmade touch is sure to be appreciated by anyone who enjoys keeping their space tidy. Let your creativity lead the way, whether it’s choosing colors, adding trims, or customizing the overall look, you can make it truly your own.
Plastic Bag Holder Crochet Pattern
Make your home organized with this practical yet stylish hand crocheted plastic bag holder. This easy to follow design uses minimal yarn and features functional elements like a hairband for the base, a drawstring for closure, and sturdy double crochet stitches for durability.
Quick Overview of the Pattern
- Sections:
- Base: Created with single crochet around a hairband.
- Holder Body: Worked in double crochet with increases.
- Hanger and Drawstring: A simple chain and single crochet for hanging convenience.
- Uses: Organize and store plastic bags neatly in one place with easy access from the bottom.
Notes
- The pattern uses continuous rounds, requiring a slip stitch at the end of each round to join. Always ensure you're stitching into the correct stitches for seamless construction.
- Use a similar weight yarn if substituting to ensure correct dimensions.
- Highlights: Creates a stretchy, sturdy bag with space for storing multiple plastic bags.
Skill Level
Beginner: Basic stitches are used (single crochet, double crochet), along with foundational techniques such as chaining and slip stitching.
Materials
- Yarn: One skein (~100 grams), thicker DK weight yarn in your chosen color.
- Hook: 3.5 mm crochet hook.
- Hairband: A basic elastic hairband to serve as the base.
- Tapestry needle: To help with weaving in ends.
- Scissors
Measurements / Sizing
- Finished Size: 12–14 inches (30–35 cm) tall, using the specified yarn and hook.
- Width: Stretches to fit multiple plastic bags.
Gauge
Gauge is not critical for this project. Ensure even tension for a clean and durable holder.
Stitch Abbreviations
- ch: Chain
- sc: Single crochet
- dc: Double crochet
- inc: Increase (two stitches in the same stitch)
- slst: Slip stitch
- sk: Skip stitch
- FPDC: Front post double crochet
Special Techniques
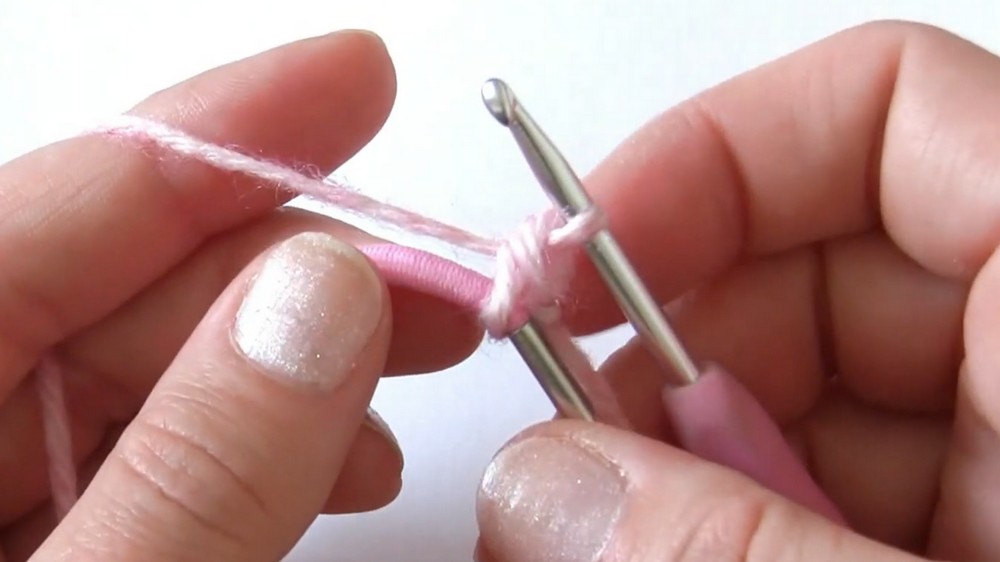
- Working Around a Hairband: Place the band along your working yarn and crochet over it to cover the hairband completely with stitches for a sturdy base.
- Front Post Double Crochet (FPDC): Yarn over, insert your hook from the front to the back around the post of the target stitch, yarn over and pull through. Complete as a double crochet.
The Crochet Pattern
Base
Step 1: Foundation Round (Hairband and SCs)
- Start with a slipknot around your hook.
- Hold the yarn above the hairband. Insert your hook under the hairband, yarn over, pull through, then yarn over and pull through both loops on the hook to create 1 SC.
- Work 55 SCs evenly while crocheting around the hairband until it is entirely covered.
Joining the Round:
Slip stitch into the first single crochet (starting stitch) to join the round.
Step 2: Begin the Holder Body (Double Crochet Rounds)
Round 1:
- Chain 3 (counts as the first DC).
- Work 1 DC into each SC from the first round. You should have 55 DCs in total.
- Slip stitch into the top of the first DC (not the chain 3).
Round 2:
- Chain 3 (counts as the first DC).
- Work 1 DC into each DC from the previous round. You should again have 55 DCs.
- Slip stitch into the top of the first DC (not the chain 3).
Round 3: Repeat the instructions from Round 2, ensuring you work into each DC from the previous round.
Increasing the Holder’s Width
Round 4 (Increase):
- Chain 3 (counts as the first DC).
- 1 DC into the same stitch you slip stitched into.
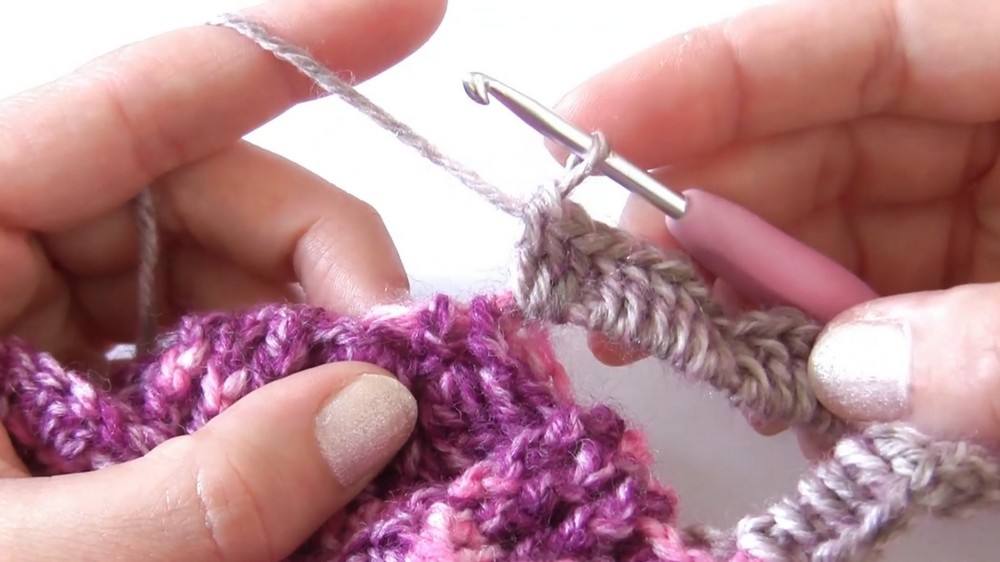
- Work 1 DC into the next 4 DCs, then 2 DC into the next stitch.
- Repeat (1 DC in next 4 stitches, 2 DC in next stitch) to the end of the round.
- Slip stitch into the top of the first DC to join.
Round 5 (Increase):
- Chain 3 (counts as the first DC).
- 1 DC into the same stitch you slip stitched into.
- Work 1 DC into the next 5 DCs, then 2 DC into the next stitch.
- Repeat (1 DC in next 5 stitches, 2 DC in next stitch) to the end of the round.
- Slip stitch into the top of the first DC to join.
Sides of the Body
Round 6:
- Chain 4 (counts as 1 DC + 1 ch).
- Skip 1 DC, then 1 DC into the next stitch.
- Skip 2 DCs, then into the next stitch, work 3 DC. Into the next stitch, work 3 DC again.
- Skip 1 DC, then into the next stitch, work 1 DC + chain 1.
- Continue the sequence:
- (ch 1, sk 1 DC, 1 DC, sk 2 DC, 3 DC, 3 DC, sk 1 DC, 1 DC + ch 1).
- Finish with a slip stitch into the top of the chain 3.
Front Post Details
Round 7:
- Work Front Post SC into chain 3 from Round 6 to secure it.
- Chain 3 (serves as first FPDC + ch 1).
- Work FPDC, chain 1 around the posts of the next DCs in the previous round.
- Skip 2 DCs from Round 6, then work 3 DCs into each stitch for the next two consecutive DCs.
- Skip 2 DCs, and continue the sequence (FPDC, ch 1, FPDC, 3 DC) around.
- Slip stitch to join at the end.
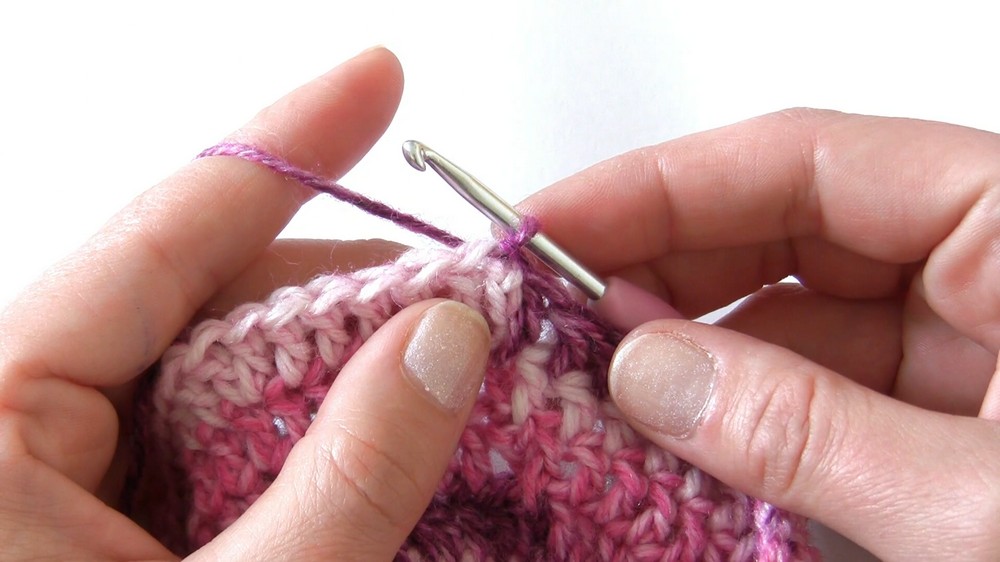
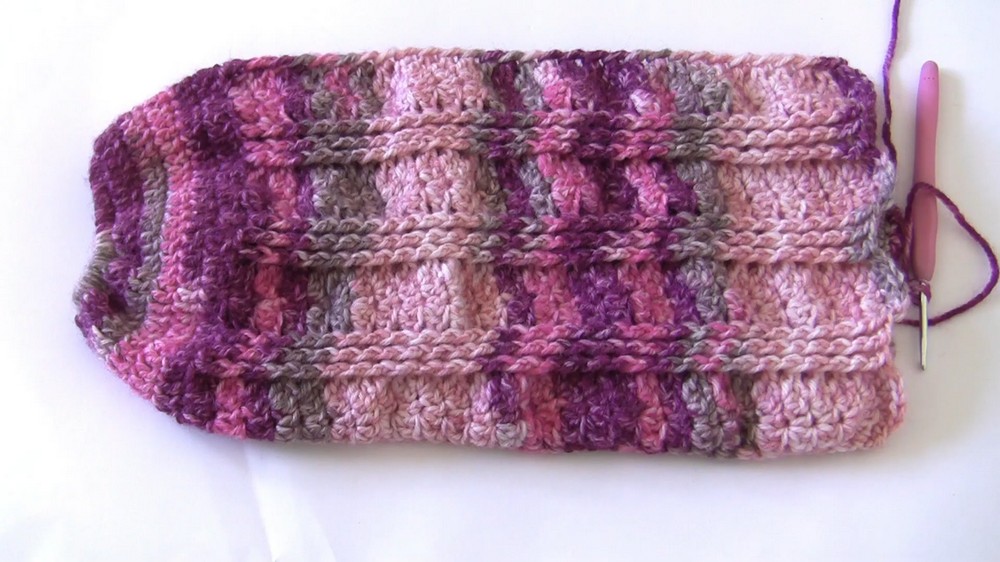
Repeat Round 7's sequence for 10–27 more rounds to build the sides of the holder, maintaining the FPDC texture for aesthetic appeal.
Top Handle / Hanger
Round 38–39: Attach yarn, and work chain 15 into the top edge where there are gaps formed by FPDCs.
- Slip stitch into the third DC on the opposite side of the FPDC gap to form a loop.
- Chain 2, skip one stitch, and slip stitch into the next stitch.
Drawstring Cord
- Begin with a slipknot and work a foundation chain (~100 chains for a shorter cord; increase if a longer cord is needed).
- Into each chain, work 1 SC, starting from the second chain from the hook.
- At the end, fasten off, weave in the ends, and prepare to insert the cord.
Assembly & Finished Size
- Insert the drawstring cord around the top of the bag holder between FPDC gaps (Round 39). Weave the cord by threading it alternately behind and in front of stitches to create a neat closure.
- Tightly secure the cord by tying the ends once all sides are threaded.
- Finished Size: Approximately 12–14 inches in length.

Conclusion
Congratulations on completing your plastic bag holder. A practical project that keeps your space tidy while showcasing your crochet skills. Experiment with colors to match your home decor, or create sets for gifting.