
Free Crochet Headband Pattern to Wear on Casual Outings
Follow this free crochet headband pattern to turn simple yarn into a cozy and cute accessory that shows your style and is fun to make.
A touch of handmade elegance can turn the simplest accessory into a standout piece. This free crochet headband pattern is the perfect example, offering style, comfort, and practicality all in one. With adjustable ties at each end, it fits people of all ages and sizes, making it a versatile addition to any wardrobe. Whether worn to keep your hair in place during an outdoor picnic or dressed up for a casual outing, this headband effortlessly complements a variety of outfits and occasions.
Featured By Pembe Düğme
Made using cotton mercerized yarn, it feels soft against the skin and is breathable for warm weather yet sturdy enough for cooler days. The texture is smooth and lightweight, ensuring all day comfort without any bulk. Its wearability makes it ideal throughout the year, and its timeless appeal pairs beautifully with relaxed boho attire, everyday casual looks, or even more polished ensembles.
Free Crochet Headband Pattern to Match Your Favorite Dress
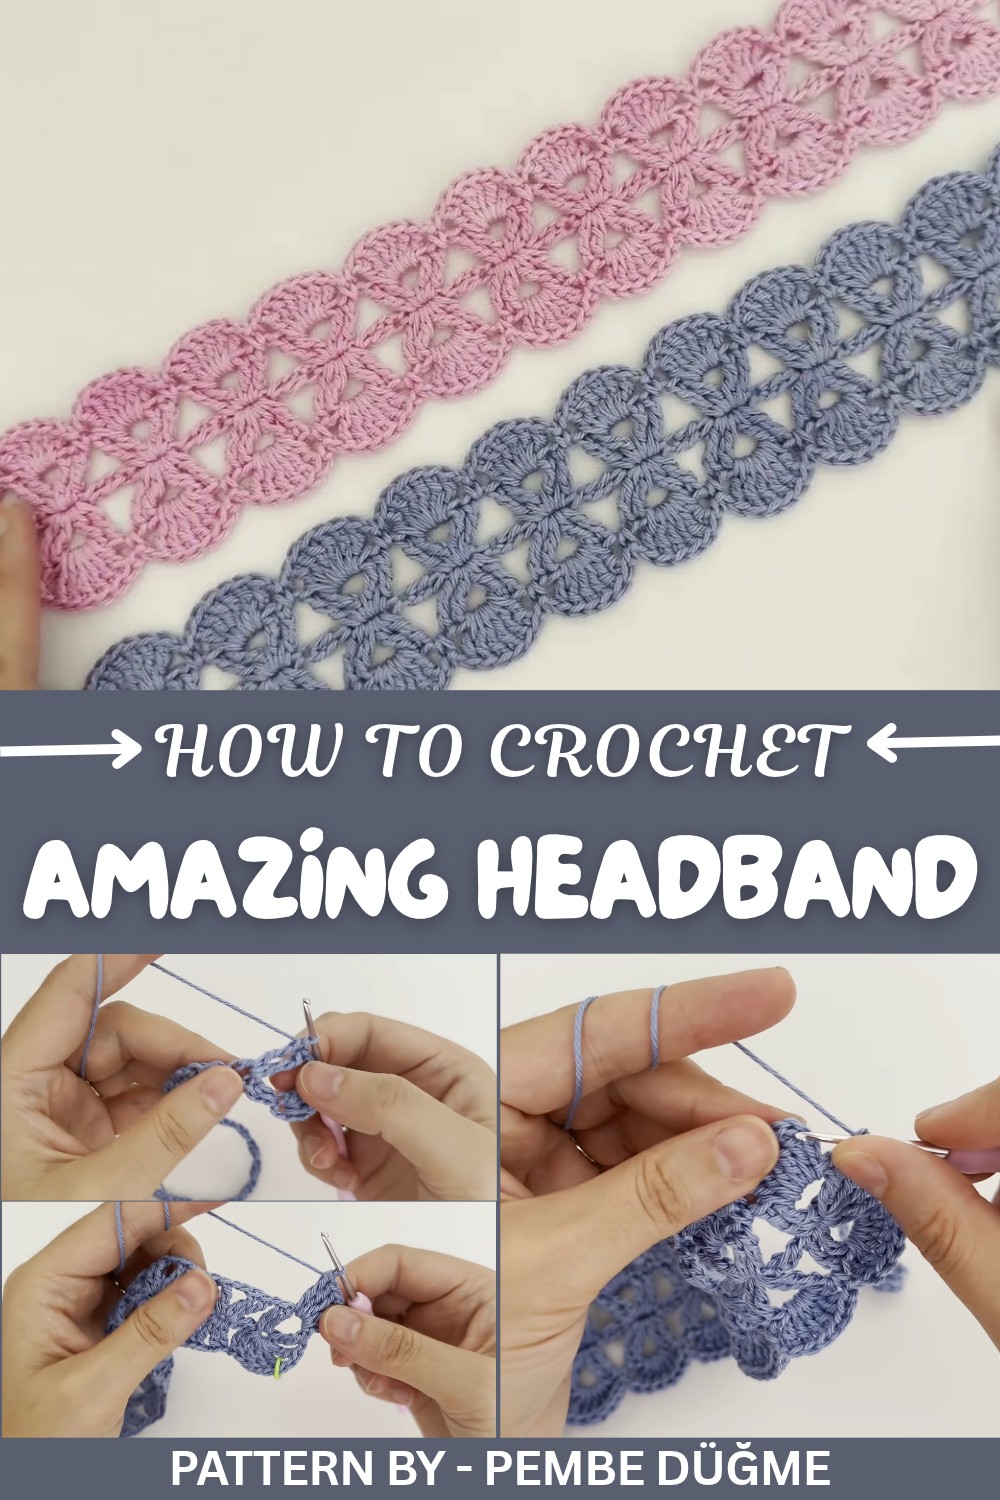
Standout details include its striking stitchwork, which combines elegant threads to form a stunning pattern. The ties add functionality while enhancing its charm, offering a balance between utility and design. A soft, delicate finish completes the look, perfect for enhancing hairstyles or simply adding a touch of personality to your outfit.
Begin your path towards this delightful project by following the instructions. Whether for yourself or as a thoughtful gift, this headband is sure to inspire joy.
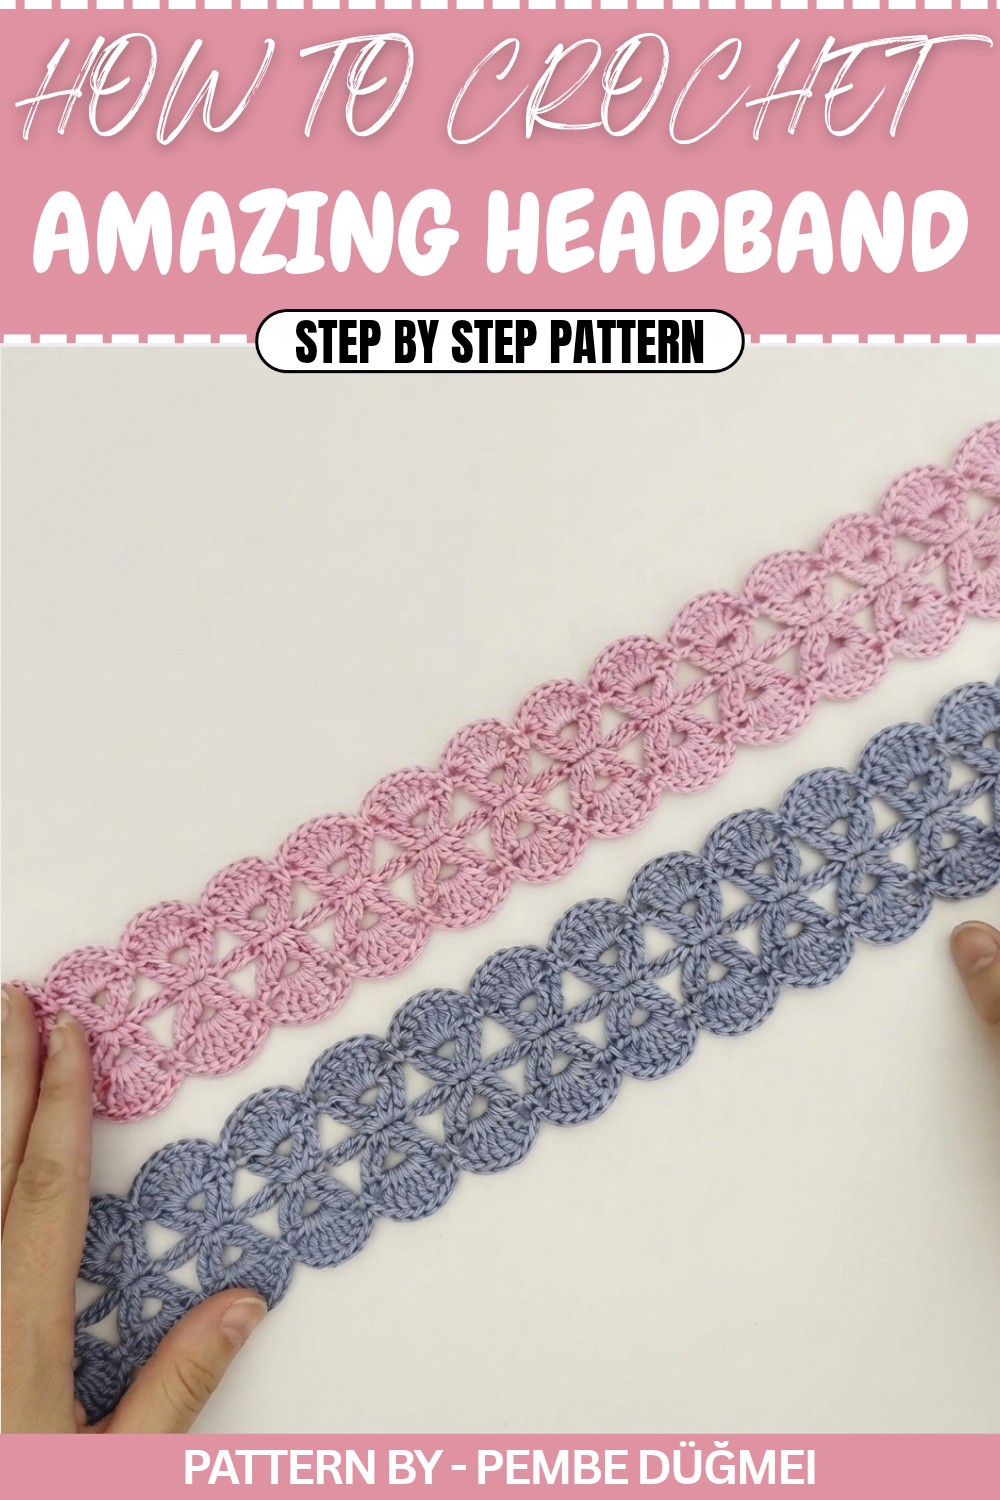
Free Crochet Pearl Headband Pattern
Introduction
In this tutorial, we will crochet a very elegant headband. You can customize the length of the headband as desired. For younger children, the middle section can be shortened to suit their size. The design features tying ends at both sides, similar to a bandana. The headband is made using 100% cotton mercerized yarn, which is lightweight and comfortable. A 2 mm crochet hook is chosen to match the yarn. The middle crochet section, excluding the ties, measures approximately 46 cm (18 inches). Instructions on adjusting the size for younger children and measurements are detailed in this tutorial.
Quick Overview of the Pattern
- Delicate, tie on headband design
- The middle band is made with chain stitches and double crochets
- Decorated edges with treble crochet border stitches
- Two ends form ties created with chains and single crochet stitches
- Added detailing of small "petal" puff stitches at the tie ends
Notes
- The headband length can be adjusted depending on how many groups of stitches you work in the middle section.
- Always count stitch groups in odd numbers (25, 27, 29, 31, 33, etc.).
- Increase the groups for a longer headband or decrease for a shorter one.
- Use stitch markers to mark corner and middle points for easy tracking of progress.
- You can adjust the chain length of the ties to fit preferences.
Skill Level
- Intermediate Beginner
- Basic knowledge of chains, single crochets, double crochets, and treble crochets is required.
Materials
- Yarn: 100% cotton mercerized yarn for a lightweight and breathable texture
- Hook: 2 mm crochet hook (or size suitable for your yarn)
- Stitch markers: To mark corners and the middle section
- Scissors
- Yarn needle or crochet hook (to weave in ends)
Measurements / Sizing
- Middle band length (excluding ties):
- For 31 stitch groups: approximately 39–46 cm or 15–18 inches.
- For shorter or longer sizes, reduce or increase the number of stitch groups.
Examples:
- For smaller children, use 25, 27, or 29 stitch groups.
- For adults, 31, 33, or 35 stitch groups provide an ideal size.
- Tie chain length:
- Each tie consists of 41 chains (adjustable to desired length).
Gauge (and Stitch Pattern)
While the exact gauge isn't provided, the band length depends on the number of stitch groups:
- 31 stitch groups = 39 cm (15 inches).
- 33 stitch groups were used in a pink headband, which was slightly larger.
Stitch pattern (for the middle section):
- Each stitch group:
- Chain 3
- Work 1 double crochet in the back loop of the first chain
Stitch Abbreviations
(Using standard crochet abbreviations)
- ch = chain
- sc = single crochet
- dc = double crochet
- tr = treble crochet
- sl st = slip stitch
Special Stitches
Treble Crochet (tr):
- Yarn over the hook twice.
- Insert the hook into the designated space, yarn over and pull up a loop (4 loops on the hook).
- Yarn over, pull through the first two loops, yarn over, pull through the next two loops, yarn over, and pull through the final two loops.
Petal Puff Detail (Tie Decoration):
- Work a double crochet stitch twice into a single chain.
- Make 3 chains, insert the hook into the top of the second double crochet, yarn over and pull through, completing a small knot like "puff."
- Repeat for the next chain stitch, and single crochet down the length of the tie.
The Crochet Pattern
1. Middle Crochet Band
- Wrap the yarn around your finger and create a slipknot to start.
- 3 ch to form the foundation.
- Yarn over, insert the hook into the first ch, and pull up a loop.
- Work a dc by pulling through two loops at a time, twice (one group is complete).
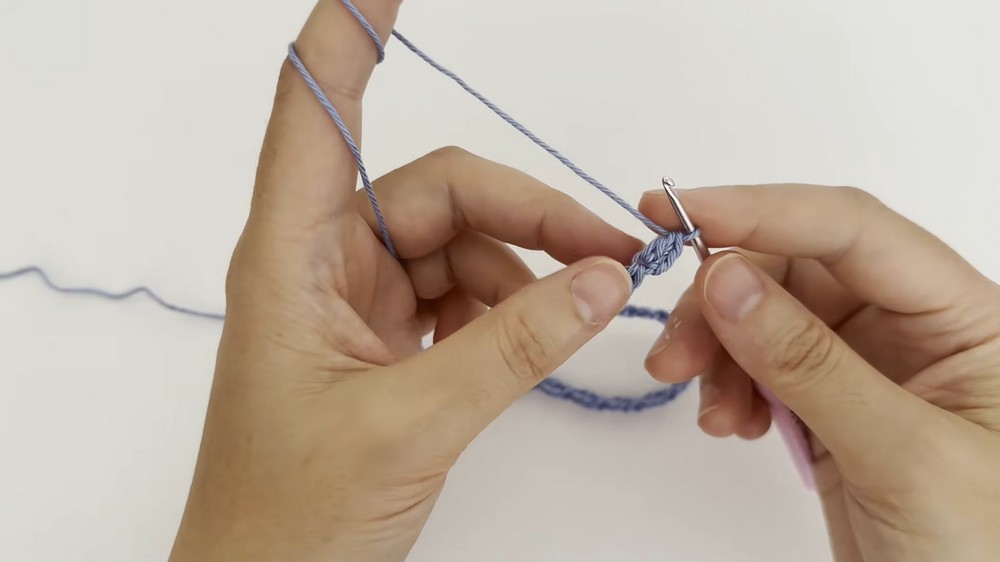
Continue the sequence:
- 3 ch.
- Yarn over again, and work dc into the back loop of the same first chain.
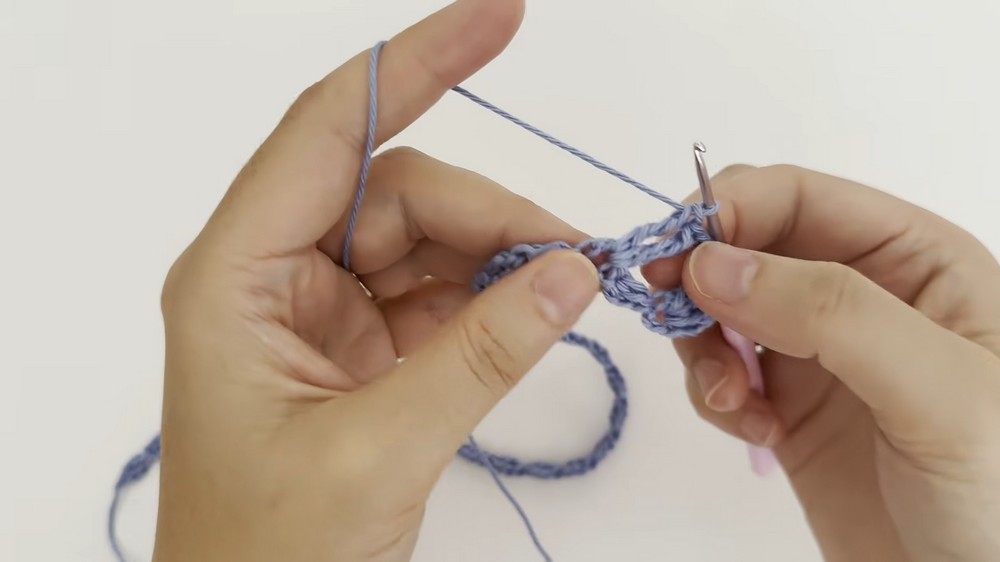
Repeat Steps 5–6 to create consecutive stitch groups.
- Target: Create 31 stitch groups for a band approximately 39 cm long. (For other sizes, adjust stitch group count to odd numbers: 25, 27, 29, etc.)
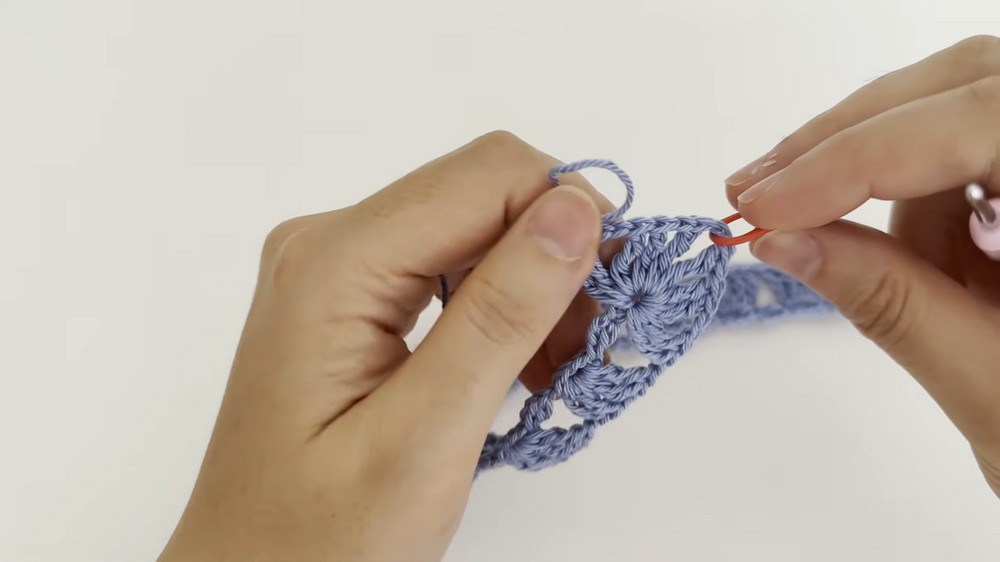
Once completed, the middle section should form a neat texture of chains and double crochets.
2. First Row of the Border
We will now create the border around the middle band with treble crochets.
- From one end, ch 4 as the first "treble stitch."
- Yarn over twice, and insert the hook into the space between two stitch groups below. Pull up a loop.
- Complete a tr by pulling through two loops at a time, three times.
- Work another tr into the same space.
- Add 2 ch, then work 2 more tr into the same space.
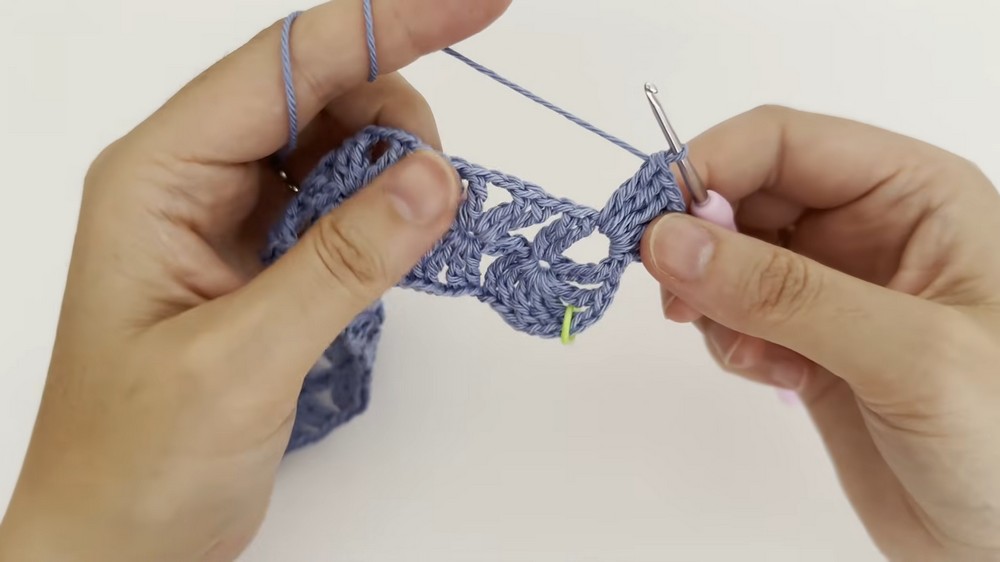
You’ve completed your first border group.
- Ch 1, and skip one stitch group below. Insert your hook into the next stitch group space.
- Work 2 tr, 2 ch, and 2 tr into this new space.
Repeat the following pattern across the row:
- Skip one stitch group, then create
- 2 tr, 2 ch, 2 tr,
- ch 1 to separate each border group.
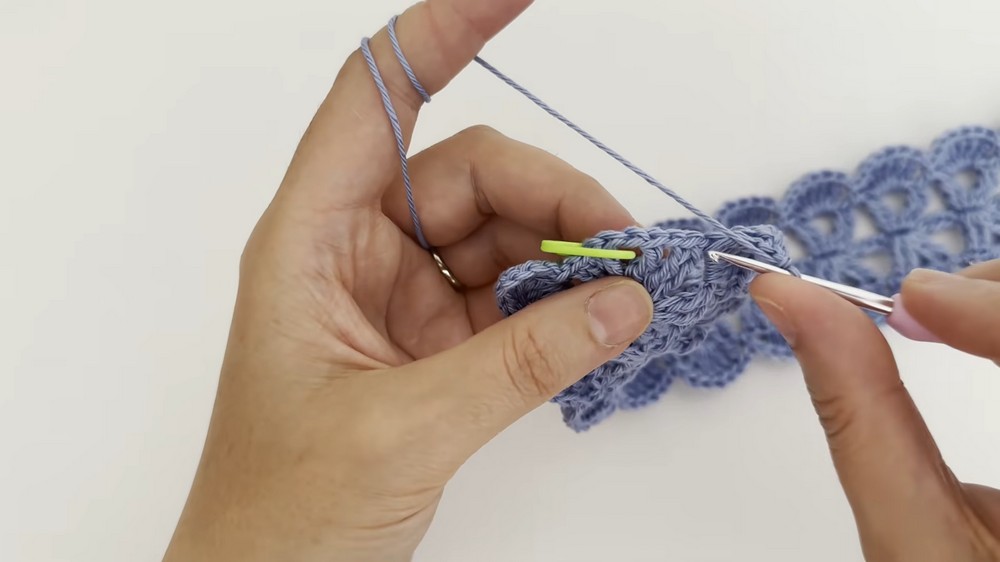
Continue until you reach the last group space.
3. Corner Creation and Second Side
At the corner:
- Work 2 tr, 2 ch, and 2 tr into the last corner space.
- Ch 1, and repeat for the other side.
The second side uses the same technique as the first side.
4. Adding the Tie Ends
At the corner (with stitch marker):
- Start making your tie by chaining your desired length (e.g., 41 chains).
- After chaining, return with single crochets along each chain.
- Add a small puff decoration by working two double crochets into one chain, then creating 3 chains, and finishing with a slip stitch at the top of the double crochet.
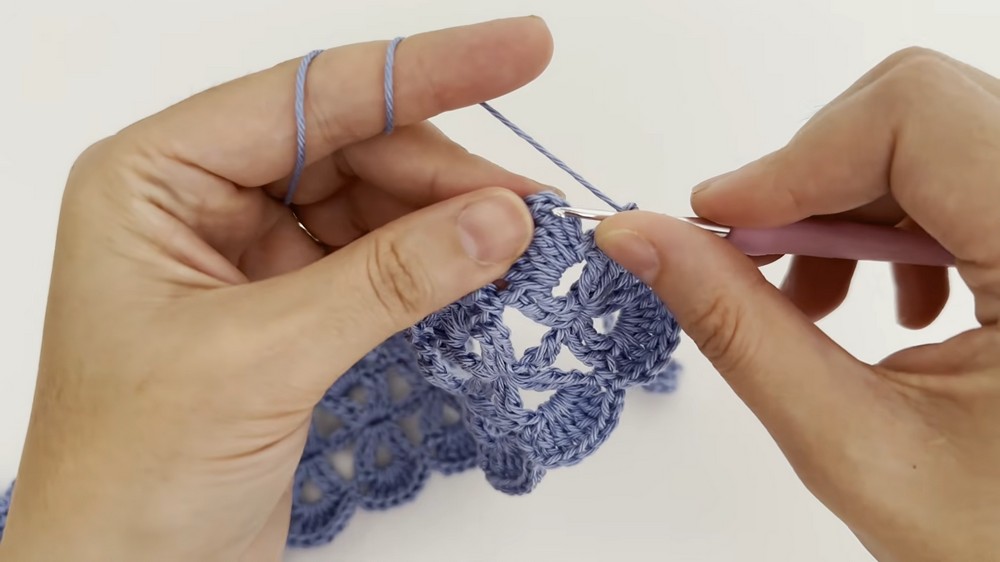
- Repeat this tie detailing for the opposite side of the headband.
5. Final Touches
- After adding the second tie, weave in all loose ends using a yarn needle.
- Lightly steam press the headband to smooth any uneven edges or stitches.
Assembly & Finished Size
- No further assembly is required.
- The finished headband measurement will depend on the selected group count. For a 31 group headband (as demonstrated), about 39 cm (15 inches) excluding the ties is expected.
Conclusion
Your crochet headband is now complete. Lightly steam it to add a polished touch. We hope you enjoyed this elegant yet simple headband tutorial. If you'd like more crochet tutorials like this, don't forget to subscribe, like, and comment.