
Free Crochet Earflap Flower Hat Pattern to Keep Ears Warm
Stay cozy and stylish with this free crochet earflap flower hat pattern, great for creating a warm and adorable accessory that’s fun for winter days.
The wind was sharp that winter afternoon, the kind that nips at your ears no matter how fast you walk. A little girl stood at the bus stop, tugging at a plain beanie that kept sliding up her head. Her grandmother reached into her bag and pulled out a bright, flower topped earflap hat, slipping it gently over the girl’s head. Suddenly, the cold didn’t feel so strong anymore. The earflaps hugged her cheeks, the flower sat proudly to one side, and for the first time that day, she smiled and forgot about the chill. That’s the magic of a handmade earflap flower hat, it doesn’t just keep you warm, it makes you feel special.
Patterned By
On Amira Crafts, this design comes to life with calm, clear teaching and a caring touch. The channel explains every step slowly and simply, so even a beginner can follow along without stress. From forming the first ring at the crown to building the earflaps and adding the pretty flower on the side, each part is shown in a friendly, easy to understand way.
Free Crochet Earflap Flower Hat Pattern with Fun Color Ideas
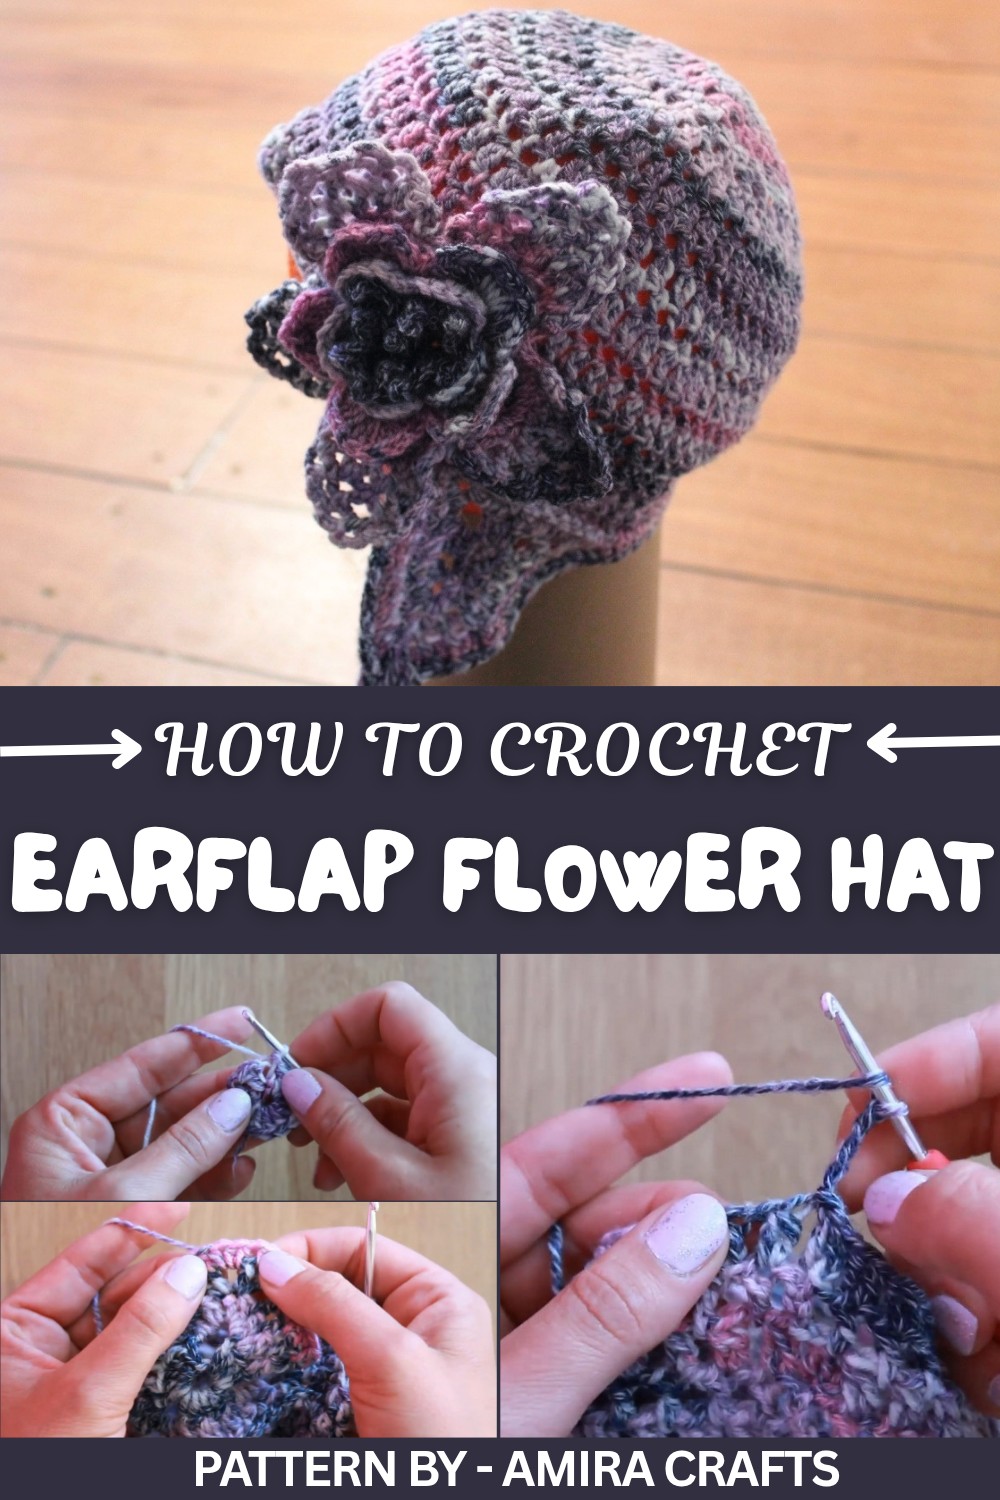
This free crochet earflap flower hat pattern stands out because of its beautiful structure and practical shape. The earflaps protect the ears and sides of the face, while the rounded crown gives a soft, snug fit. The flower detail is the most eye catching feature, adding charm and personality to the hat. It’s perfect for kids, teens, and adults, and works wonderfully as a gift or a winter wardrobe favorite.
The working style uses clusters, chain spaces, and neat edging to form a stylish yet cozy piece. With just a small amount of yarn and some patience, you can turn simple stitches into a warm, cute, and unique hat that looks handmade in the best possible way.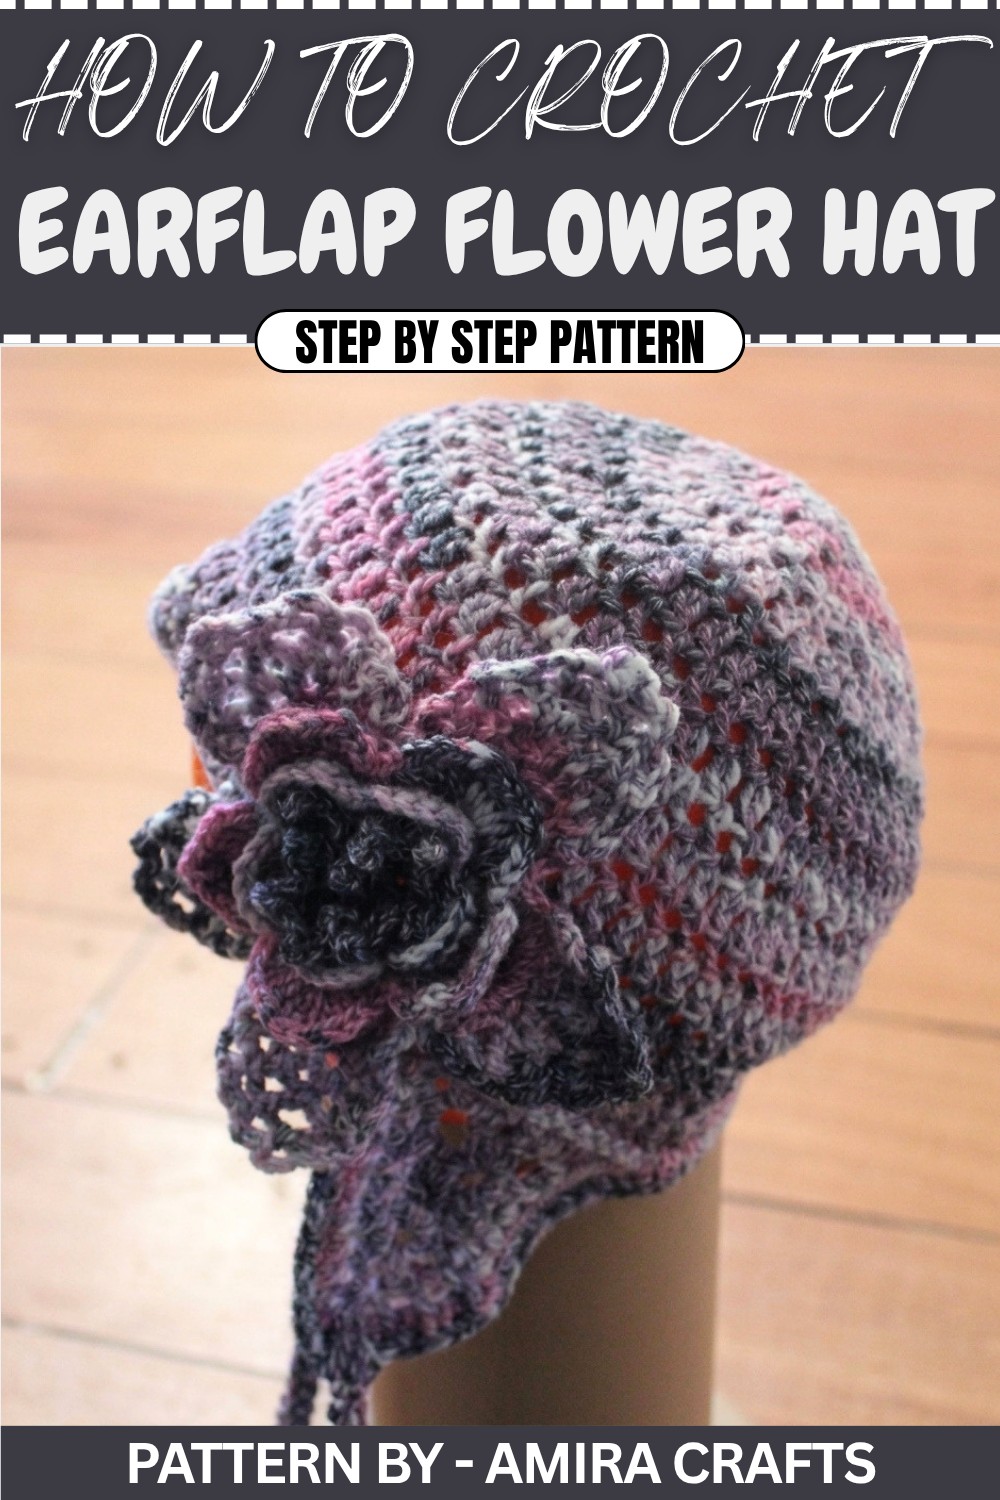
Crochet Earflap Flower Hat Pattern
This elegant crochet hat is quick to make and uses less than 100 grams of DK weight yarn. Customize it by adding a decorative flower (optional), the pattern for which is linked separately, and make it the perfect accessory for colder days. Follow these easy step by step instructions to create a stylish and cozy hat.
Quick Overview of the Pattern:
- Step 1: Create the hat's crown with double crochets worked in continuous rounds from a magic ring or slip knot.
- Step 2: Alternate between cluster stitches and double crochet rounds to build texture and height for the hat.
- Step 3: Add triangular ear flaps for warmth and attach decorative details like a crochet flower for added style.
- Step 4: Finish the edge with half double crochets for a clean, polished look.
Notes:
- This hat is designed for DK weight yarn, which makes it light and comfortable.
- Maintain consistent tension throughout to achieve uniformity.
- Each round is joined with slip stitches carefully placed to maintain the shape and pattern of the clusters.
- Adding the decorative flower is optional, and the video link for the flower pattern is provided by the creator.
Skill Level:
✔ Advanced Beginner
Materials:
- Yarn: Less than 100 grams of King Cole Drifter DK yarn (any soft DK yarn works).
- Hook Size: 4mm crochet hook.
- Markers: To mark chain spaces for joining ear flaps.
- Scissors.
- Needle and thread: For assembling the ear flaps and securing the flower (if adding).
Measurements/Sizing:
- Designed for an average adult size head. Hat circumference and height can be adjusted by adding or reducing rounds.
Gauge:
While gauge is not critical for this pattern, work tightly to allow the hat to hold its shape.
Stitch Abbreviations:
- ch: Chain
- sl st: Slip Stitch
- sc: Single Crochet
- hdc: Half Double Crochet
- dc: Double Crochet
- tog: Together (for decreases, e.g., sc2tog).
Special Stitches:
Cluster Stitch (2 Double Crochets Together):
- Yarn over, insert hook into the stitch, yarn over, pull through (3 loops on hook).
- Yarn over, pull through 2 loops (2 loops on hook).
- Yarn over, insert hook into the same stitch, yarn over, pull through (4 loops on hook).
- Yarn over, pull through 2 loops (3 loops on hook).
- Yarn over, pull through all 3 loops.
The Crochet Pattern
Hat Crown:
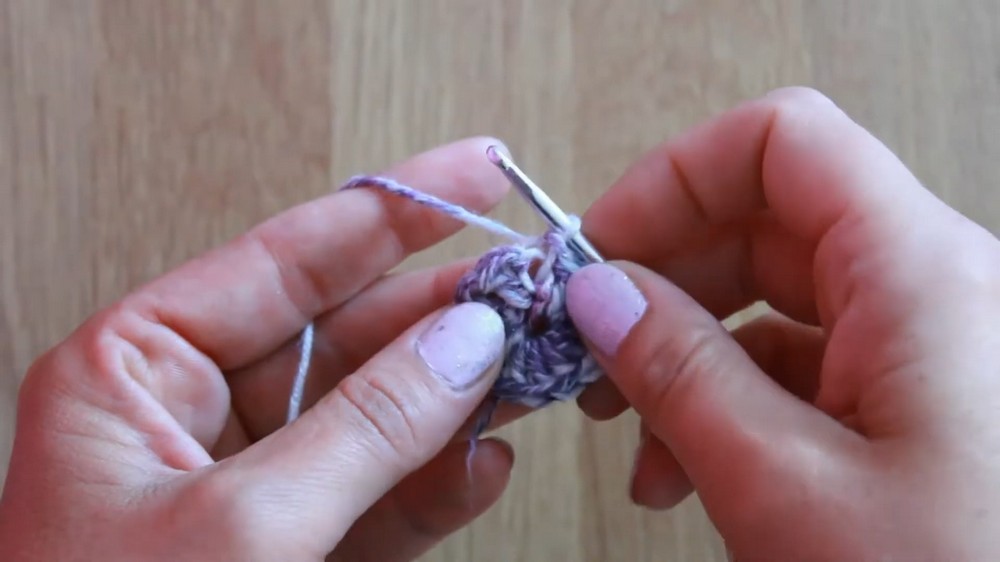
Round 1 (Foundation):
- Make a slip knot and chain 3.
- Work 11 double crochets (dc) into the first chain (12 stitches, including the starting ch 3).
- Slip stitch into the third chain of the starting ch 3 to join the round.
Round 2:
- Ch 2, work a cluster stitch into the same stitch, followed by ch 1.
- Into the next dc, work another cluster, followed by ch 1.
- Repeat this pattern around until there are 12 clusters, separated by ch 1 spaces.
- Slip stitch into the chain space before the first cluster.
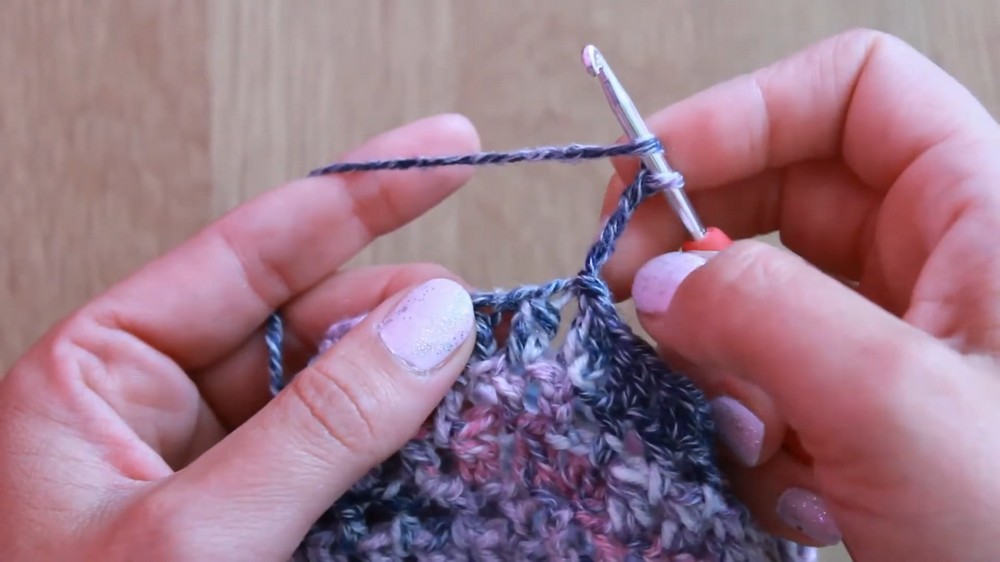
Round 3:
- Slide your hook into the first chain space and make a sl st to begin.
- Ch 3 (counts as the first double crochet) and work another dc into the same chain space, followed by ch 1.
- Into the next chain space, work 2 dc, followed by ch 1.
- Continue this pattern of working 2 dc + ch 1 into each chain space around.
- Slip stitch to the third chain of the starting ch 3 to finish this round.
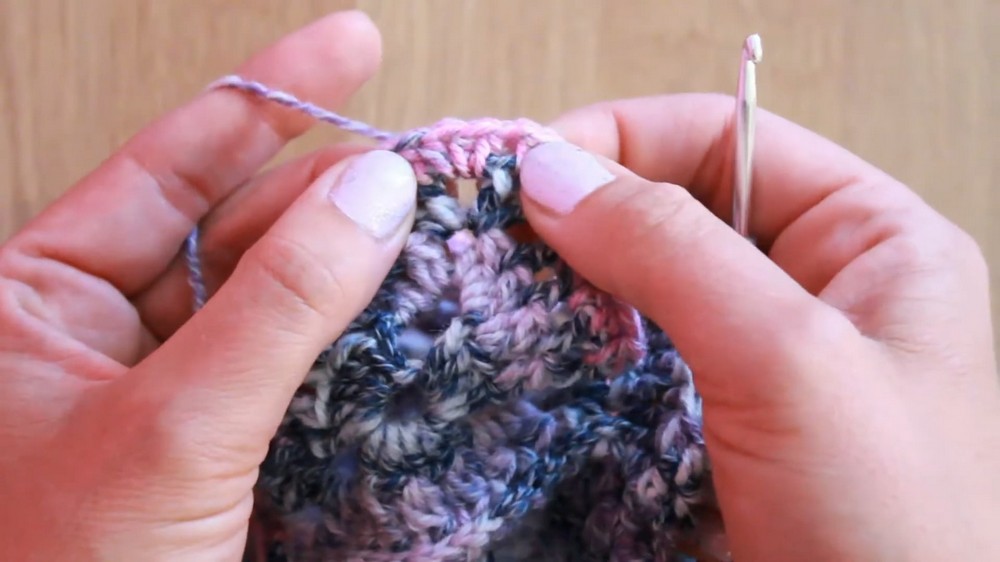
Hat Body:
From Round 4 onward, alternate between Cluster Rounds and Double Crochet Rounds as outlined below:
Cluster Round:
- Ch 2, work a cluster stitch with 2 dc into the same stitch, followed by ch 1.
- Work a cluster stitch into each dc between chain spaces and on top of ch-1 spaces from the previous round.
- Separate each cluster with ch 1.
- Slip stitch into the chain after the first cluster to maintain the shape.
Double Crochet Round:
- Slip stitch into the nearest chain space.
- Ch 3 (counts as first dc), work another dc into the same chain space, followed by ch 1.
- Work 1 dc into the next chain space, followed by ch 1.
- Continue this sequence around, alternating between 2 dc and 1 dc in every chain space.
- Finish with a sl st into the starting ch 3.
Repeat the Cluster Round and Double Crochet Round, alternately, until desired height is achieved.
Earflap
Foundation Triangle (Round 1):
- Create a magic ring (or chain 5 and slip stitch into the first chain to form a loop).
- Chain 3 (ch 3) (counts as the first DC).
- Work 4 double crochets (DC) into the ring.
- Chain 5, then work 5 DC into the ring.
- Chain 5, then work 5 more DC into the ring.
- Chain 5, then slip stitch (SS) into the third chain of the starting ch 3 to close the round.Pro Tip: At the end of this step, you should have a triangle with three sets of 5 DC stitches, separated by chain 5 spaces at each corner.
Round 2 (Cluster Stitch Triangle):
- Begin with a chain 2 (ch 2) (counts as part of a cluster).
- Work a cluster stitch (2 DC together) into the same stitch. Follow with chain 1 (ch 1).
- Skip 1 DC, then work a cluster stitch + chain 1 into the next DC.
- Continue this pattern along the side of the triangle, alternating cluster stitches and ch 1 spaces.
- At the corner (chain 5 space):
- Work 2 clusters, separated by chain 2 (ch 2).
- For example: Cluster, ch 2, Cluster.
- Repeat the same pattern along the second and third sides of the triangle. At the end of the round, slip stitch (SS) into the chain space after the first cluster to close the round.
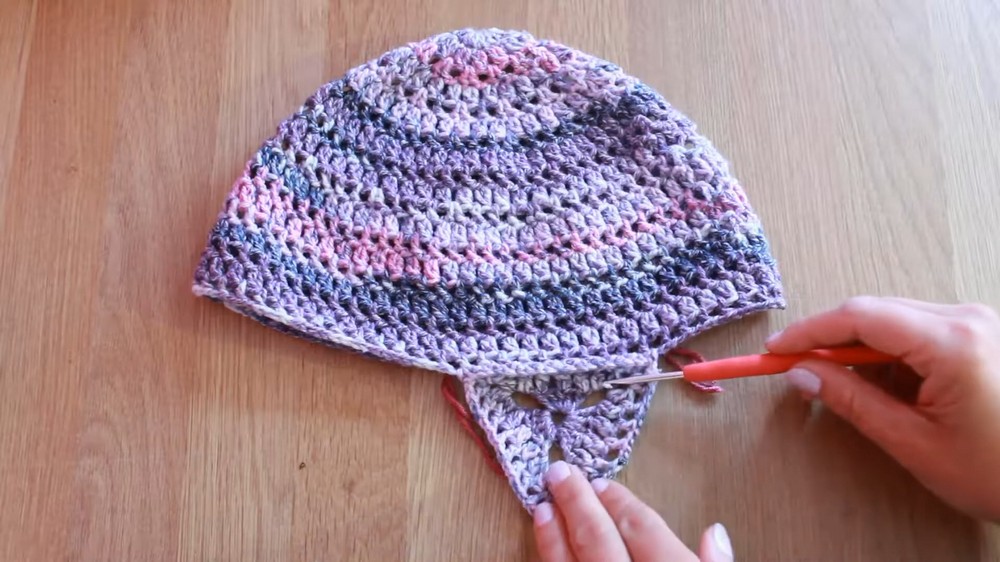
Final Round of Triangle and Joining:
Marking the Hat:
- Lay the hat flat and use stitch markers to mark 12 chain 1 spaces at the back of the hat for earflap placement. Leave a gap of 9 chain spaces in the front to differentiate the earflap area.
Joining the Triangle to the Hat:
- Begin the final triangle round:
- Slip stitch (SS) into the chain space between two clusters of the triangle.
- Chain 4 (ch 4) (counts as the first double crochet and chain 1).
- Work 1 double crochet (DC) into the next chain space, then chain 1. Continue working DC + ch 1 into each chain space along the triangle.
- At the corner (chain 2 space):
- Work DC + ch 1 + DC + ch 1 into the chain 2 space.
- To connect the triangle to the hat:
- At the first marked chain space of the hat, make a slip stitch (SS) into the chain space.
- Work 1 DC into the corresponding chain space of the triangle. Repeat this process all the way around the earflap by slip stitching into the marked chain spaces of the hat while continuing to work DC + ch 1 on the triangle.
- At the next corner, repeat the corner treatment:
- DC + ch 1 + DC + ch 1 into the triangle’s chain 2 space.
- Continue joining along the second and third sides of the earflap triangle.
- Slip stitch into the third chain of the starting chain 4 to finish the connection, and fasten off.
Second Earflap Construction:
- Repeat the same process to create the second earflap.
- Ensure placement symmetry with the first earflap by marking the corresponding spaces on the opposite side of the hat.
Finishing the Hat:
Base Edge of the Hat:
- To clean up the edge, use standing half double crochets (hdc). Begin at any chain space at the back of the hat (just before the triangle).
- Work 1 hdc into each chain space and double crochet around the base and ear flaps.
- At the corners, make 3 hdc into the chain 2 spaces for a smooth rounding.
- When the round is complete, join with an invisible join for a seamless look.
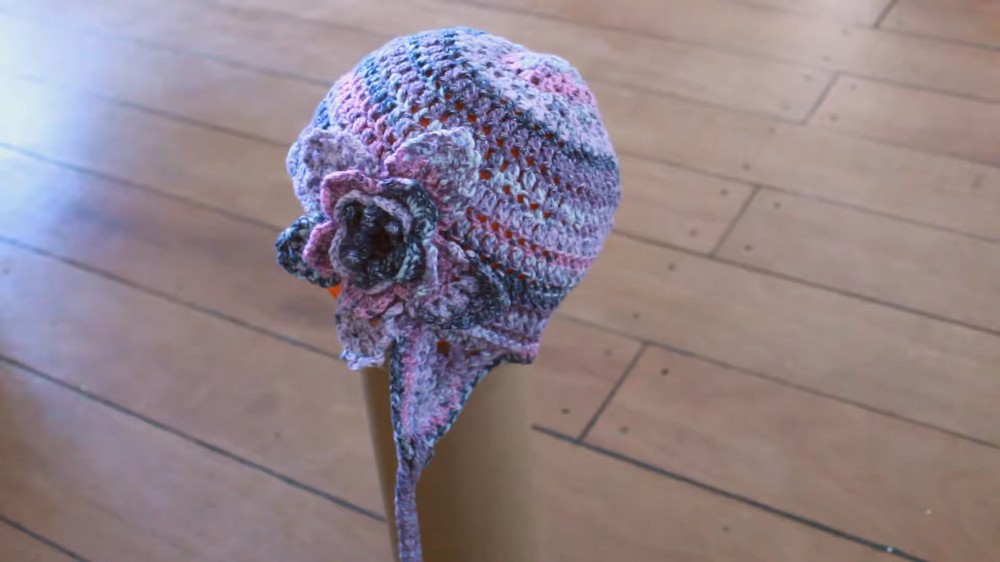
Assembly & Finished Size
Once the main portion of the hat is completed, you can optionally:
- Add a decorative flower using the linked video tutorial by the creator.
- Attach the flower to the left side of the hat for a stylish accent.
- Take time to check symmetry and position for both the ear flaps and any additional decorations.
Conclusion
Congratulations, You’ve finished your beautiful crochet hat complete with a decorative flower and functional ear flaps. This is a cozy, lightweight, and stylish accessory suitable for cold weather or as a thoughtful handmade gift. Experiment with different yarn colors and flower designs to add your personal touch to the hat.