
Free Crochet Christmas Garland Pattern to style stair railings
Catch holiday cheer around your fireplace with a Free Crochet Christmas Garland Pattern while you string colorful handmade bunting across your mantel.
Every time I pull out my holiday decorations, I feel inspired to add something handmade to the mix, a little touch of crochet magic that makes everything feel warmer and more personal. This year, I decided to design an easy and festive garland pattern using basic crochet stitches, the kind that even beginners can make without stress. A crochet Christmas garland is such a charming way to dress up your mantel, staircase, or even your tree. With just a simple combination of chain stitches, single crochets, and slip stitches, you can create a long decorative strand that feels playful and unique. Think about a garland full of fun shapes, like stars, snowflakes, tiny trees, or even ornaments, perfect for spreading holiday cheer.
Ultimate Free Crochet Christmas Garland Pattern for Fun
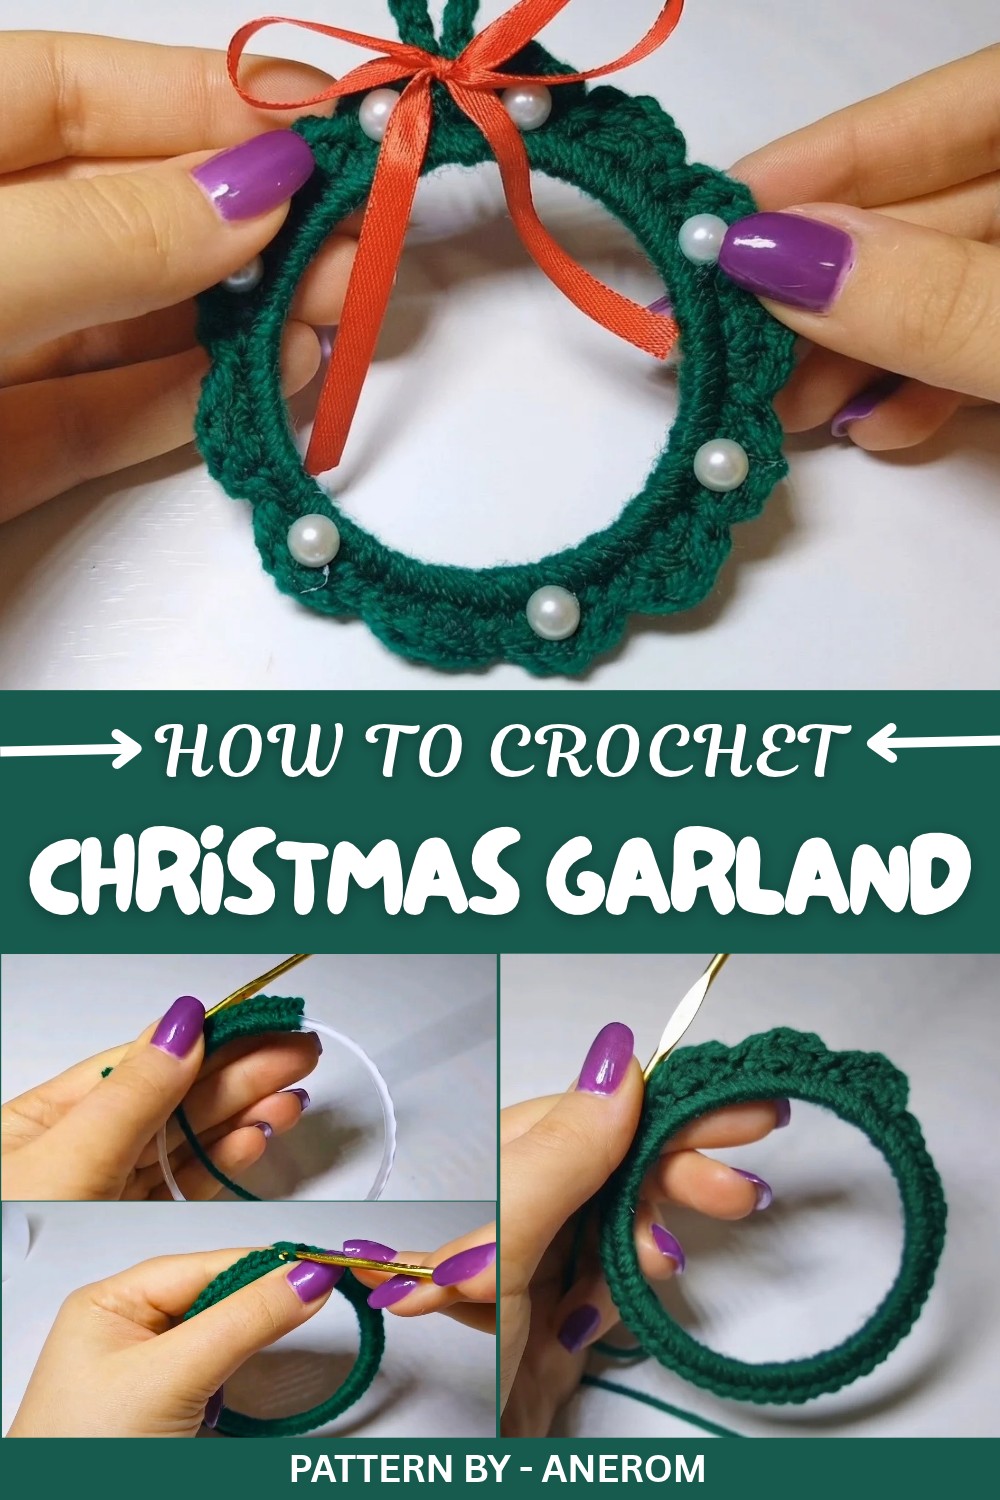
From this pattern, you’ll learn how to work in sections to build small motifs and connect them seamlessly into a flowing garland. It’s also a chance to practice some classic stitches and understand how they can be shaped into specific designs. Beginners will appreciate the simplicity of the techniques, while more experienced crocheters can add their own flair with colors and embellishments. The beauty of this project is that there’s no need for perfection, it’s all about enjoying the creative process and celebrating what you make.
Pattern By Anerom
Once you master the garland, the possibilities are endless. Using the same stitches, you can create other festive items like hanging ornaments for your tree, gift toppers for presents, or cute appliques for a scarf or sweater. This pattern is more than just a garland, it’s a foundation for holiday creativity. Whether you crochet it as a family activity or as a cozy solo project, it’s sure to become a favorite part of your holiday tradition.
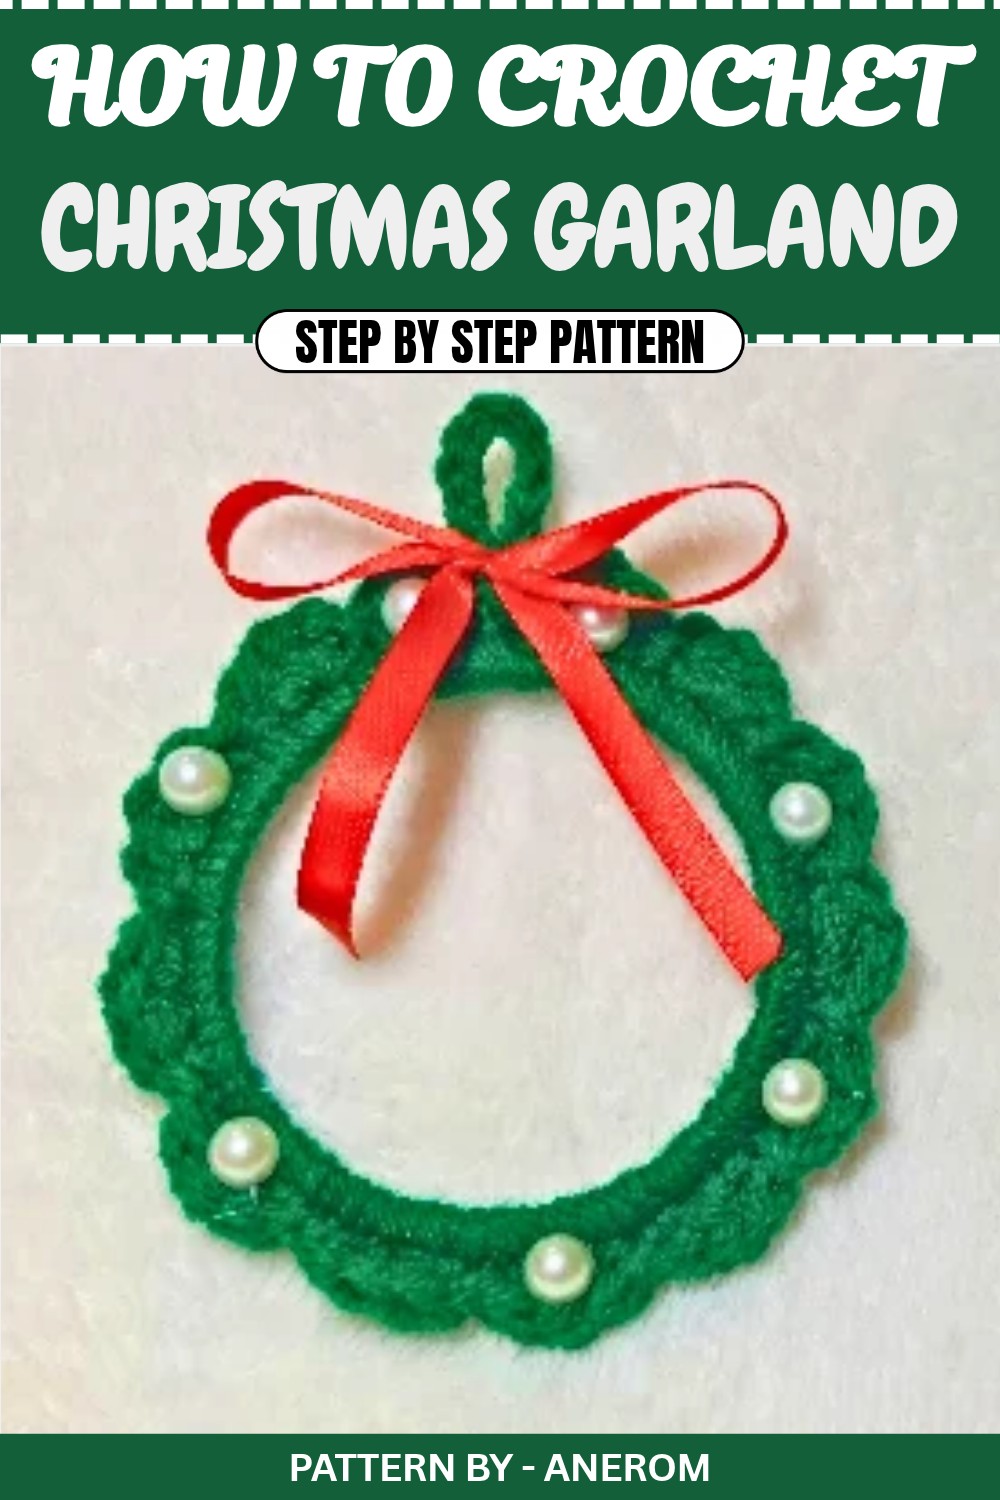
Simple Crochet Christmas Wreath Pattern
Quick Overview of Pattern
- Project Type: Small, circular holiday wreath
- Style and Theme: Festive, lightweight, customizable
- Key Features: Versatile, beginner friendly, quickly made with minimal materials
- Uses: Christmas decoration, ornament, or holiday gift
- Customization: Pick your own colors, decorations, and ribbon length
Notes
- The only shaping involved is cutting the plastic cup into a circular form.
- While this project is designed for beginners, pay attention to how the stitches cover the plastic ring evenly.
- For best results, use yarn with vibrant colors that pop against your holiday décor.
Skill Level
Beginner: Utilizes simple stitches (slip stitch, single crochet, double crochet) and straightforward shaping.
Materials
- Yarn: Acrylic yarn in green or red (other colors can also work depending on your preference). Recommended weight: medium/worsted weight.
- Hook Size: 3.0 mm crochet hook
- Plastic cup: A common plastic cup available at home.
- Scissors
- Hot glue gun
- Red ribbon for decoration (approximately 12–15 cm)
- Beads, small embellishments, or decorative elements
- Yarn needle: For weaving in ends
Measurements / Sizing
- Approximate size: 8–10 cm in diameter (based on the size of the plastic ring).
Gauge
Gauge is not critical, but stitches should be relatively tight to fully cover the plastic ring.
Stitch Abbreviations
- ch: Chain
- sl st: Slip Stitch
- sc: Single Crochet
- dc: Double Crochet
Special Stitches
- None: This pattern uses basic crochet stitches and techniques suitable for beginners.
The Crochet Pattern
Step 1: Prepare the Plastic Cup
- Take a plastic cup and use scissors to cut off the rim of the cup carefully.
- Trim away the excess parts until you’re left with the round, sturdy edge of the cup—the top rim.
- Smooth the edges by trimming any sharp points to prevent injury or snagging on your yarn.
Step 2: Cover the Plastic Ring with Single Crochet Stitches
- Use green yarn (or any color of your choice) to cover the rim/ring.
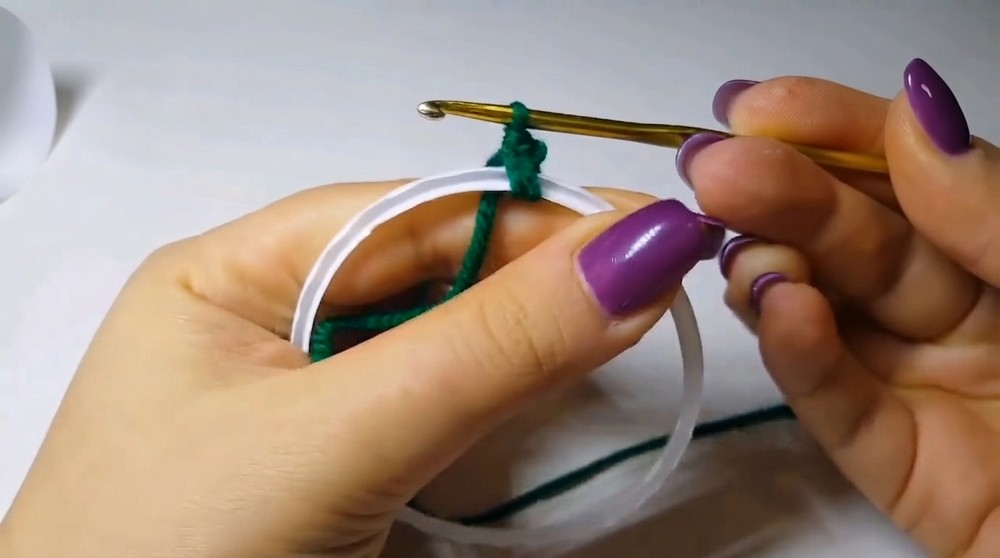
- Create a slip knot and attach your yarn to the plastic ring. Position the yarn tail behind the ring.
- Insert your hook into the plastic ring, pull the yarn through, and work your first single crochet (sc).
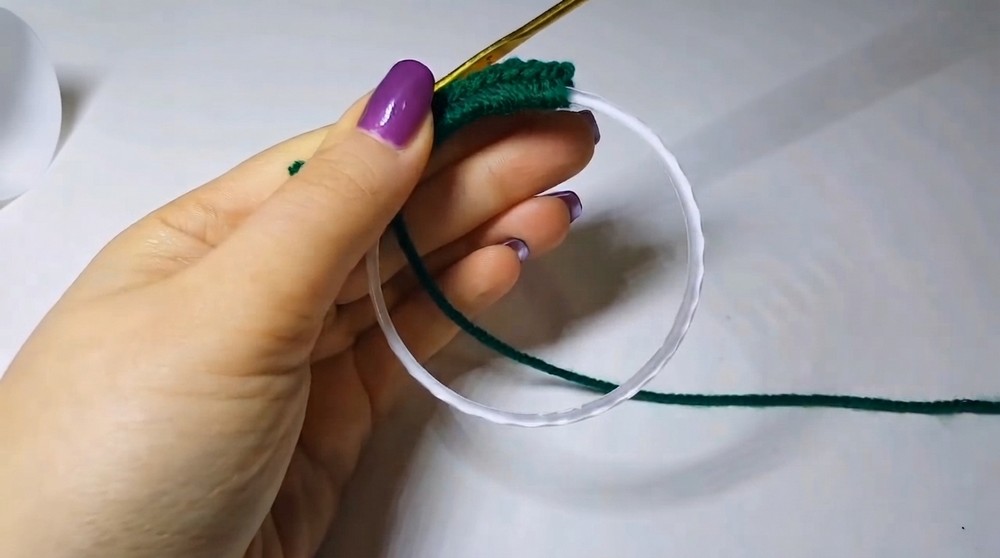
- Continue working single crochet stitches (sc) all around the ring, covering it completely.
Helpful Tip: There is no fixed number of stitches. Simply ensure that the stitches cover the ring evenly without overlapping. Avoid leaving gaps between stitches.
- Once the ring is fully covered, join the last stitch to the first single crochet with a slip stitch (sl st).
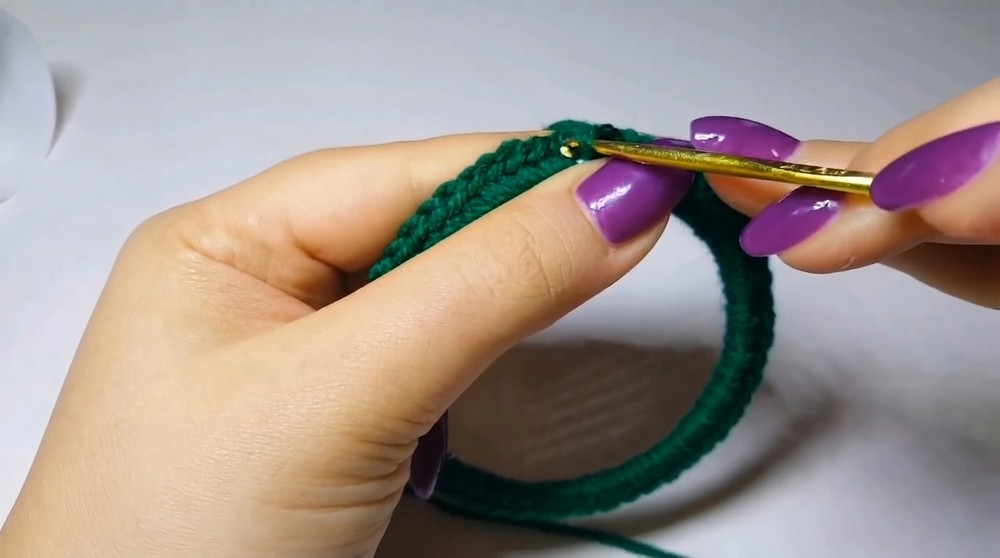
Step 3: Create Decorative Loops Around the Wreath
- After completing the first round, join with a slip stitch (sl st) in the next stitch to position the yarn for the next round.
- In the next stitch, work 3 double crochets (dc) into the same space.
- Skip 1 stitch, and in the next stitch, work 1 slip stitch (sl st).
- Repeat this pattern around the ring:
- Work 3 double crochets (dc) into one stitch
- Skip 1 stitch
- Work 1 slip stitch (sl st) in the next stitch
Note: These alternating loops create the decorative, scalloped edges of the wreath.
- Continue this sequence until you’ve worked all the way around the ring.
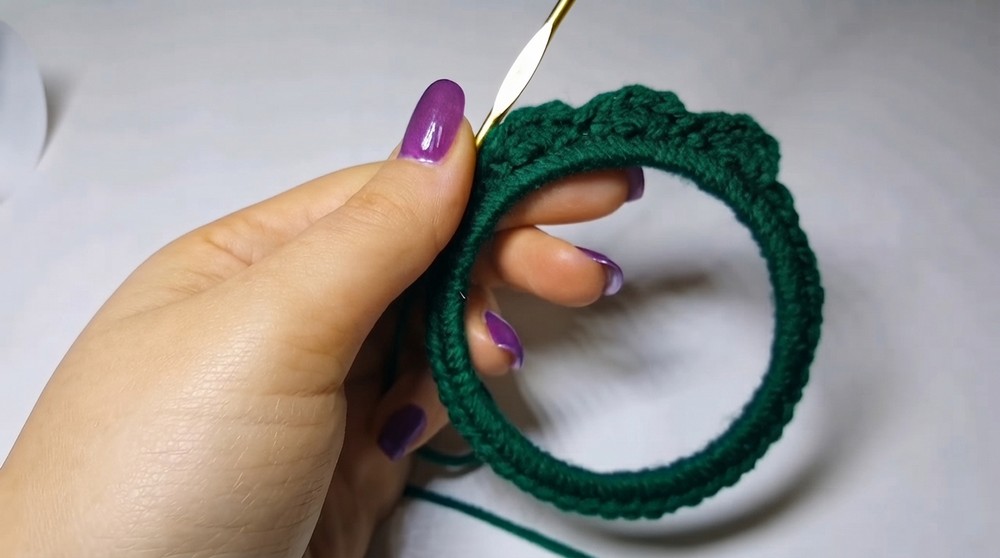
Step 4: Finishing the Decorative Loops
- After completing the final loop, join the round with a slip stitch (sl st) into the starting point.
- Cut the yarn and pull it through the final stitch to secure it.
Step 5: Add a Hanging Loop
- Reattach the yarn to the top of the wreath.
- Chain 10 (or adjust for a longer/shorter loop if desired).
- Insert your hook back into the same stitch where the chain began, and work a slip stitch (sl st) to close the loop.
- Cut the yarn, pull it through, and weave in the ends with a tapestry needle.
Step 6: Weave in Any Loose Ends
- Use a yarn needle to weave all loose yarn ends securely into the stitches.
- Trim any excess yarn for a tidy finish.
Step 7: Add Decor and Embellishments
- Position your wreath on a flat surface. Using a hot glue gun, attach:
- A red bow or ribbon to the top of the wreath.
- Optional decorations like beads, bells, or small ornaments can be glued around the wreath for extra sparkle.
Tip: Customize your decorations to fit the color scheme of your holiday décor or the recipient’s preferences if gifting the wreath.
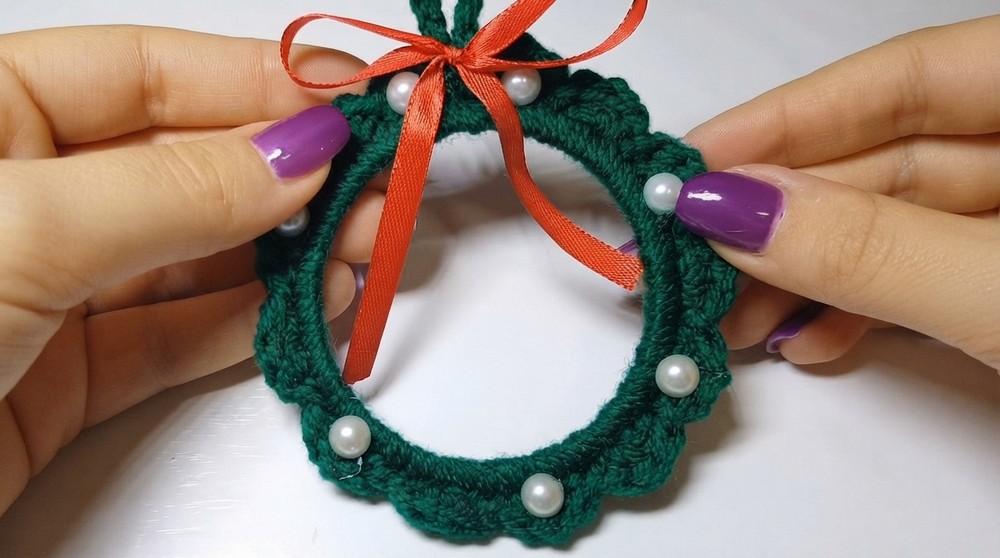
Assembly & Finished Size
Once complete, your finished Christmas wreath will measure approximately 8–10 cm in diameter, depending on the size of your original plastic ring. Hang it on a door, wall, or tree with your handmade hanging loop for a festive addition to your holiday décor!
Conclusion and Ending Words
Congratulations on finishing your crochet Christmas wreath! Isn’t it amazing how such a simple pattern can turn a plastic cup into a festive, handmade decoration? With its ease and versatility, this project is a fun and creative way to celebrate the holiday season. Whether you make one for your home or as gifts for loved ones, these little wreaths are sure to bring joy.