
Free Crochet Burger Bucket Hat Pattern That’ll Make You Hungry
Refresh your crochet projects with this free burger bucket hat pattern that’s fun, easy, and perfect for adding a playful touch to your look.
FEATURED BY: Ashley D
The grill was sizzling, the sun was shining, and the smell of burgers filled the air, that’s exactly where this bucket hat idea was born. It was one of those lazy afternoons when the laughter of friends and family spilled over the backyard while everyone debated toppings. And as I stacked lettuce, onions, tomato, patties, and cheese on my bun, I thought, “What if I could wear this instead?” That little moment of backyard inspiration became the spark for the quirkiest project I’ve ever made, one you’ll love.
Crochet This Whimsical Burger Bucket Hat with Free Pattern

With its playful layers and bold colors, this one of a kind bucket hat captures the joyful essence of everyone’s favorite cookout food. The top bun forms the hat’s cozy crown, while the brim makes sure you’re ready for sunny days. The real magic lies in the details: frilly lettuce edges worked in front loop only stitches, a smooth tomato stripe in the back loop, and neat embroidered sesame seeds to top it all off. It looks whimsical, but the versatility of this hat is no joke, it fits most adults and can easily be adjusted for smaller or larger sizes if needed.
Using worsted weight yarn ensures the hat has enough stretch to fit comfortably while holding its shape. Bright colors make those burger layers pop, but feel free to tweak the palette and add extra ingredients to match your taste. Switch out the tomato red for ketchup pink or add a stripe for onions—the options are endless, much like when you’re building your favorite burger.
Perfect for gifting or keeping, this project is all about fun. Whether you’re dressing up for a picnic, accessorizing for a silly photoshoot, or adding some cheer to your wardrobe, this burger bucket hat is sure to make heads turn (and mouths water).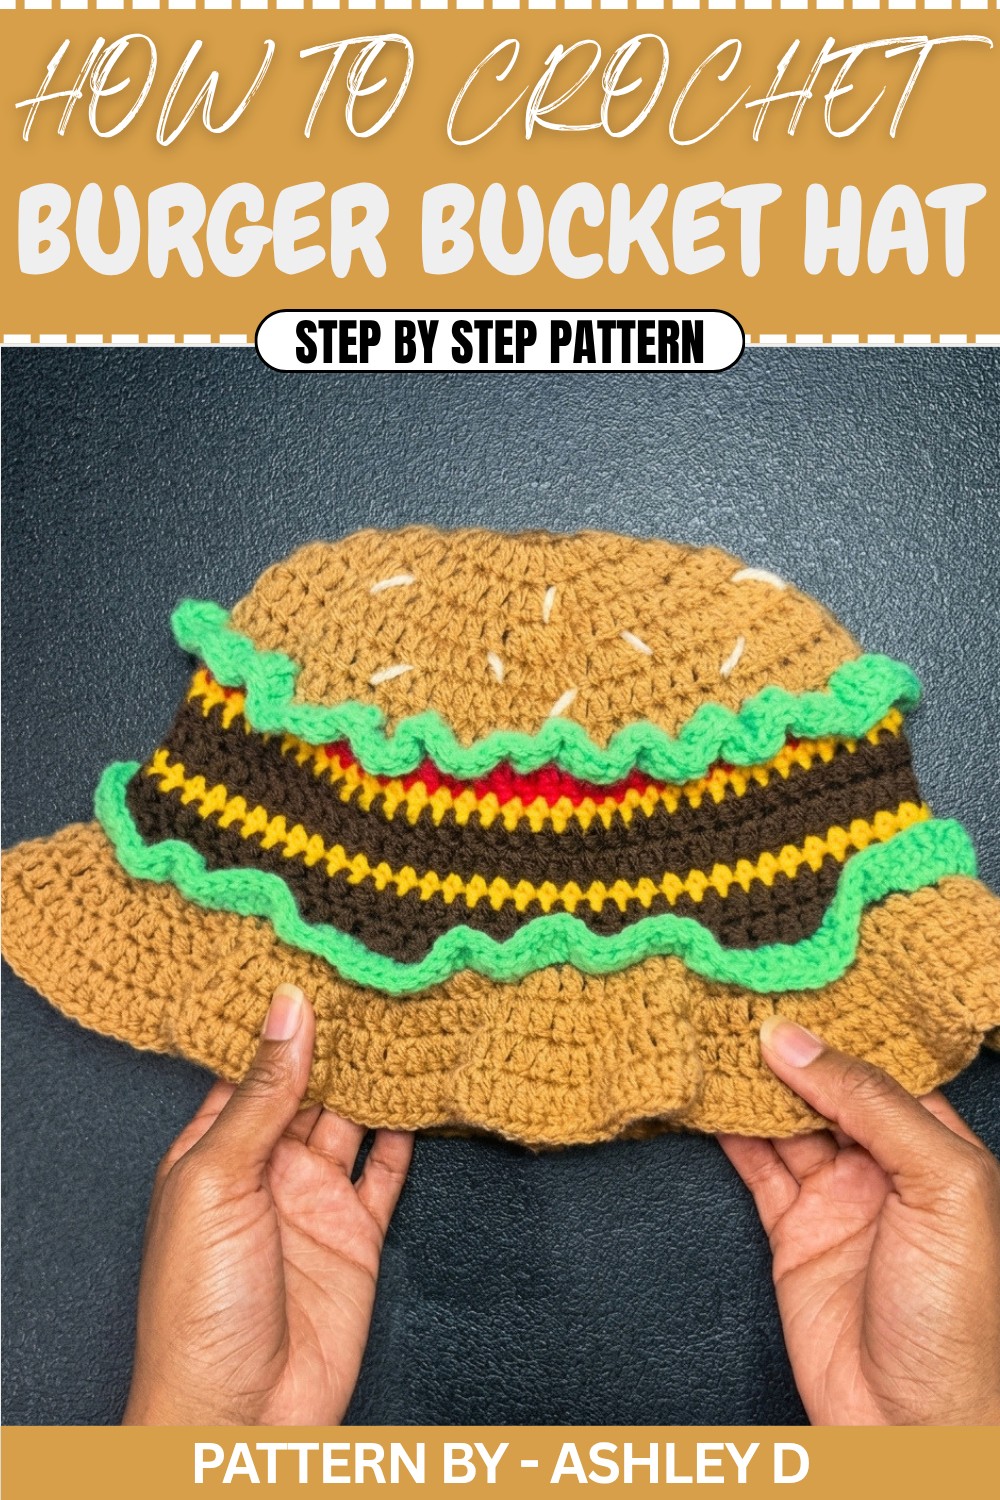
Crochet Burger Hat Pattern
Quick Overview of Pattern
- Project: Crochet Burger Hat
- Hat Elements: Bun, lettuce, tomato, cheese, burger patty, sesame seeds
- Techniques Used: Magic ring, double crochet (DC), half double crochet (HDC), increasing and working in front and back loops.
- Customization: Adjustable for different head sizes by modifying the number of increases.
Notes
- For those who struggle with the magic ring, a chain 4 loop can be used instead.
- Measurements are based on adult sizing. For smaller or larger sizes, reduce or add rounds as instructed.
- Color changes represent different parts of the burger (bun, lettuce, tomato, cheese, etc.).
- The brim acts as the bottom of the bun, blending functionality and design.
Skill Level
Beginner to Intermediate – Basic crochet knowledge (magic ring, double crochet, and working in front/back loops) is required.
Materials
- Hook Size:
- 4.25 mm hook (main hat)
- 3.5 mm hook (shaping the brim and detailing)
- Yarn Colors:
- Tan: Bun
- White: Sesame seeds
- Brown: Patty
- Yellow: Cheese
- Red: Tomato
- Green: Lettuce
- Other Supplies:
- Scissors
- Tapestry needle
Measurements / Sizing
- Hat is sized for adults (approx. 22 inches in circumference).
- To adjust sizing, increase or decrease the number of rounds during the crown section or omit certain layers if the head is smaller.
Gauge
- Gauge Swatch: 4” x 4” = 16 double crochets (DC) x 8 rows using a 4.25 mm hook with tan yarn.
Stitch Abbreviations
- CH: Chain
- DC: Double Crochet
- HDC: Half Double Crochet
- INC: Increase (2 stitches in one stitch)
- SL ST: Slip Stitch
- SC: Single Crochet
Special Stitches
- Magic Ring (MR): Create a loop and work the first round of stitches inside it. Pull the loop tight to close the center.
- Front Loop Only (FLO): Work into the front loop of the stitch closest to you.
- Back Loop Only (BLO): Work into the back loop of the stitch furthest away from you.
The Crochet Pattern
1. Crown and Bun
- Foundation (Tan Yarn):
- Create a magic ring (MR). If unable to make a MR, chain 4 and join into a loop.
- CH 2 (counts as the first DC). Work 15 DC into the ring. Pull tight to close the ring and SL ST to the top of CH 2. (16 stitches)
- Round 2:
- CH 2, DC in the same stitch.
- Work 2 DC in each stitch (INC) around. SL ST to the top of CH 2. (32 stitches)
- Round 3:
- CH 2, DC in the same stitch.
- DC in the next stitch, INC in the next stitch. Repeat * to * around. SL ST to the top of CH 2. (48 stitches)
- Round 4:
- CH 2, DC in the same stitch.
- DC in the next 2 stitches, INC in the next stitch. Repeat * to * around. SL ST to the top of CH 2. (64 stitches)
- Round 5:
- CH 2, DC in the same stitch.
- DC in the next 3 stitches, INC in the next stitch. Repeat * to * around. SL ST to the top of CH 2. (80 stitches)
- Note: Adjust size here. If making for a smaller head, stop increasing and begin working evenly.
- Round 6 to 7:
- Switch to the 3.5 mm hook.
- CH 2, work 1 DC in each stitch around (no increases). Repeat for 2 rounds.
- Cut Yarn: CH 1 and cut yarn. We’ll revisit the bun for the brim later.

2. Lettuce (Green Yarn)
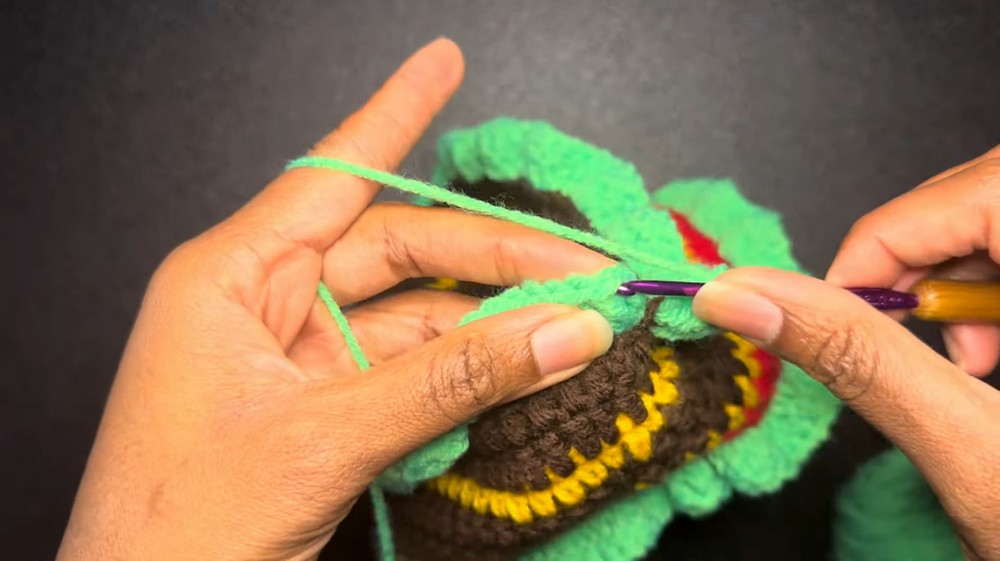
- Attach yarn to the FLO of Round 5.
- CH 2, DC in the same stitch. Work 2 DC in every stitch around. (This creates the ruffled lettuce effect.)
- SL ST to the top of CH 2, cut yarn, and fasten off.
3. Tomato (Red Yarn)
- Attach yarn to the BLO of Round 5.
- CH 2, work 1 DC in every stitch around.
- SL ST to the top of CH 2, cut yarn, and fasten off.

4. Cheese (Yellow Yarn)
- CH 2, begin regular DC stitches around (no FLO/BLO).
- Work 1 HDC in every stitch for this round to create the cheese texture.
- SL ST to the top of CH 2, cut yarn, and fasten off.
5. Patty (Brown Yarn)
- Attach brown yarn and CH 2.
- Work 1 DC in every stitch for the next 2 rounds to represent the patty.
- SL ST after each round, cut yarn, and fasten off.
- For a double patty burger, alternate another round of yellow (cheese) and repeat 2 more brown yarn rounds for the second patty.
6. Additional Lettuce Layer (Optional)
- Repeat the lettuce instructions from Step 2 to add a second layer of ruffled texture under the top patty.
7. Brim of the Hat
- Attach tan yarn to BLO of the last patty round.
- CH 2, place 1 DC in the next 3 stitches, and 2 DC in the next stitch (INC). Repeat * to * around.
- Repeat this increasing pattern for the next 3 rows to create a widening brim that resembles the bottom of the hamburger bun.
- SL ST, cut yarn, and fasten off.

8. Sesame Seeds
- Using white yarn, thread a tapestry needle.
- Randomly embroider small dashes (resembling sesame seeds) across the top bun section. Keep the placement irregular for authenticity.
Assembly & Finished Size
- Fully assemble the hat layer by layer during crocheting, ensuring all pieces are securely attached and aligned.
- Finished Hat Dimension: Approx. 22” in circumference; fits most adult head sizes.

Conclusion
Congratulations, Your crochet burger hat is complete. This whimsical and creative project is perfect for fun events, gifts, or even as a quirky accessory for yourself.