
Keep your essentials stylishly organized with the Free crochet Seamless Wallet Pattern, perfect for adding a handmade charm to everyday accessories.
Creating functional and beautiful accessories is a rewarding skill, especially when they serve both style and practicality. The Crochet Seamless Wallet Pattern delivers a clean and polished design that eliminates visible seams, ensuring a professional finish.
Soft Crochet Seamless Wallet Pattern to Gift Loved Ones
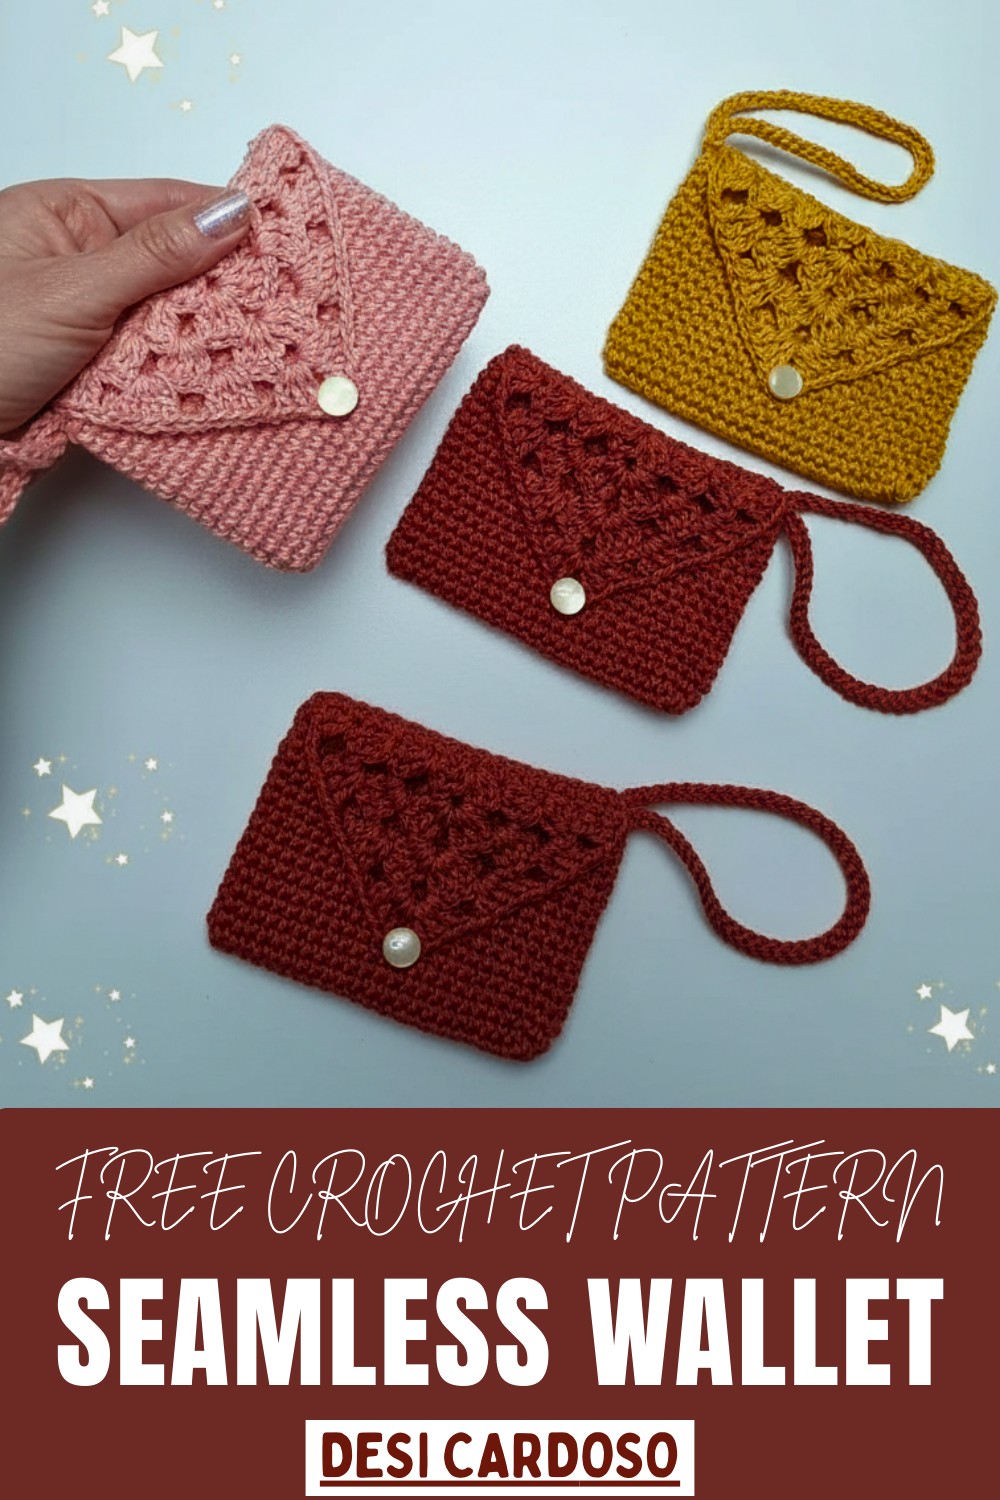
This pattern offers the flexibility to customize with different yarn colors and textures, allowing users to create unique pieces that match their personal style or serve as thoughtful, handmade gifts. It’s easy to follow and beginner-friendly, making it accessible for those new to crochet while still providing satisfying results for advanced crocheters. The wallet’s minimalist yet functional design makes it a versatile accessory that combines practicality with understated elegance.
How to Make a Crochet Wallet (No Sewing Required)
Special Features
- No Sewing Required: One of the standout features of this tutorial is that the wallet is made completely without sewing, making it easier and faster to complete.
- Customizable Colors: Choose any color of yarn to suit your personal preference or the recipient’s taste.
- Versatile Design: The wallet is the perfect size for holding important cards, documents, or small items.
- Beginner-Friendly: Detailed and clear steps ensure even beginners can follow along and feel confident in their skills.
Materials Needed
To make this crochet wallet, you will need:
- Yarn: Amigurumi yarn (the tutor uses an organza color, but you can use your preferred colors).
- Crochet needle: Size 3.0 mm.
- Tapestry needle: To weave in any loose threads.
- Button or Pearl: For the final closure of the wallet.
- Silicone glue: To secure loose threads for added durability.
Step-by-Step Instructions
Base of the Wallet
- Start with Chains:
- Make an initial knot and create 23 chains.
- First Row:
- Begin from the second chain and create single crochets (SC) across each chain.
- When you reach the last chain, add 4 single crochets in the same loop to round the edge.
- Begin from the second chain and create single crochets (SC) across each chain.
- Second Side:
- Work single crochets along the loops on the opposite side of the chains while hiding the initial thread.
- Last Loop:
- In the last loop, make 4 single crochets to create a rounded end.
- You will complete the first row with a total of 49 single crochets.
- Subsequent Rows:
- From here, do not close the rows. Instead, work single crochets in consecutive rows without joining.
- Tip: Use a stitch marker to mark the last stitch of each row and avoid losing track.
- Continue for 16 rows, ensuring each row has 49 stitches to grow the base.
- Finish the Base:
- After finishing the 16 rows, cut the thread, and use a tapestry needle to create an invisible finish.
- Hide the remaining thread through some loops and secure it with silicone glue for durability.
Making the Closing Flap
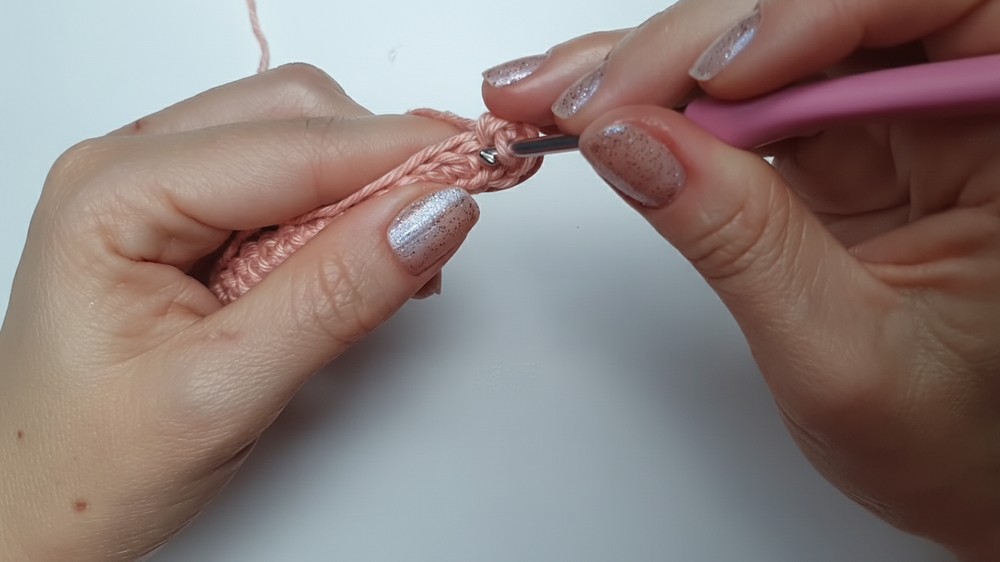
- Start with a Magic Ring:
- Begin with a magic ring and chain 3 chains.
- First Row:
- Inside the magic ring, create 2 double crochets, chain 3, and add 3 more double crochets. Close the magic ring to form your fan shape.
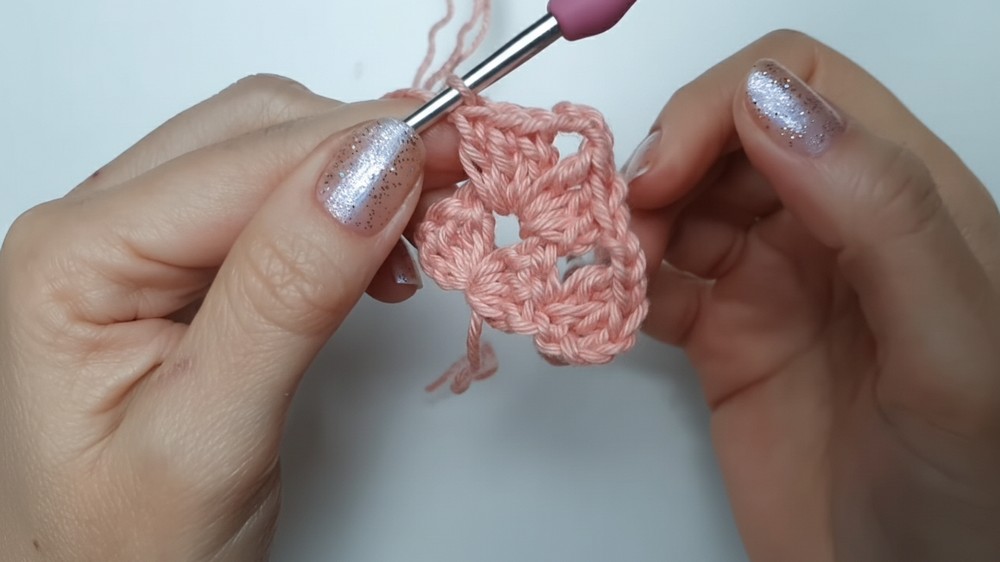
- Work Back-and-Forth Rows:
- Turn the piece and chain 3 more stitches at the beginning of each row.
- Add 2 double crochets at the beginning and end of each row for symmetrical growth.
- Create fans (3 double crochets, 3 chains, 3 double crochets) in the middle of each row.
- Continue Expansion:
- Repeat the increases for 4-5 rows until the flap reaches the desired size.
- Once completed, create single crochets all along the edges of the flap to give it a polished finish.
Joining the Pieces
- Align the Flap with the Wallet Base:
- Place the finished flap over the back of the wallet and align them carefully.
- Slip Stitch to Join:
- Using only the back loops of both pieces, make slip stitches to join the flap to the base.
- Ensure a relaxed tension while stitching to maintain a neat finish.
- Complete the Connection:
- Continue stitching all around the edges until the flap is securely attached to the wallet base.
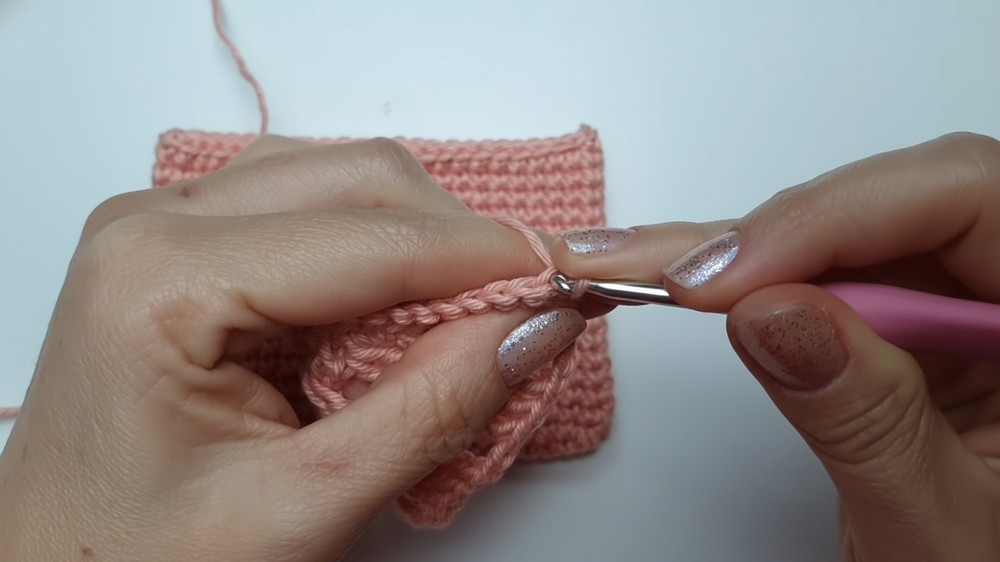
- Continue stitching all around the edges until the flap is securely attached to the wallet base.
Making the Handle (Optional)
- Crochet the Chains:
- Create a chain of 54 stitches to make a handle loop. Customize the number of chains depending on the user’s hand size.
- Slip Stitch:
- Connect the chain into a loop by making a slip stitch at the start.
- Work a row of slip stitches along the chains to strengthen the handle.
- Secure the Handle:
- Fasten the thread and secure the leftover yarn with silicone glue for durability.
Adding a Button
- Select a Button:
- Use a regular button, pearl, or crochet a custom button as per your preference.
- Attach the Button:
- Position the button in the middle of the flap, ensuring it aligns properly with the wallet’s front.

- Secure the button tightly with knots and pass the thread through the inner stitches, so it does not tangle or loosen.
- Secure using silicone glue for additional stability.
- Position the button in the middle of the flap, ensuring it aligns properly with the wallet’s front.
Tutor’s Suggestions
- Color Customization: Choose colors that match your preference or your giftee’s liking. The wallet looks attractive in both solid or dual-tone combinations.
- Practical Finishing: Use silicone glue to ensure lasting durability, especially for securing loose threads.
- Watch Your Tension: Keep your tension consistent to create clean, even stitches.
- Simple Modifications: You can easily adjust the size by increasing the number of rows for the base or chains for the handle.
Level of Difficulty
This project is beginner-friendly and ideal for anyone starting with crochet. If you’re new, Deisi’s clear and thorough instructions make it easy to follow along. If you’re more advanced, you can enjoy experimenting with color combinations or even adding decorative elements.
Uses
- A beautiful and functional wallet for carrying documents and cards.
- Thoughtful and handmade gifts for family and friends during holidays or special occasions.
- A perfect starting project for beginners to practice foundational crochet techniques.
- A versatile piece for selling in craft markets or adding to your product collection.
Conclusion
This no-sew crochet wallet tutorial is a perfect blend of simplicity and creativity. Featuring practical and thoughtful design, it is easy to make yet yields a polished and professional look. Whether you create it as a gift, for personal use, or for selling, this project showcases the beauty of handmade craftsmanship.
Pro Tip
"Always use a stitch marker to avoid losing your place when working continuous rounds without joining. It will help you maintain consistent rows and prevent mistakes along the way."

This wallet is ideal for carrying essentials such as cards, cash, and small documents, all while remaining compact and lightweight for everyday use. The seamless construction not only enhances durability but also adds to its sleek aesthetic appeal.


