
Enhance décor with this Crochet 3D Rose Flower Pattern for lifelike, textured bloom that offer charm, elegance, and add beauty to any project.
Add a touch of sophistication to your décor or accessories with this intricate Crochet 3D Rose Flower Pattern. Perfect for embellishing garments, home accents, or handmade gifts, these lifelike blooms instantly elevate the charm of any project. The three-dimensional design gives the roses a realistic and delicate appearance, making them stand out beautifully on headbands, brooches, cushions, or wall hangings.
Lush Crochet 3D Rose Flower Pattern You’ll Love Creating
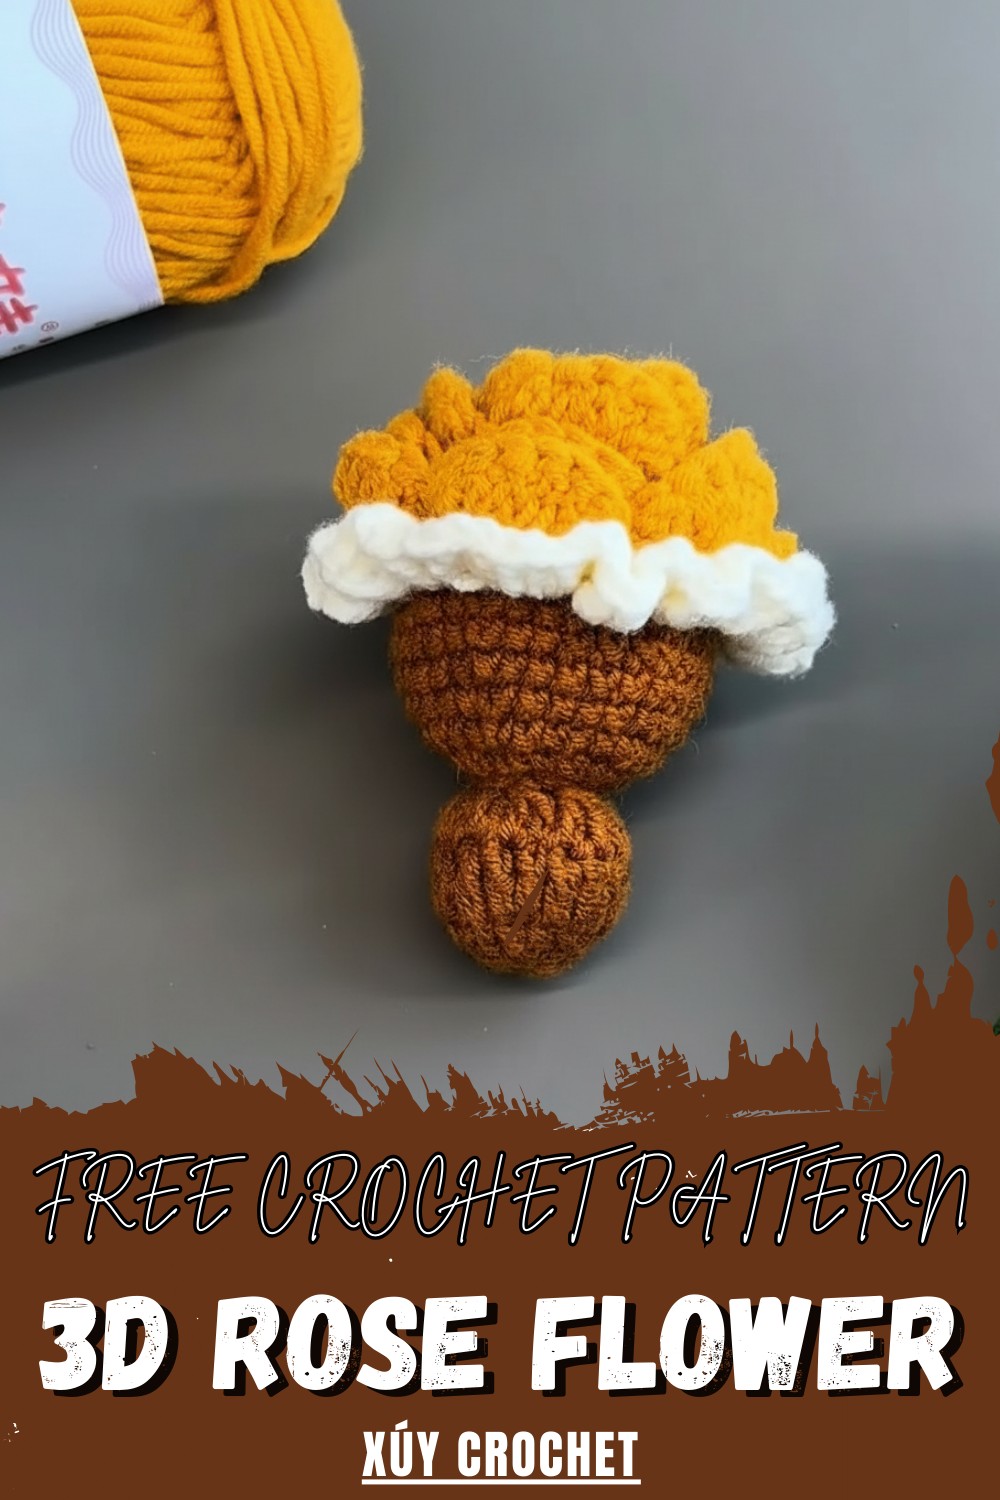
Crocheted with soft yarn, each petal unfolds naturally, offering a tactile and visually appealing texture that enhances both casual and elegant creations. Beyond decoration, this pattern provides a relaxing and rewarding experience for crocheters of various skill levels, encouraging creativity while improving precision and stitch techniques.
The versatility of this design allows for experimenting with colors, sizes, and arrangements, letting every project become uniquely personal. Whether used as a standalone flower or in a bouquet ensemble, these 3D roses bring elegance, depth, and handmade charm to every creation.
How to Crochet a Beautiful Mini Rose Bouquet
1. Materials Needed
- Four-ply yarn
- 2.0 mm crochet hook
- Fiberfill: For shaping the bouquet holder.
- Tapestry needle: To sew and weave the yarn ends.
- Stitch markers: To keep track of rounds.
- Scissors: For cutting yarn neatly.
- Optional: A hot glue gun (for securing the final piece).
2. Make the Mini Rose
Step 1: Foundation Chain
- Start by making a slip knot and hold your yarn comfortably.
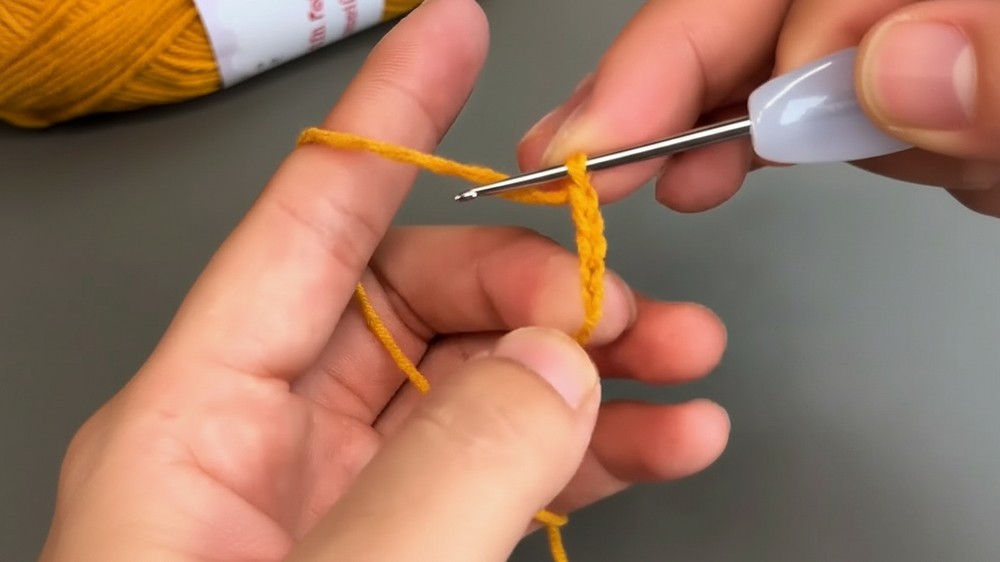
- Chain 53 stitches (the first chain doesn’t count as a stitch).
Step 2: First Row
- Work single crochet stitches across the chain:
- Skip the first chain.
- Insert your hook into the second chain from the hook, yarn over, pull up a loop, then yarn over and pull through both loops (single crochet).
- Repeat across for 52 single crochets.
3: Second Row (V-Stitches):
- Chain 5 to begin and turn your work.
- Work a V-stitch pattern as follows:
- Double crochet (DC) into the first stitch.
- Skip two stitches, then DC, Chain 2, and DC into the same stitch.
- Repeat the V-Stitch pattern across the row.
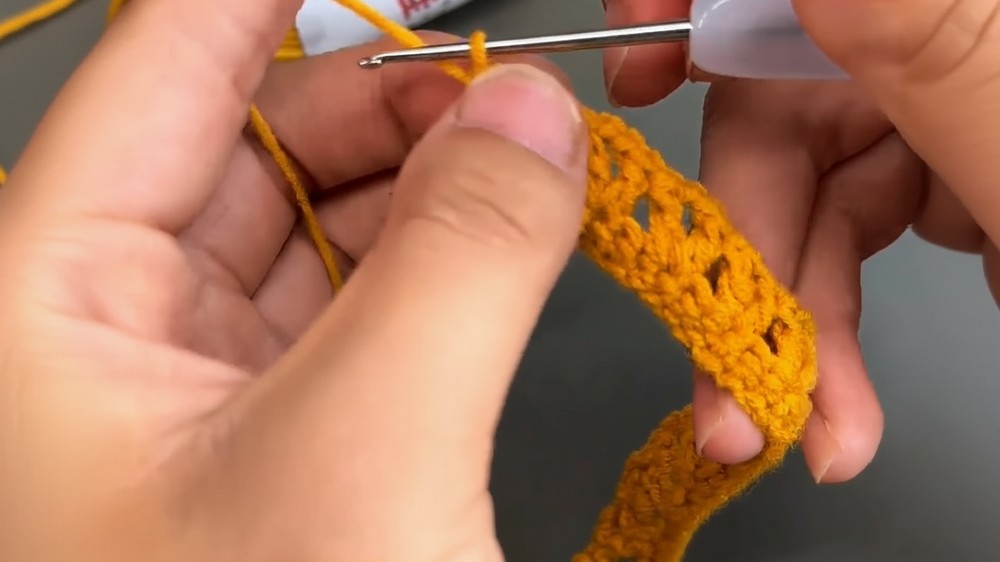
4: Third Row
- Chain 3 and turn your work.
- In each chain-2 space (from the V-Stitch), work 2 double crochets, chain 2, and 2 double crochets. This row creates shell stitches.
5: Fourth Row (Petals)
- Chain 1 to begin.
- Into each large chain-2 space, work 8 double crochets (this forms the petals).
- Slip stitch into the small space between the previous double crochets, chain 1, and repeat.
Final Step for Rose:
- At the end, slip stitch to the final double crochet, chain 1, leave a long yarn tail, and cut the yarn.
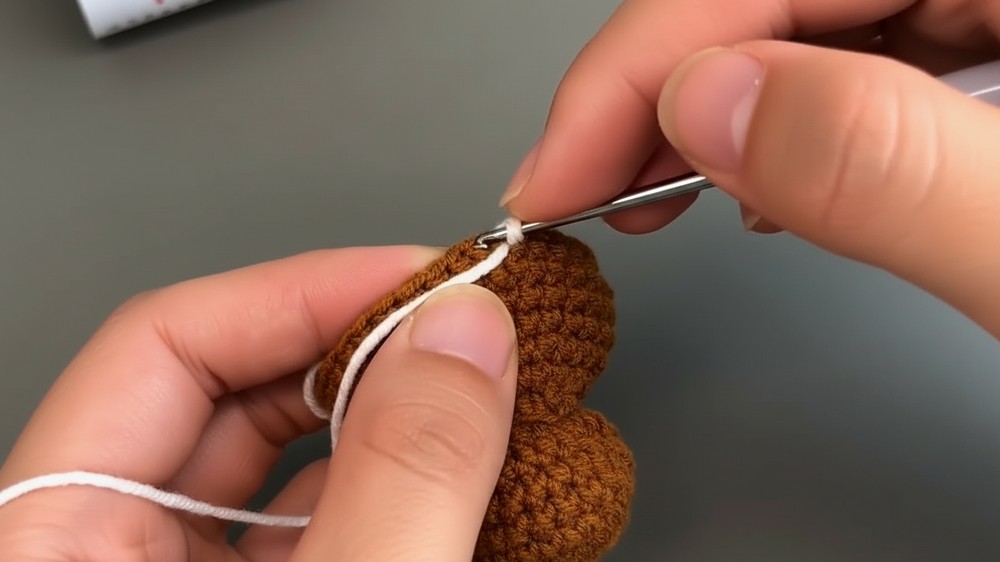
- Use the long yarn tail to roll the crocheted strip into a rose, keeping the base tight.
- Using a tapestry needle, sew through the rose’s base to secure its shape. Sew from different directions to ensure stability.
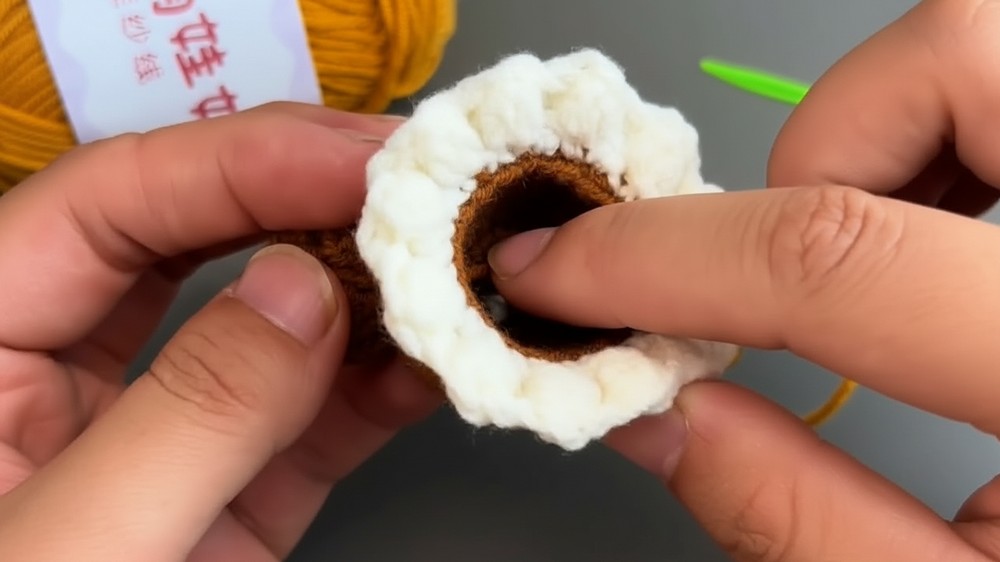
3. Create the Bouquet Holder
Step 1: Base of Holder
- Begin with a magic ring.
- Chain 3 and crochet 12 double crochets into the ring. Use a stitch marker to track your rounds, if needed. Slip stitch to close the round.
2: Increase Rounds
- Round 2: Chain 3 and alternate 1 double crochet in one stitch and 2 double crochets in the next stitch (increase) for a total of 6 repeats.
- Round 3: Add double crochet groups (DC3tog) across six sets. Add a bit of fiberfill to shape the holder.
3: Single Crochet Rounds
- For several rounds (rounds 4–10), work waste coat single crochets (a neat variation of single crochet) in even patterns, such as alternating increases or non-increases.
- Follow the video’s instructions carefully to shape the holder perfectly.
4: Decorative Lace Edge
- Switch to a contrasting yarn color for the lace edge.
- Work single crochets into the front loop only.
- For the second round, alternate between 3 double crochets into the front loop and 3 double crochets into the back loop. This creates a delicate and decorative lace border.
- Finish by weaving in all the yarn ends using a tapestry needle.
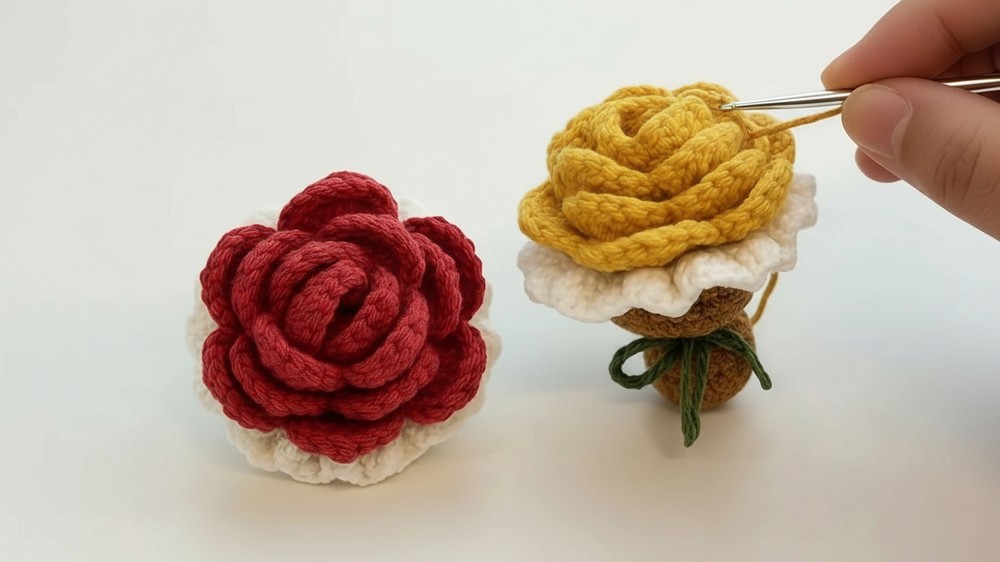
4. Assemble the Mini Rose Bouquet
Attach the Rose to the Holder:
- Either glue the rose to the holder using a hot glue gun or sew it.
- If sewing, use the rose's remaining long yarn tail. Stitch through the back loops of the holder, securing them firmly at the rose's base.
Final Touch:
- Add a small yarn bow by tying a contrasting yarn around the bouquet’s base. Adjust the loops and trim the ends for a neat finish.
Special Features
- Beautiful Decoration: The delicate mini rose and lace-edged holder create an elegant, artistic piece.
- Beginner-Friendly: The project uses simple stitches (single crochet, double crochet, shell stitch) suitable for anyone starting with crochet.
- Customizable Design: Adjust colors, size, and embellishments to personalize your bouquet.
- Versatility: Use the bouquet as a gift, centerpiece, or home decor.
Level of Difficulty
This project is suitable for beginners who have basic experience with single and double crochet stitches. The step-by-step instructions make it easy to follow, regardless of skill level.
Tutor’s Suggestions
- Take Your Time: Go slowly with the shell stitches and petals to ensure precision.
- Use Stitch Markers: Place markers at the beginning of each round to avoid losing track.
- Adjust Fiberfill: Use small amounts of fiberfill so the bouquet holder has a neat, rounded shape.
- Practice Tension: Keep consistent tension when rolling and sewing the rose to create a polished look.
Uses and Materials
Uses:
- Gifts: Ideal for Mother’s Day, birthdays, or weddings.
- Decor: Perfect as a table centerpiece, desk accessory, or small decor item.
- DIY Keepsakes: Cherish your handmade bouquet as a sentimental creation.
Materials Recap:
- Four-ply yarn, 2.0 mm crochet hook, fiberfill, scissors, stitch markers, tapestry needle, optional hot glue gun.
Pro Tip
When adding the decorative lace edge, ensure even stitches by alternating between the front and back loops consistently. It will create a clean and professional finish.
Conclusion
This crochet mini rose bouquet project combines simplicity and elegance, making it perfect for beginners and seasoned crocheters alike. With its versatile uses and customizable design, it’s an excellent addition to your crochet repertoire.


