
Celebrate the holiday with this Crochet Christmas Characters Pattern, perfect for festive décor, playful gifts, and joyful crocheting fun.
Festive charm comes alive as tiny figures take shape, bringing the warmth and joy of the holiday season into any home. Perfect for decorating Christmas trees, creating playful seasonal displays, or gifting to loved ones, these characters add personality and cheer to holiday celebrations. The Crochet Christmas Characters Pattern guides each step with clear instructions and careful shaping, allowing makers to craft detailed, expressive figures that capture the spirit of the season.
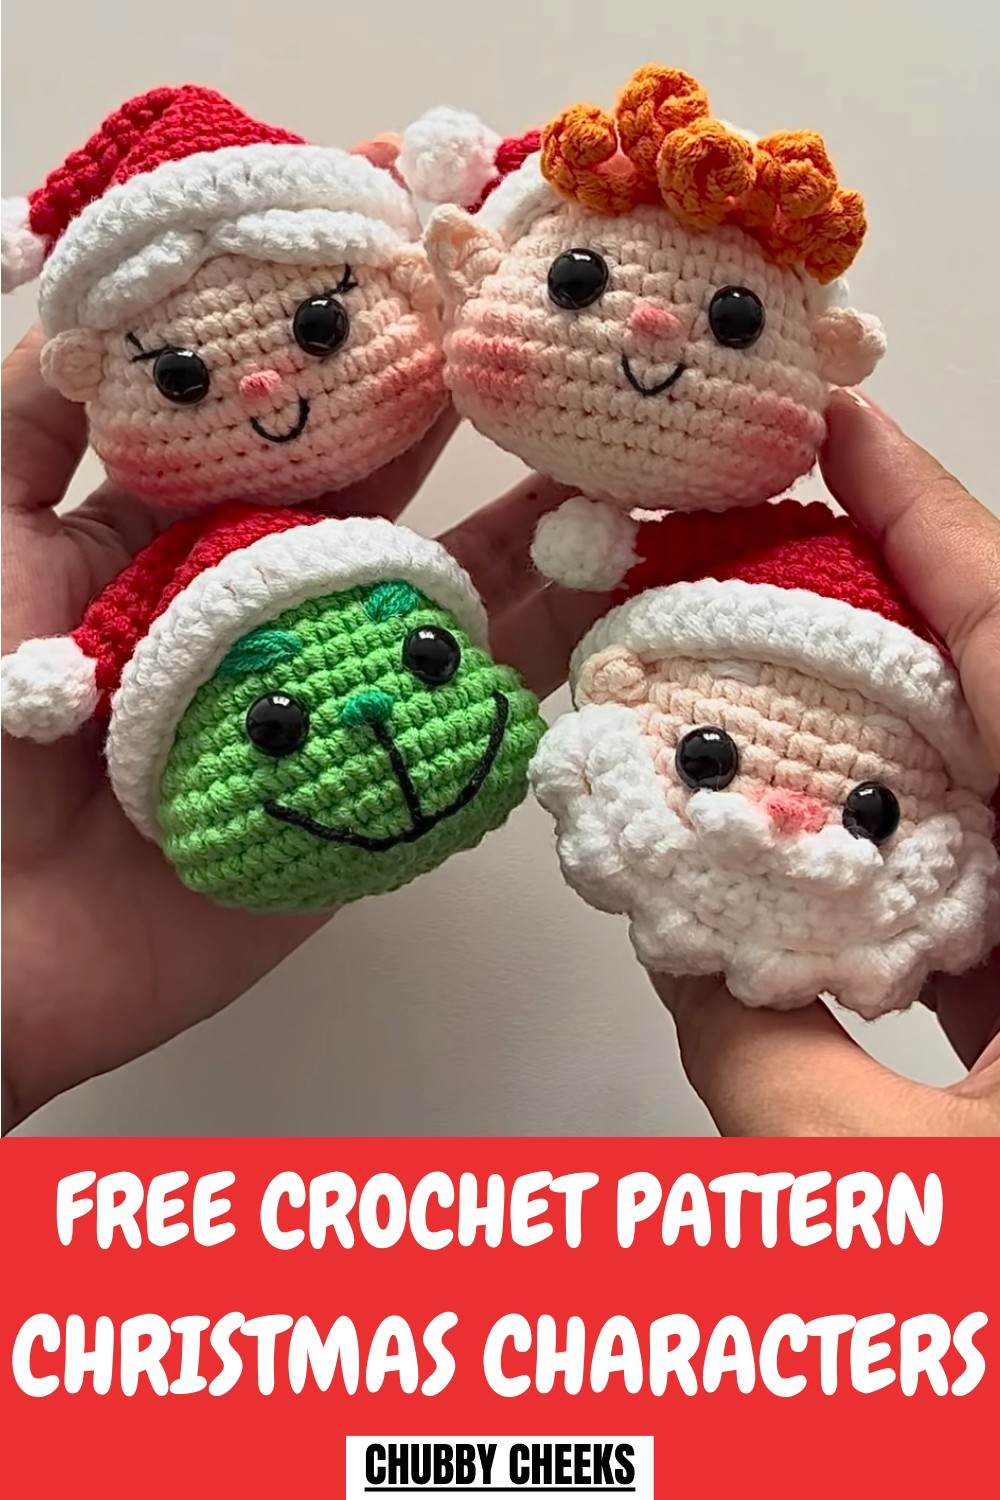
Adorable Crochet Christmas Characters Pattern for Holiday Decor
From Santa Claus and reindeer to snowmen and elves, each character features intricate details and playful textures that make them both delightful and visually engaging. The pattern encourages personalization through color choices, accessory variations, and size adjustments, giving each finished piece a unique and charming personality.
Once complete, the figures can be displayed on mantels, shelves, or as ornaments, or incorporated into festive centerpieces, adding a handmade touch that elevates any décor. Combining creativity, holiday spirit, and detailed craftsmanship, this pattern transforms simple materials into enchanting characters that fill spaces with warmth, cheer, and the unmistakable magic of the Christmas season.
Step-by-Step Project Details
1. The Universal Head Base
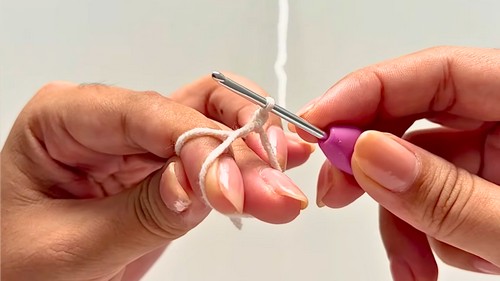
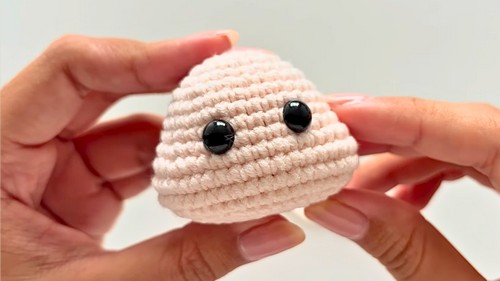
All four characters share a similar head structure using a magic ring and single crochet (SC) rounds.
-
Rounds 1–3: Start with 8 SC in a magic ring, then increase to 16, and then 24.
-
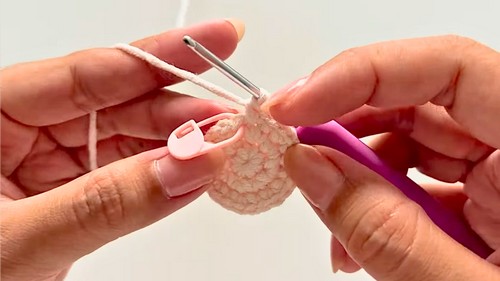
Rounds 5–10: Increase to 32 stitches, then create the "chubby cheek" shape by adding specific increases (SC + Increase sets) in Rounds 9 and 10.
-
Safety Eyes: Attach 8mm safety eyes between Rounds 8 and 9, spaced 5 stitches apart.
-
Closing: Stuff the head firmly, pushing fiberfill into the cheeks for a rounded look, and decrease until the hole is small enough to sew shut.
2. Character-Specific Facial Features
-
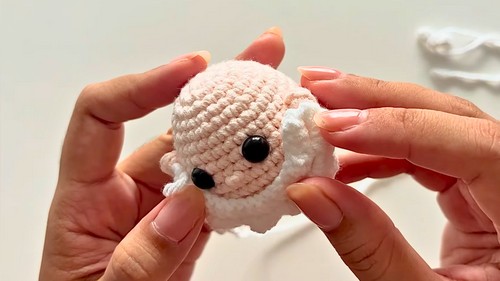
The Nose: For all characters, sew a small raised loop of yarn between the eyes.
-
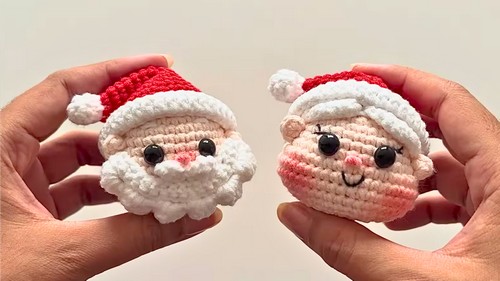
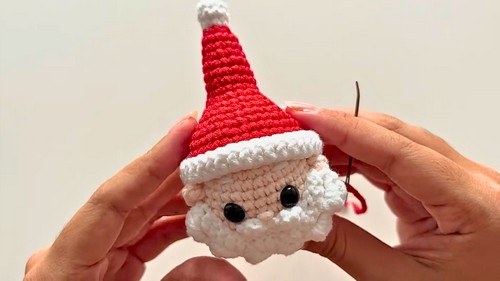
Santa's Beard & Mustache: Crochet a white beard with a scalloped edge and a small two-part mustache, then sew them right under the nose.
-
Mrs. Claus: Add dainty eyelashes and a small pink mouth. Crochet two white hair strands to peek out from under her hat.
-
The Elf: Crochet pointed ears directly onto the head. Add a bright orange "spiky" hair fringe across the forehead.
-
The Grinch: Use green yarn for the head and darker green for his signature furrowed eyebrows and a wide, slightly mischievous mouth.
3. The Iconic Christmas Hat
Each character wears a classic pointed hat.
-
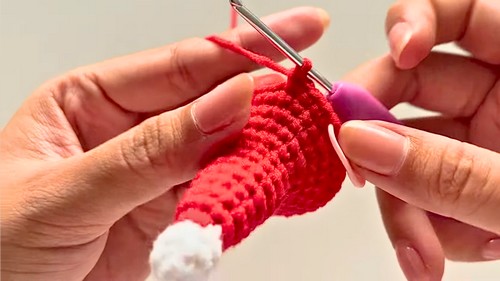
The Tip: Start with white yarn for a small "pom-pom" ball, then switch to red (or green for the Elf).
-
Shaping: Increase gradually over 20 rounds to create a cone shape that fits over the head.
-
The Trim: Finish the base of the hat with a row of white double crochets worked in the "front loop only" to create a fluffy-looking texture.
4. Assembly & Finishing
-
Sewing the Hats: Place the hats on the heads and pin them in place. Sew through the base of the hat into the head. For Mrs. Claus and the Elf, ensure you sew the hair strands into the hat seam so they stay positioned.
-
Folding the Tip: Fold the point of the hat over and secure it with a single stitch to give it a relaxed, "slouchy" look.
-
Blush: Use regular makeup blush and a brush to add rosy color to the cheeks and noses of Santa, Mrs. Claus, and the Elf for a healthy, winter glow.
Project Specifications
-
Materials:
-
Yarn: Milk cotton yarn (colors: skin tone, red, white, green, orange, and dark green).
-
Hook: 2.5mm crochet hook.
-
Eyes: 8mm safety eyes.
-
Stuffing: Polyester fiberfill.
-
Tools: Stitch markers, tapestry needle, pins, and cosmetic blush.
-
-
Special Features:
-
Unified Design: The shared head pattern makes it easy to mass-produce the base for all four characters.
-
Chubby Cheeks: Specific increase patterns in the lower face create a distinct "kawaii" or "amigurumi" style.
-
-
Level of Difficulty: Easy to Intermediate. While the stitches are basic (SC, DC, increases, and decreases), the small-scale sewing and facial embroidery require patience and a steady hand.
-
Uses: Perfect for Christmas tree ornaments, holiday bag charms, or festive table decorations.
Tutor's Suggestions
-
Stitch Markers: Use markers for the first stitch of every round to avoid losing your place in the spiral.
-
Stuffing Technique: Don't just fill the center; use your fingers to push stuffing specifically into the "cheek" increases to emphasize the character's face shape.
-
Tension: Keep your tension consistent so the safety eyes sit flat against the fabric and the stuffing doesn't peek through the stitches.
Conclusion
These Christmas characters offer a wonderful way to practice amigurumi basics while creating something truly special for the holidays. By changing just a few colors and adding small details like a beard or eyelashes, you transform a simple green or peach sphere into a beloved holiday icon. Once completed, these ornaments serve as a charming reminder of the warmth and creativity of handmade gifts.
Pro Tip
When sewing the mustache and beard onto Santa, leave a small gap between the two pieces. This allows the nose to stand out more clearly and gives the face a more expressive, 3D appearance!


