
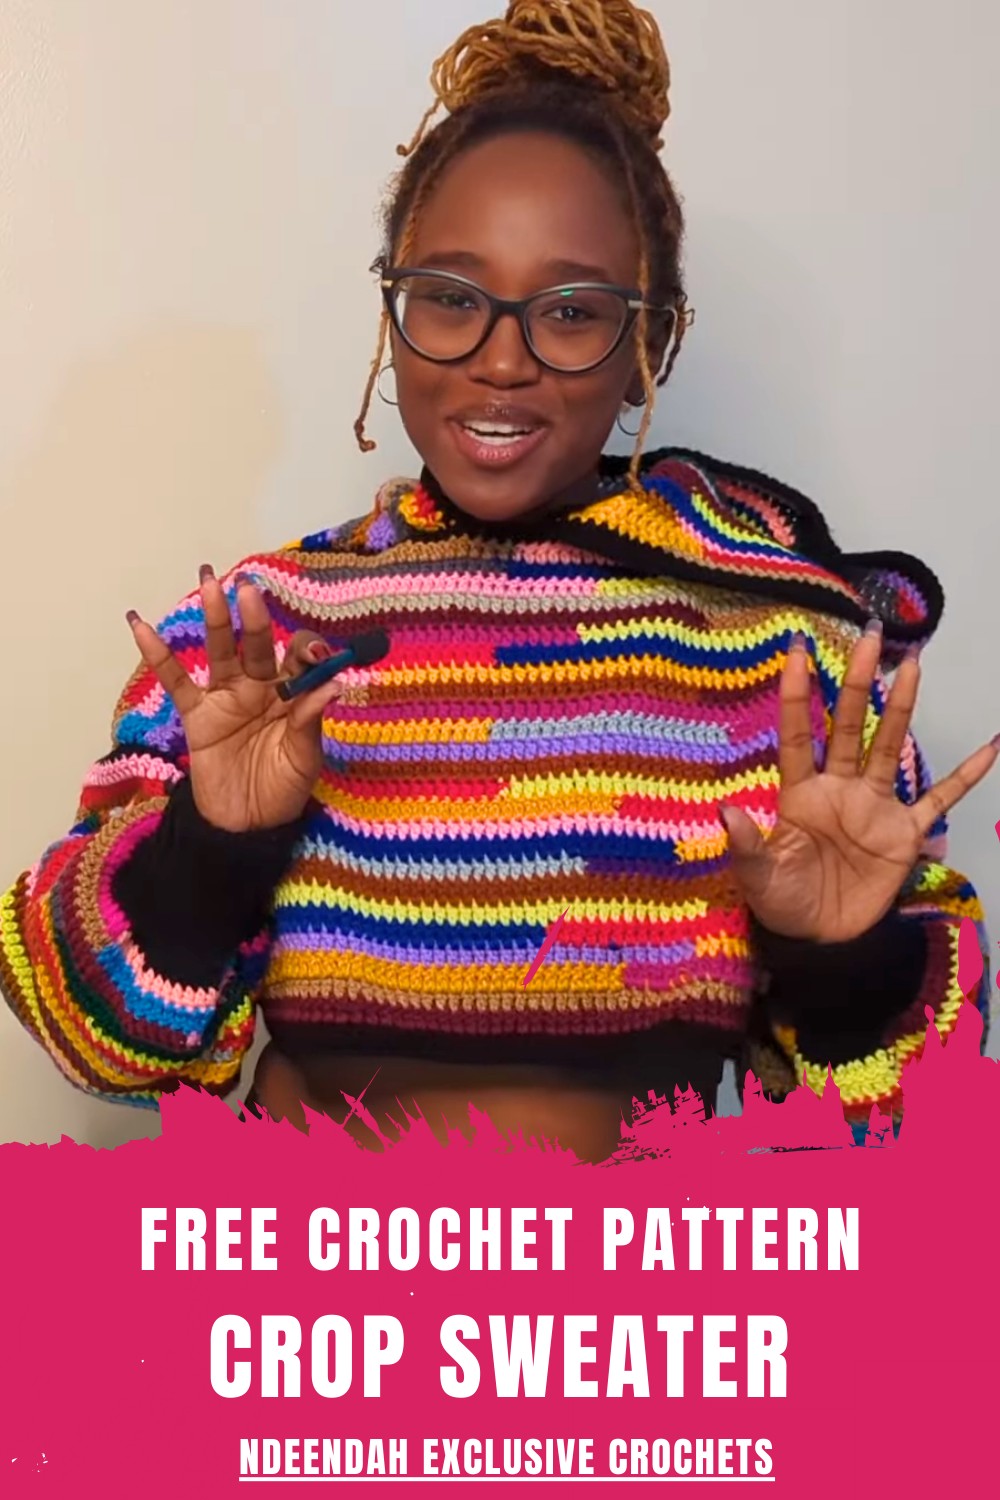
Step into chic style with this Crochet Crop Sweater Pattern for trendy, textured that offer comfort, flair, and casual elegance every day.
Effortlessly blending style and comfort the Crochet Crop Sweater Pattern creates a versatile garment that elevates any outfit. Its breathable open stitches offer flexibility and movement while the cropped fit highlights a modern flattering silhouette. The piece can be personalized through yarn type, color, and sleeve length producing a unique garment that reflects individual style.
Effortless Crochet Crop Sweater Pattern to Elevate Your Style
Step-by-step instructions make the project enjoyable and rewarding supporting creativity and skill development for both beginners and experienced crocheters. The finished piece drapes gracefully combining softness and structure and adding a handmade polished charm to any wardrobe. Lightweight yet stylish it pairs beautifully with skirts pants or shorts making it ideal for casual or semi-formal wear.
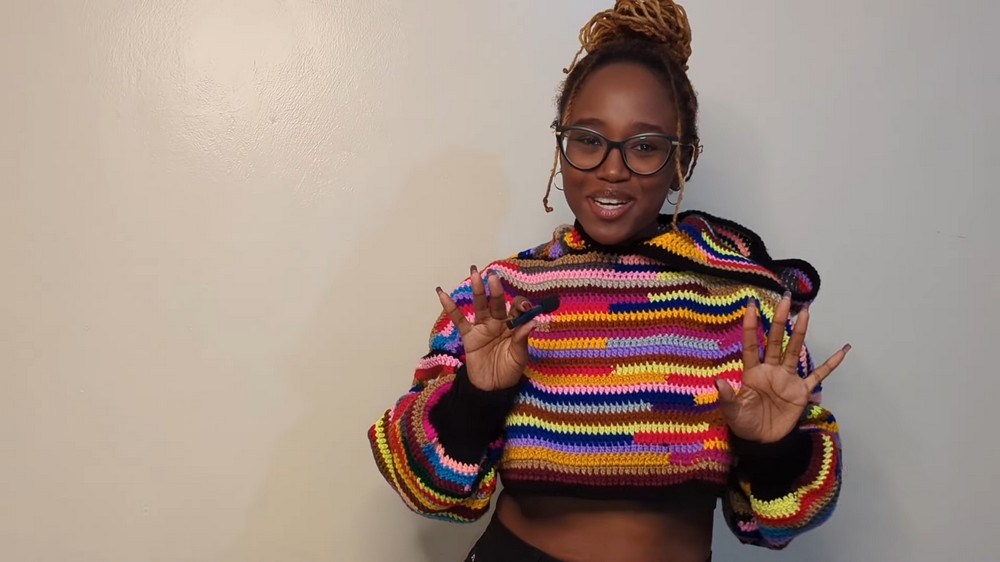
Beyond fashion the project encourages artistic expression and a sense of accomplishment. Combining timeless crochet techniques with contemporary design this pattern delivers a chic functional and wearable garment that enhances every ensemble with elegance and flair.
Step-by-Step How to Crochet Cropped Sweater
1. Materials Needed
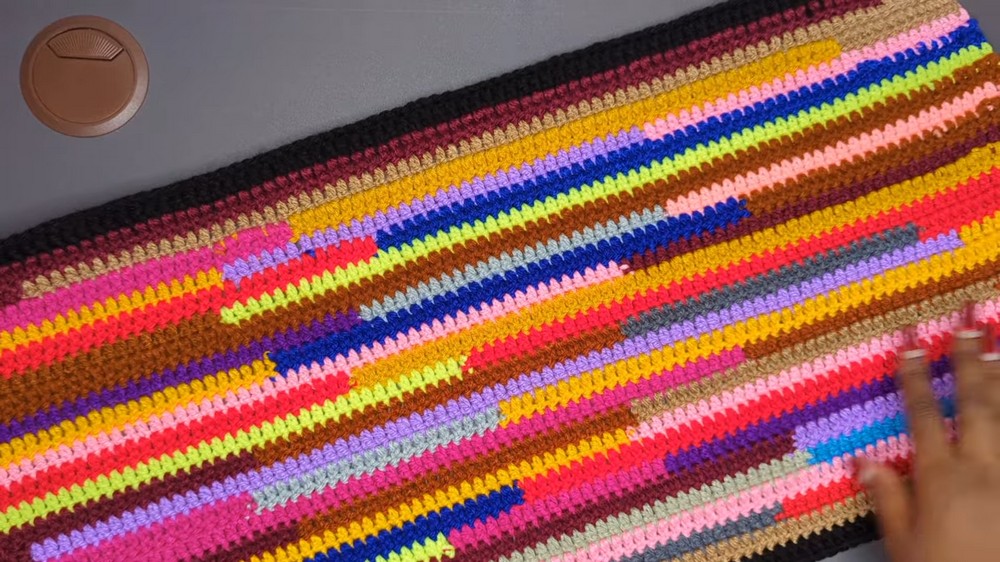
- Scrap Yarn: A selection of leftover yarns. Start and end with a solid neutral color (e.g., black or white) to maintain a polished look.
- Crochet Hooks: A 4.5mm hook for the main project and a smaller 4.0mm hook for cuffs and seam definition.
- Darning Needle (Optional): For attaching panels (if not using the crochet hook).
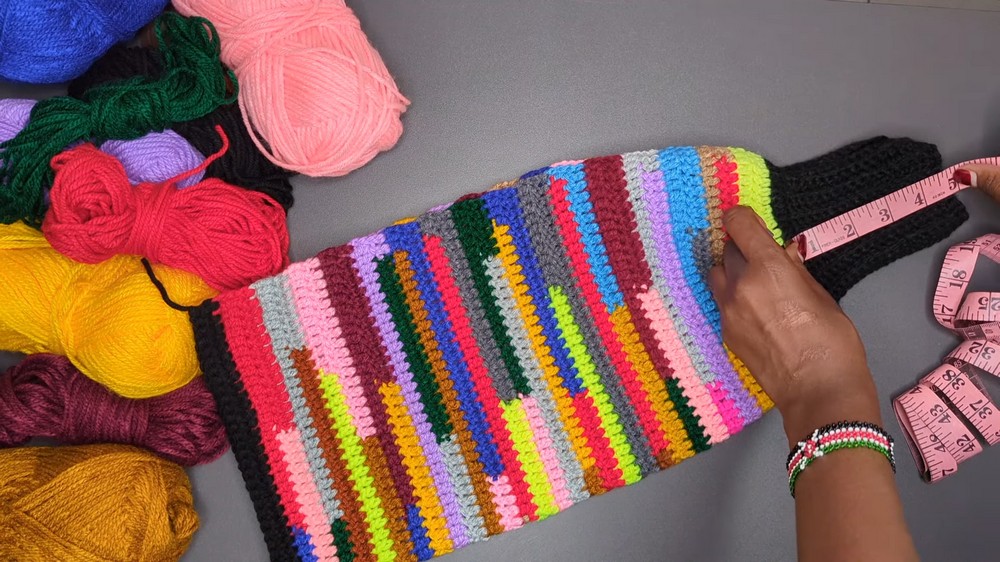
- Tape Measure: For measuring panel sizes.
- Scissors: To trim yarn ends.
- Stitch Markers: To secure points during attachment.
2. Create the Panels
Front and Back Panels:
- Make the Foundation Chain: Chain an even number of chains depending on the desired width of your sweater:
- Example: For the tutorial, the tutor worked 90 chains for the front panel (cropped sweater width).
- Work Double Crochets:
- In the second chain from the hook, begin working double crochets (DC) in each chain until the end of the row.
- Attach new yarn colors from your scrap supply as needed. Use a basic knot to attach the yarn securely, then sew in loose ends as you crochet.
- For subsequent rows, chain 2, turn your work, and continue working double crochets across the row (using scrap yarn).
- Repeat Until Desired Length: For a cropped sweater, work fewer rows. The front panel in the tutorial was 13 inches long (around 20 rows).
- Repeat for the Back Panel: Create an identical back panel with the same dimensions as the front panel.
3. Crochet the Sleeves
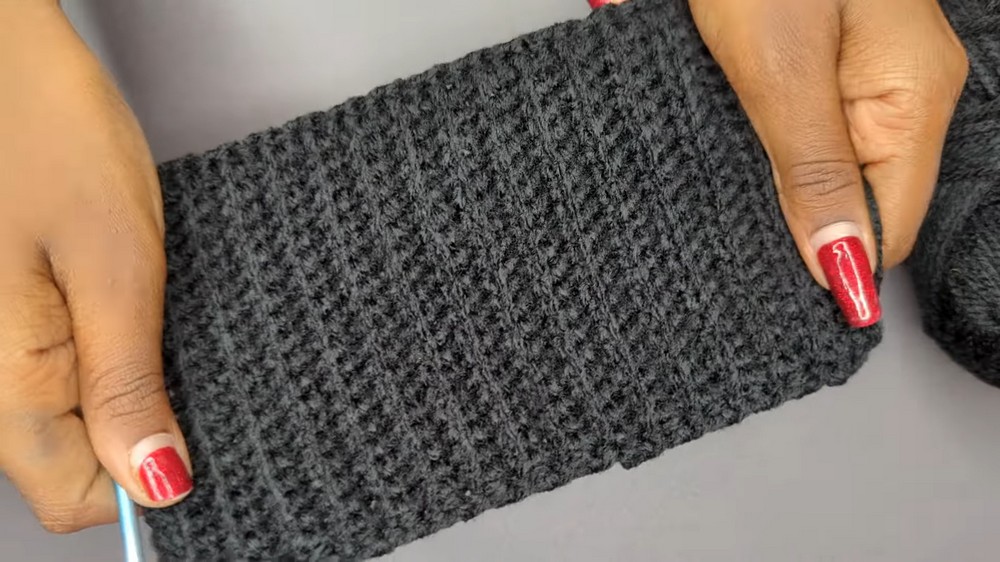
Cuff:
- Use a 4.0mm Hook for Ribbing: Chain 20 chains (or enough to achieve 4 inches wide for the cuff).
- Single Crochet into the Back Loop Only: Work single crochets (SC) into the back loop of each stitch to create a ribbing pattern.
- Repeat until the cuff’s width matches your shoulder measurement. The tutorial created 32 rows for the cuff.
Sleeve Body:
3. Switch to a 4.5mm Hook: Attach the main yarn and begin working double crochets across every row of the cuff.
- Increase Stitches in the Foundation Row: Work 2 double crochets in each ribbing row to create the wavy foundation.
- Work in Scrap Yarn: Use normal double crochets for the sleeve’s body without increases. Attach additional yarns as needed using the same knotting method.
- Repeat Until Desired Sleeve Length: For the tutorial, the sleeve length was 20 inches (34 rows).
Make the Second Sleeve: Work another sleeve identical to the first.
4. Crochet the Hood
- Foundation Chain for the Hoodie Body: Chain 50 chains to create the hoodie’s width.
- Complete 20 rows of double crochets for the main body of the hood.
- Complete 20 rows of double crochets for the main body of the hood.
- Decrease for the Rounded Top:
- Leave the last 3 stitches unworked on each end from row 21 onward.
- Continue decreasing until you complete 10 rows with this method.
- Make Two Identical Parts: Crochet a second hood panel with the same size and dimensions.
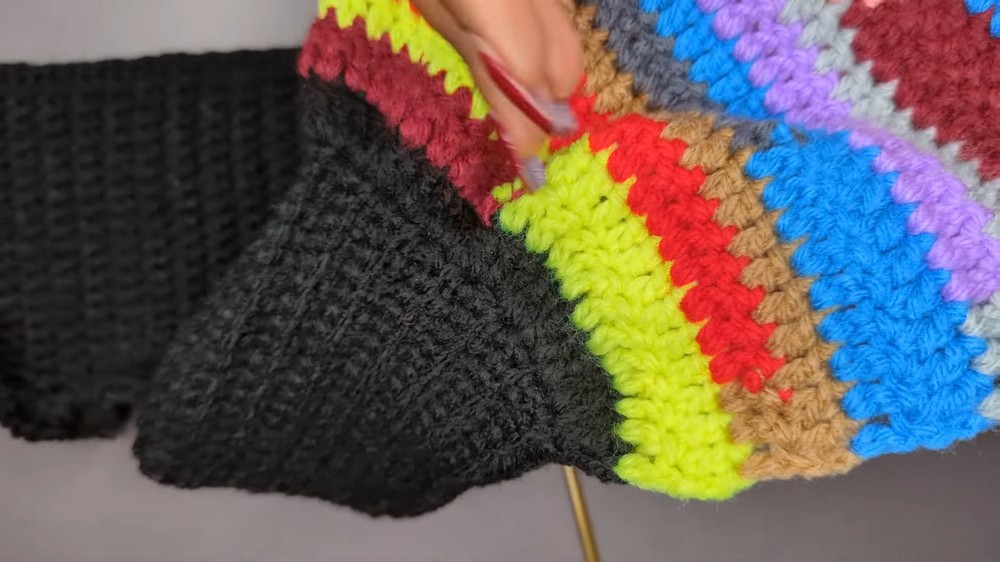
- Join the Hood Pieces: Sew the two hood panels together using single crochets or a darning needle to form a seam. This creates the rounded hood structure.
5. Assemble the Sweater
Attach the Hood to the Panels:
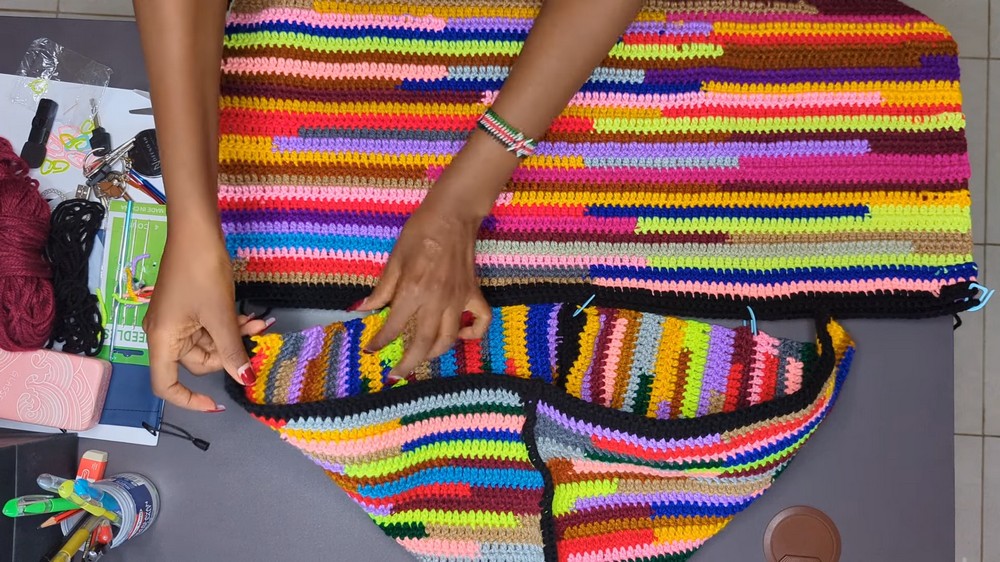
- Find the Back Center Point: Fold the back panel in half and place a stitch marker in the center.
- Line Up the Hood: Match the center back of the hood to the stitch marker on the back panel. Use additional markers to attach the edges of the hood to the panels.
- Single Crochet the Hood in Place: Work single crochets along the edges to attach the hood securely to the sweater panels.
Attach the Sleeves:
4. Mark the Center of the Sleeve: Fold the sleeve in half and mark the midpoint with a stitch marker.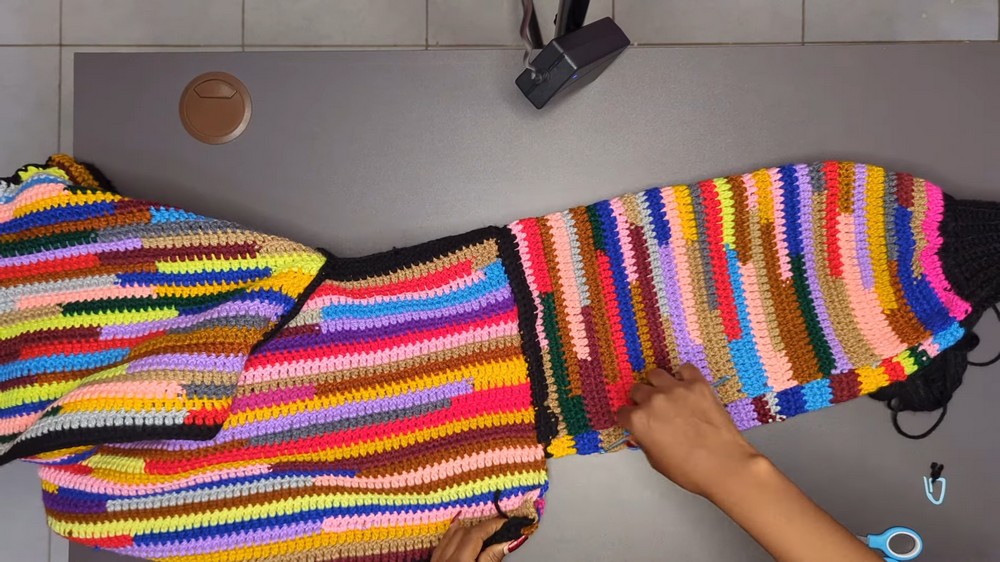
- Line Up sleeve with the Shoulder Seam: Attach the sleeve’s midpoint to the shoulder seam.
- Secure to Front and Back Panels: Use single crochets or a darning needle to join the sleeve to the front and back panels.
Seam the Body and Sleeves:
7. Fold the Sweater Inside Out: Seal the sweater by joining side seams and sewing the sleeve edges closed. Use single crochets (or a darning needle) from the cuff up to the shoulder.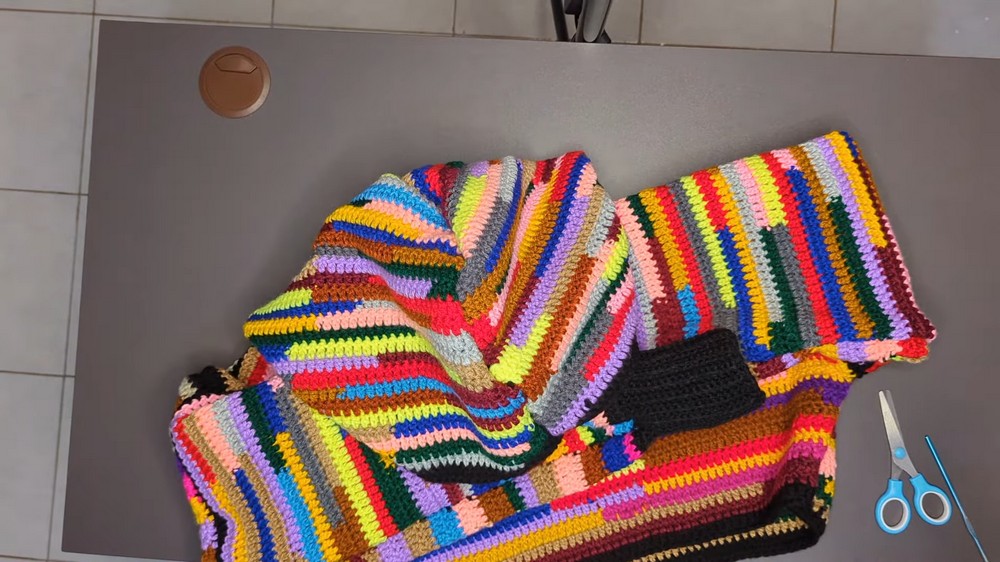
Special Features
- Sustainable Project: This sweater repurposes leftover scrap yarn, minimizing waste.
- Beginner-Friendly: Double crochets are the primary stitch used, with only slight variations for details like ribbing (single crochets in the back loop only).
- Customizable Design: The cropped length, hoodie, and sleeve width can be easily adjusted to personal preference.
- Efficient Use of Tools: The use of two different hook sizes provides defined seam edges and detailed cuffs.
Level of Difficulty
The project is beginner-friendly, and the tutor provides extra guidance on key techniques like joining yarns, working basic stitches, and assembly. Beginners with knowledge of double and single crochets will find this project satisfying and rewarding.
Tutor's Suggestions
- Use a Solid Neutral Color for Seams: When assembling parts, use black or white yarn to make the joining points tidy and seamless.
- Sew in Ends as You Go: This ensures a clean, professional finish and eliminates loose threads protruding from your work.
- Use a Smaller Hook for Details: The cuff, as well as panel seams, look better when crafted with a slightly smaller crochet hook.
- Attach Scrap Yarns Securely: Use strong knots and trim loose ends for neatness.
Uses and Materials
Uses:
- Wear the hoodie for casual outings, layering in colder weather, or as loungewear.
- The design makes it great for gifting or as a project to use up leftover yarn.
Materials:
- Scrap yarn, crochet hooks (4.5mm & 4.0mm), tape measure, scissors, stitch markers, and darning needle (optional).
Pro Tip
Plan Your Scrap Color Order: Arrange your scrap yarns beforehand to create a pleasing sequence of colors. Start and end with a solid color for a polished, cohesive look.
Conclusion
This creative cropped sweater project is a sustainable and stylish way to repurpose scrap yarn. The use of basic stitches, combined with detailed guidance from the tutor, ensures ease of execution and a rewarding result. Perfect for beginners and experienced crocheters alike, this sweater is an excellent addition to your handmade wardrobe.


