
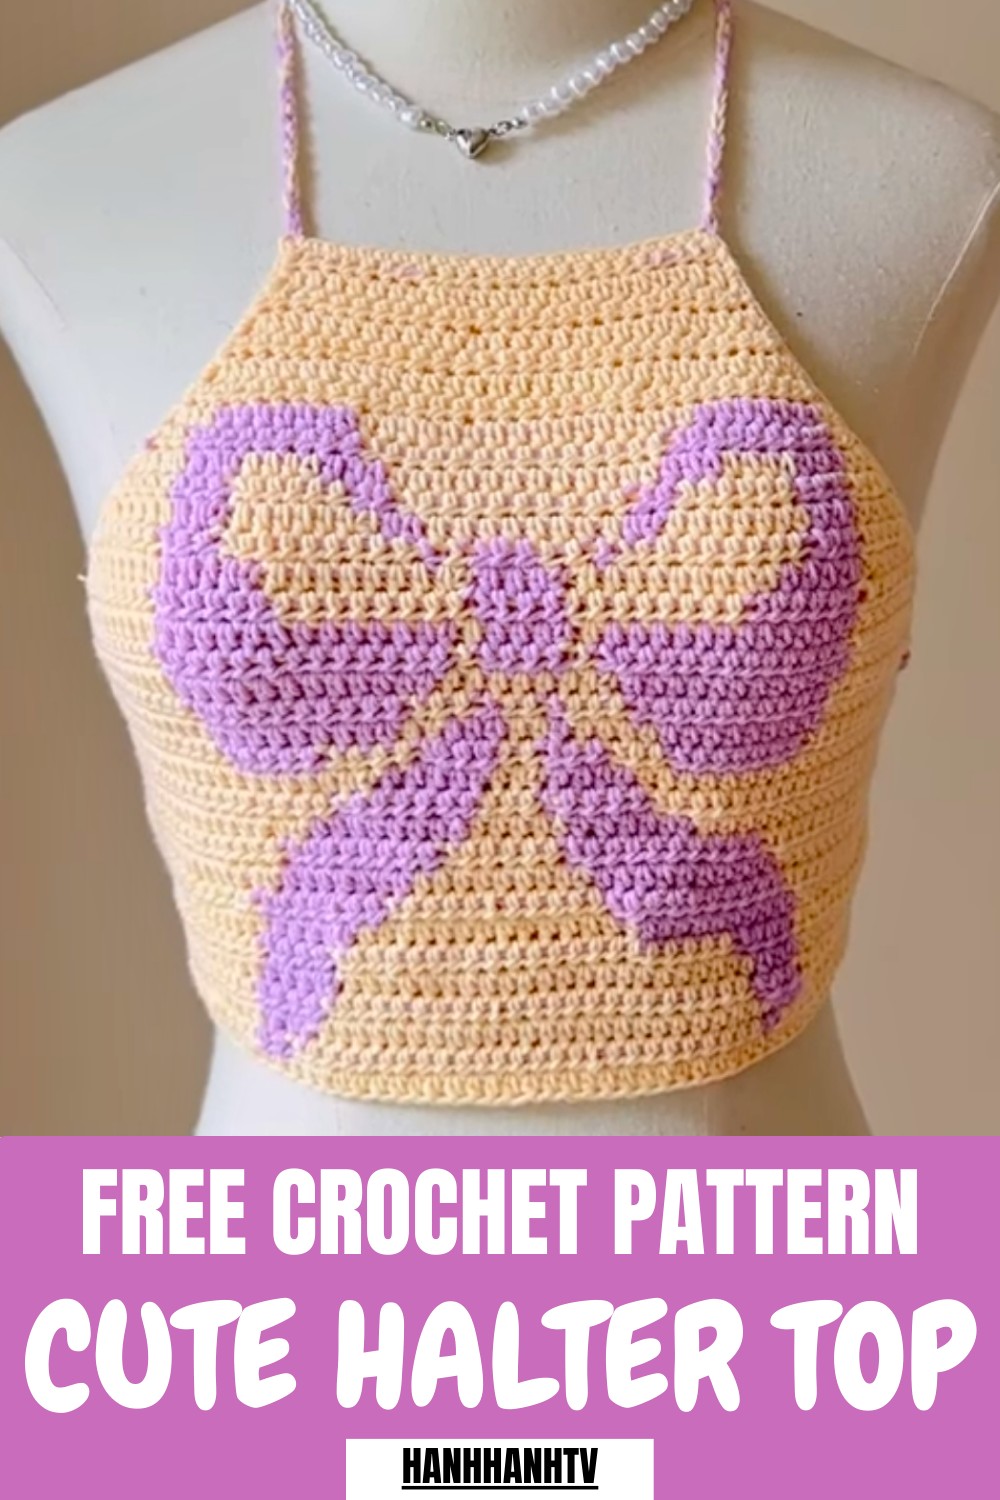
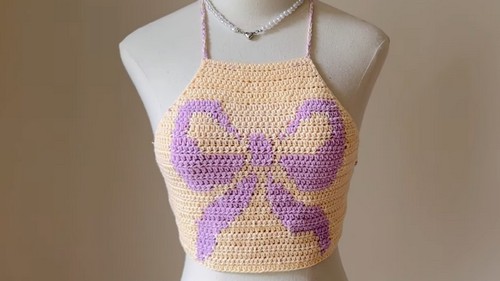
Step out in style with this Free Crochet Halter Top Pattern for breezy, fashionable tops that keep you comfortable and trendy all summer long.
Perfect for warm days or layering under jackets, this stylish top combines comfort with a flattering, breezy design. The Crochet Halter Top Pattern highlights delicate stitchwork that creates both texture and visual appeal, making it a standout piece for casual outings, beachwear, or summer gatherings. Its adjustable fit and lightweight construction ensure freedom of movement while offering support where needed.
Tropical Crochet Halter Top Pattern Ready for Poolside Vibes
The pattern inspires creativity, allowing customization in colors, yarn types, and decorative details to match personal style. Beyond its fashionable appearance, crafting the top provides a relaxing and rewarding experience, turning each stitch into a small achievement.
Versatile and chic, it can be dressed up with accessories or paired with shorts and skirts for a relaxed look. Combining elegance, practicality, and the joy of handmade artistry, the Crochet Halter Top Pattern transforms a simple wardrobe staple into a unique and eye-catching creation.
Step-by-Step Instructions
Materials Needed:
- Yarn: Choose three colors (e.g., white, yellow, and purple). For quantities:
- White: ~100g
- Yellow: ~100g
- Purple: ~50g
- You can adjust based on your preference.
- Crochet Hook: Size 3.5mm.
- Additional Tools: Scissors, sewing needle, sewing pins.
Step 1: Foundation (Base of the Bib)
- Make a knot and crochet 25 chain stitches. This forms the top of the bib.
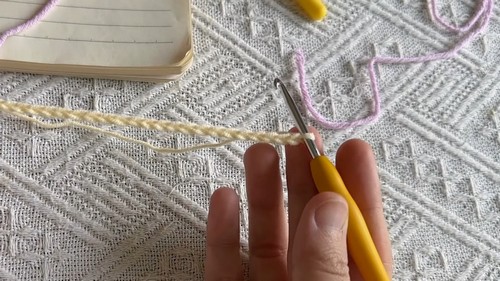
- Row 1: Skip the first stitch, and crochet half-double crochet stitches (HDC) into the rest of the stitches. You should have 23 HDCs in this row.
- Row 2: Chain one, turn your work, and crochet one HDC into each stitch.
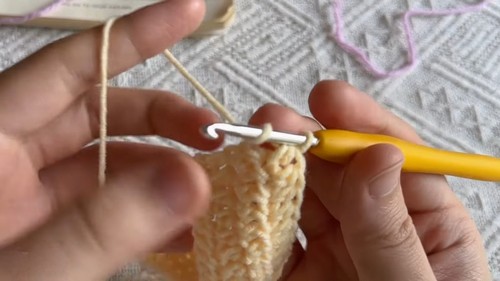
Step 2: Increasing Stitches
- Row 3 onward: Begin increasing stitches at the beginning and end of each row. Do this by crocheting two HDCs into the first and last stitch of every row.
- With each row, the stitch count will increase by 2 stitches (one at the start and one at the end).
- Continue this pattern until the height of the bib reaches approximately 14 cm or has 34 rows.
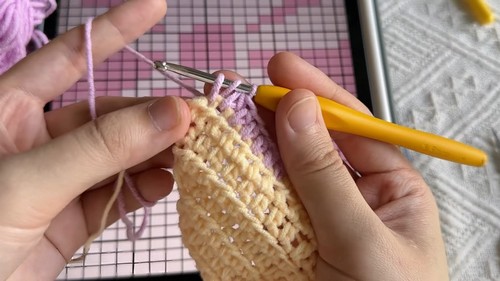
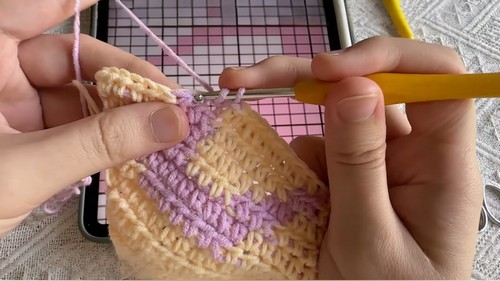
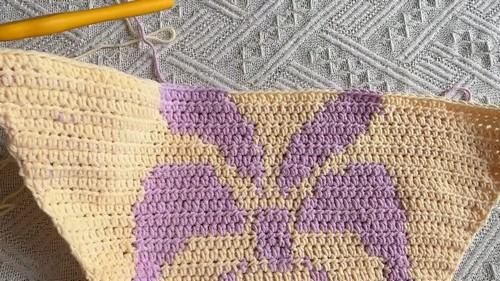
3: Adding the Bow Pattern
- After setting the foundation of the bib, begin crocheting the bow design in rows:
- The bow design replaces some sections of HDC stitches with alternating colors (e.g., purple for the bow).
- The bow design replaces some sections of HDC stitches with alternating colors (e.g., purple for the bow).
- Adjust yarn colors as needed while maintaining consistent tension by carrying the inactive yarn horizontally across the back.
- Each bow pattern consists of three purple rows surrounded by yellow stitches. Increase stitches at the beginning and the end of each row, ensuring the bib remains trapezoid-shaped.
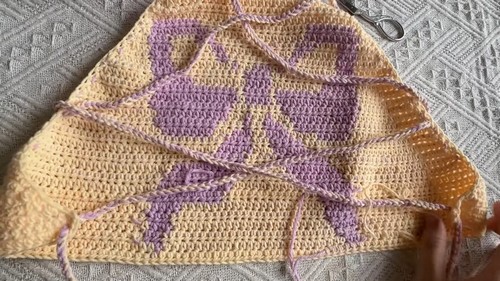
4: Creating the Bib's Ribbon Structure
- Once the body reaches 34 rows and is approximately 51cm wide, fold the two corners of the bib together slightly to form the diagonal sides.
- Crochet the strap holes that will hold the braided cords (to secure the bib around the neck and chest).
5: Adding the Borders and Braided Straps
- Crochet a border around the edge of the bib to give it a clean and polished appearance. Use single crochet stitches for each row along the edge.
- For the braided straps:
- Combine two yarn colors and create 200 chain stitches per strap.
- Attach one strap to each side of the bib where it meets the neck and chest areas.
- Thread these straps diagonally across the bib to create a crisscross design at the back.
Special Features
- Customizable Patterns: The bow design is just one option. Users can alter this with hearts, animals, or other shapes using similar methods.
- Personalized Sizing: You can adjust the width and length of the bib by changing the number of foundation chains or rows.
- Durability and Usability: With its adjustable straps and sturdy build, the bib is both practical for daily use and aesthetically pleasing.
Level of Difficulty
- Beginner-Friendly: The tutorial emphasizes simple stitches like chain, HDC, and single crochet.
- The main challenges are increasing stitches evenly and changing yarn colors smoothly, which may require focus and practice—but the tutor explains these clearly.
Tutor's Suggestions
- Adjust Sizes as Needed: Determine the exact size of the bib by measuring your chest and adjusting the number of rows or stitches accordingly.
- Experiment with Designs: If the bow design doesn’t suit your taste, check Pinterest or other sources for alternative patterns like animals, flowers, or geometric shapes.
- Tension Control: When changing yarn colors, keep the non-active yarn taut to prevent the design from looking uneven or messy.
- Take Breaks: Crochet can take time, especially when changing colors frequently. Take your time and enjoy the process.
Uses and Materials
- The crocheted bib is a stylish addition to your wardrobe, great for layering over a tank top or incorporating into casual outfits.
- It makes a perfect handmade gift for loved ones, suitable for both daily wear or as an artistic statement piece.
- The braided cord design ensures a snug fit while doubling as an attractive accessory element.
Tip
When choosing yarn colors, opt for contrasting shades to emphasize the bow (or other designs). For example, bright yellow and purple work well against a neutral white base. Also, block your finished piece to give it a polished look.
Conclusion
Pattern teaches you how to crochet a fully customizable bib that blends functionality with beauty. With clear instructions, step-by-step guidance, and room for creativity, you can crochet a handmade piece that reflects your personal style. Whether you use the bow design or experiment with others, the finished product will surely be a charming addition to your wardrobe.


